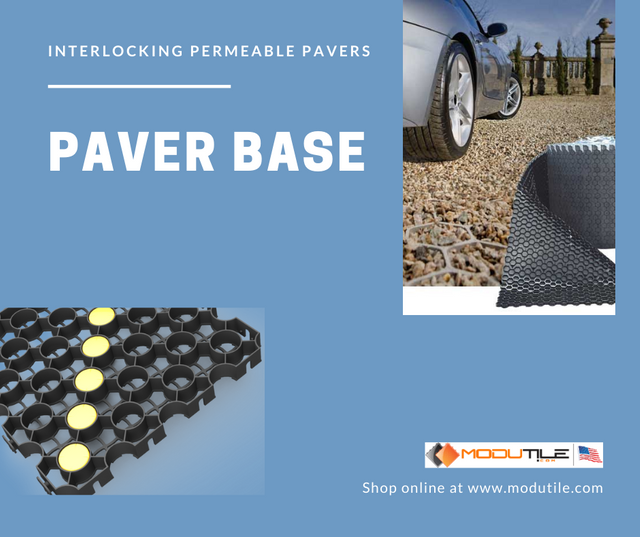
The paver base is the underlying layer upon which pavers are set. Made of different materials such as crushed stone, gravel, and sand, the base is installed to create a stable and level surface for pavers. The base typically includes multiple layers: a sub-base layer, a compacted base layer, and a bedding layer. Together, these layers distribute weight evenly, prevent shifting, and aid in drainage.
Importance of a Paver Base
A properly prepared paver base is essential for a durable hardscape. Key benefits of installing a strong paver base include:
Prevents Shifting and Settling: A stable base prevents pavers from shifting under heavy loads or regular use.
Improves Drainage: The base materials allow water to drain through, preventing pooling on the surface.
Enhances Longevity: Pavers are less likely to crack or sink if set on a proper base, resulting in a long-lasting, maintenance-free surface.
Ensures Leveling: A level base provides an even surface for pavers, preventing tripping hazards and improving overall aesthetics.
Types of Paver Base Materials
Several materials are commonly used in paver base construction, each with specific benefits. Here are the most popular options:
- Crushed Stone
Crushed stone is one of the most common materials for paver bases due to its durability and drainage properties.
Pros:
Provides excellent drainage, reducing the risk of pooling and water damage.
Locks tightly into place when compacted, creating a stable surface.
Resistant to erosion and compaction under pressure.
Best For: Patios, walkways, and driveways that need a stable, water-draining base.
- Gravel
Gravel, typically composed of larger stones, is often used in the sub-base layer of paver installations.
Pros:
Offers good drainage properties.
Provides a solid foundation for the upper layers.
Suitable for heavy-duty applications like driveways.
Best For: Use as a sub-base layer, especially for driveways or high-traffic areas.
- Limestone Screening
Limestone screening, a fine powdery material, can be used as a base layer in some cases.
Pros:
Can create a smooth, compacted surface for pavers.
Ideal for small projects or areas where drainage is less of a concern.
Cons:
Doesn’t drain as well as crushed stone, making it more prone to water retention.
May break down over time and require replacement.
Best For: Smaller areas like walkways or patios where drainage is not a primary concern.
- Concrete Sand
Concrete sand, also known as bedding sand, is used as the final layer on top of the compacted base. This layer ensures that pavers sit evenly and allows for minor adjustments during installation.
Pros:
Creates a smooth, level surface for paver placement.
Allows for adjustments during installation.
Provides a cushioning effect to prevent cracking.
Best For: The top bedding layer for all types of paver installations.
Steps to Install a Paver Base
A successful paver project starts with a well-prepared base. Follow these steps for optimal results:
Plan and Mark the Area
Define the area where the pavers will be installed by marking the boundaries with stakes and string. This helps you create a clear outline and maintain accurate dimensions.Excavate the Site
Excavate the marked area to a depth that will accommodate the base layers, bedding sand, and pavers. Typically, this requires digging down 6–12 inches, depending on the type of project.Add the Sub-Base Layer
If your project requires a sub-base, such as for a driveway or high-traffic area, lay down a layer of larger gravel or crushed stone. This layer should be compacted thoroughly to create a strong foundation.Lay the Base Material
Add the primary base material, typically 4–6 inches of crushed stone. Spread the material evenly and use a plate compactor to compress it firmly. The base should be even and stable, with no loose or moving parts.Apply the Bedding Sand Layer
On top of the compacted base, add 1–2 inches of bedding sand. Level it with a straight edge or screed board to create a smooth, even surface for paver installation. Avoid compacting the sand layer, as it needs to stay loose for the pavers to settle.Install the Pavers
Begin laying the pavers in your desired pattern, pressing each piece firmly into the sand. Work from one end to the other, checking periodically to ensure that the pavers are level.Add Joint Sand and Compact
Once all the pavers are in place, sweep joint sand into the spaces between them. Run a plate compactor over the surface to settle the pavers and fill the joints fully.
Best Practices for a Durable Paver Base
Compact Each Layer: Proper compaction is crucial for a stable, long-lasting base. Use a plate compactor on each layer for the best results.
Check for Leveling: Ensure that each layer, especially the sand bedding layer, is level. Uneven layers can result in an uneven surface over time.
Use the Right Depth: The depth of each layer will depend on the paver type and traffic load. Driveways generally require deeper bases (8–12 inches), while walkways and patios can often be shallower (4–6 inches).
Consider Drainage Needs: In areas with poor drainage or heavy rainfall, use materials that promote drainage, like crushed stone, to reduce the risk of water retention.
Paver Base Maintenance
Regular maintenance can extend the life of your paver installation:
Inspect for Shifting or Settling: Over time, some pavers may shift due to natural settling. Check for any uneven areas and re-level pavers as needed.
Add Joint Sand Annually: Joint sand can wear away over time, so adding more sand every year or two is good practice.
Seal the Pavers: Sealing pavers helps protect against staining, moss growth, and weather damage, keeping the surface attractive and durable.
Conclusion
A well-built paver base creates attractive, stable, and durable outdoor surfaces. By choosing the right materials, following proper installation steps, and adhering to best practices, you can enjoy a long-lasting paver patio, walkway, or driveway that enhances your outdoor space. A strong foundation sets the stage for an outdoor project that not only looks great but also withstands the elements and heavy use for years to come.
