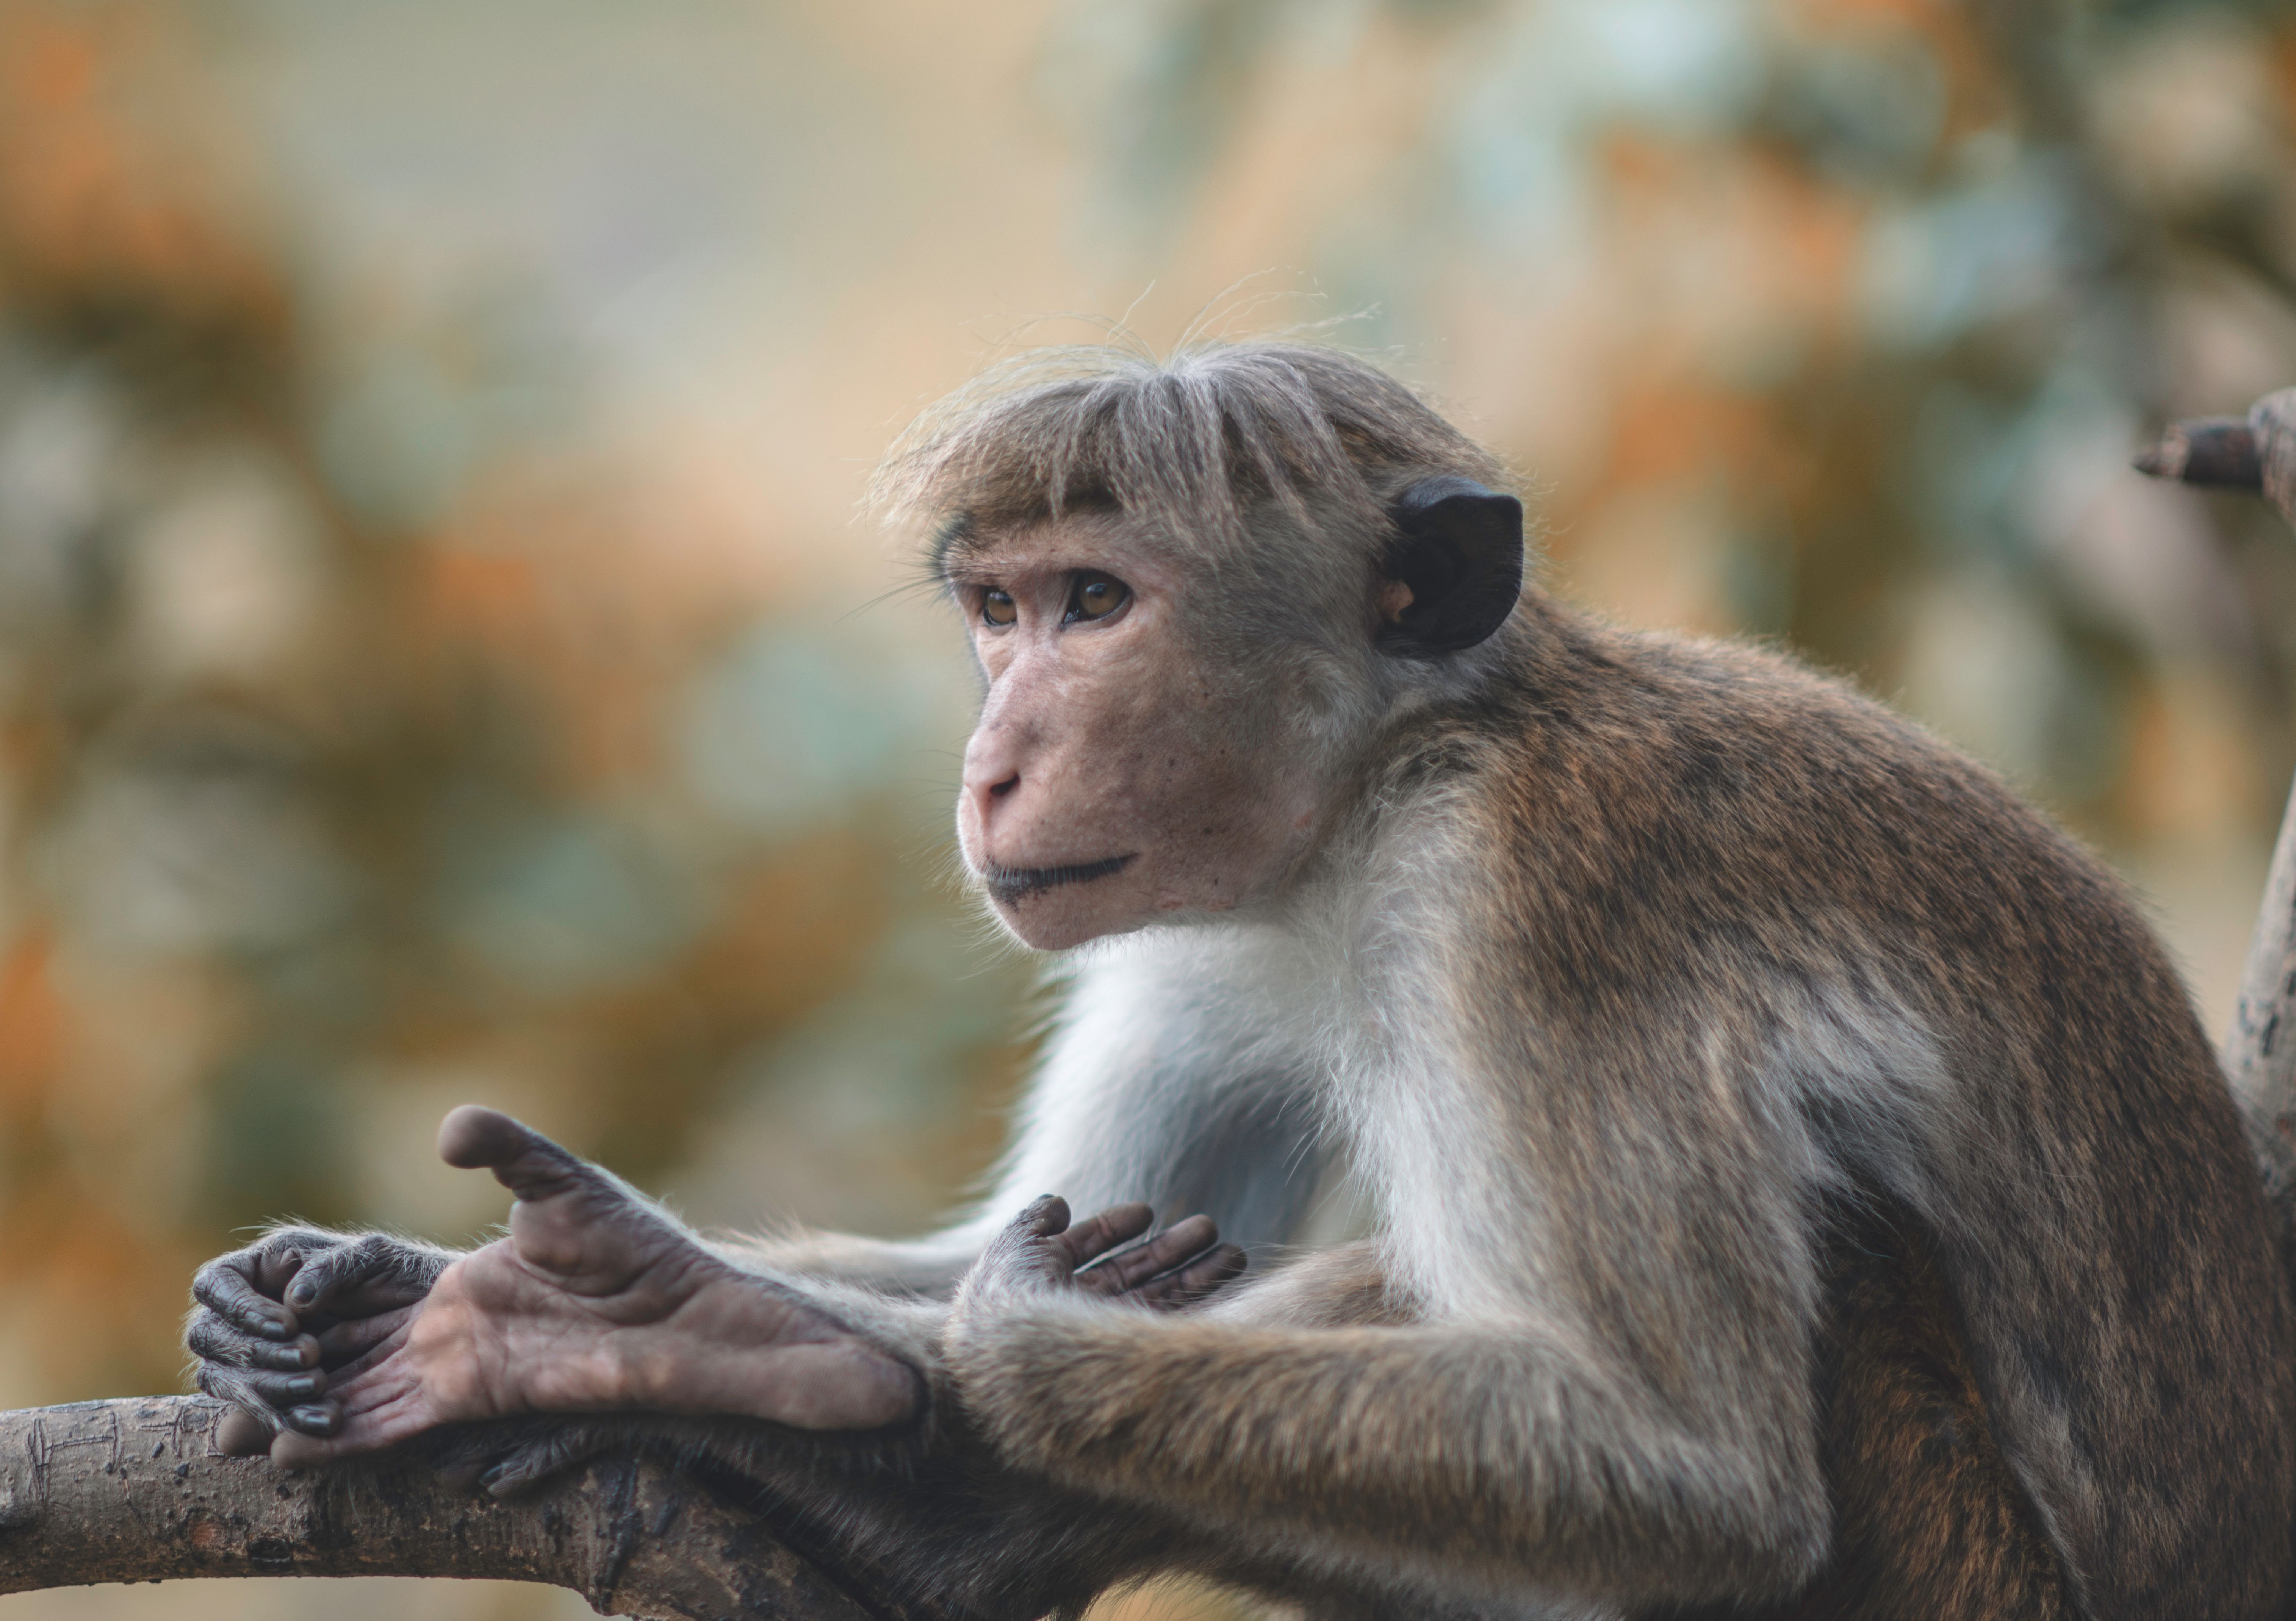
How to get bokeh effect with flash in daylight.
How you can use HSS to break the contrainst of flash on our camera.
All images are my own work, and copyright, apart from where otherwise stated.
Around 2 years ago, I bought my fist studio light set up. The lights were made by Godox, and pretty good quality, they costed me around 250 pounds for a 3 light setup with lightboxes and other accesories.
The lights were good, but I struggled to achieve short Depth Of Field. (DOF) I constantly found that I was having to narrow the aperture (Increase the F-stop ) because the lights were too bright and over exposing the subject with a wide aperture.

BOKEH BACKGROUND
Monkey in Sri Lanka, F2, 1/640 Sec No Flash -

NO BOKEH --- BACKGROUND IN FOCUS
WIDE APERTURE (F22, 1/200 second, ISO 200 , BRIGHT SKY, FLASH AROUND 15 FEET AWAY)
How could I fix the problem and why is this important?
There are many ways you can throw a background out of focus ( widen the aperture) without over exposing.
1. Move the subject further away from the background., or get closer to the subject in relation to the background.
In my case this was difficult in a small studio room, and also I like to REALLY throw the background out of focus (Bokeh), which does require a wide aperture. Also I like the subject to have some parts of the face in focus (eyes are the most important)
and some out of focus (hair and maybe nose / ears).
Getting to close to the subject will distort the face (eyeys and nose will look bigger) and is not usually a good thing. (Hence why selfie sticks are way better than holding you camera at arms length.)
2. Open the aperture (which lets in more light) on your lens to decrease the DOF.
Great, using a prime lens, or lens with a wide aperture (maybe F4 or below ) this is a lovely effect. The problem come when you are photographing your subject with a flash in bright daylight, or in my case in a small studio with bright lights which I couldn't turn down low enough.
To solve this with studio lights you can add ND* gels (this can reduce the power of the lights). You can also add a ND filter to the lens to reduce the light coming in.
This can work fine, but if the ND filter is strong on your lens, it can be difficult to see and focus on the subject. This is important if you are using a short DOF.
- (neutral density - they are opaque and block some of the light)
3. Use photoshop or another program in post editing to increase the blur around the subject
This wouldn't be my ideal solution, but I've seem some people do it well, and most do it badly. Masking the subject can be tricky, and the whole process is usually time consuming. Knock yourself out though if you want to use this solution.
4. Use raw files, over expose and "pull back " the over exposed area in photoshop or another editor.
Great idea, this may well allow 1-2 stops of over exposure to be recovered, but it's hard to know in our camera if some of the highlights are totally "blown out". That means that the data has not been stored, and cannot be recoveredIf I was taking pics for a client, I would be very wary about using this technique, and it is not really practical. Sometime if you are taking photos of a sunset or sunrise this us unavoidable, but in the case of a studio or portrait, it really wouldn't be acceptable.
5. Lower the ISO
I'm presuming here that you already have your ISO at the lowest setting. If not then please do so before trying anything else. It's also good practice generally in photography, where shutter speed allows.
6. DOH!! Make the shutter speed faster!!!
Ahh, I didn't think of that. It's the obvious solution, in bright daylight and an open aperture, you might have the shutter speed somewhr between 1/2000 and 1/8000 to get that lovely short depth of field and bokeh. Great. Problem solved. So pop on that flash or light, turn the shutter speed to 1/2000 and erm.... Nothing's happening. The camera is broken, it won't take a pic.
Yer, most cameras will sync to around 1/200 or 1/250 second, then BOOM that's it.
Stuck. So taking pics of your subject with the sun behind using flash are only possible with a small aperture (high F -number)..
This is due to limitations of your camera and the way the the curtain moves across the sensor, and how it synch with the flash..

IMAGE REPRODUCED WITH THANKS FROM http://www.masteringphoto.com
So How can we prevent this?
HIGH SPEED SYNC -- (HSS)
How does it work?
With a normal flash, the flash only is only active for part of the time that the shutter is open, if the shutter is open for to shirt a time, the sensor will only capture part of the flash as the digital shutter breifly exposes the sensor to the light.
Luckily, it has been figures out that by firing a numnber of hight speed pulses at the right time, the flash will be on all of the time that the shutter is open , all the way up to 1/8000 of a second, or the fastest shutter speed that your camera allows.
You will need a HSS transmitter (also a receiver if you are using your exisiting flashes)
Or you can buy a set starting around 100 pounds/ 120 dollars on ebay/ amazon.
Personally I would recommend Godox, as their HSS transmitter is compatible with some bigger and stronger lights.
GODOX FLASHES (HSS)
Godox TT685n (Normal Flash) HSS
Godox AD200 (Double power of a normal Flash, but still portable)
Godox AD360(ii) - More Power
Godox AD600 /(TTL) AD600BM
I chose the AD600 BM, it's not TTL ( I have to change the setting manually on my transmitter) , but it saved me a lot of money)
I also bought an octobox (Large softbox ) to diffuse the light. I plan on making another post about the nature of the light setup in my next post.
HSS PICS WITH BOKEH. -
HSS was used with an AD600 Light portable light in a softbox. Also a TT685N flash behind the subject to add some highlight to the hair.
 F2.2 , ISO 160. 1/1000 sec

ISO 160, F2.2, 1/250 sec.

F2.5 ISO 100, 1/1000 sec

F2.5, ISO 100, 1/1000 Sec.

Good information and nice shots.
Downvoting a post can decrease pending rewards and make it less visible. Common reasons:
Submit
Thanks a lot Team101.
Downvoting a post can decrease pending rewards and make it less visible. Common reasons:
Submit
This is some really good advice! Thanks would you be so kind as to have a look at some of my photography blogs and critique some of it? It would really help me improve!
Downvoting a post can decrease pending rewards and make it less visible. Common reasons:
Submit
Hi Jared, I just checked out your Instagram. The pics are cool, but seem to be more personal, than you having put much thought into them. I think for a nice pic, you need to really hunt for it, rather than just pointing your camera/ phone at something nice. Try setting up a seperate stream and just adding one or 2 photos a week. Really think about how your pic can be different from other people's pics. Interesting angle, or editing, or subject/ lighting. Ideally all of those things . Probably best to practice one thing at a time. I guess trying a new angle could be a good start. Lying on the floor can throw up some cool pics. Or maybe getting in close to the subject , be it human or inanimiate. Why not try seeing if you can get some bokeh effect as well? You don't need to use an expensive light, just start with a good amount of separation from the subject to the background, and the aperture as wide as possible (low f stop. )
Downvoting a post can decrease pending rewards and make it less visible. Common reasons:
Submit