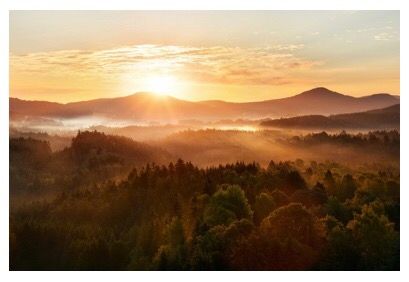
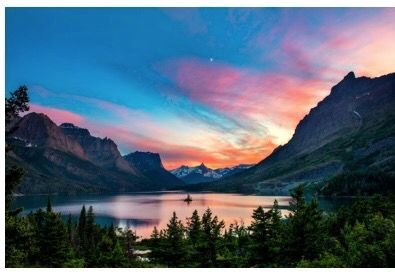
Tips for panoramas in the morning or evening
Here I am referring primarily to landscapes but much of it also refers to seascapes and skyscapes.
Get The Photographer’s Ephemeris (TPE) app
This helps you plan outdoor photography shoots in natural light, particularly landscape and urban scenes. It's a map-centric sun and moon calculator. You'll see how the light will fall on the land, day or night, for any location on earth.
TPE is a universal app with optimised user interfaces for both iPad and iPhone/iPod touch devices.
TPE's map-based approach means you aren't limited to a predefined list of locations, which often miss the places many photographers go. Instead, search for any place name on the planet or position the map pin exactly where you want it.
Don't go out without this!
Get more information by clicking the link below:
photoephemeris.com
Choose the right lens
When photographing panoramas, typically you’ll want to make use of wide or ultra-wide focal lengths that offer a wide perspective and the opportunity to capture wide expanses.
Remember: Think light!
Landscape photography is all about making the most of the light.
For landscape shots with extra depth and dimension, early sunrises and late evening sunsets are best, as they produce softer, more colourful light with longer shadows.
Read the landscape
Before you start shooting, stop and survey the lie of the land.
Take some time for reflection. Visualise the photo you're trying to capture.
Make sure you're in the best spot in relation to the position of the sun.
Try and find an 'anchor' - a focal point that leads the eye into the image, e.g. a farmhouse, a line of trees or the like.
Use a tripod
You know that when shooting landscapes in low light the shutter speeds will be too low to shoot hand-held. You must use a tripod to avoid camera shake.
Also, enable the camera mirror lock-up setting available on your DSLR to make doubly sure your shots will be sharp. The best solution of all is to go for a remote release trigger.
Then take sample shots and check the histogram.
Additional tip: We take lots of photos in the hills, lochs and sea around Scotland’s capital: Edinburgh. It’s a truly wonderful arena but it can get pretty windy at times. Our tripods can struggle to remain still. So, I take some tent pegs and a rubber hammer with us. I hammer in the pegs and tie them tightly to the tripod legs. It works a treat.
Go manual: maximise the depth of field
To maximise the depth of field, select a narrow aperture of around f/16 or f/22, then focus one third into the scene to ensure your photos are acceptably sharp from the foreground to the horizon.
If you leave your camera to work out the focus, there’s the possibility that it will only focus on the objects closest to you. Select the central focus point on your viewfinder, then focus 'one third up’.
Check the white balance
Modern DSLRs should ensure the white balance is fine. If the end product doesn’t meet your expectations, then ‘warm up’ or ‘cool down’ the temperature in the scene later by adjusting the raw file.
Most importantly: stay safe!
True Story
Many years ago, I took my first landscape images in the hills in the South of Scotland: the Southern Uplands.
In Scotland, you can truly get ‘4 seasons in one day’ – in the blink of an eye. One lightish foggy day, I was at the top, fully engrossed in the different images that fog can present.
Within a few seconds, literally, I was surrounded by a bout of heavy fog and I was unable to see more than a metre in front of me.
Fortunately, when reading the landscape when I first arrived, I had noticed an old, rickety sheep fence.
In the almost total blur, I made my way very tentatively across the 50 metres or so terrain to the fence. Holding on to it tightly, I used that as my guide to the track some 800 metres below. It was a pretty scary experience.
I learned a lot that day!
Tips for portrait shoots
Let's now look at some top tips for portrait shoots.
Choose the right lens
An ideal lens for portraits is a short telephoto lens, 85mm to 135 mm or so, with a wide aperture (f/1.2 to f/2.8). With this, you can work at a bit of a distance, with the additional benefit of being able to capture shots without any distortion to facial features, such as the nose.
A wide aperture also allows you to work in low light conditions, whilst separating your subject from the background by providing a shallow depth of field and making the background appear more blurred. Portrait photographs usually look best with a shallow depth of field – but you decide!
Standard zoom lenses with a wide aperture can also achieve this.
Remember: The less available light there is, the wider the aperture you need. As an example, setting your lens to stop at f/1.8 lets in about 4 times more light than f/3.5, which is a big difference.
Experiment with lighting
There are so many possibilities.
Try side-lighting, which can create a specific mood. Also, backlighting and silhouetting can be very effective – and different.
Use a flashgun remotely
A flashgun is much more powerful than the built-in one that's on your camera, so you’ll have more light enabling you to set smaller apertures to capture more depth of field, or to light up a group of people.
You also have more control over a flashgun’s placement, angling it up or sideways to bounce the light off neutral-coloured ceilings and walls.
Take some candid, non-posed shots
Catching subjects unaware in their normal/natural environment is very powerful and can produce some stunning images, particularly with children.
Here you need a lens which allows you to shoot close-ups from a distance. Try a zoom lens in the 70mm-200mm range, shooting at telephoto.
Group portraits
Lens choice will be determined by the size of the group. Clearly, the larger the group, the wider the lens needs to be.
A wide-angle lens in the 16mm-35mm should do the trick for a very large group. With a smaller group, a standard fixed focal length lens in the focal range of 30mm-85mm will usually suffice.
Background
Where you intend to include the background, use backgrounds with structures and colours that complement your subject and do not draw the viewers’ eyes away from the main subject.
For example, some wedding portraits put more emphasis on the tree that the happy couple are standing under than the couple themselves. It’s their day to stand out - not the tree’s day!
Increase your ISO
Let’s assume you are moving around with your camera hand-held, i.e., you’re not using a tripod, and you’re taking shots of people as they’re mingling and moving around as at, say, a wedding reception.
Naturally, people move around a lot, change their facial expressions whilst chatting to others and they blink.
To avoid these issues, you'll need to use a fast shutter speed to ensure sharp shots, and no motion blur from the people’s movement or camera shake.
In Aperture Priority mode and maintaining a wide aperture, increase your shutter speed by increasing your ISO, say, from ISO 100 to ISO 400.
If the light is low, indoors or outdoors, you may need to increase the ISO even further.
Be creative
Think Composition!, try different viewpoints.
Take some photos from side-on, not full frontal.
Take some with your subject side-on and to one side of the frame, looking into the space in front of him. This creates interest. Later, viewers will create their own thoughts as to what he is looking at.
Take some with your subject side-on, looking up or down to something else in the photo, e.g. a parent looking at the ‘new’ baby, or a child looking at his/her brand-new toy. In this way, a relationship is formed between the two subjects and a ‘story’ is created within the image.
Shoot your subject in a frame, e.g. in a doorway or via a frame created by tree branches.
Use a reflector
To fill in unwanted shadows, use reflectors indoors (near windows) or outdoors to bounce light back onto your subjects.
Reflectors come in different colours to suit different portrait situations. See the article below:
photographylife.com
Go horizontal
Just because a vertical camera frame is often called ‘portrait’, it doesn’t mean that you must always shoot portraits vertically. Mix up your framing for variety.
Portraits for children
Children are a special case. They often feel confined in indoor spaces and it’s even worse when they are asked to pose for what seems an interminable time for them.
Get them outside where they’re more comfortable and have plenty of things to distract them. Then you can take some really captivating, candid and non-posed portraits.
You won’t have much time to focus on your settings whilst the children run around. By working in Aperture Priority mode, you’ll be able to control the depth of field while the camera works out the best shutter speed for a good, balanced exposure.
Also, take some different bits of clothing with you for the children, to add a bit variety to your images.
Tips for night photography
Let's looks at some tips for night photography.
Shoot in manual mode: when you’re ready to
Once you’re reasonably familiar with what function does what, and why it does it, it's best to shoot in Manual mode so you can choose the best narrow aperture and slow shutter speed and ISO setting for your night photography.
In the early days, though, it might be best to let your camera tell you what it thinks is best by looking at its automatic mode settings.
Take a few shots in automatic mode and review them on your LCD screen. Remember that the camera is not always right. It may get confused with certain aspects of the light, particularly city lights.
If, for example, the shots look just too bright, underexpose them by 1-2 F stops so that they look a bit darker.
It would be wrong to use the phrase ‘trial and error’. There’s no ‘error’ here. What you’re doing is applying what you know bit by bit until you’re pretty confident that you can work out your preferred exposure for a particular scene.
Shoot in raw
The best image quality will come from shooting in raw. Raw is especially beneficial when taking night shots as it gives more flexibility when you want to alter things later, such as colour temperature or you wish to accurately brighten or darken your exposures.
Post-processing an image is not difficult. Commercial products for processing raw files lead you through what you want to do.
ISO
Night photography needs a lot of experimentation to get it right. You're aiming for clarity and detail.
You may have to use a higher ISO setting, but this may lead to increased 'noise' which can make the image look grainy. You can reduce this by lowering your ISO and using a longer shutter speed.
Some modern DSLRs, however, have the technology to allow you to shoot at higher ISOs, whilst reducing the noise and still capturing the fine detail.
Remember: Just because you're shooting in low light, it doesn't mean that you should always increase the ISO to help the camera 'see' in the dark. If you're using a tripod or you have flash switched on, you can often keep the ISO set to 100.
Use a tripod, wherever possible
Make sure your camera is as steady as possible by using a tripod, if you can.
Less light means slow shutter speeds, anywhere from 1-30 seconds. This is just too slow to shoot hand-held.
Remember: Never hold onto your tripod whilst you're shooting with slow shutter speeds because the slightest movement may lead to blurred photos. This is a common error.
Hand-held shots in low light
At night time, your camera needs a longer exposure time to capture more light.
To try and avoid blurred images resulting from your movement, try not to use a shutter speed of under 1/60th of a second. Anything less than that will make it difficult to capture a steady shot.
Using a higher ISO will help capture more of the available light.
Some cameras have an image stabiliser function which controls camera shake.
Flash: yes, but less obvious
The issue with flash shots at night is that it can make the subject just too bright and the background too dark.
As you know, a way round this is to switch the ISO setting to a higher value.
However, when increasing the ISO still doesn't give you a fast-enough shutter speed or a narrow enough aperture to capture the subject sharply, your camera's flash can be very useful.
Flash is often essential for low-light portraits, for example, because often a live subject can't be captured sharply enough with an exposure measured in whole seconds.
The solution to this is to make the flash less obvious. Combine a burst of flash with a long shutter speed.
This 'slow-sync' flash technique is easy to set up on your DSLR and it works pretty well with the camera's built-in flash unit. (Check your manual for instructions.)
Also, bouncing the flash from a flashgun is a good technique. The flash is diffused and weakened as it bounces off a nearby wall or low ceiling, removing the harsh shadows caused by direct flash.
It works particularly well with portraits in low light, giving a soft-lit appearance. When you get this right, there’ll be no indication that flash was used.
The ‘starbust’ effect
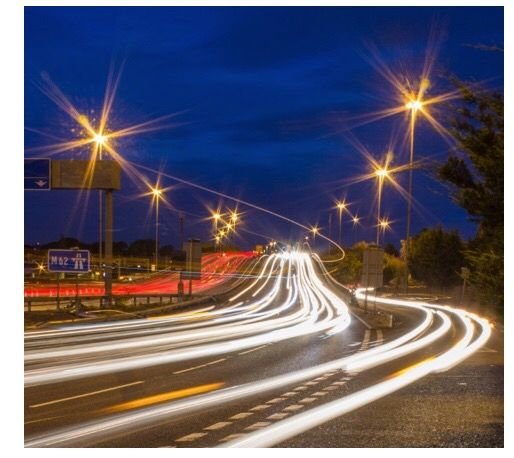
Getting a starburst effect from street lights has become a popular activity
Use a narrow aperture (around f/16). This will not only ensure a deeper depth of field, so your shots are sharp from foreground to background, but it will also make street lights 'sparkle' magically in your scenes.
Here's an example from a motorway in England, showing the sparkling lights and the traffic light trails:
A rough guide to settings in low-light
Here's a rough guide to settings for some popular low-light situations:
Subject Shutter speed Aperture ISO
Cathedral (floodlit) 4 seconds f/16 100
Fairground rides 15 seconds f/16 100
Fireworks (in the air) 20 seconds f/11 100
Football (floodlit) 1/125 sec. f/4 1250
Full moon 1/250 sec. f/8 100
Landscape (moonlit) 4 minutes f/5.6 100
Rock gig 1/125 sec. f/4 800
Skyline at dusk 1/30 sec. f/5.6 100
Skyline at night 15 seconds f/5.6 100
Stage show 1/60 sec. f/4 400
Traffic 30 seconds f/22 100
Tips for sports/action photography
Let's now look at some top tips for Sports/Action Photography
Learn the rules of the game
It makes sense to know the rules of the activity you’re about to shoot. If you know the rules, you can better predict where the action will be. Thus, you can better plan where you should be and better plan your shots.
Shooting from afar
If you want the perfect shot of an individual competitor in action from any part of the stadium, or you want a close-up of a lion in the Luangwa Valley but you don’t want to get up close and personal, a telephoto lens is the one for you.
These are expensive but they’ll likely last you for a good 10 years or more.
Consider a super telephoto lens such as a 300mm or 400mm, if you can afford it.
If not, get a medium telephoto lens at 70-200mm. This, though, is more suited to closer action, so the lion may have to come closer to you in your hopefully safe vehicle.
Key points:
• Choose a lens with an F stop of f/2.8 or f/4.
• Ensure the lens has a tripod mount.
• Stick with tried and tested lenses from reputable manufacturers such as Nikon and Canon.
Get as close as you can
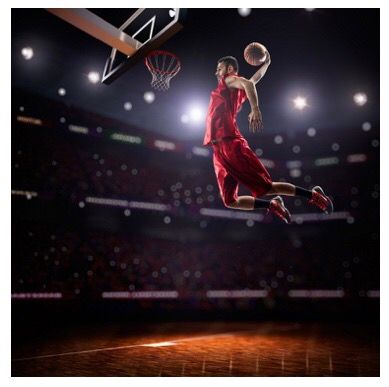
No matter which lenses you have, you should plan to get as close as you can to the action. Don't leave this to chance.
When you're close, you'll be able to shoot the players' beads of sweat, the mud on their knees, and that look of determination and concentration.
Use a long lens so that you can zoom right in on your subject.
Check the lie of the land
Where’s the sun? Where are the possible shadows?
Visualise the photo you're hoping to capture.
Before the action starts, take some test shots of people close to the point where you hope the action will be, e.g. groundkeepers, officials, and players warming up for the game.
Remember the supporters
Just as the match is about to begin you might want to get as high as you can at the top of the stand. You could take a photo of all the cheering supporters in place using a wide lens, say, 10.5mm or 14mm. Then get back to your seat quickly in case you miss the best action of the day.
This image would provide a great contrast against the final picture mentioned below.
Some of the best sports/action photos are photos of the supporters after, say, a goal has been scored or a penalty has or hasn’t been given by the referee.
Here you see raw emotion: either elation and joy, or disappointment and sorrow, on the faces of the supporters.
If you are quick off the mark, you may be able to take images of both sets of supporters. The contrast in emotions will provide two captivating images.
And don’t forget the scenes after the match, particularly the lost soul sitting in the stand alone, with his head in his hands and, sometimes, tears running down his cheeks.
Use a high ISO as the light dims
It’s time for you to take some action when the light begins to dim.
You know what to do.
Yes, raising the ISO on your camera will allow you to shoot at a higher shutter speed, giving you a better chance of getting the perfect action shot.
A shutter speed of around 1/1000 sec or a bit more to freeze the motion may have been OK a couple of hours before. But as the light dims you will need a faster F stop than your lens is suited for. To compromise, you increase the ISO. Now your camera can ‘see’ more light.
Try something different
Just as in all types of shoots, think composition.
Is there another way you could compose your images?
Whether that’s using some kind of frame or getting right down to the pitch area (if allowed) to take images at knee-height or taking an image through the goal net, keep thinking how you might be able to change the composition.
Be prepared
You will likely want to try out some different lenses to add variety to your shots. Rummaging around in a bag wastes time and you may very well miss the most important bit of action in the event.
Get a good belt system with several holsters. In a second or two, you can put back the one you’re using and pull out the one you want, without taking your eye off the action. Ensure your holsters have covers to keep out the rain. You need to look after these expensive tools.
A belt system is a must if you intend to use different lenses.
Don’t get into the habit of chimping!
‘Chimping’ is a colloquial term used in digital photography to describe the habit of checking every photo on the camera display (LCD) immediately after capture.
Some habits die hard and you can even see long-in-the-tooth professional sports/action photographers doing this. Please don’t pick up this habit!
There are good reasons for not chimping:
- It takes your eye off the action and you may miss the best shot of the day.
- You can easily get trampled on by some big, burly player if you’re shooting from the sidelines of the pitch.
- And, what’s the point? You cannot rewind the history of the game. What’s done is done and cannot be undone.
So, don’t chimp.
Use a slow shutter speed, occasionally
Some action shots are great when the subject is in focus but there’s a bit of a blur in the background. This technique adds a different perspective and adds energy to the picture.
Take some shots at 1/100 sec or 1/80 second to get this effect.
Be careful with flash
At higher-level games, flash will likely be prohibited. It’s a serious distraction for participants and you may get into a spot of bother.
There may be some exceptions but you need to check it out.
This is a very important reason for getting to grips with your ISO settings, so that you avoid the need for flash.
Here is one definite ‘rule’ you should follow: Never use flash at sports/action events.
Niche Shots
My final tip for all shoots is this:
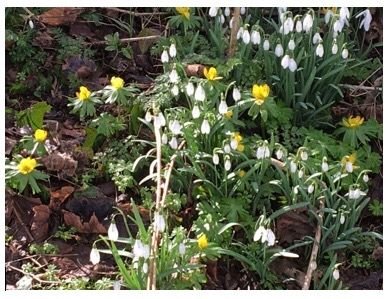
When you're getting to grips with your DSLR, an excellent way to track your progress is to focus on a niche area.
When we first started, we were shooting landscapes, night scenes, sports and action photos, family and friends, and so on. The only problem was that it was difficult to track our progress in each specific genre.
So, I decided to change tack and focus on a specific niche area, one at a time, until we felt I'd pretty much cracked the specific shooting principles for that genre.
The photograph above is part of our collection of 'Months of the Year'. This is a collection of wild flowers that pop up each month near our home in Scotland. The above image is from the cold month of January.
After I'd got a fairly good grasp of our first niche area- landscapes - we moved on to my second niche area - flowers.
It wasn't because I was besotted with flowers. It was because it was easier to track my progress in photographing flowers. So, I decided on the niche: flowers in every month of the year. Of course, I was shooting other subjects in between, but I didn't put so much emphasis on these.
Once I had a good grasp of shooting flowers in their wild habitat, I moved onto another genre: 'Birds on the Wing'.
It just makes it all so interesting and rewarding. I learn lots of things about our subjects that I'd never given any attention to before. And I increase our skills in photographing a specific genre.
You should give this a try!
Remember this: The key to shooting captivating images is to allow the subject to influence the composition, rather than trying to force the subject to conform to a photography 'rule' or 'custom'.
I enjoy your pic ^^. Thanks.
Downvoting a post can decrease pending rewards and make it less visible. Common reasons:
Submit
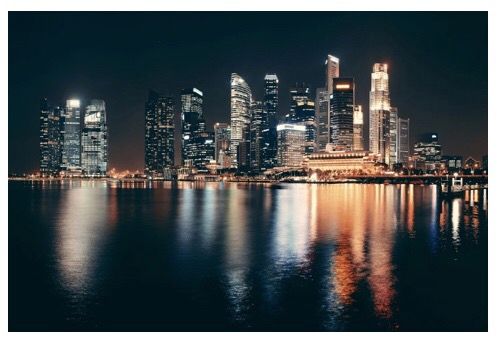
Good post! Did you take that one night photo of the city yourself? I really like that one
Downvoting a post can decrease pending rewards and make it less visible. Common reasons:
Submit