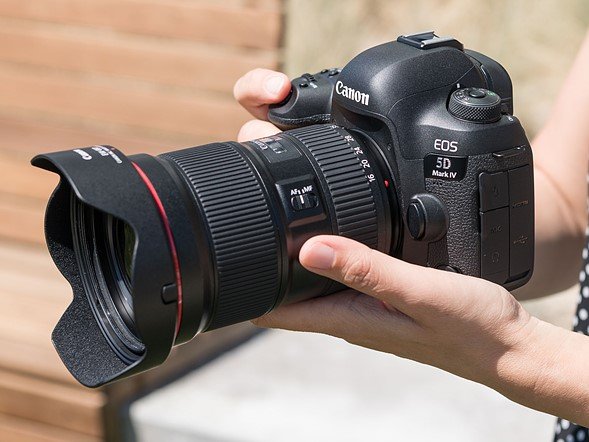
How to take a picture with a Canon DSLR.

Source: https://www.dpreview.com/news/3672064065/canon-eos-5d-iv-what-you-need-to-know
Step 1. Attach the lens to the camera body and insert the battery.
Step 2. Turn the camera on, then set the dial in the top of the camera to the letter M (Manual mode) then check if is a memory card inside the camera, if not insert one.
Step 3. Adjust your zoom with the zoom ring on the lens. Usually, the zoom ring is the bigger ring in the lens.
Step 4. Adjust your shutter speed with the dial on top of the camera. Under 60/1, subjects will start looking blurry above 60/1 subjects will start looking freezing.
Step 5. Adjust your F-stop (aperture) by using the dial close to the screen which is on the back of the camera. Smaller numbers mean the aperture is open and more light will come in. Bigger numbers mean the aperture is close and less light will come in. Use smaller numbers for portraits, from 1.2f to 2.8f your subject background will be blurred out. Use bigger numbers for general photography. An aperture from 3.5f to 11f will maintain all your subjects in focus without any blurry face.
Step 6. Adjust your ISO (artificial light) by using the ISO button close to the smaller screen which is on top of the camera. Hold the ISO button and move the dial on top close to the button. In light conditions set it under 400 ISO. For low light condition set it from 800 ISO to 1600 ISO. Above 1600 ISO you will start getting noise in your photography. Some newer cameras allow you to go further into ISO without getting any noise.
Step 7. Focus your subject by using the auto-focus or the manual-focus. Most of the time you will be using the auto-focus because it’s more practical, but there are some cases that you will need the manual focus. For instance, if you want to focus just a person in a group of people you will need the manual-focus because the auto-focus will try to focus all the faces in the group. To use the auto-focus move the focus button to auto (AF) in the lens then just press the shutter button gently until you feel the first click. Then, the camera will start focusing automatically. To use the manual focus, move the button to manual (MF) in the lens then use the smaller ring on the lens to set your focus manually.
Step 8. With the zoom, shutter speed, F-stop, ISO and focus already set you can take the picture by pressing the shutter button all the way down, you will feel two clicks (the first one was to focus, review step 6) after you feel the two clicks your camera will shoot the picture.
Hi! I am a robot. I just upvoted you! I found similar content that readers might be interested in:
https://digital-photography-school.com/5-situations-when-manual-focus-is-better-than-auto-focus/
Downvoting a post can decrease pending rewards and make it less visible. Common reasons:
Submit