Anyone with basic cooking skills can learn to preserve fresh foods naturally. This piece is a summary on how to safely and successfully preserve foods naturally. I will present methods I have used to preserve fresh food without using harmful chemicals or additives.

You will learn the methods, steps and tools needed to successfully preserve and store fresh foods for months or even years without additives or refrigeration. Additionally, you will learn about the values of preserving, preserving seeds in order to grow successive generations of fruits and vegetables and the nutritional benefits of preserving food naturally.
Each chapter ends with an outline of the essential information presented in the chapter. Use this book in concert with professionals to assure health and safety and develop your skills in preserving.
Chapter 1
Sanitation
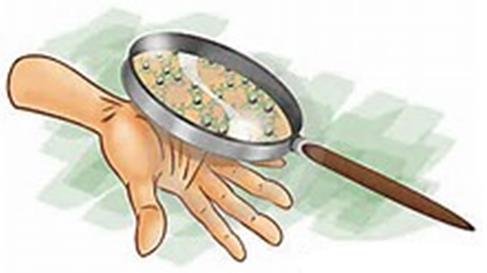
Good sanitation is a must when handling food in order to prevent contamination that can make you sick. Good sanitation is achieved by closely following established methods to prepare, handle and store food. It is easy to contaminate items without realizing it. Food can be accidentally contaminated by touching something that is contaminated during the preserving process and then touching food or utensils afterwards.
Think of this example: You pick up the back of a chair to move it out of the way. A few minutes earlier your spouse came in and moved the same chair, grabbing it in the same exact spot. If your spouse was outside working in the compost pile, then those germs were transferred to your hands when you touched the chair in the same spot! Wash your hands frequently. Keep a spray bottle of 25% water and 75% white vinegar and spray surfaces frequently to help keep surfaces sanitary.
Spoiled Food
Bacteria that cause food-borne illnesses do not always leave food with a foul taste or smell; so taste and smell are not reliable indicators of spoiled food. Harmful bacteria include clostridium botulinum, staphylococcus and salmonella. Salmonella is destroyed by heat, but the deadly bacterium of botulinum is not destroyed by heat. An indicator that botulinum is present is that the lid or container will swell and bulge. Cans or jars with bulging lids should be discarded without opening.
Temperature
Temperature control is needed to properly sanitize and preserve food. Boil food sealed in Mason jars for at least ninety minutes to kill bacteria. When dehydrating food on the other hand, you would keep heat levels very low because you don’t want to “cook” the food. Instead, you want to dehydrate all of the moisture out of it.
Humidity
Moisture is the number one enemy of storage areas because it increases the chances of mildew and mold. Excess moisture will cause powders and spices to clump up, and high humidity can prevent foods from drying thoroughly. High humidity can also prolong the time it takes for food to dehydrate during the dehydration process.
Rotation
Rotating food means that you will consume the older food before the more recently preserved food. Create a system to safely rotate old food out for consumption before the more recently stored food, such as a system using shelf location: “add new items to the back left”, and “take older items from the front right”.

You can also color-code items or write dates on the labels.
Chapter 2
Five Preserving Methods

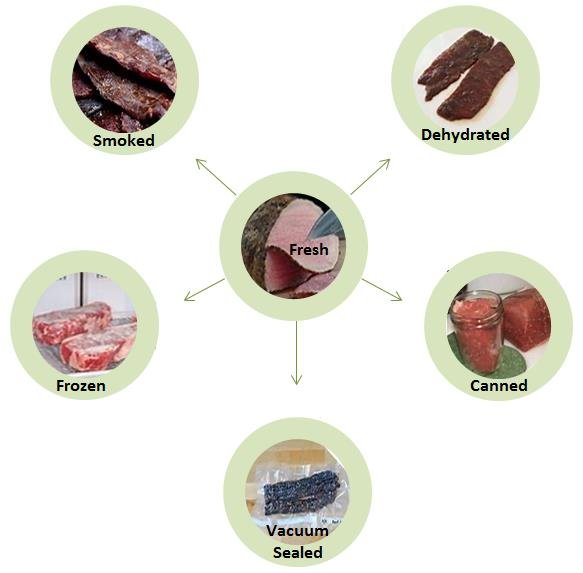
Fresh food can be naturally preserved by dehydrating, canning, vacuum sealing, smoking and freezing. Preserving food involves cutting, soaking, skimming, rinsing, marinating, packing, hanging (to dry), freezing, boiling, smoking, sucking air out of bags, containers and buckets, and different combinations and methods of preparation. The preserving method you choose will depend on the type of food you are preserving and what facilities and tools you have available. Use common sense when picking a method for preserving, but feel free to try different methods with the same type of food. I’m sure you’ve seen “canned” green beans in glass Mason jars, but I have also seen green beans dehydrated, salted and spiced and they were great. You can try anything you want. Who is to say only one way is right! My sister-in-law even canned cookies by dry packing them in Mason jars and boiling the jars (processing) in a hot bath for 90 minutes. Two years later we opened up the jar and ate the cookies, and they were as fresh and crispy as the day she bought them!
Sometimes you will have to choose a preserving method as a matter of practicality. For example, dry oatmeal is already dehydrated, so you would not “can” it, but you can vacuum seal in plastic bags for long term storage. Another obvious preserving method you would not choose is dehydrating pieces of watermelon since watermelon is almost all water, so if you dehydrate watermelon you will probably only wind up with small, red squiggly lines on your dehydrating tray! Preserving recipe books will come in very handy to give ideas and guidance for preserving methods, but whichever method you pick plan for the supplies and space you’ll need before you get started.
The Preserving Method of Dehydrating

Dehydrating food involves laying pieces of food in an extremely dry atmosphere for 12 – 24 hours until the moisture is completely removed. With no moisture left, the food will not have the catalyst it needs to spoil - water. Dehydrated food is stored by vacuum sealing it in bags or putting it in air-tight containers. It can then be stored for months or years.
Dehydrating food can be done in a dehydrating machine or in a 150 degree oven. Food can also be dehydrated by laying pieces of food out in the sun. To prepare food for dehydrating, you will cut the food (fruit, vegetable or meat) into equally sized, thin strips ¼ to ½ inch thick (into any length you want), and lay the slices on your dehydrator trays, in the oven or on a rack in the sun. Keep a little space between each piece to allow air to circulate. Properly dehydrated food will be very tough or leather-like in the case of meat, or crispy or spongy in the case of fruits and vegetables.

Some dehydrating machines will have a small fan and a single heat source, usually on the bottom. Food closest to the heat source will dehydrate slightly faster, so put thicker pieces near the heat source. This way, the thicker pieces will get done at about the same time as the other pieces. Again, it will take from 12 -24 hours to completely dehydrate most food.
Vacuum seal handfuls of thoroughly dehydrated food in plastic bags, or place the dehydrated food in buckets with oxygen absorbers. The vacuum sealed plastic bags can be placed directly on the shelf for storage, or you can put vacuum sealed bags of food in air tight buckets with oxygen absorbers for double protection. There is no need to vacuum seal dehydrated food if you intend to eat it within a few weeks or a month if you put it in air tight containers, Ziploc bags or in the refrigerator. Dehydrated foods can be “re-hydrated” by soaking them in a bowl of water until they are plump again.
• Dehydrating Fruits and Vegetables
Use fruits and vegetables at their peak and preserve it as soon as possible after picking. Wash well and cut out imperfections. You may add salt and spices before or after dehydrating.
• Dehydrating Herbs

You can keep the leaves on the stems during dehydrating but remove the stems later. Prepare herbs by first washing them and patting them dry. Lay herbs out on plates, paper towels, coffee filters or by stringing them up on a line in your home. I have even put handfuls of herbs on a paper towel on the dash of my car with the windows closed to dehydrate them.
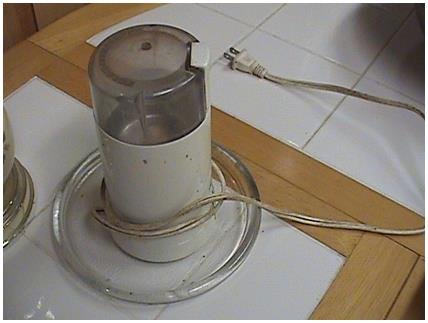
After herbs are completely dry, rub them between your hands to remove the leaves from stems, and then crush the leaves well with your fingertips. Use an electric coffee bean grinder to grind them further if you want them chopped very fine. Immediately store the finished product in air tight containers because herbs will reabsorb moisture from the air and become spongy if not stored immediately. Vacuum sealing herbs in plastic bags is difficult because the sucking action of the hose may pull the herbs up in the tube.
• Dehydrating Meats
Use very, very low heat in a very, very dry environment to dehydrate meat. You do not want to “cook” the meat when you dehydrate it, but instead just slowly remove all the moisture. When the meat is leathery or crispy then it’s done. Thicker strips will wind up more leathery and flexible, and very thin strips will be crispier. The time it takes depends on how thick the meat strips are and how hot and dry the environment is.
Carving large slabs of meat into thin strips can be difficult to slice since meat is soft when raw. It is helpful to freeze the chunk of meat half way before you carve it. This makes the meat easier to hold while you cut the strips. Trim off as much fat as possible because fat goes rancid easily. Meat strips can be marinated before dehydrating, but pat the meat strips to remove excess moisture before dehydrating.
To dehydrate meat in the sun, drape the strips over a stick suspended between props or on a grate in full sun on a hot, dry day. Keep a small slow, smoldering fire under it to keep the flies away. The meat will take on some flavor of the wood, so pick an acceptable wood, such as oak, cherry or Applewood.
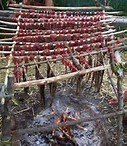

If it becomes overcast or starts to rain and you have to stop the dehydration process, refrigerate the meat until you can resume the process. This method uses smoke only as a bug repellant and is not the same as the preserving method of “smoking” discussed later.
What You Need to Know
The Preserving Method of Dehydrating
• To dehydrate fruits, vegetables and meats cut out imperfections, trim fat off of meat
• Slice in ¼ to ½ inch thick flat pieces, and put thicker slices nearer to the heat source.
• Dehydrate food in a very, very dry and hot environment.
• Immediately store crush dehydrated herbs in air tight containers.
• Partially freeze chunks of meat to help hold while carving.
• Marinate meat before dehydrating if desired, but pat strips dry before dehydrating.
• To dehydrate meat in the sun, lay strips on a rack or over a bar above a small slow, smoldering fire to keep bugs away.
• Meat is dehydrated when it’s crispy or has leather like texture.
• Vacuum seal handful sizes of fully dehydrated food in plastic bags or put in air tight containers with oxygen absorbers scattered on the food.
THE NEXT INSTALLMENT OF THIS SERIES WILL START WITH "CANNING"