Since Lightmod makes it super easy to get started with ClojureScript and Reagent (React for ClojureScript) web development, and because I've been using it for a week now to write Steem Observatory, I thought I'd start posting a tutorial series for web development with Reagent here.
All you need to know is ClojureScript, you don't need to know anything about React (I don't, never used it, Reagent takes care of everything for you).
First download Lightmod, it's available for Linux/Mac/Windows and is completely self contained, you don't need anything else besides Lightmod to do ClojureScript development. It's written in Clojure and uses JavaFX for the UI. Then open it up and click on the Basic App button in the top left to create a new ClojureScript + Reagent web app.
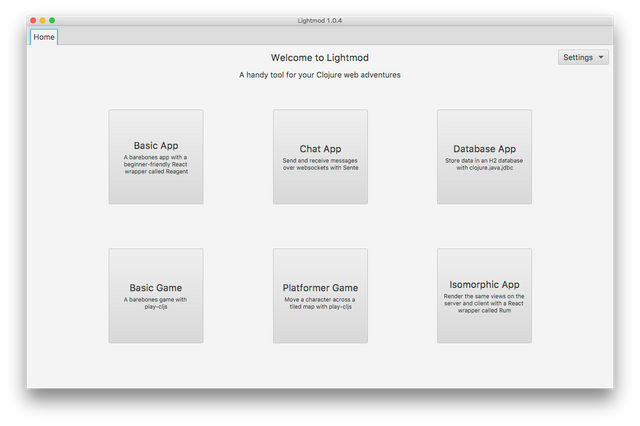
Enter a name for your new app, I'm going to use myfirstapp here, and a new tab with that name will appear next to the Home tab. Click it and you'll see this:
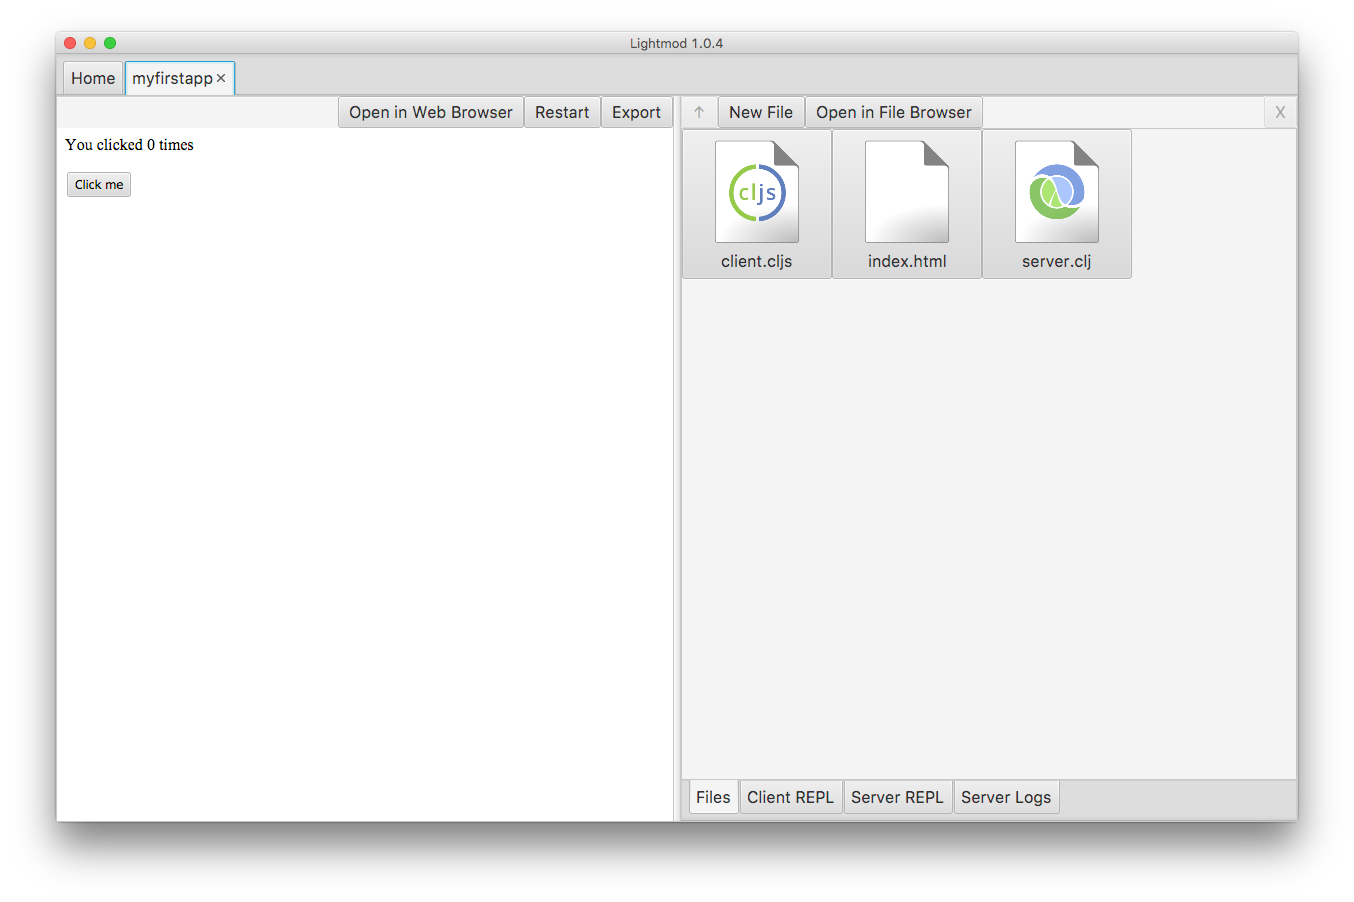
Click on the client.cljs file, that is where your client side ClojureScript code is in and the only file we'll use for this tutorial. Play around with the counter on the left a bit and look at the code on the right, see if you understand how it works. Feel free to change the code to try it out, we're going to replace all of it anyhow. Lightmod saves automatically so after you've typed, you should see the result on the left after a second or two.
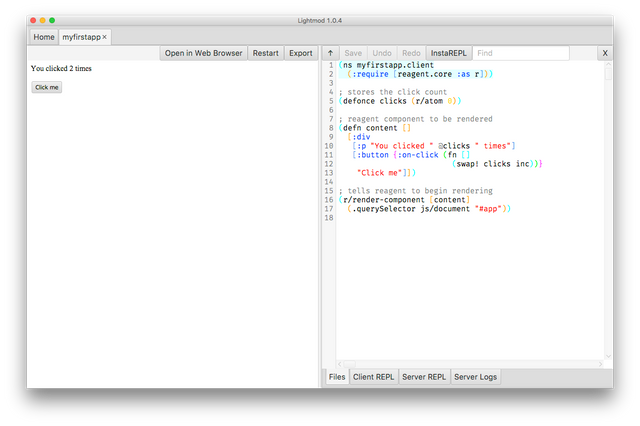
Now we're going to replace the code with a very simple todo list app, using best practices so you'll know how to best structure your Reagent web apps in the future. Here is the finished code and app, but we'll go through this step by step:
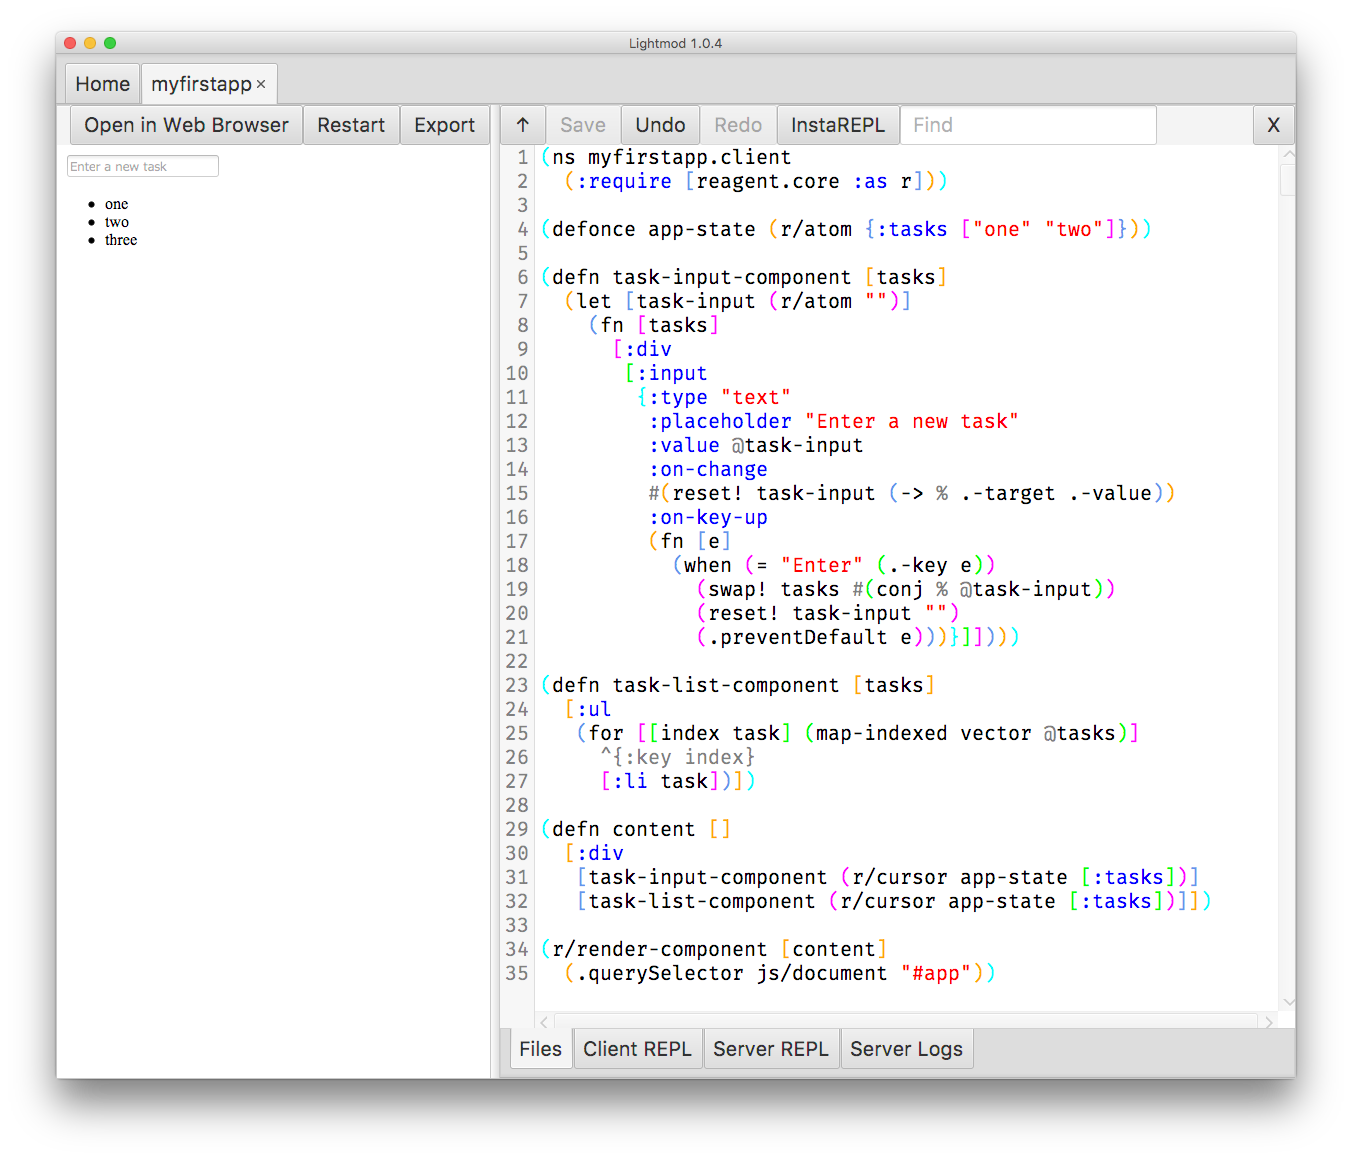
Now delete all of the code in client.cljs. You're going to write the app from scratch! And I won't even let you copy and paste the code, you'll have to type it out by hand, because that is the best way to learn. We'll start with the namespace declaration.

That should be self-explanatory. We require the Reagent library and alias it as r so that it's easy to use in our code. Next we'll need a place to store a list of our tasks, we'll just use a vector for that. It's considered good design to have a single atom for the app state instead of lots of smaller atoms that clobber up the global namespace, usually that global app state atom is just plainly called app-state, so we do just that. Not really necessary since our app isn't going to have much state, but better to get used to this now because in bigger apps you'll want to do it exactly like this.

We're using defonce here instead of plain def so that hot reloading changes to our code with figwheel won't overwrite our app state. And we're using Reagent's special version of atom which works exactly like ClojureScript's atom, but re-renders React components whenever it's dereferenced.
In that atom we put a hash map with the key :tasks and the value just a vector with two test tasks, plain strings, just so that there is something on the screen before we've entered a new task ourselves in the UI.
Now let's write the React render method, which will take our app's main component and render it. This should stay at the bottom of your code, so write new code before that render call. Look at the screenshot of the whole app again if you're unsure where to put the new code.

Using r/render-component we tell Reagent to render the component content in the div #app. Now let's actually write that component. Component's in Reagent are just plain ClojureScript functions. How cool is that?

Our content function returns a vector which represents an HTML div element. If you wanted a paragraph you'd write :p instead, and if you wanted a span, :span. You get the idea. This style of writing HTML is called Hiccup syntax, maybe you're already familiar with it.
Inside of the div we render two components. But wait, I just said components are just ClojureScript functions? Why aren't there ( )around the components instead of [ ]?. That's how Reagent knows it's a component. It will call the function, which returns a component.
The task-input-component returns an input element that lets people enter a new task. And the task-list-component will display them in an HTML :ul (unordered list). Both components take a single argument (remember, they are functions, and using function arguments is how we share state between components in Reagent, pretty neat!)
But what's that? r/cursor? Since it's good practice to keep all of the app's state in a single global atom, Reagent makes it easy to work with that big data structure by using cursors. Think of a cursor as a shortcut somewhere into a bigger hash map. By using r/cursor app-state [:tasks] as an argument to a component function, that component receives an atom that points directly to our tasks vector instead of the outer hash map with the :tasks key. Makes it much easier to work with!
Next we'll write the task-list-component function.

The new thing here is that we use a for loop to create a :li element for every task in the tasks atom (which is a cursor, but our component doesn't have to know that since a cursor works exactly like a normal atom). We can do that because again this is just a plain ClojureScript function, so you can use all of the functionality ClojureScript provides to create HTML elements. And we use an annotation to give that :li element a :key. Every element created in a loop needs a unique id or React will complain. It will still work without it, but for performance reasons you should add it. In this case we just use the map-indexed function to turn each of our tasks into a vector with an index and then use that index as the :key.
Now for the last and the biggest part of our little todo list app, here comes the input component:
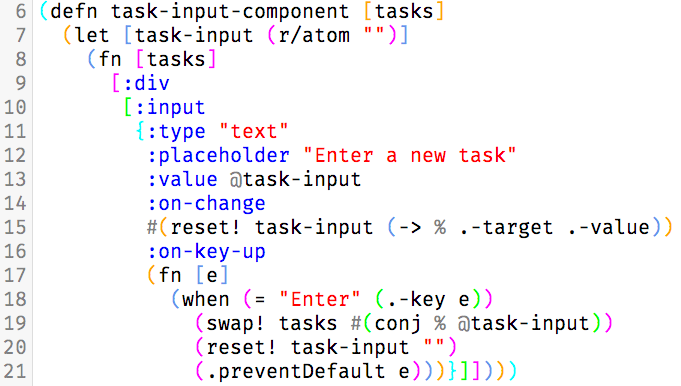
The first new thing you will notice here is that we don't return a vector with an HTML element this time, but an anonymous function instead and we're using let to create a new atom. This is how you do component local state in Reagent. The task-input atom will hold whatever the user enters into the input field, and the rest of our app doesn't need to have access to that atom, so it'll be local to our component. Returning the function is necessary so that React doesn't redefine the local state atom every time it re-renders the component.
The :inputelement vector is a bit more complex this time because we use a hash-map to set properties of the element. We set the :type to text, use a placeholder message, set the value property to our local state atom and then we define two event handlers. One for when text is entered in the input field (:on-change), and one for when the user presses the Enter key (:on-key-up). Using these properties you can also set CSS styles, just use the :styleproperty and give it a hash-map like this: {:color "red" :background "black"}
If you've made no errors, the app should work now, try entering a few new tasks! If it doesn't work, click on the Open in Web Browser button and then open the Chrome/Firefox dev-tools, whichever you use, to see the error message, it's probably a typo or you messed up the indentation. Lightmod uses paren soup to match parentheses, which uses whitespace to figure out where parens should be. So check if everything is indented correctly, and if not, use Tab and Shift+Tab to indent/outdent sections of the code.
That's it for the first tutorial in the series. Next tutorial I'll show you how to export your app, compile it with the boot build tool, and deploy it on the internet. Feel free to ask questions if you have any, I'm no expert since I've only been using Reagent for a week myself, but I'll try to help when I can. You might also want to follow my Steem Observatory posts since I also mention my development experience with Reagent there.
Have fun programming, cheers!
Cheers!
Downvoting a post can decrease pending rewards and make it less visible. Common reasons:
Submit