Symantec™ Protection Engine 7.5 for Network Attached Storage Installation Steps
(For Windows Server 2008 & Above )
I. About Symantec Protection Engine for NAS
Symantec Protection Engine is a carrier-class content and URL scanning engine. Symantec Protection Engine provides content scanning
and URL filtering capabilities to any application on an IP network, regardless of its platform. Any application can pass files or URLs to
II. Symantec Protection Engine for scanning.
Symantec Protection Engine accepts scan requests from the client applications that use any of the following protocols:
Symantec Protection Engine Native protocol Note: From version 7.0, Native protocol has been deprecated. Symantec recommends the use of either ICAP or RPC protocol.
The Internet Content Adaptation Protocol (ICAP), version 1.0, as presented in RFC 3507.
A proprietary implementation of remote procedure calls (RPC).
How Symantec Protection Engine works
You can use one of the SDKs or build your custom application that supports ICAP to connect to Symantec Protection Engine.
You can configure client applications to pass files to Symantec Protection Engine through one of the supported communication protocols. You can configure Symantec
Protection Engine to scan only the files that it receives from the client application. The client application must decide which files to scan and what to do with the results.
You might need to configure the third-party application to add threat, security risk, and URL filtering.
III. What you can do with Symantec Protection Engine
Configure protocols to pass files to Symantec Protection Engine for scanning
- Detect threats
- Prevent potential threats
- Prevent denial-of-service attacks
- Specify the files to scan
- Filter HTTP requests for unwanted content
- Monitor Symantec Protection Engine performance
- Keep your protection up-to-date
- Perform tasks from the command-line scanner
- Installing Symantec Protection Engine on Windows Server 2008
We will see the installation steps but before this we need to perform few tasks and its necessary
Install Java 2SE Run-time Environment (JRE) 7.0 (update 80 or later) or JRE 8.0 (update 66 or later) on the server.
Note: Symantec Protection Engine supports only 32-bit versions of Java Run-time Environment. Symantec Protection Engine cannot be installed with 64-bit version.
Disable any third-party antivirus products that are running on the server on which you plan to install Symantec Protection Engine.
Check whether you have enough rights on domain network to Run SPE for NAS.
Install Microsoft Visual C++ 2010 (SP1 or later) redistributable package (x86).
Installation Steps:
Log on to the computer on which you plan to install Symantec Protection Engine as administrator or as a user with administrator rights.
In the Symantec Protection Engine.zip file, run SymantecProtectionEngine.exe with Administrator rights
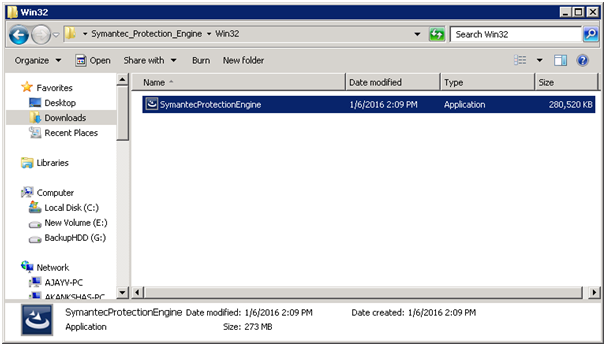
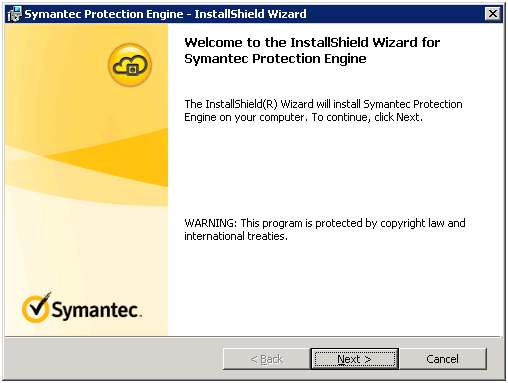
- In the Welcome panel, click Next.
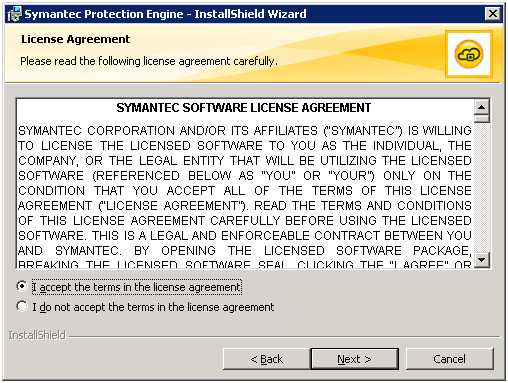
- In the License Agreement panel, after you read the agreement, indicate that you agree with the
terms of the Symantec Software License Agreement, and then click Next
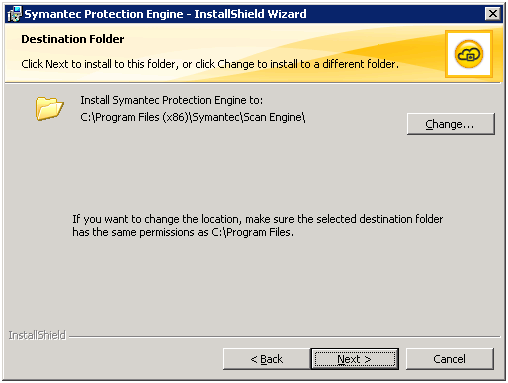
- In the Destination Folder panel, select the location to install Symantec Protection Engine, and then click Next.
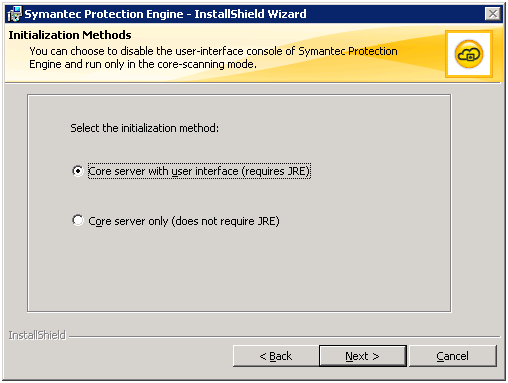
- In the Initialization Methods panel, select one of the following options, and click Next:
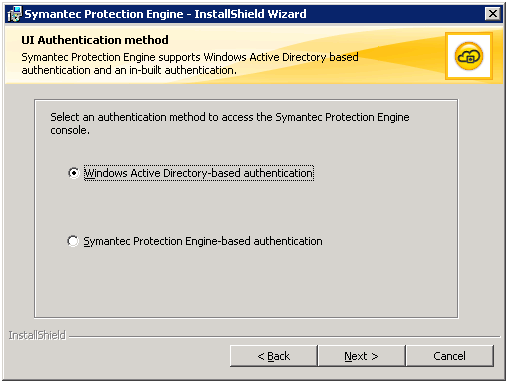
- In the UI Authentication method panel, select any authentication, and then click Next.
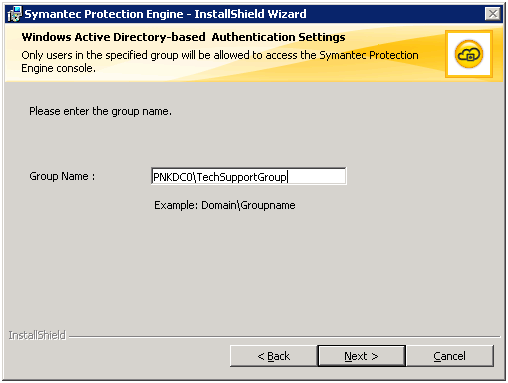
If you select AD based Authentication then you will see this sceen, Define securty group over here.
Click Next.
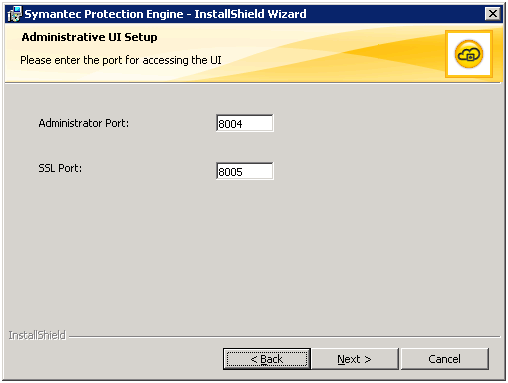
In the Administrative UI Setup panel, configure the Administrator port and SSL port.
Click Next
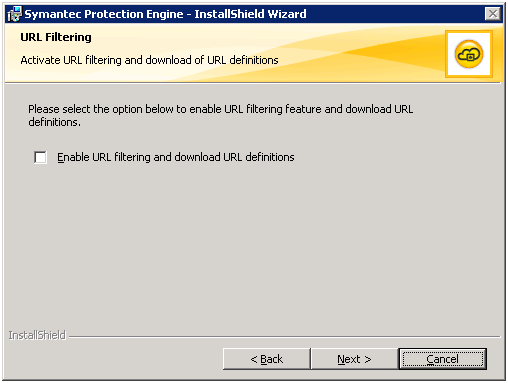
- In the URL filtering panel, select the provided option to enable URL filtering feature and downloading of URL definitions.
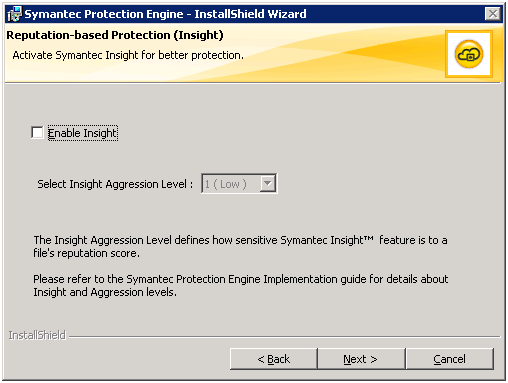
- In the Reputation-based Protection (Insight) panel, select the Enable Insight check box to enable the Insight feature.
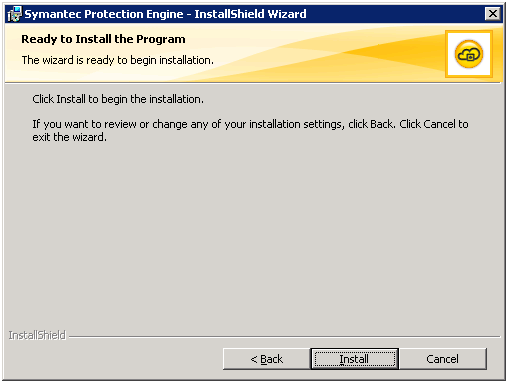
- In the Ready to Install the Program panel, click Install.
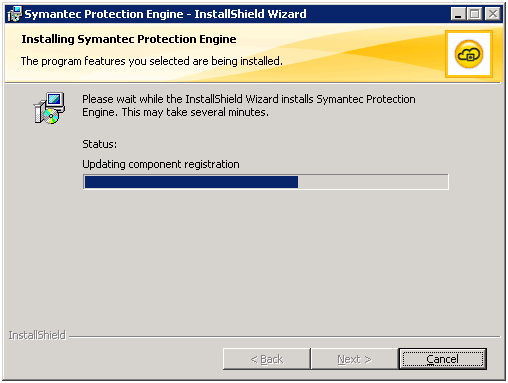
- It will take Few minutes to Install the Program.
- Click Finish

- Verify the Installation by logging in consol
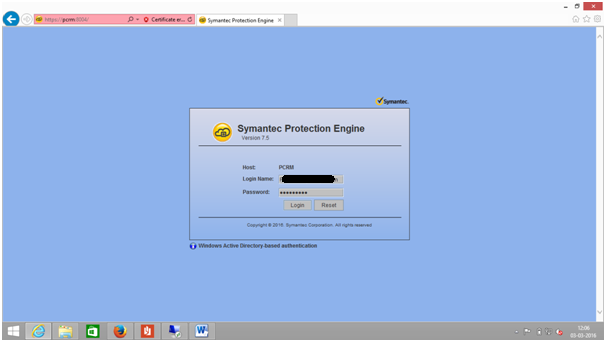
- As soon as you login first time it will ask you to give License file.
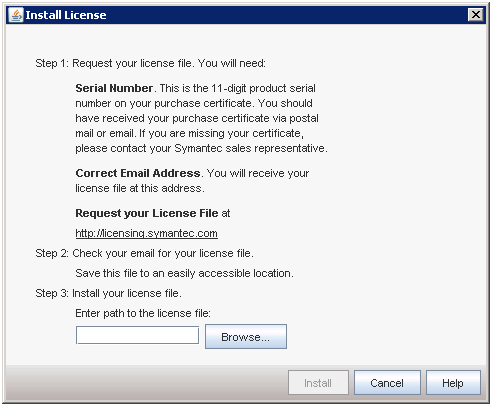
- Provide valid License File
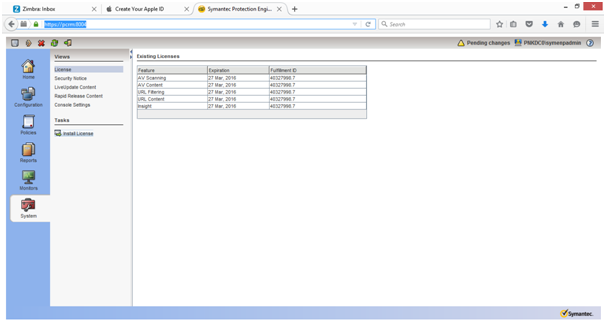
- Please find more details about Symantec from below links.
Congratulations @hardeepsinh! You have completed some achievement on Steemit and have been rewarded with new badge(s) :
Click on any badge to view your own Board of Honor on SteemitBoard.
For more information about SteemitBoard, click here
If you no longer want to receive notifications, reply to this comment with the word
STOPDownvoting a post can decrease pending rewards and make it less visible. Common reasons:
Submit