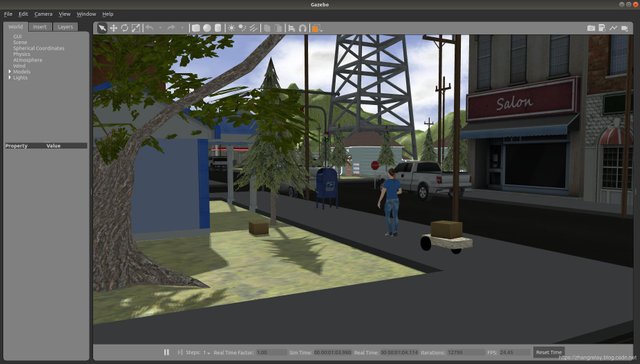
ROS is a collection of tools, libraries, and conventions for robotics programming.

(Image credit: https://www.freesion.com/article/5635107270/)
It is not an operating system (OS) by itself. It requires an OS to run (Linux, Win, Mac, etc.).
Using a terminal. Install:
source /opt/ros/eloquent/setup.bash
echo $ROS_DISTRO
code .bashrc
ROS Nodes
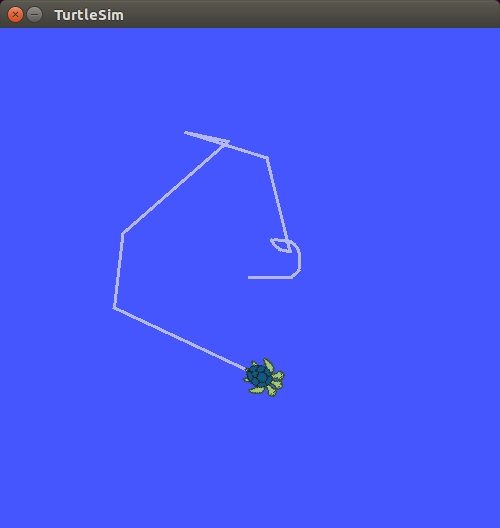
We used Turtlesim a lightweight simulator for learning ROS 2.
Run package (ros2 run <package_name> <node_name>):
ros2 run turtlesim turtlesim_node
Then launch a teleportation (by key press) node:
ros2 run turtlesim turtle_teleop_key
Then you can use arrow keys to control the movement of the turtle.

(Image credit: https://shiroku.net/robotics/setup-ros-on-jetson-tx2/)
There are 2 important command line commands to know:
- Node List—List of all running ROS2 nodes:
ros2 node list
- Node Info—Returns info on a specified node:
ros2 node info /<node_name>
ROS Topics
Robotics systems consist of several nodes that work together and each node has a specific task. The nodes need a way to communicate and share data between each other. ROS used Topics to exchange messages.
Starting a ROS node that publishes a string message:
ros2 run demo_nodes_py talker
Prints a sequence of: [INFO] [talker]: Publishing: “Hello World: xxxx”
ros2 run demo_nodes_cpp listener
Prints a sequence of [INFO] [listener]: I heard: [Hello World: xxxx
The message being published by the first node is being received by the second node.
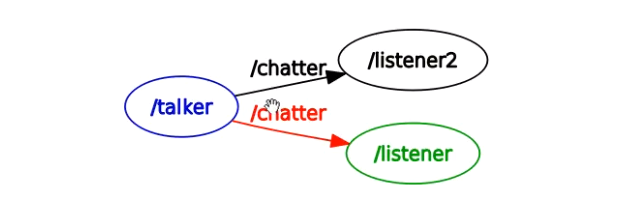
You can subscribe another node to listen to the same Topic:
ros2 run demo_nodes_cpp listener --ros-args -r __node:=listener2
Now 2 nodes are listening to the same Topic.
There are 4 important Topic command line commands to know:
Topic List — Get list of all active Topics:
ros2 topic list
Topic Info — Get info on specified Topic (returns type of Topic and count of publishers and subscribers):
ros2 topic info /<topic_name>
Topic Echo — Displays data being published on this Topic now:
ros2 topic echo /<topic_name>
Topic hz — Displays count of messages on Topic being published per second:
ros2 topic hz/<topic_name>
rqt_graph
Tool to visualise Topic communication.


ROS Workspaces
Workspaces are directories where you modify, build, and install ROS packages.
Create a workspace
Create a directory under Home:
mkdir -p my_ws/src
Navigate to source folder:
cd my_ws/src
Clone ROS package that simulates a robot in Gazebo:
Go to parent directory:
cd ..
Build workspace (using colcon, a build tool used by ROS2):
colcon build
List new directories:
ls
- build — directory where all the build process artefacts are saved
- install — directory where your workspace setup files are stored
- log — directory where build logs are stored
Source the installation (after each build):
source install/setup.bash
Launch the simulation package that downloaded into the workspace:
ros2 launch ankhbot_gazebo ankhbot.launch.py world:=ankhbot_city.world
This starts 2 new applications;
- RVIZ — used to visualise some ROS messages (scans from laser sensors, camera feeds, etc.)
- Gazebo — a powerful 3D robot simulator
Press CRTL+C to close RVIZ and Gazebo
ROS Packages
Packages are like containers for your ROS2 code, allowing you to install your code or share it with others.
Create a Package
Go to source folder of your workspace:
cd my_ws/src
Create new package (Python = ament_python, C++ = ament_cpp)
ros2 pkg create --build-type ament_python <package_name>
Explore the new package:
ls <package_name>
- <package_name> (directory with same name as your package) — contains source code for your ROS2 nodes, used by ROS2 tools to find your package
- package.xml — meta info about the package
- setup.cfg — required for package executables, so ROS2 run can find them
- setup.py — instructions on how to install the package
Build a ROS2 node for object classification from robotics perception system
Go to workspace:
cd my_ws
Open Visual Studio Code inside the ROS package:
code src/<package_name>
Create ROS2 node:
- Create new file inside folder of same name as your package
- Name it <package_name>_node.py
- Import rclpy (client library for Python to interact with ROS2) and import node class:
import rclpy
from rclpy.node import Node
- Import image message type that the node uses to structure the data that is passed on the Topic:
from sensor_msgs.msg import Image
- Import Cvlib for object detection and bounding boxes function:
import cvlib as cv
from cvlib.object_detection import draw_bbox
- Import CvBridge
from cv_bridge import CvBridge
- Import Python time module
import time
- Create class for our node and define constructor
class DetectorNode(Node):
def init(self):
super().init("detector_node")
self.pub = self.create_publisher(Image, "/object_detection/output", 10)
self.subscriber = self.create_subscription(Image, "/ankhbot/camera/image_raw", self.callback, 10)self.cv_bridge = CvBridge()def callback(self, msg):
time_now = time.time()
img_opencv = self.cv_bridge.imgmsg_to_cv2(msg, desired_encoding="rgb8")
bbox, label, conf = cv.detect_common_objects(img_opencv)
output_image = draw_bbox(img_opencv, bbox, label, conf)img_msg = self.cv_bridge.cv2_to_imgmsg(output_image) self.pub.publish(img_msg) self.get_logger().info("detection took {}s". format(time.time()-time_now))def main(args=None):
rclpy.init(args=args)detector = DetectorNode()
rclpy.spin(detector)
detector.destroy_node()
rclpy.shutdown()if name=='main':
main()
Make sure to make necessary edits to the package.xml,
~line 19: <build_type>ament_python</build_type>
<exec_depend>rclpy</exec_depend>
<exec_depend>sensor_msgs</exec_depend>
<exec_depend>cv_bridge<exec_depend>
and setup.py files.
~line 23: 'detector=objects_detection.objects_detection_node:main'