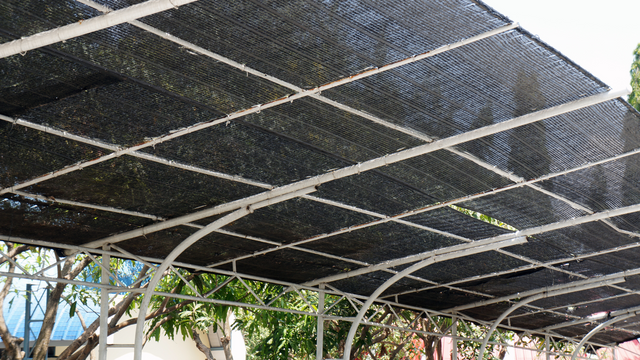
Installing a shade tarp is one of the easiest and most cost-effective ways to create a comfortable and protected outdoor area. Whether you want to shield your patio, cover a carport, or provide shade for a garden, learning how to install a tarp on your own can save you time and money.
This step-by-step guide walks you through the process, offering tips and techniques to ensure your shade tarp is secure, functional, and visually appealing. With a little preparation and the right tools, you’ll be able to install your tarp like a pro.

1. Planning Your Shade Tarp Installation
Before diving into the installation, it’s essential to plan the setup thoroughly.
Assess the Space: Measure the area you want to cover, noting its dimensions and shape. Consider the path of the sun and identify areas where shade is most needed.
Choose the Right Tarp: Select a shade tarp that suits your needs. Consider factors like UV protection, shade percentage, material durability, and color.
Identify Anchor Points: Determine where you’ll secure the tarp. Common options include walls, wooden beams, trees, or poles. Ensure anchor points are sturdy and capable of handling the tension.
Gather Tools: Collect essential tools, such as ropes, bungee cords, carabiners, eye screws, and a ladder. Having everything ready ensures a smoother process.
Thorough planning sets the stage for a successful installation, minimizing potential issues and ensuring your tarp fits perfectly in its designated space.
2. Preparing the Installation Site
Preparation is key to ensuring a stable and secure tarp setup.
Clean the Area: Remove debris, low-hanging branches, or obstacles that could interfere with the installation.
Install Anchor Points: If you don’t have natural anchor points like trees, consider installing poles or posts. Use treated wooden beams or metal poles to ensure longevity. Anchor them securely into the ground using concrete or heavy-duty stakes.
Check Tension Requirements: Consider the direction of tension for the tarp. It should be installed taut to avoid sagging or water pooling during rain.
Safety Measures: When using a ladder or working at heights, prioritize safety. Secure the ladder and have someone assist you if needed.
Preparing the site ensures that the foundation of your installation is strong and reliable, setting you up for long-term success with your shade tarp.
3. Installing the Tarp: Step-by-Step Instructions
With your planning and preparation complete, it’s time to install the shade tarp.
Position the Tarp: Lay the tarp over the area, ensuring it aligns with your intended coverage. Adjust its orientation for optimal shade.
Attach the Corners: Start by securing one corner of the tarp to an anchor point using a rope or bungee cord. Repeat with the opposite corner, pulling the tarp taut as you go.
Secure the Edges: Once the corners are in place, move to the sides. Use additional ropes or tarp clips to attach the edges to anchor points.
Adjust the Tension: Ensure the tarp is pulled tightly across the area. Use ratchet straps or tensioners for a more secure fit.
Check for Stability: Once installed, test the tarp by gently pulling on it to ensure it’s stable and doesn’t sag. Make adjustments as needed.
By following these steps, you’ll have a properly installed tarp that provides reliable shade and withstands outdoor conditions.
4. Tips for Angling and Securing the Tarp
The angle and tension of your tarp play a crucial role in its functionality.
Angle for Rain Runoff: Always install the tarp with a slight slope to allow water to run off rather than pool in the center. A 20–30% angle is generally sufficient.
Avoid Over-Tensioning: While the tarp should be taut, over-tightening can strain the material and cause it to tear. Aim for a balance between tension and flexibility.
Use Adjustable Fasteners: Installing pulleys or adjustable straps allows you to tweak the tarp’s position based on weather changes or sun movement.
Reinforce Weak Points: Pay special attention to the grommets and edges of the tarp, as these areas are prone to wear. Reinforce them with extra stitching or use tarp reinforcements for added durability.
Proper angling and securing techniques enhance the tarp’s performance and longevity, ensuring it remains functional during changing weather conditions.
5. Maintaining and Troubleshooting Your Shade Tarp
Once installed, regular maintenance will keep your tarp in top shape.
Inspect Regularly: Check for signs of wear, such as frayed edges, loose grommets, or sagging. Address issues promptly to prevent further damage.
Clean Periodically: Remove dirt, dust, and debris from the tarp using water and mild soap. Avoid harsh chemicals that can degrade the material.
Adjust for Weather: In strong winds or storms, consider temporarily taking the tarp down to prevent damage. After the weather clears, reinstall it securely.
Replace When Necessary: Over time, UV exposure and environmental factors may weaken the tarp. Replace it when it shows significant signs of aging or damage.
By maintaining your shade tarp, you can extend its lifespan and enjoy reliable shade for years to come.
Conclusion
Installing a shade tarp is a rewarding DIY project that enhances the functionality and comfort of your outdoor spaces. By following this step-by-step guide—from planning and site preparation to installation and maintenance—you can achieve a professional-grade setup without professional costs. Shade tarps not only provide protection from the elements but also add a stylish and practical element to your home or outdoor adventures. With the right techniques and a little effort, you’ll enjoy the benefits of your shade tarp for seasons to come.