Okay, so first of all before I start my step-by-step illustration, I just wanna express how thankful I am of steemit because it is such an amazing platform for people on sharing their daily adventures, their talents and other things! So kudos to you guys for creating such great platform!
Anyway, I will now start my step-by-step illustration with another Fan Art that I made with the person that makes me laugh and she is Catherine Gonzaga but she is commonly known here in the Philippines as "Alex".

This is Alex Gonzaga and this is actually my reference photo for the sketch I made. She is a Filipina and she is an actress and probably my favorite Filipino vlogger because she is so funny and I don't know but her jokes are like legit funny for me and so natural and aside from being funny she is so witty and I think you have to be witty to have good jokes LOL and so much for me being a fan!
1. Okay, first is you need to have a good reference photo and for me I really prefer high definition photos that is why sometimes I just don't like downloading photos from Google because the quality is not so good and in my case as you can see in the photo above, I am not so sure if you can see that in HD but in my phone it is in HD.
2. After finding your reference photo, you have to study every detail in the photo so that when you start the shading process it will somehow be easy for you where the details will be and for me that is really effective. And also, when you look for a reference photo and you're thinking of sketching something or someone, you actually have to connect to your subject and you have to feel it and I am not talking crazy here because connecting to you subject gives you more passion and the eagerness to have a perfect outcome!
3. Next is preparing the materials! You will need:
- Graphite Pencils
- Blending Stump
- Eraser
- Sharpener
- Kneaded Eraser
- Vellum Board
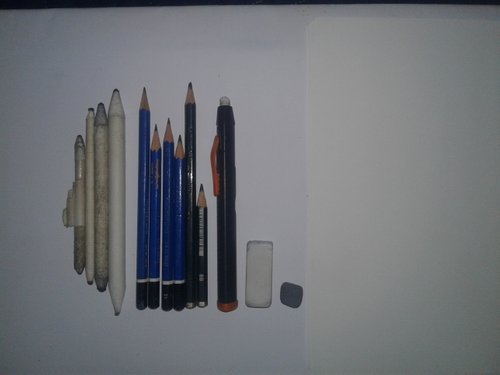
Those white things are my blending stumps. Blending stumps are good for shading because they make the shades more soft and more realistic but you should not worry when you don't have any blending stumps because you can use cotton buds/Q-tips or you can simply use cotton balls. And DON'T USE YOUR FINGERS because that can create uneven shades and will eventually make your piece messy. Next are my graphite pencils which is a B, 2B, 4B, 7B, and an 8B. The higher the number is, the darker the pencil is. And I will explain later where I use those pencils. And then I have the eraser and a kneaded eraser and on one of my post I have differentiated what is an eraser and a kneaded eraser. And lastly you need to have a paper and I used a vellum board on this one because this paper is great and is cheap too!
4. Next is you put grid lines to your reference photo and to your paper in order to create a precise or accurate outline. Like this one. When doing an outline, you have to do your best in making sure that you are able to copy the reference photo. Also, while making the outline, I think it is very important that you are able to copy the eye so that people will be able to recognize who you are sketching. And as you can see on the photo below, on the hair part, I have thickened some lines because that indicates that those parts are dark.
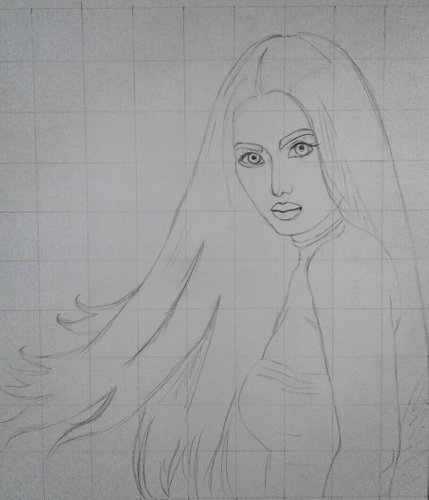
5. Then you start the shading process. Some artists say that you should not start with the eyes because it gets messy but since I believe that we are all unique in different beautiful ways, I start with the eyes because that will also tell me if I got the eye right and if I was able to capture the emotion and the expression in my reference photo and for me that is very important. For the eyeballs, I started with a light shade of 2B and I left the highlights in the eye unshaded. Then I layered it with a 4B and slightly outlined the eyeballs with a 4B. And I also used 4B for the iris and lastly I used the 8B for the iris to make it a lot darker and also to the upper part of the eyeballs and also used 8B with small pressure on the eyeballs and also on the outline of the eyeballs. And just a reminder that you have to keep your pencils sharp to have better shade. And I did the same thing to the skin. I started with a base of a B and used my blending stump and the topped it with a 2B and then I used a 4B on the darker parts. I did not use an 8B to the skin. If there are dark parts, I juts apply more pressure to my 4B then use my blending stump and a kneaded eraser for the highlights.

6. And then voila I am now done with the face, the chest area and I applied some shades to the arm and the shoulder because after shading her dress the hair on the back, I will go back to the arm and the shoulder to add some more shades. And just like what I said, I did not use an 8B on the dark parts of the skin. But it depends on the reference and on this one, I don't think I need an 8B on the skin.

7. I finished her dress and I only used 4B on this one and again with a lot of pressure applied on the pencil.
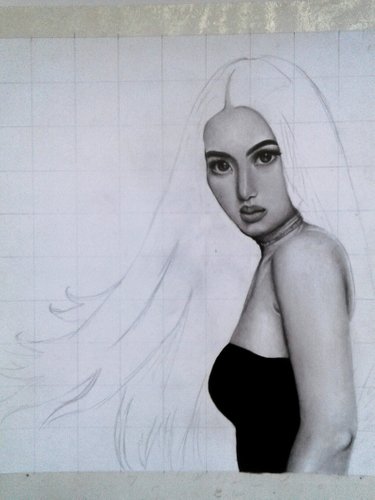
8. I am now on her hair. For the hair, I always start with a creating a base using a B and then blend it. Then I use a B again but this time I make hair strands. This is because it will be much easier for me to create the highlights later. And when doing the hair, you always have to bear in mind that your pencil should be sharp in order to achieve a more realistic hair.
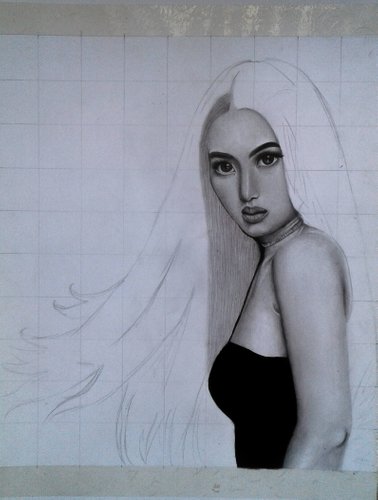
9. And now I finished the left side of the hair and if you can notice the highlights, that is because of step 8. And time I used my 8B and since my 8B is already so small, I used my 7B. And I used my blending stump too to distribute properly the dark shades and in order to have greater depth of the hair.
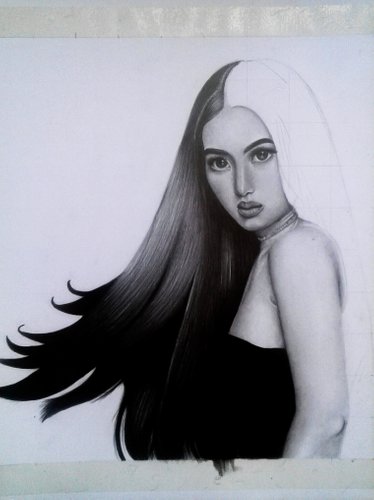
10. Tadaaa! I finished the other side of the hair with the same process. And like what I have said earlier, I then added some more shades to the shoulder and the arm. And by this time, I look at my work and then I added more shades to the chest area, I added some more shadows and blended some other parts of the skin and used my kneaded eraser to enhance more of the highlights. And for the hair, I added some more stray hairs to have a more realistic
approach.
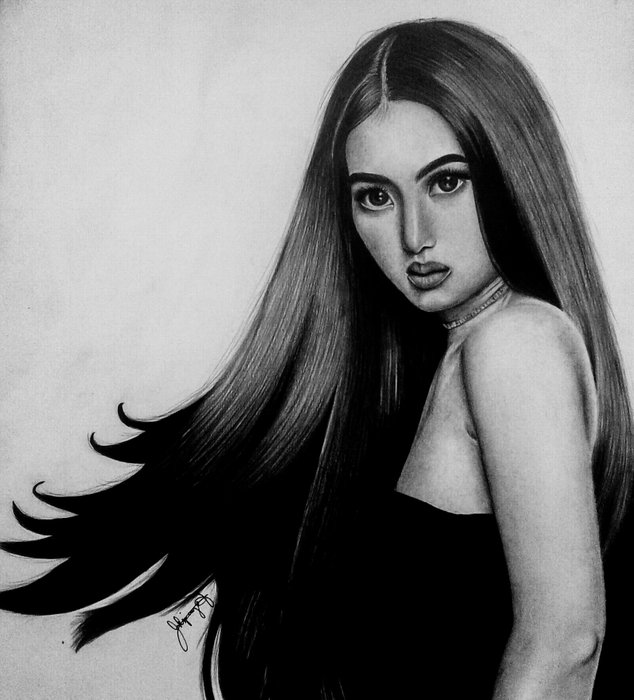
I used a larger photo so you guys could see the details :)
Here is a gif of the process
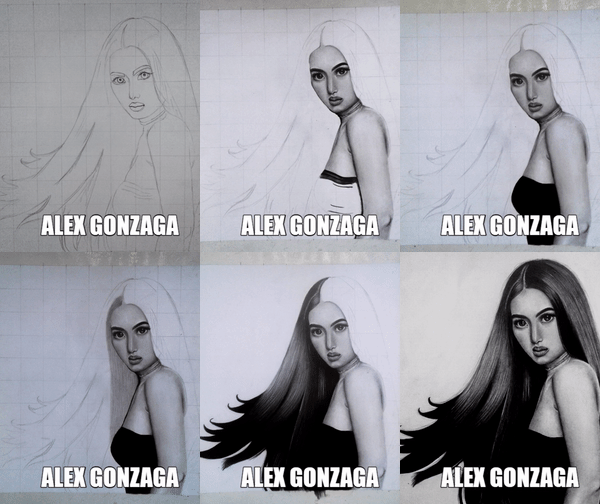
https://gph.is/2uY4RrS

done
Downvoting a post can decrease pending rewards and make it less visible. Common reasons:
Submit
Thank you :)
Downvoting a post can decrease pending rewards and make it less visible. Common reasons:
Submit
This post was shared in the Curation Collective Discord community for curators, and upvoted and resteemed by the @c-squared community account after manual review.
Downvoting a post can decrease pending rewards and make it less visible. Common reasons:
Submit
Nice post ! You capture her likeness well and the step by step is very nicely done :D
Downvoting a post can decrease pending rewards and make it less visible. Common reasons:
Submit
Thank you so much!
Downvoting a post can decrease pending rewards and make it less visible. Common reasons:
Submit
Congratulations @adrnhpyo! You have completed the following achievement on Steemit and have been rewarded with new badge(s) :
Click on the badge to view your Board of Honor.
If you no longer want to receive notifications, reply to this comment with the word
STOPDownvoting a post can decrease pending rewards and make it less visible. Common reasons:
Submit
Congratulations @adrnhpyo! You have completed the following achievement on the Steem blockchain and have been rewarded with new badge(s) :
Click on the badge to view your Board of Honor.
If you no longer want to receive notifications, reply to this comment with the word
STOPDownvoting a post can decrease pending rewards and make it less visible. Common reasons:
Submit
Congratulations @adrnhpyo! You received a personal award!
You can view your badges on your Steem Board and compare to others on the Steem Ranking
Vote for @Steemitboard as a witness to get one more award and increased upvotes!
Downvoting a post can decrease pending rewards and make it less visible. Common reasons:
Submit