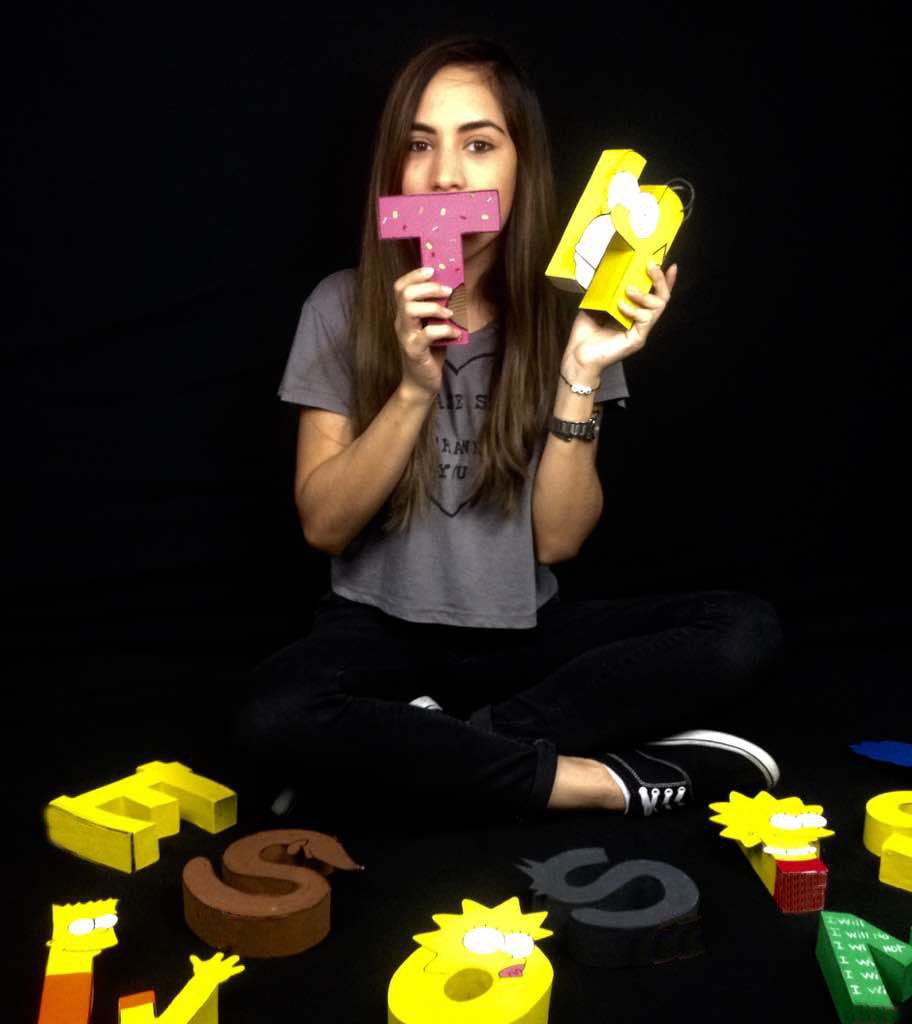
Once again I have encouraged to share one of my creations ...

It is a fun letter made with cardboard.
The fact that it was fun for me to create them is because I chose as thematic
"The Simpsons"
Who does not love the simpsons?
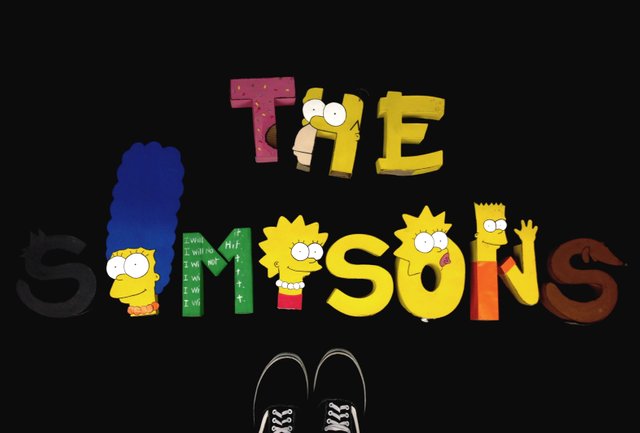
Each letter represents a character or highlight of this popular series.
Here I leave you the elaboration process so that you can also create them with your characters or favorite motif.


To start, make the sketches in pencil so that you have a clear idea of what you want and avoid making mistakes.
The size of the letters you decide, mine are 15cm high x 10cm wide.
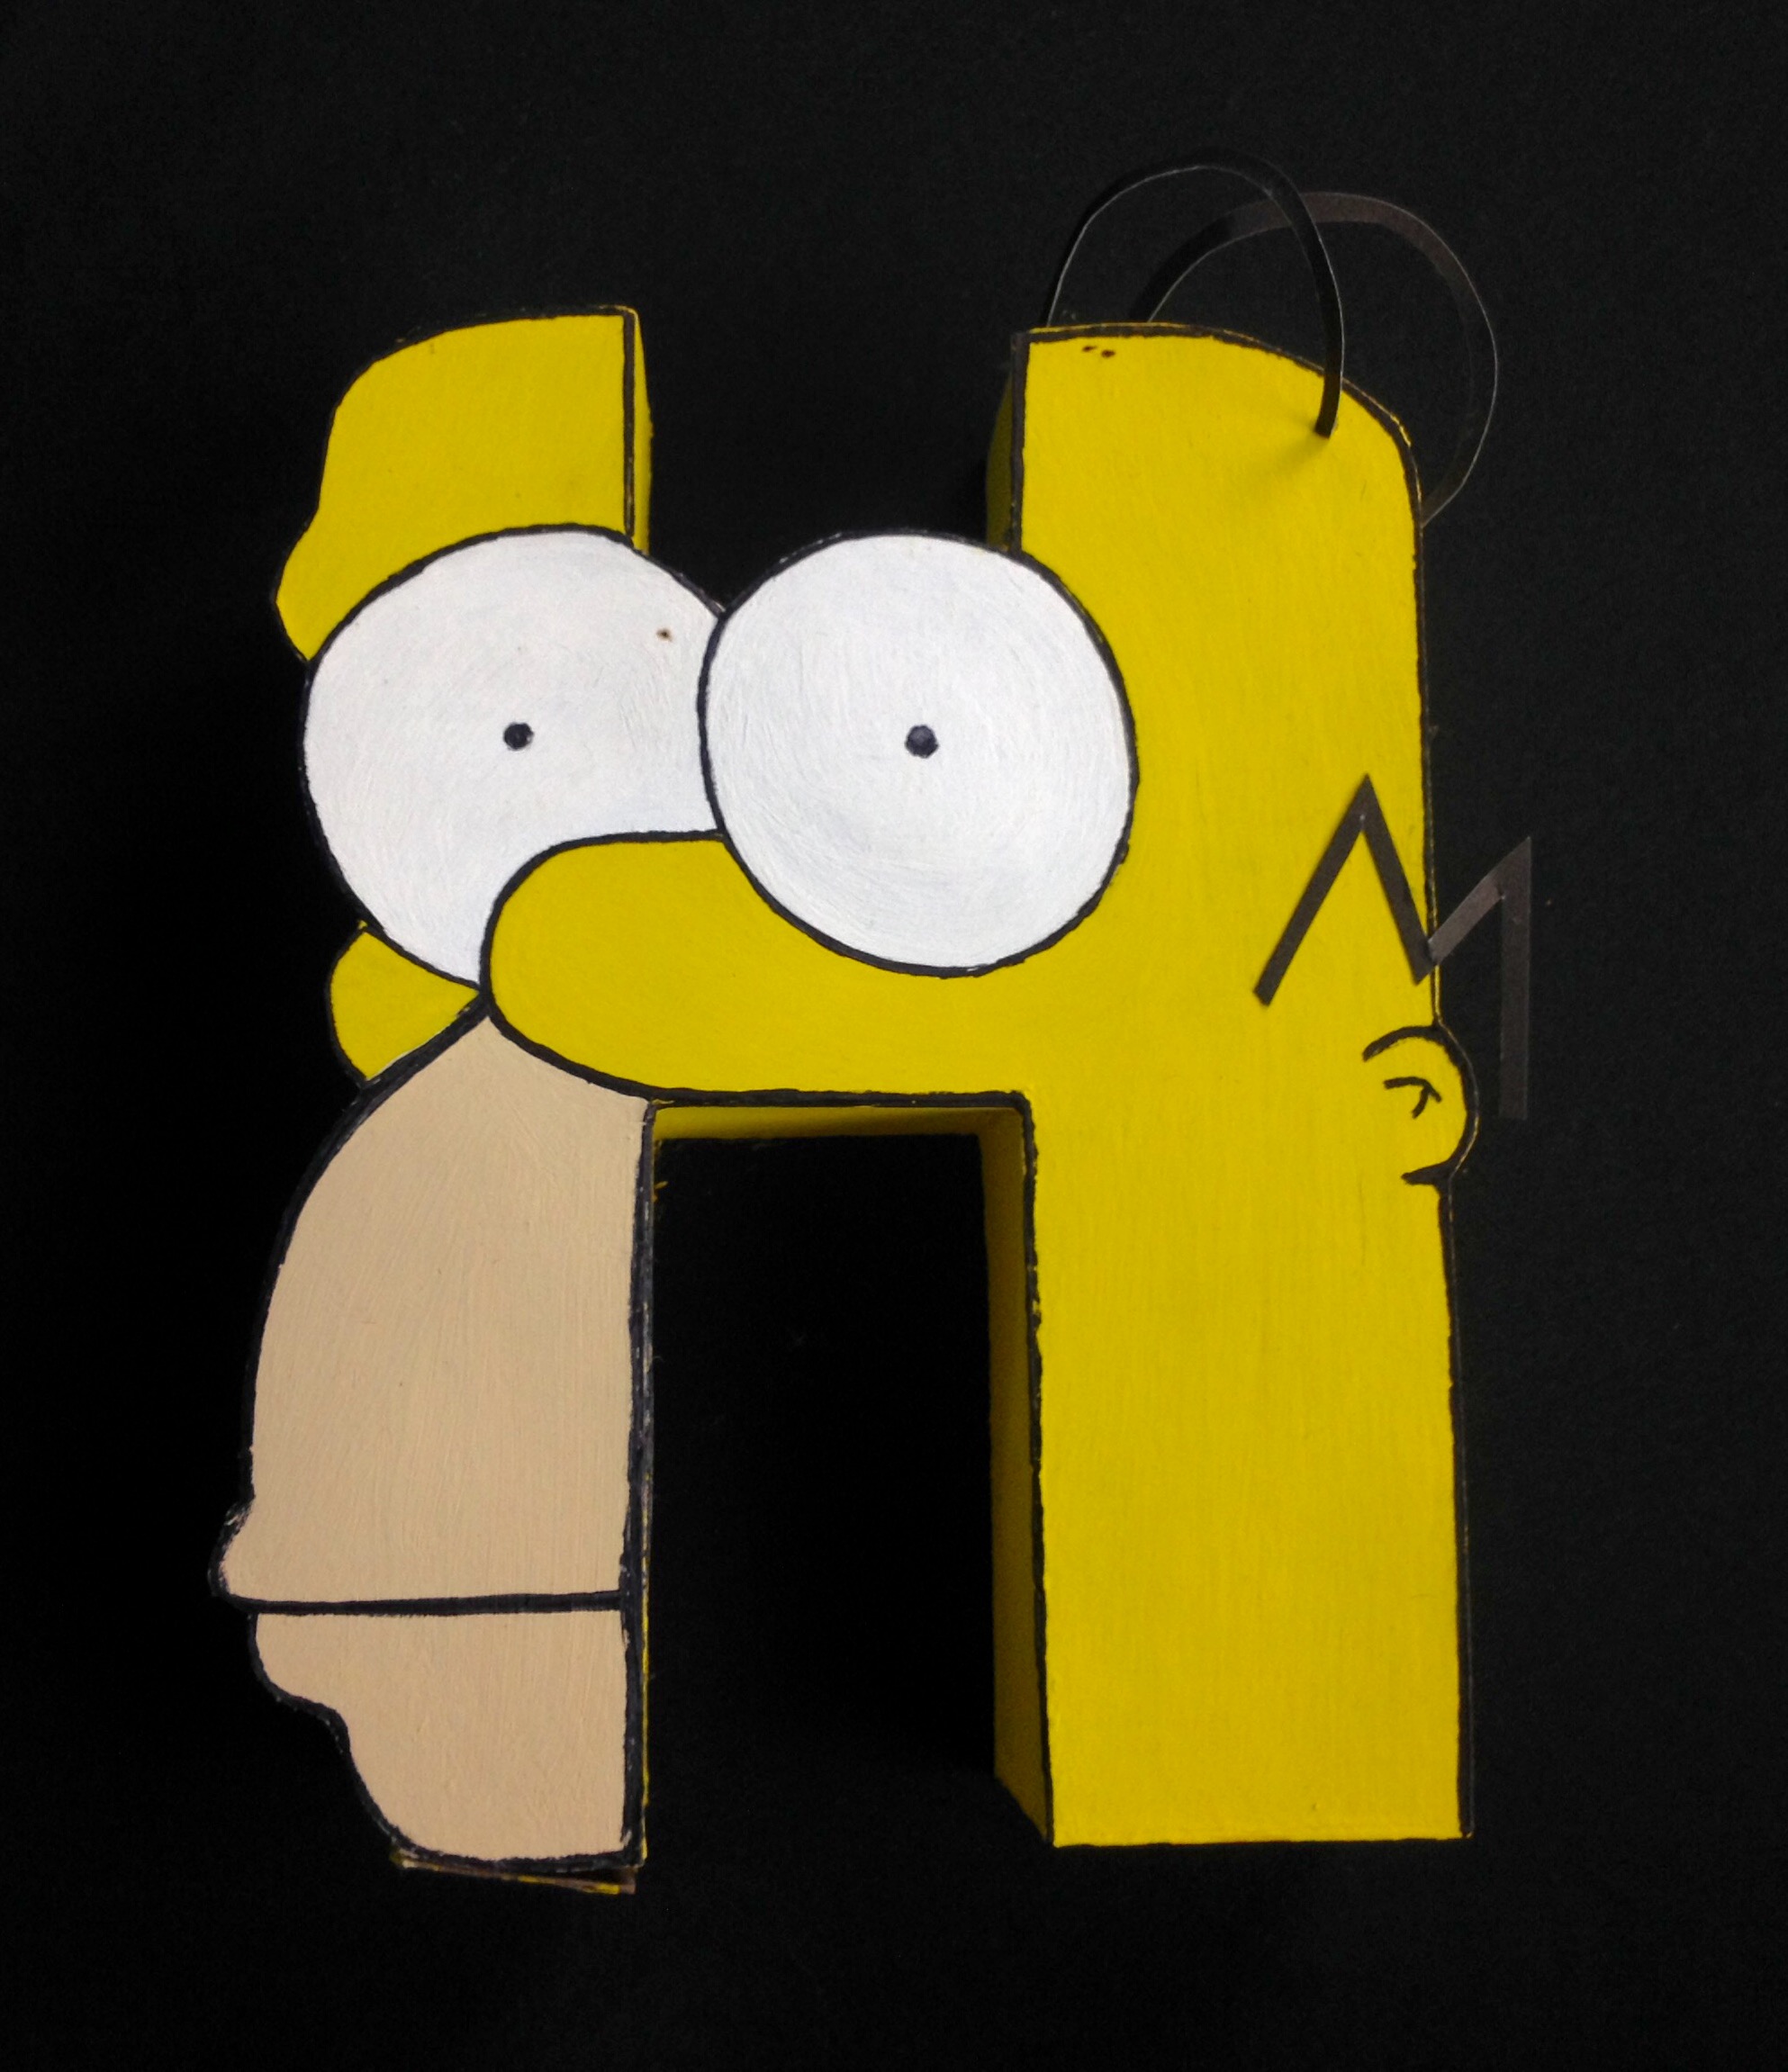
In this case the H was Homer.
Then darken them with a marker and cut them out. You must do this with all the letters, I made a total of 11.
"T-h-e-S-i-m-p-s-o-n-s".

Once you have all the sketches ready you will have to pass them to the cardboard and cut them out,
I recommend you look for a resistant cardboard because we are going to color the letters.
Note: the cardboard you are going to use should not be too hard, because when you cut it you will find it very difficult to work. Use good scissors or an instrument with which you can easily cut.
Cut long, straight strips to form the sides of the letters, stick them on both sides forming a box with the letter.
.jpg)
Join all the pieces in cardboard using some glue that you have (front face, back and straight strips for the sides of the letters), and to fill them place inside them paper balls,
this will make them more resistant and durable.
It's time to be creative, paint them with cold paint and put all the details you want.
Each letter I gave two layers of paint and let it dry for 24 hours and then decorate, I used markers and pieces of paper to give them a different touch.
--- This is how Homer was ---
.jpg)
--- And his whole family ---


Did you like it?
I think it's a great idea to decorate some space in your room, home or office.
It is not expensive and the letters when they are ready do not look like cardboard, if you dare to make them, comment me here below your experience.
See you...
¿Alguien tendrá idea sobre cómo recortar cartón más fácilmente? Una vez leí por ahí sobre mojar con un pincel, pero no estoy seguro, ¿qué tanto podría absorber el resto del cartón? ¿Alguna medida de seguridad?
Downvoting a post can decrease pending rewards and make it less visible. Common reasons:
Submit
Holaa, si he escuchado lo de mojarlo, pero claramente puedes dañar el cartón. Si es fino uso unas tijeras y si me cuesta recortarlo con ellas, me ayudo con un exacto y lo paso varias veces sobre el cartón hasta lograr cortarlo.
Downvoting a post can decrease pending rewards and make it less visible. Common reasons:
Submit
OH :O genial me encanto la idea :3 ademas te quedaron muy bien, tienes mi voto <3
Downvoting a post can decrease pending rewards and make it less visible. Common reasons:
Submit