STEP 1: MAKE A SLIP KNOT.
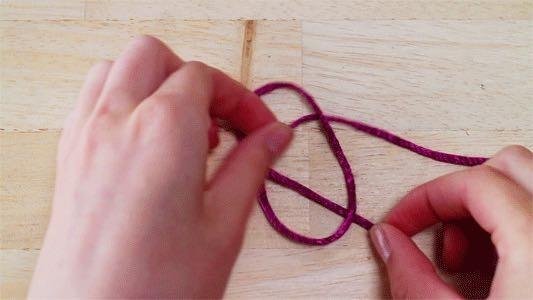
Begin the slip knot by laying the yarn down and looping it. Making sure your short piece, the tail, is on top of the long yarn. Next, flip the whole thing down, onto the longer yarn. Grab the middle yarn between your thumb and forefinger and pull the middle yarn out gently. Hang on to tail and pull the loop tight.
STEP 2: TIGHTEN THE LOOP
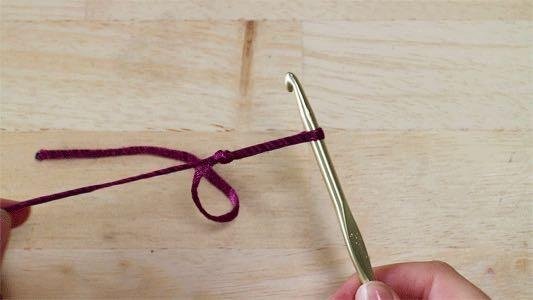
Pick up the loop in your left hand and slide the hook into the loop and tighten the loop around the hook. Not too tight, there should be some give. Note: I started out life left-handed and am now ambidextrous. I prefer to teach the way my nana taught me because it's how all the books are
STEP 3: HOW TO HOLD THE THREAD
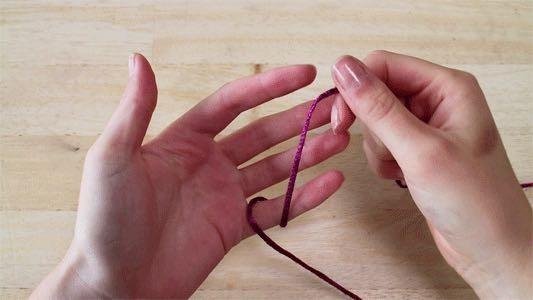
Turn the long side of the thread around your pinkie and twist it around your index finger. Grab the short side, the tail, with your middle and ring fingers. Hold the hook in your right hand. This way of holding the thread and hook will create enough space to move the hook and it keeps tension on the thread.
There are multiple ways to keep your thread and boldhook, find out what works the best for you.
STEP 4: BEGIN THE CHAIN
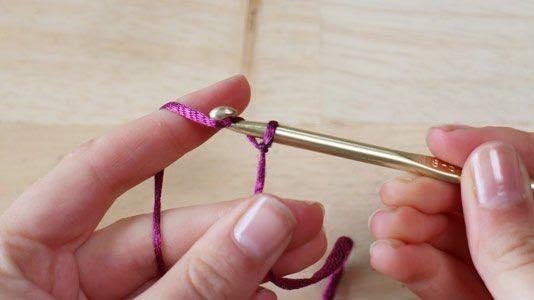
Begin with the starting chain stitch by twisting the thread around the hook and pull it through the loop.
STEP 5: FINISH THE CHAIN
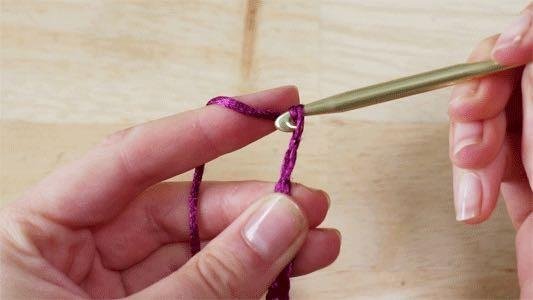
Don't make the loop too tight and continue to the second loop by pulling the thread trough the second loop. Keep continuing until you have a chain.
STEP 6: BEGIN THE FIRST ROW
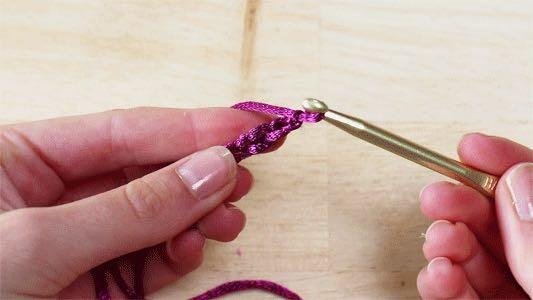
To start the first row of single crochet insert the hook in the second chain from the hook. You now have two loops around your hook.
STEP 7: CROCHETING THE CHAINED ROW
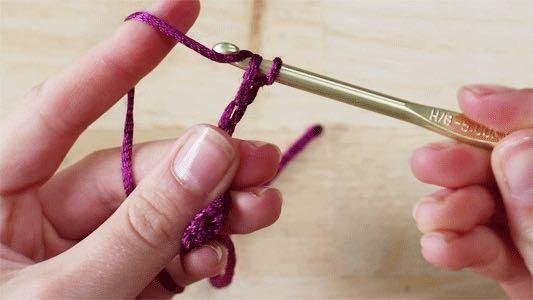
Catch the yarn in your left hand with the hook and pull it through the first loop. This will leave you again with two loops on your hook. Catch the yarn again with your hook and pull it through both loops. Repeat these steps until you get to the end of the chained row.
To crochet more rows, chain one stitch at the end of each of the end of your row and turn your crocheting over to start the next row.
STEP 8: FINISH
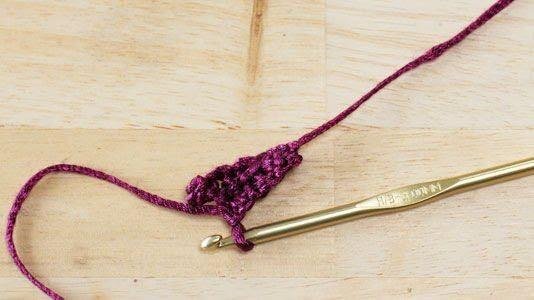
To finish, cut the long side of the yarn and pull it through the loop.
Remember, it doesn't matter what you're crocheting, it only matters that you're doing it!! :)>quote1. item# header
published.
Hi! I am a robot. I just upvoted you! I found similar content that readers might be interested in:
http://www.instructables.com/id/Beginning-crochet/
Downvoting a post can decrease pending rewards and make it less visible. Common reasons:
Submit
Siempre he querido aprender a tejer. Se me dan muy bien las manualidades, todo menos tejer! Excelente post! Te invito a visitar mi perfil...
Downvoting a post can decrease pending rewards and make it less visible. Common reasons:
Submit
Wow ... Thanks for showing step by step Technic .... i'll definitely try :-)
Downvoting a post can decrease pending rewards and make it less visible. Common reasons:
Submit
Write what you want next under this comment 😄😁
Downvoting a post can decrease pending rewards and make it less visible. Common reasons:
Submit