
Ever wonder how all those super cool CUSTOM GIF's are appearing in posts?
Most of the advice I have seen out there so far has been to go to a website like GIPHY, search for a GIF, "right click" to copy the image address, and then paste over to Steemit with this syntax:

This is all good and fine , but what if you just can't find one you want and need to make your own? Think to yourself you don't have the skills to do it? Think again!
Follow these steps and you will be GIF'ing in NO TIME!
I am sure there are like 10,000 ways out there to do this. I picked this particular sequence of steps because I thought they would be the easiest for most people to follow. Here's how I created the Banner GIF for this post:
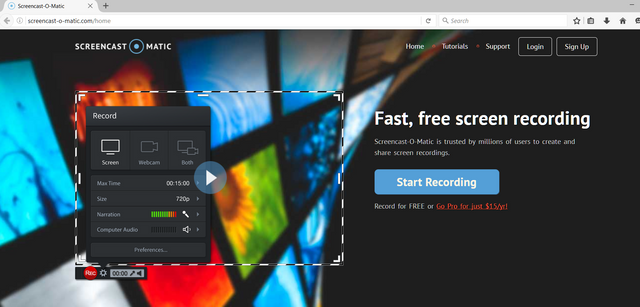
Step 1: Get a great screencast tool! Mine is ScreenCast-O-Matic.
I have used this tool for years as a teacher to create math tutorials, but works very well for creating GIF's too. For just $15 per year, you can screencast anything, save as mP4, write over video, narrate, the whole nine yards. The free version is cool too, but it has a watermark in the lower left corner. I think the $15 is well worth it though. I am in NO way affiliated with this website. I just use it because it works for me
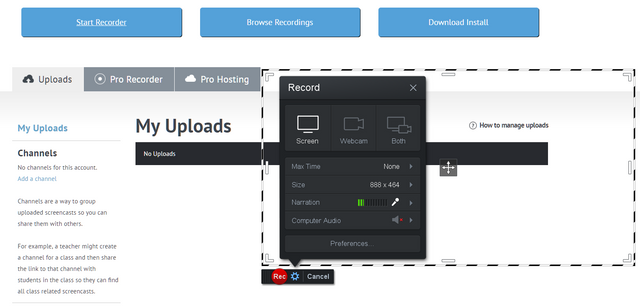
Step 2: Once you get your Screencast tool, start recording.
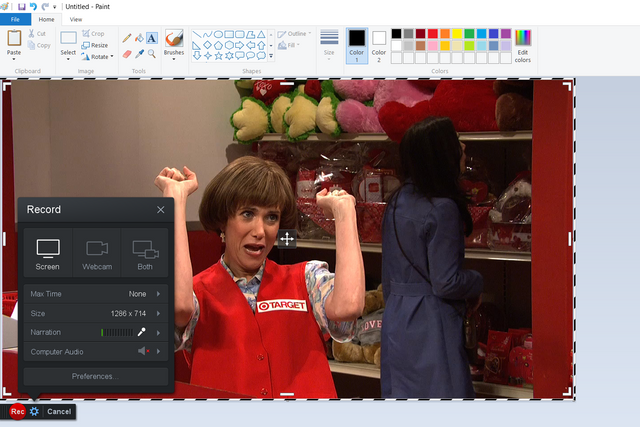
A rectangle will appear on your screen. Resize and drag to a desired length and width for your GIF. I placed the Target Girl picture in MSPaint for this particular exercise, but you could do this in just about anything on your computer.
Step 3: Record, Pause, Place Text, Stop, Rinse, Repeat.
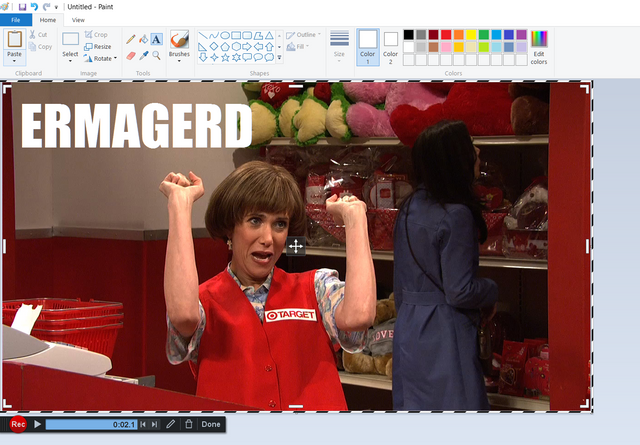
You have to think like an animator. Just place whatever text you would like to appear on your image, then record for a bit and stop. Repeat for as many words as you would like. Don't worry about length yet, you can fix this in editing.
Step 4: Editing
When finished with your clip, click Done and the Options menu will appear. On this menu, click Edit. From here, you can preview your clip and drag sections to cut to make transitions smoother. You might notice sound on your clip if you didn't turn off the mic on your computer. Don't worry about this, your GIF will not have any sound eventually.
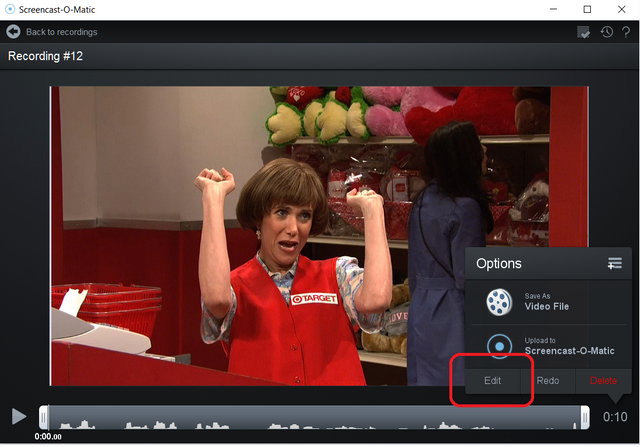
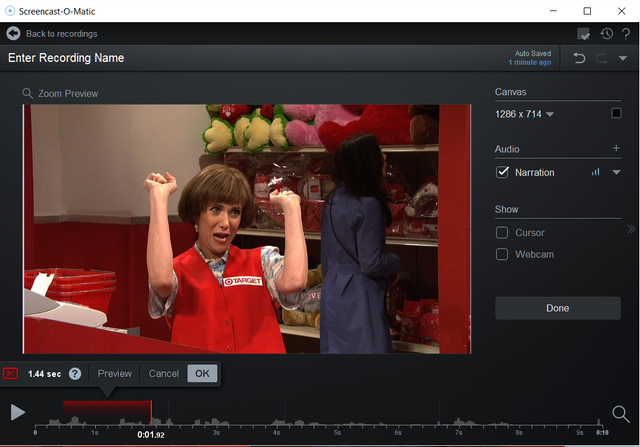
Step 5: Save your video to a place you will remember on your computer.
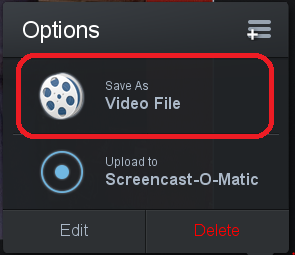
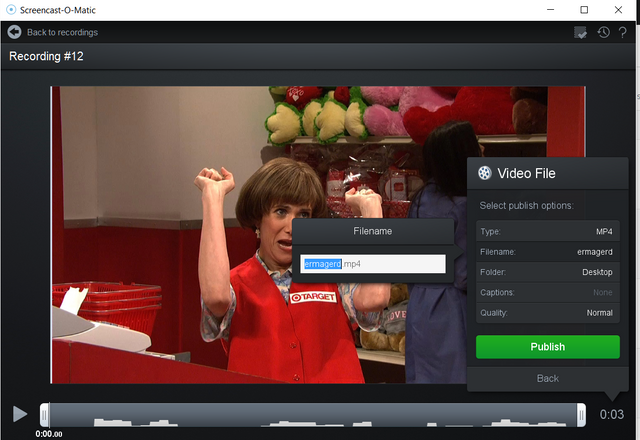
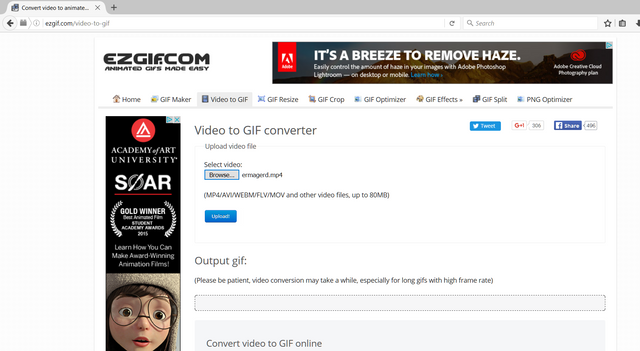
Step 6: Convert your video file to a GIF. A fast easy and FREE site is EZGif.com.
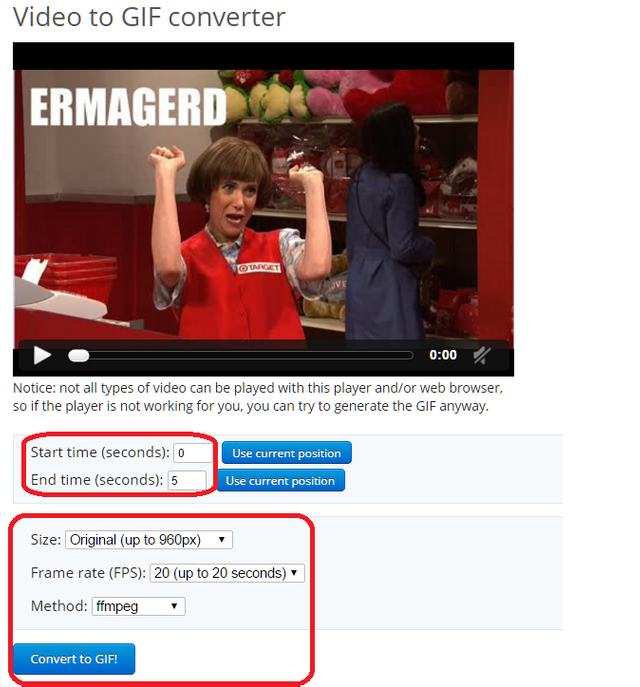
Click on Browse to find your file, then Upload to get started. You will want to make sure the GIF starts at 0 and ends at the time your video ends. Also, for maximum quality, choose 20 FPS (frames per second).
Step 7: Save your GIF to your computer
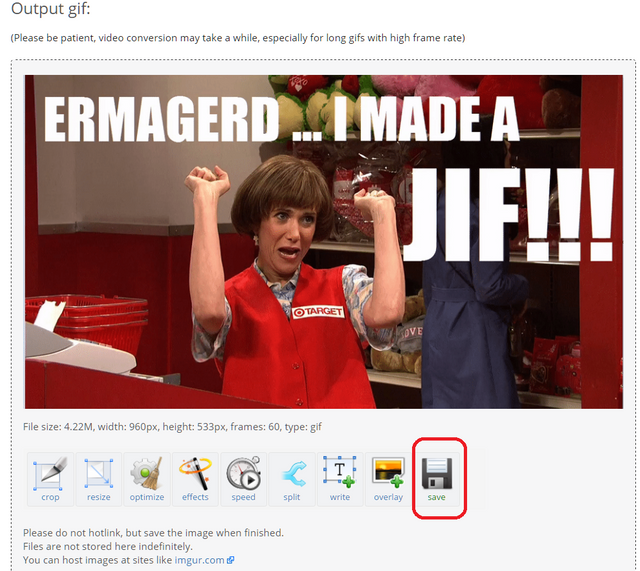
Step 8: Upload your GIF to an image sharing site.
This could be IMGUR, but we have our very own! SteemIMG! Just click START UPLOADING and locate your freshly minted GIF file. Select a desired category to place your GIF, or just click Upload if you don't care.
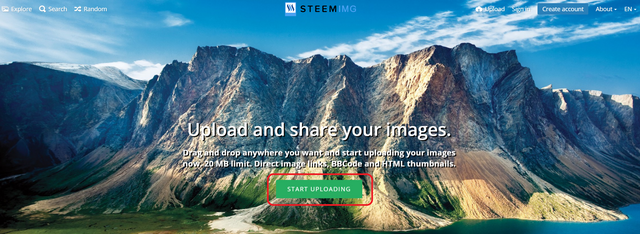
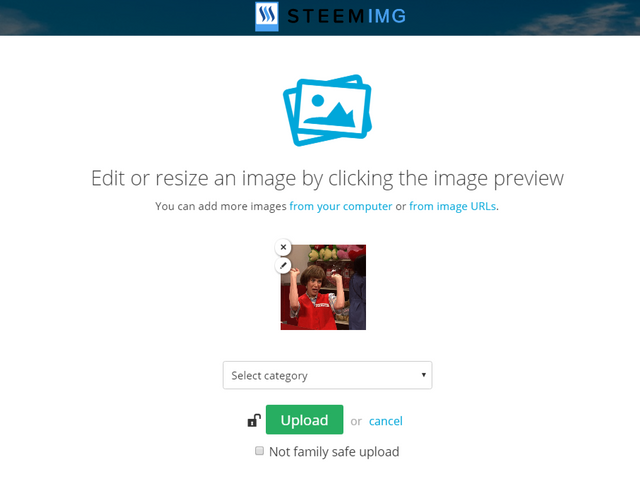
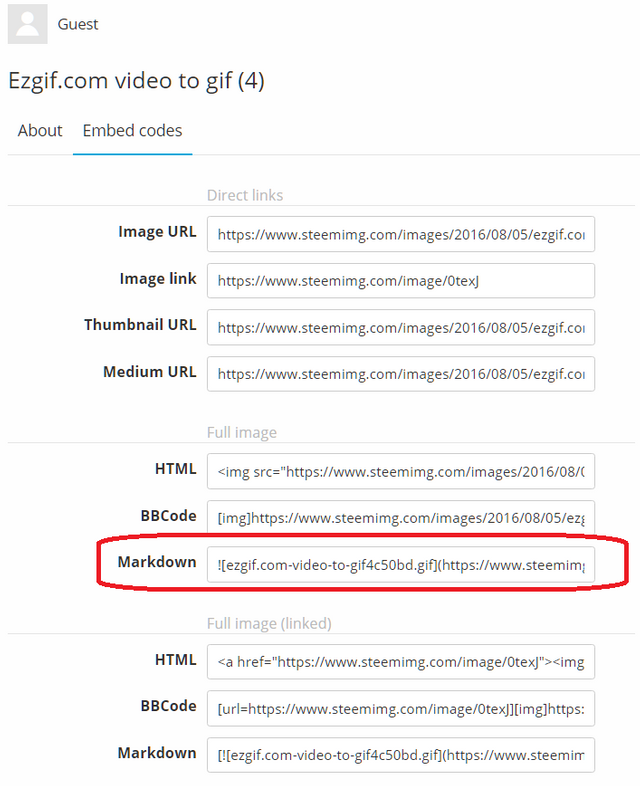
Step 9: Once uploaded, Copy the markdown text. You will need this for your post
Step 10: Paste your Markdown text in your post!
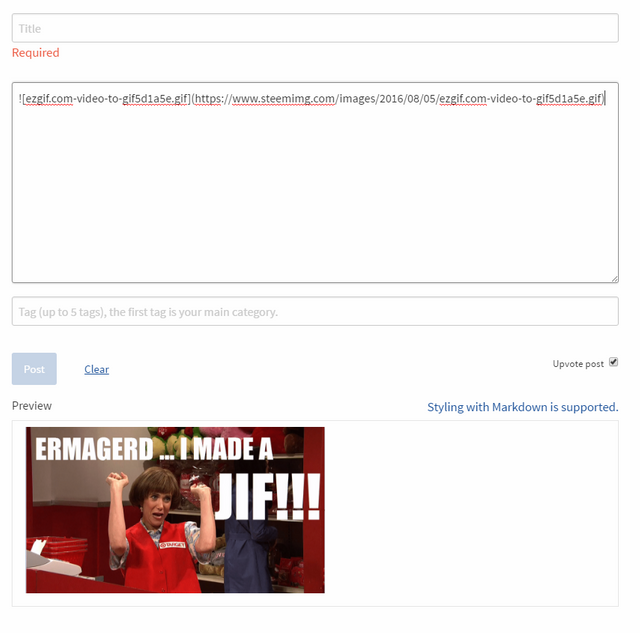
Congratulations! You just made your first animated GIF!

Great explanation, thanks!
Downvoting a post can decrease pending rewards and make it less visible. Common reasons:
Submit
Thanks!, Looks useful and fun! :)
Downvoting a post can decrease pending rewards and make it less visible. Common reasons:
Submit
Nice info, this will make steemit more fun, and atractive to read
Downvoting a post can decrease pending rewards and make it less visible. Common reasons:
Submit
Great tutorial, I've bookmarked this to try later.
Downvoting a post can decrease pending rewards and make it less visible. Common reasons:
Submit
Thank you! As I said, im sure there are tons of other ways out there you can do this, but this is for sure something I think anyone of any background level can follow! When you post something with it, let me know how it worked out for you!
Downvoting a post can decrease pending rewards and make it less visible. Common reasons:
Submit
Downvoting a post can decrease pending rewards and make it less visible. Common reasons:
Submit
Downvoting a post can decrease pending rewards and make it less visible. Common reasons:
Submit