In today's age of Photoshop, Lightroom, or Instagram the need for filters is becoming obsolete. You can snap a photo with your phone and instantly post it to Instagram while applying any of its variable filters available. Why even use a blue or a warming filter when you can apply it during post-processing using Photoshop? There is no need to buy or carry around expensive Graduated Neutral Density filters when you can bracket the shot and then blend these exposures during post-processing

Indeed, the current technology and techniques allow us photographers to carry less gear that weighs down our backpacks. However, there are still some things that Instagram and Photoshop can't do what a Polarizing Filter can. That's because the Polarizer's purpose is to filter the light coming in through lens and into your camera's sensor. You see, the light becomes "polarized" as it travels through the Earth's atmosphere and as it passes through pollution all the way to your lens glass.
The Circular Polarizer's primary function is to block this light, and that's why you will see darkened and bluer skies on your photos using the filter. In theory, you can achieve this same effect in Photoshop but what you can't do is filter polarized light. For example, reflections - water reflection or non-metallic objects deliver polarized light. You reduce or eliminate these reflections before you even press the shutter with a polarizer. This effect alone cannot be replicated in Photoshop or any post-processing process known to man.
The Polarizing Filter works it's magic with a linear polarizing film that filters out the scattered light rays and allowing only the light that moves in a linear direction. Linear Polarizing Filters were one of the first polarizing filters produced for film and manual cameras.

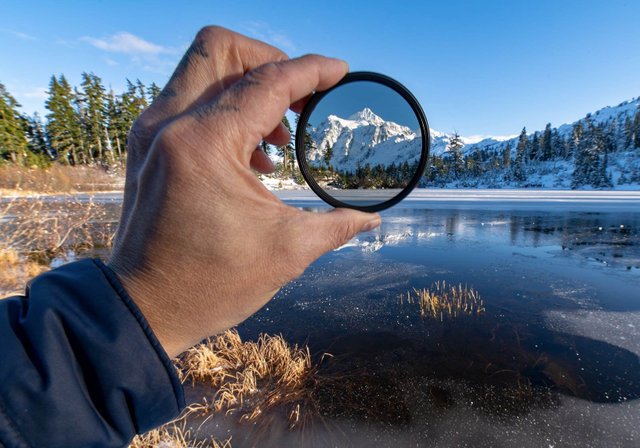
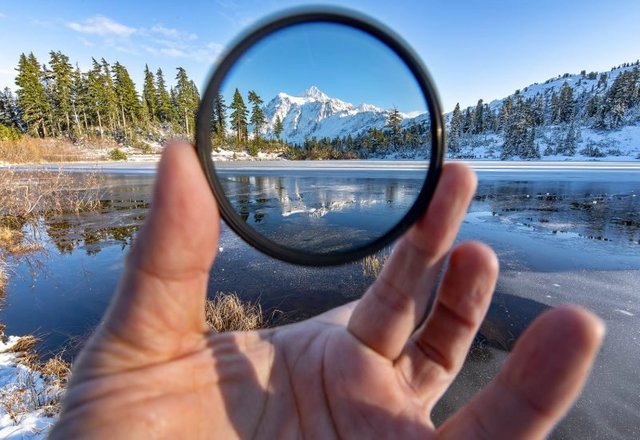
Here's a Circular Polarizer Filter in action. Noticed how much darker and bluer the skies above the mountain is compared to the rest of the frame?
I've used Linear Polarizing filters when I was shooting with large format film cameras. They worked great but had one downside, their use interferes with modern camera auto-focus and metering systems as it had problems seeing the light moving in linearly. The solution to this is to add a quarter wave plate on the polarizing film to twist the light coming into the lens in a circular pattern - That's what a Circular Polarizer Filter is, the topic of this article!
Without getting into the physics to explain polarization further, the important thing you have to know is - Polarizing Filters have the most profound effect then it's used at 90-degree angle from the Sun. That means it works the best when the Sun's rays are to the left or right of your composition. It is less effective when the Sun is 180 degrees, meaning right behind or in front of you. Still, these minuscule effects can even have a pleasant addition to your image.
Wide Angle With Circular Polarizer Filter:-
As mentioned, the degree of polarization is most effective when you point your lens 90 degrees from the Sun. You can see this profound effect when you use a Circular Polarizer Filter with a wide angle lens 28 mm or smaller (full frame, cropped sensors will be lower). Since wide angles include more of the sky, you can see part of the atmosphere that isn't fully polarized. This leads to part of the sky being darker than the rest. It's up to you if you like this effect or not, I don't have a problem with it, and I often use Polarizers with Super Wide angles.
There are some things you would be aware of when using a Circular Polarizing Filter. Using one will subtract 1-2 stops of light coming in so you'll have to adjust accordingly. Most applications of a Circular Polarizing Filter is when the camera is Mounted on a Tripod, but some wildlife photographers use it well while hand holding the camera.
Another thing to be aware of is that the physical thickness of the Polarizers. With wide angle lenses and shooting wide open, can reveal unnatural vignetting at the corners of the frame. There are thin Circular Polarizer Filters to address this particular issue, but you should always check to make sure you're not at the point of vignetting before taking the shot. You can also check the frame after you took the shot and examine the corners to retake another photo if necessary or adjust your f-stop for a smaller aperture.

With all that said, some photographers leave the filter on their lenses all the time. I shoot most of my nature and landscape photos with a Circular Polarizer Filter on my optics. Most images and scenery can use a Polarizing filter, and you should be using them or at least have one in your camera bag. There are just some things Photoshop can't recreate and what a Circular Polarizer Filter can do is one of them.
Good polarizing filters are not cheap. The ones I use are costly. There's no reason to tack on a $30 piece of glass on top of a $2,000 lens, that would be stupid. Add to the fact that you could easily have 2-3 different size filter mounts on your lenses and the costs can add up. So what is the solution to this problem? Buy the largest Circular Polarizer Filter matched to the largest lens you have and then buy step-down rings to allow it to fit your smaller lenses. The most common size is 77 mm, but some Super Wide Angle lenses go up to 82 mm - the larger the filter, the more expensive it is!