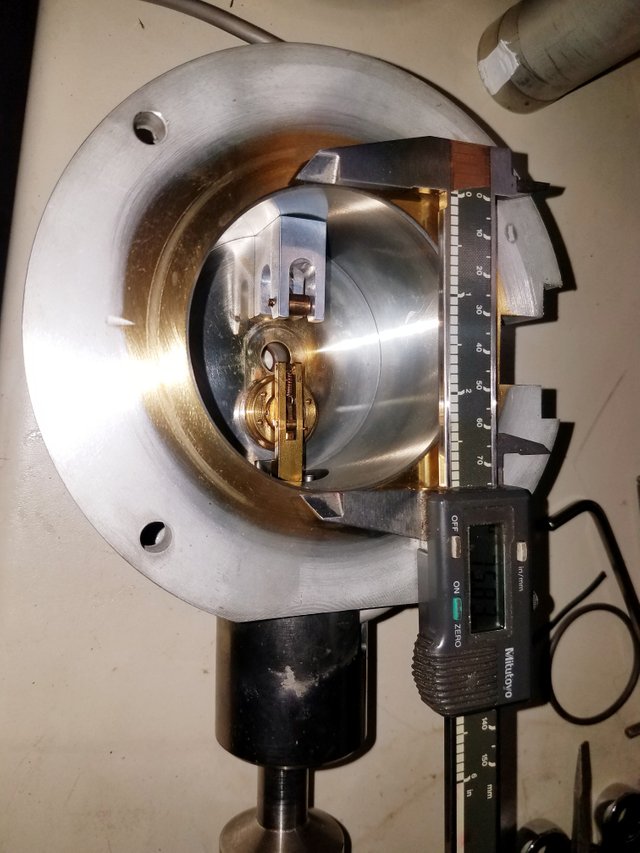
Figure 1: Column valve assembly as seen from the bottom side so its working mechanism can viewed.
Moving on down the column, the next component to tackle is the aluminum column valve assembly, which looks to be cast, then machined. This Gate Valve is manually operated, and made mostly of brass. Nestled inside a horseshoe shaped aluminum block you can see a roller where the cam locks the slide into place.
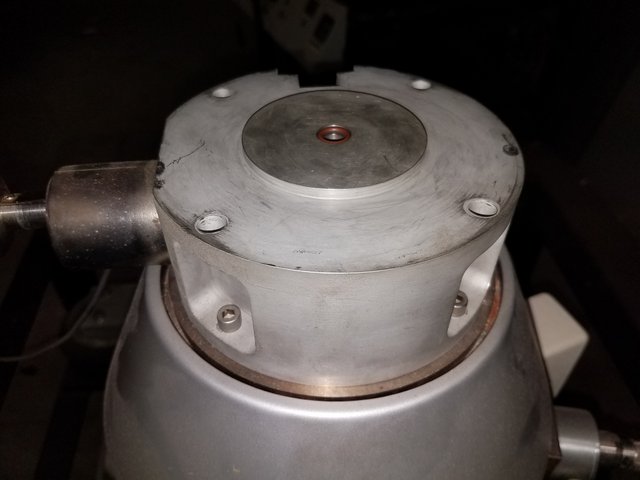
Figure 2. Column valve assembly as seen mounted to the column. The liner tube shown in part 2 fits right into that o-ring.
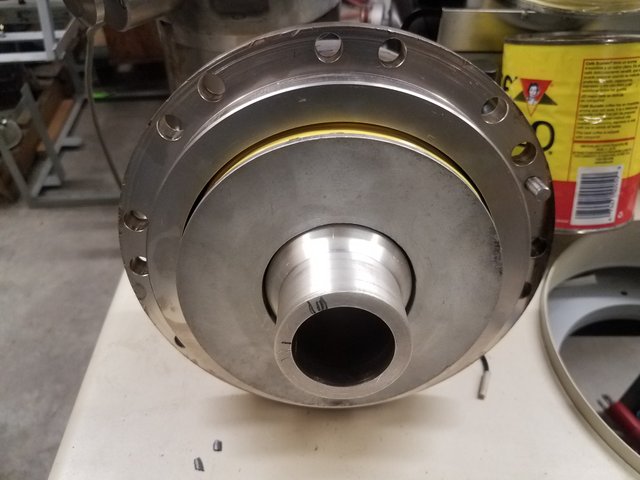
Figure 3. Objective lens and pole piece section, The inside of the approximately 30mm ID tube would be under vacuum and would also house the Scan Coils for generating the roster image as well as the Objective Stigmator coils. Stigmator coils are for reducing distortion in the beam, image etc. This design has the Obj and Stig coils under vacuum, which is not something I am used to seeing and IMHO a horrible idea. Its just more volume to evacuate air from, and potential outgassing which can cause "Virtual Leaks".
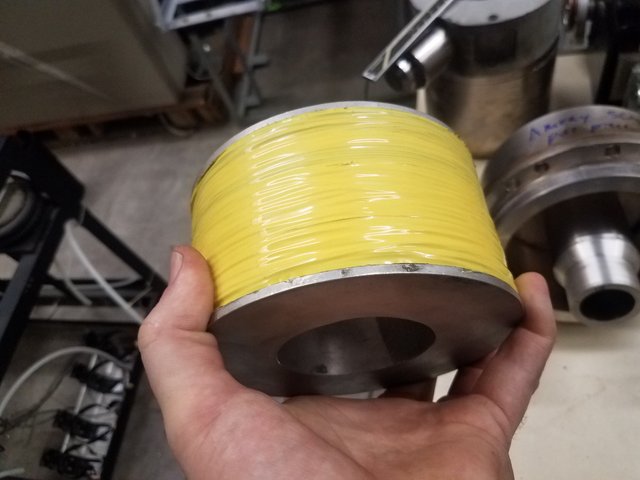
Figure 4. Objective lens coil that has been removed from above section. Once again, really poor quality windings. Yuck!
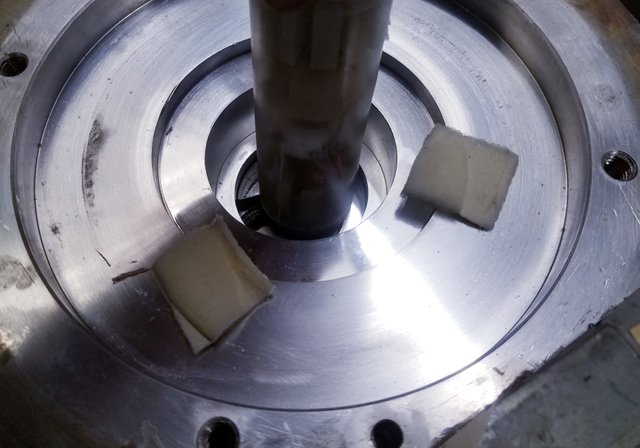
Figure 5. Next we have the scan coil and objective stigmator assemblage (protruding cylinder) . With some imagination you can see how the pole piece from figure 3 fits right down into that recess. You can see 2 of the 3 pieces of ~1 mm thick foam rubber that may serve as a insulator. I am not a fan of this. However, if you look back at 3, you can see proof marks, which makes me suspect these pieces of foam may have served as mechanical fine adjustments. The again, a service engineer could have left those proofs to mark its orientation when it was disassembled.
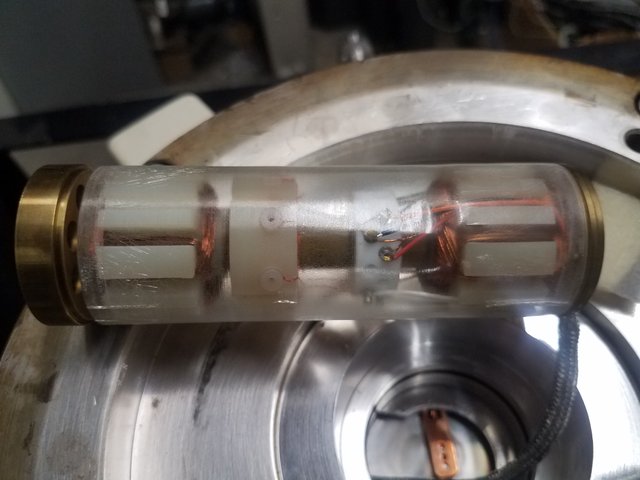
Figure 6. Better picture of the Scan and Stig coils. Notice the crazing and cracking of the plastic enclosure. I am going to take back what I said earlier about no fixed apertures. Its inside the brass cylinder to the left, which by the way is mounted on a threaded shaft for adjustment. Any FSE that removed that assembly and let that brass dial turn may have found himself spending a whole lot of time splitting the column a few times to get it back in the right place. Adjustments in the alignment settings could also correct it tho. Basically what would happen is that that aperture is going to be right at crossover, and shifting it up or down would effect your beam diameter coming through it.
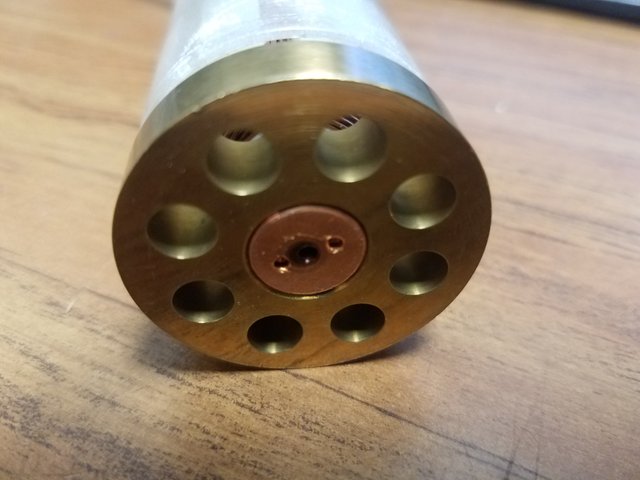
Figure 7. Close up of the objective aperture and the cylinder it is in. The holes in the cylinder are for heat dissipation. This is the top end btw.
Video 1. Objective aperture operation, which sits right below the Obj and Stig assembly.
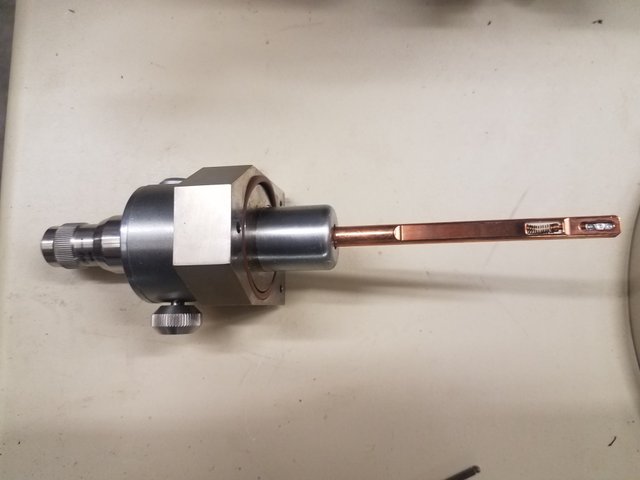
Figure 8. Objective Aperture mechanism. Not sure if its copper plated or solid, looks solid. I do not want to scrape it to find out, since someone may need it. There are still some AMRAYS in operation, even though the company is defunct.
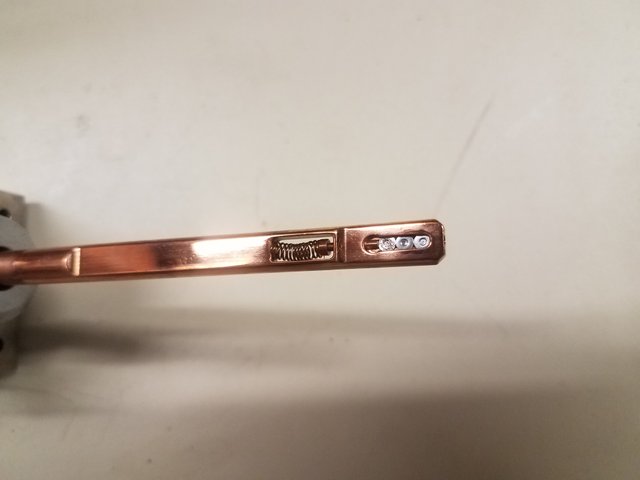
Figure 9. Close up. The small 3mm discs are platinum and are standard size for many SEM and TEM.
Its nice to have something interchangeable between different types of equipment other than screws, o-rings, and electronic components!
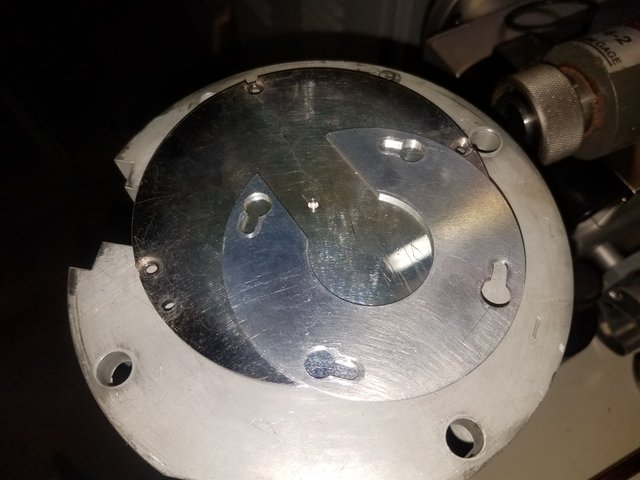
Figure 10. Next removed are these two plates, the C-shaped one served as support for the Scan and Stig assembly, and also allowed some space for the braided wired that was attached. The larger plate seems to serve as a pole piece, and is right above the stage and the last column component.
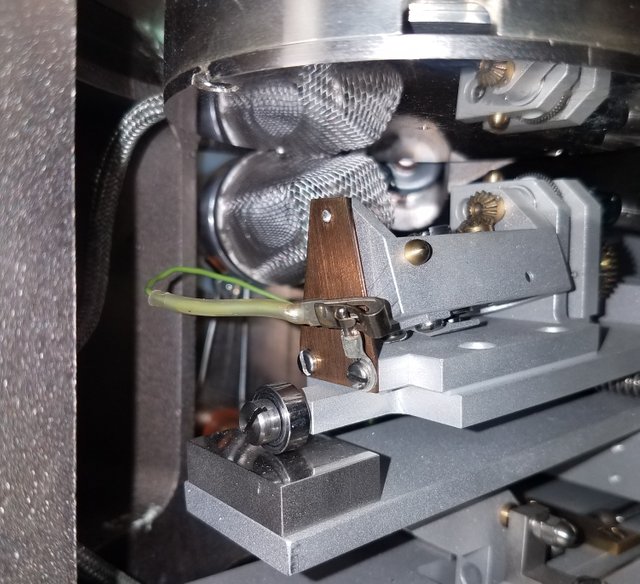
Figure 11. Stage view form the inside, and it looks like there are two of those baskets but your are seeing a reflection. The baskets cover the Secondary Electron Detector (SED), which detects the electrons and sends a electrical signal that is synchronised with the scan coins to make an image. The operating principle is very much like an old Cathode Ray Tube Monitor.
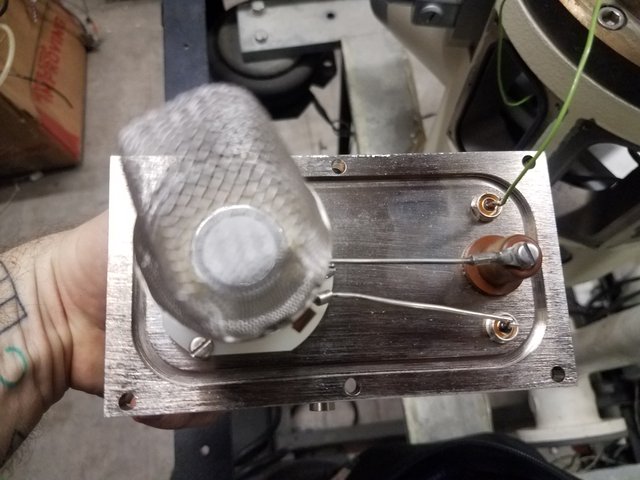
Figure 12. SED removed from the chamber. Inside that basket is a scintillator that is really fragile and would cost a lot of money to replace. A scintillator is a Transducer that converts electron energy to light, in a process called electroluminescence. Behind the scintillator lies a photomultiplier tube that converts that light into a electrical signal.
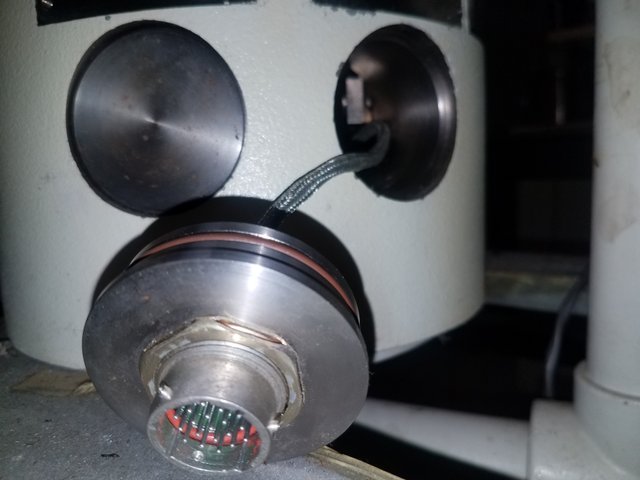
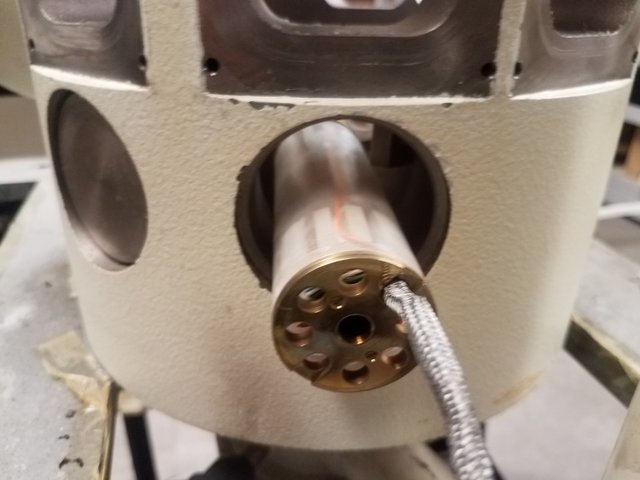
Figures 13 and 14. Removing the feed through for the coil assembly and snaking it through the port. The feedthrough had no retainer ring, or bolts holding it on. It would have been secured by vacuum alone. Not a good idea.
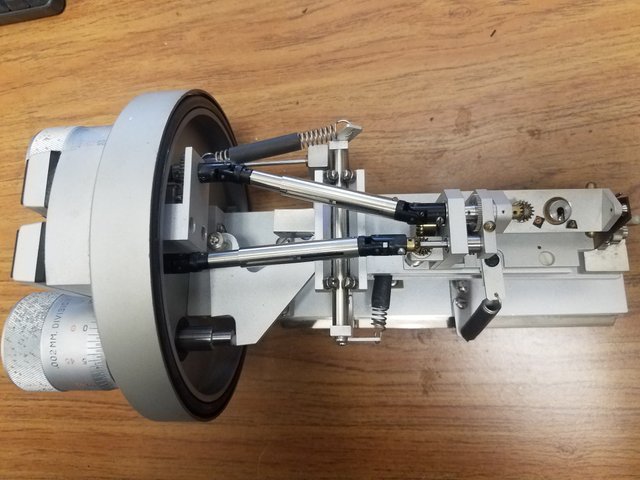
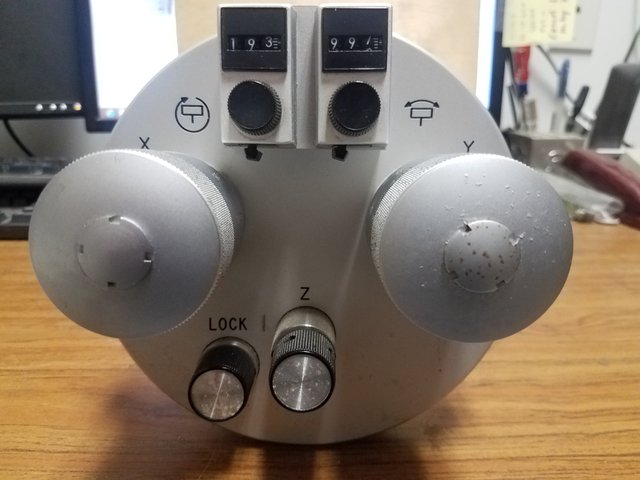
Figures 14 and 15. Lastly the stage. This is actually a really nice mechanism from what I can tell, the proof would be in its use. I like the over all simplicity really, and from the look and feel of it, it has also held up very well, and has smooth operation. Would be a good thing to re purpose for manual manipulation of things under vacuums up to 5 x 10⁻⁹ mBar, possibly higher vacuum. It was easy to remove, it slid out on delrin channels and was held in the back by a spring loaded latch.
Well that sums it up! I will be uploading a video of the stage operation soon, since I do not really like the setup I have for video right now...I need a tripod.
I hope this posts well, because I am not seeing any image previews!
Hi, @roguescientist84!
You just got a 0.01% upvote from SteemPlus!
To get higher upvotes, earn more SteemPlus Points (SPP). On your Steemit wallet, check your SPP balance and click on "How to earn SPP?" to find out all the ways to earn.
If you're not using SteemPlus yet, please check our last posts in here to see the many ways in which SteemPlus can improve your Steem experience on Steemit and Busy.
Downvoting a post can decrease pending rewards and make it less visible. Common reasons:
Submit
This post has been voted on by the SteemSTEM curation team and voting trail. It is elligible for support from @curie and @utopian-io.
If you appreciate the work we are doing, then consider supporting our witness stem.witness. Additional witness support to the curie witness and utopian-io witness would be appreciated as well.
For additional information please join us on the SteemSTEM discord and to get to know the rest of the community!
Please consider setting @steemstem as a beneficiary to your post to get a stronger support.
Please consider using the steemstem.io app to get a stronger support.
Downvoting a post can decrease pending rewards and make it less visible. Common reasons:
Submit
Hi @roguescientist84!
Your post was upvoted by Utopian.io in cooperation with @steemstem - supporting knowledge, innovation and technological advancement on the Steem Blockchain.
Contribute to Open Source with utopian.io
Learn how to contribute on our website and join the new open source economy.
Want to chat? Join the Utopian Community on Discord https://discord.gg/h52nFrV
Downvoting a post can decrease pending rewards and make it less visible. Common reasons:
Submit