So you have decided to delve into 360° videos.
However, it's not just as easy as firing up your camera app and just shooting a video like you would using your smartphone. That is, it's not this easy if you intend on producing something that is interesting to watch in 360°. Aside from chosing the right camera for your project, you have to really think about what the focus of the video will be, what will be happening in the background, how the camera will move and much more. Will there be a ton of post-production work to be done? Say, if you are to record an interview in 360°, will the name of the interviewed person be displayed next to them?
Now you might be asking yourself: Isn't this something I need to worry about with any type of video? Aren't there even more things to worry about in classical video production, like framing the shot correctly, how much footage you need for each shot before there's a cut and so forth? Can't you just slap a 360° camera in the middle of the table, between the interviewer and the interviewed person and call it a day?
These are questions I want to address in this and following posts. Having worked to produce a 360° corporate video for the Institute for Journalism and Public Relations at my university (see this post), I and the students I have worked with have done a lot of research on the topic of producing high quality 360° videos. This post will elaborate on the types of cameras available and which one is the best choice for which usecase.
Chosing the right camera
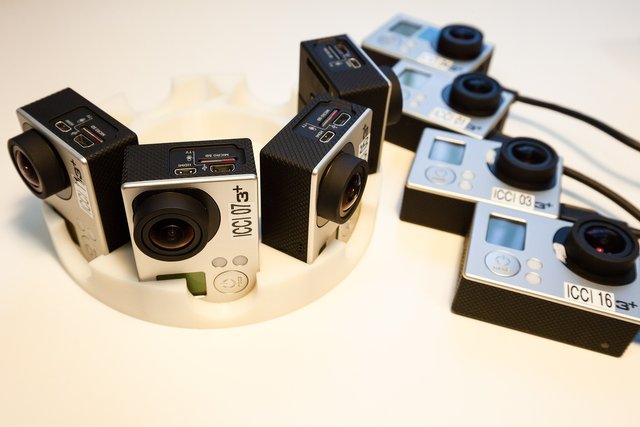
Originally, 360° shots were created by taking a bunch of wide angle lens cameras, putting them onto a specialized rig, synchronizing the footage later on and using a program that is geared to the specific model of camera and the specific type of rig to stitch the footage together. Nowadays you use specifically designed cameras that do basically the same thing by using two or more lenses. You don't have to synchronize the shots anymore, but you still have programs to stitch the footage together, but depending on the camera, either it or your smartphone can be used to do so, so it's much more user friendly.
However, this doesn't mean that any 360° camera is usable in any situation. Moreover, just buying the most expensive one might not be the best of choices either. You see, if you just want to shoot 360° clips from, say, your vacation and share them, the best choice of camera is one that is easy to use, has a phone app that can be used to stich the video together without requiring a computer and has the ability to directly upload the footage to YouTube or Facebook. This type of usecase can get away with not having the best resolution and the best features. It is akin to using your smartphone for a quick shot of a monument you might see on vacation, only it "feels like you're there". An example of such a camera would be the Samsung Gear 360. We tested it out and concluded that though easy to use, the image quality isn't enough for a corporate video, given that the stitching wasn't very accurate.
Then there's the other end of the spectrum: The GoPro Fusion. It's quite an expensive camera and has astonishing image quality. However, it takes two independent SD-cards, one for each lens. It is, in essence, two GoPros stuck together. The software experience, from what we could gather researching it online wasn't very appealing either. I won't go into detail here, if you want to know more about the fallbacks of this camera, check out this video.
In the end, we decided to go with the Ricoh Theta V. This camera has the best of both worlds. It has an app that can preview the shot before you record it and which has quite a few settings to play with. It has quite decent image quality and a fairly high resolution at 4K. The stitching, when using the PC program Ricoh provides, was decent enough not to be extremely noticable, even though there still is a visible stitching line where the cameras meet. It even has the feature of "real" time-lapse, taking a picture every four seconds. Combined with the ability to change the exposure time, you can create that fun blurry effect you see on professionally done time-lapses, which you couldn't with the Gear 360. For our usecase, the production of a corporate video with strict deadlines, this was the most optimal choice.
In Conclusion
There's a ton of stuff to think about when choosing the camera you want to go with. Aside from price, technical features and usability are the factors that most impact the decision. There's no need to spend $400+ to share short clips from vacation trips. $700 bucks won't necessarily give you the best user experience. When deciding which camera is right for you, check out a lot of options of different price categories. Maybe you don't need to spend as much money as you intended to after all.
Thank you for reading my post! If you are interested in reading up more on 360° videos, check out my article on how those video files are stored here. If you'd like to see the aforementioned corporate video, check it out here.
