Introduction
This is the first chapter of the series ‘Journey Into The World Of Python’. Before we start our course on Python, it is essential to have a basic environment setup in place for programming.
Like I said in my previous post, I will be using the Atom editor. You can use any other editor of your choice, as the code that we will write in the later chapters of this course will work across all editors and platforms.
I use the Mac OS X Yosemite 10.10.5 for development. If you are a windows or a linux user, you can easily setup the Atom editor like I do on my mac.
Installing Python
The first step, is of course, to download and install the Python from https://www.python.org/downloads/.
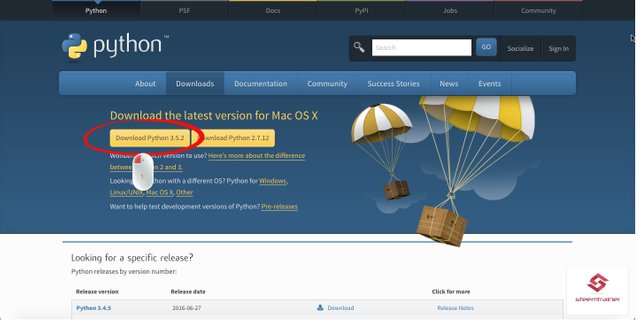
You can get the installer from there. Since, I use a Mac, the downloads page shows me a OS X installer. The installer will be 'python-3.5.2-macosx10.6.pkg’.
If you are on Windows and unable to properly install the latest version of Python, then you may follow the procedure outlined here: http://loadbalancerblog.com/blog/2015/11/python-35-install
Let’s check whether python has been properly installed on your system. For this, load up the Terminal (Command Prompt on Windows) and type in 'python' and press enter.
pythonYou will see this:
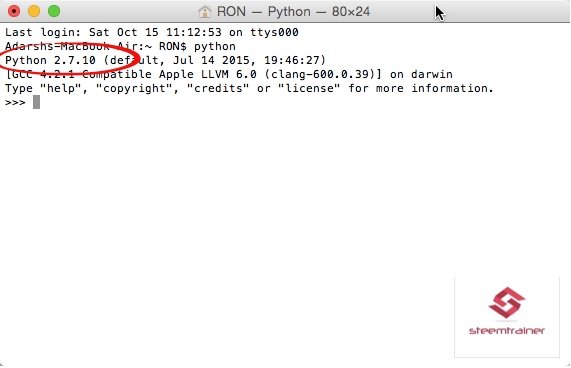
I know, you just installed a version of Python 3.5 and your terminal shows version 2.7. This is because you have the version 2 already installed on your system. Mac OS X by default comes with Python.
Both Python 2 and Python 3 can exist in the same system. So, to invoke the version 3 of Python, all you have to do is type ‘python3’ instead of ‘python’ in the terminal.
python3Now, you will see this:
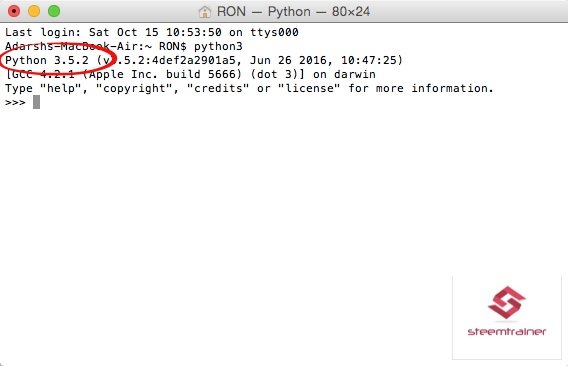
Close the terminal(Command prompt on Windows).
Installing Atom
Now that you have installed Python, let’s install Atom editor. This is simple to achieve as all you have to do is get the latest version of Atom from the official website:
Atom is free to use so, feel free to download it. It is available for both Mac and Windows.
The installation is pretty basic and when done, you can load up Atom.
This can be done either from ‘Launchpad’, via Spotlight search or via the Terminal by typing ‘atom’.
atomInstalling PEP8
PEP is expanded as Python Enhancement Proposal. Here is a quote from the Python official website that gives the best definition for this:
This PEP contains the index of all Python Enhancement Proposals, known as PEPs.
-https://www.python.org/dev/peps/
The PEP8 defines certain guidelines on the coding style. We will adopt this style throughout this course.
To install PEP8, type the following in terminal:
pip install pep8If the above doesn’t work for you on windows, then you can try this:
python -m pip install pep8Here ‘pip’ is a small tool that is installed by Python by default, for installing various Python packages easily.
Installing Linter
Linter (https://atom.io/packages/linter-pep8) is the atom package we will install next. It will make sure that we are following the PEP8 standard correctly.
To install Linter for PEP8, do the following:
1. Goto Atom Preferences->Install. You will have a screen as follows:
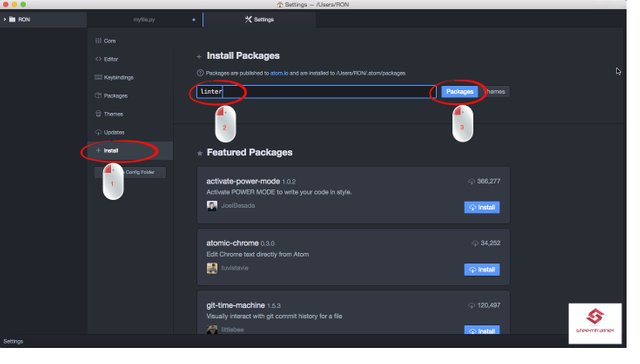
2. Next, install linter-pep8 as follows:
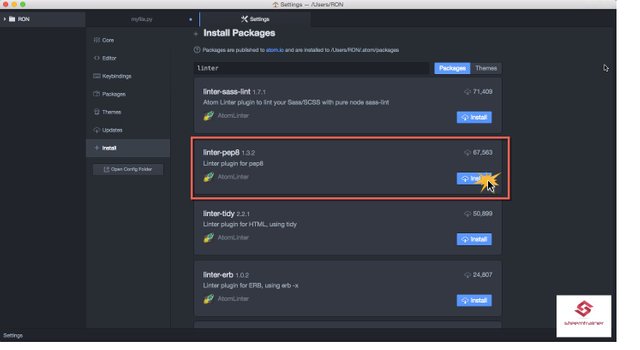
Now, Create a new Python file(with extension .py) in Atom editor and write the following:
defYou will see that Atom is providing suggestions. Press Enter key to take the first suggestion. You will now see this screen:
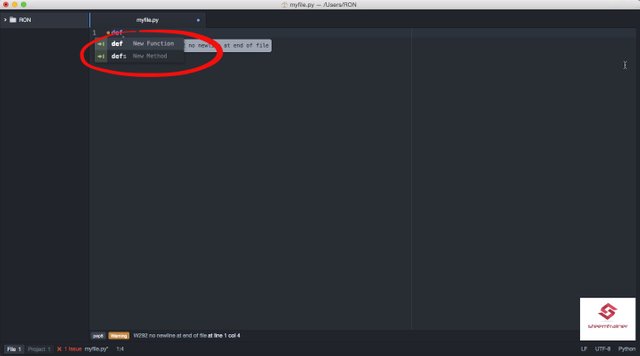
If you click after the word ‘pass’, you will see the PEP8 warning as follows:
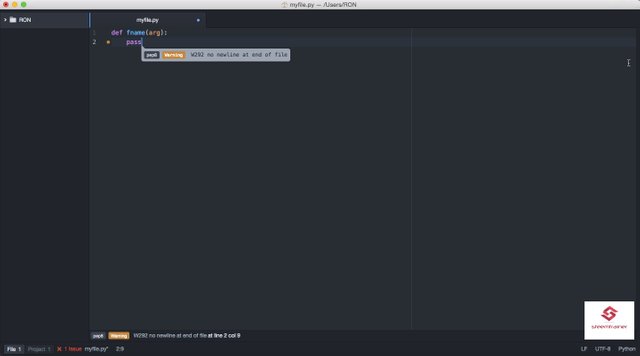
This is the linter-pep8 package that is displaying this warning, so that we stick on to the PEP8 style.
The current issue is that there is no newline after the last statement. So, we just press enter key to place the cursor at the beginning of the next line(If you have any tabs or spaces on the next line, then delete them).
If everything is okay, you see at the bottom, in green as follows:
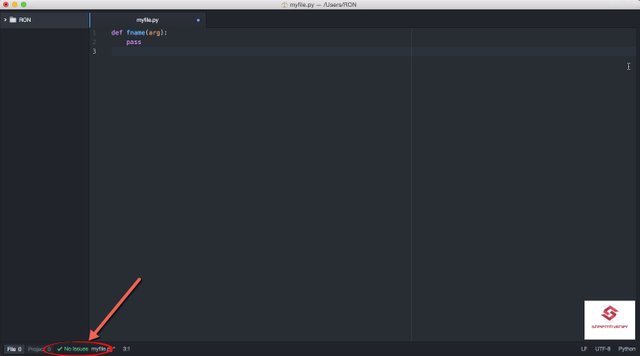
This concludes this tutorial on setting up the environment for programming. In the next tutorial, we will start with the actual Python language.
Follow me(@steemtrainer) to subscribe to the updates on the course - Journey Into The World Of Python.
Image Source: All Images are my personal images hosted on Imgur
Congratulations @steemtrainer! You have received a personal award!
Click on the badge to view your Board of Honor.
Do not miss the last post from @steemitboard:
Downvoting a post can decrease pending rewards and make it less visible. Common reasons:
Submit
Congratulations @steemtrainer! You received a personal award!
You can view your badges on your Steem Board and compare to others on the Steem Ranking
Vote for @Steemitboard as a witness to get one more award and increased upvotes!
Downvoting a post can decrease pending rewards and make it less visible. Common reasons:
Submit