Prerequisites
We will need:
A LAMP Server( Ubuntu 14.04, Apache, PHP & MySQL Server) to run Zabbix Server.
I used AWS Free Tier Virtual Machine to setup the LAMP Server because it is accessible from Internet and have a static IP to Zabbix Agent can reach out.
Note: Zabbix Server can be setup on Cent-OS and other Linux variants as well.
Installing the Zabbix Server:
Login to your Server (LAMP Server where we want to configure the Zabbix Server):
$ ssh username@server-ip-address
Update your Server’s list of available packages:
$sudo apt-get udpate
Now we can install Zabbix Server and add following configuration:
$sudo vi /etc/apt/sources.list
Zabbix Application PPA
deb http://ppa.launchpad.net/tbfr/zabbix/ubuntu precise main
deb-src http://ppa.launchpad.net/tbfr/zabbix/ubuntu precise main
We need to add the PPA’s key so that apt-get trusts the source:
$sudo apt-key adv –keyserver keyserver.ubuntu.com –recv-keys C407E17D5F76A32B
We can now install Zabbix. It will pull in the necessary LAMP dependencies as well:
$sudo apt-get update
$sudo apt-get install zabbix-server-mysql php5-mysql zabbix-frontend-php
We can also install Zabbix Agent:
$sudo apt-get install zabbix-agent
MySQL Server configuration for Zabbix Server:
We will go into the package directory and unzip the SQL files that will define our database environment:
$cd /usr/share/zabbix-server-mysql/
$sudo gunzip *.gz
Log into MySQL Server as the ‘root’ user to setup Zabbix Server configuration:
$mysql -u root -p
Now we need to create Zabbix user:
->create user ‘zabbix’@’localhost’ identified by ‘Password’;
Then we need to create database:
->create database zabbix;
Give control over the new database to the new user:
->grant all privileges on zabbix.* to ‘zabbix’@’localhost’;
Now run following command to implement new permissions:
->flush privileges;
Exit back:
->exit;
Configuring the Zabbix Server
We will need to configure the packages we just installed. First, we will edit the main Zabbix server configuration file. Open the file with root privileges and change following parameters:
$sudo vi /etc/zabbix/zabbix_server.conf
DBName=zabbix
DBUser=zabbix
DBPassword=Password
Now go to zabbix directory and unzip zabbix configuration files:
$cd /usr/share/zabbix-server-mysql/
$sudo gunzip *.zip
Now that we have our database already setup, we can go ahead with importing essential files that Zabbix needs to function:
$mysql -u zabbix -p zabbix < schema.sql
$mysql -u zabbix -p zabbix < images.sql
$mysql -u zabbix -p zabbix < data.sql

There are some PHP configuration as well. So, type following command, find and change the parameters:
$sudo vi /etc/php5/apache2/php.ini
post_max_size = 16M
max_execution_time = 300
max_input_time = 300
date.timezone = UTC
Copy the Zabbix-specific php file into the configuration directory:
$sudo cp /usr/share/doc/zabbix-frontend-php/examples/zabbix.conf.php.example /etc/zabbix/zabbix.conf.php
Open the file and change following:
$sudo vi /etc/zabbix/zabbix.conf.php
$DB[‘DATABASE’] = ‘zabbix’;
$DB[‘USER’] = ‘zabbix’;
$DB[‘PASSWORD’] = ‘Your.Password.Here’
Edit the Zabbix init file to ensure that it performs the correct action:
$sudo vi /etc/default/zabbix-server
START=yes
Change some configuration in Apache directory:
$sudo cp /usr/share/doc/zabbix-frontend-php/examples/apache.conf /etc/apache2/conf.d/zabbix.conf
$a2enmod alias
$sudo cp /usr/share/doc/zabbix-frontend-php/examples/apache.conf /etc/apache2/conf-available/zabbix.conf
$sudo a2enconf zabbix.conf
Now restart Apache to apply settings:
$sudo service apache2 restart
We can now start Zabbix:
$sudo service zabbix-server start
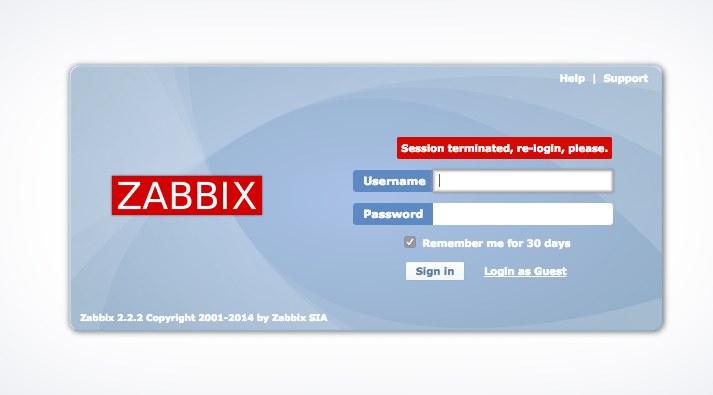
Logging In to your Zabbix Server:
Zabbix.Server.IP/zabbix
Default Username & Password:
Username = admin
Password = zabbix

Add hosts to Zabbix Server to monitor:
Go to ‘Configuration’ tab and select ‘Hosts’ to add hosts.
‘Create Host’ to add new host and choose template according to your requirements.
The default port for Zabbix Agent is 10050.
Setup Zabbix Agent:
We can also install Zabbix Agent for Ubuntu Server:
$sudo apt-get install zabbix-agent
$sudo vi /etc/zabbix/zabbix_agentd.conf
First you have to edit the IP address of the Zabbix server. Find the following section:
Server=your_zabbix_server_ip_address
We can also setup Zabbix Agent for Windows Server:
Download pre-complied agents: https://www.zabbix.com/download
Change zabbix_agentd.win.conf file and manually edit the following parameters (considering you have downloaded Zabbix Setup file in C:\Zabbix folder:
C:\Zabbix\zabbix_agents_2.4.4.win\conf\zabbix_agentd.win.conf
Server=IP of Zabbix Server
ServerActive=IP of Zabbix Server
Hostname=use the FQDN of your windows host
Run following command to install the service:
C:\Users\username>C:\Zabbix\zabbix_agents_2.4.4.win\bin\win32\zabbix_agentd.exe –config C:\Zabbix\zabbix_agents_2.4.4.win\conf\zabbix_agentd.win.conf –install
Start the service just type:
C:\Users\username>C:\Zabbix\zabbix_agents_2.4.4.win\bin\win32\zabbix_agentd.exe –start
To stop the service run the same command as above with –stop argument and to uninstall the service use the –uninstall argument:
C:\Users\username>C:\Zabbix\zabbix_agents_2.4.4.win\bin\win32\zabbix_agentd.exe –stop
C:\Users\username>C:\Zabbix\zabbix_agents_2.4.4.win\bin\win32\zabbix_agentd.exe —uninstall
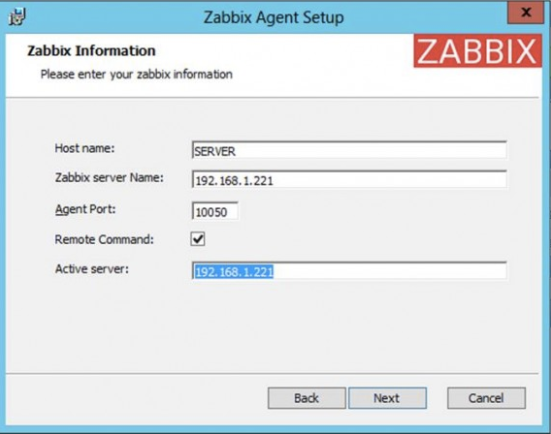
Or, You can simply download MSI file and install agant:
URL: http://www.suiviperf.com/zabbix/index.php

Also, you need to configure system firewall to allow connection from Zabbix Server.