Hello, steemies!
In my last post about my pickup truck, I wrote about cleaning up the rust on the frame and painting it. If you would like to read that post, here is the link.
https://steemit.com/vehicle-repair/@amberyooper/working-on-my-pickup-truck-part-1
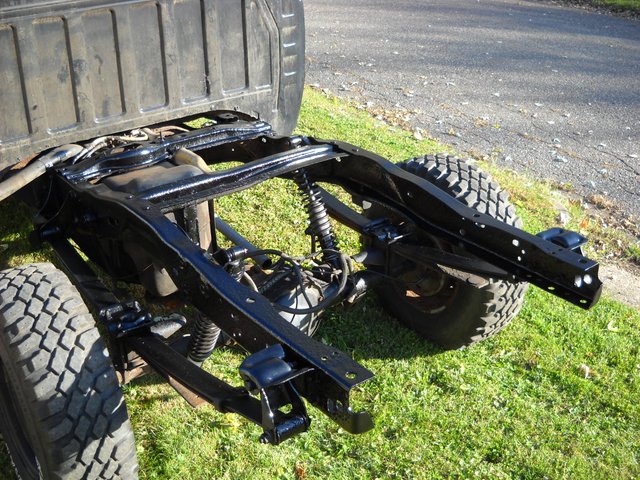
This is what the frame looked like when I was done painting it with Rustoleum gloss black spray paint.
Since I decided to build a flat bed for the back of the truck, the first thing to do was to buy some treated 4X4s for the supports. I cut them off at 69 inches. That way, when I put the 2X4s on the ends of them, the bed would be 6 feet wide.
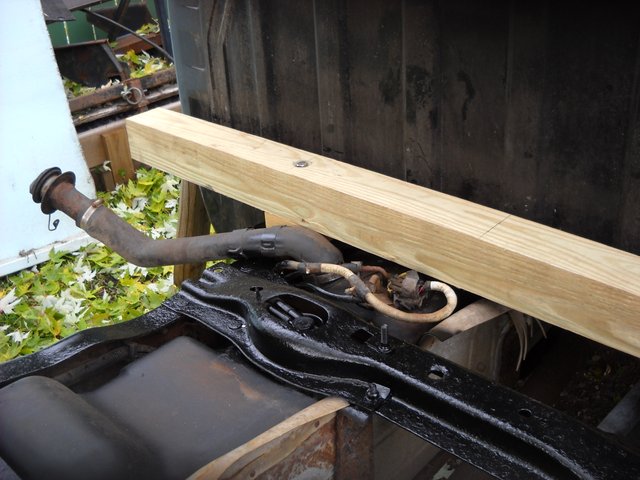
Once I had the 4X4s cut to length, I had to test fit them on the frame. That way, I could measure and mark them for the holes that I would have to drill for the bolts to hold them in place on the frame.
I also had to determine if the top surface of the 4X4s were all at the same level.
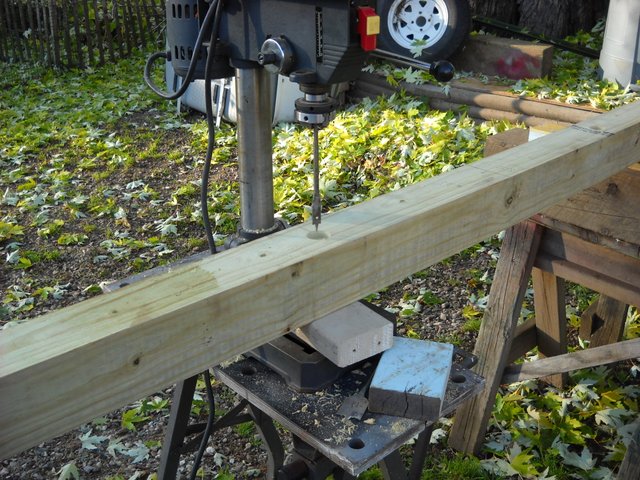
Once I had the hole positions marked on the 4X4s, I brought my drill press out to use it to drill the holes. Using the drill press was the only way to make sure the holes were drilled straight through the 4X4 instead of on an angle like I might do with a hand drill. I started with a 1-1/2 inch spade bit, so that I would have clearance for the fender washer that I would be using with the bolts. The fender washer prevents the bolt head from sinking into the wood when the bolt is tightened.
Once the large holes were drilled, I used a 9/16ths inch spade bit to drill the rest of the way through the 4X4. I was using 1/2 inch stainless steel bolts to hold the 4X4s in place and the 9/16ths inch drill bit gives them a bit of adjustment room in case they don't line up exactly.
One problem that I ran into was that the drill press doesn't have enough drilling depth to get all the way through the 4X4, so I had to finish drilling the holes with the hand drill. Since the hole was half drilled, it provided a bit of a guide to keep the bit straight with the hand drill.
I decided to use pieces of rubber matting between the frame and the 4X4 as a buffer between the two. I pushed the bolts through and then pushed the rubber buffer pieces onto the bolts.
For the 4X4 next to the back of the cab, I had to make a pair of spacers for under it to bring it up to the same height as the rest of the 4X4s. I was able to use sections of treated 2X4 for that. I had to drill them for the mounting bolts also. I used a couple of construction screws to hold them in place. These construction screws are coated so they won't rust in the treated wood.
I had to use longer bolts for this 4X4 because of the spacers.
I found it necessary to cut a notch in the spacer and the edge of the 4X4 on the drivers side in order to clear the gas tank filler tube.
At this point, I had 3 of the 4 cross members in place on the truck frame.
By this time last year, fall was well underway and it was getting colder. I didn't get the fourth cross member mounted, but I managed to get the 2X4 edge pieces screwed onto the 3 cross members.
I covered up the gas tank area with a piece of a roof from a different project that I had taken apart, and that is how the flat bed project sat for the winter.
I started working on this project again in late spring of this year. I ended up having to redo some of the work I had already done because of some warping issues with the wood. That will be the subject of my next post on this subject.
That's all I have for this post, I hope you found it interesting!


