Sustainable living often means DIY and working with what you have. We ran into a situation like this the recently when a well-known chef in San Diego purchased a turkey through us but needed assistance in processing the bird.
As the owners of a small farm and sustainability center, my wife and I knew we needed to assist him; the publicity for our farm, the relationship built with the chef and the reach to his social media channels (the man has more than 9,000 Instagram followers) would be invaluable and not something we could afford to pass up.
We decided to assist Chef Brown on pretty short notice, so we gathered up what we had around the homestead and began taking stock of what we were lacking. All of the processing cones we have are for chickens and were never going to be large enough to handle a well taken care of Narragansett Turkey – this fella was big!
I called around to a couple of the local ranch supply stores and they had nothing. I was surprised when even TSC didn’t carry large poultry processing cones – I mean come on! This in turn lead me to the Internet and several YouTube videos with variations of what I’m about to describe. Bottom line, with a just a little investment in time and materials I had on hand, I saved us about $50 dollars or so by making this DIY poultry processing cone.
Step 1
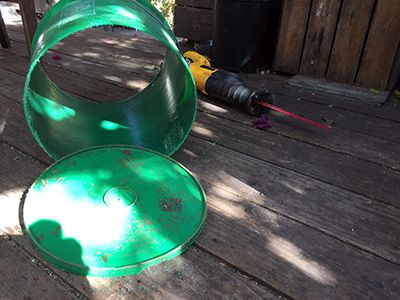
Cut the bottom off of a 5-gallon bucket. You’re going to want to make sure the bucket is somewhat new – older, more brittle buckets tend to break when you least need them to. I used my sawzall to remove the bottom, but realistically, you can use whatever cutting tool you have available just be safe about it!
Step 2
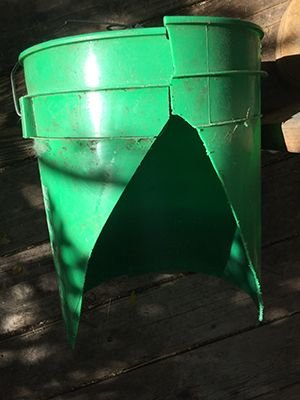
Along the cut edge, measure and mark a 12-inch span. Once you’ve made you marks, from each of these points, draw a diagonal line (forming a triangle) near the top of the bucket – about 7/8 up (see image below). From there, cut a straight line from the tip of your triangle to the top of your bucket. Don’t worry about perfectly straight lines, this doesn’t need to be exact.
Step 3
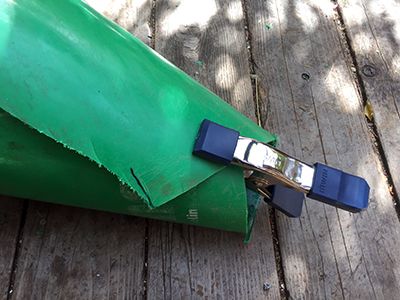
Bring the sides of your bucket together, forming a cone. For larger birds like turkeys, I measured the bottom opening to be approximately four inches, you can adjust the size of the opening depending upon your particular needs. At this point, I grabbed some clamps to help me hold it together for the next step.
Step 4
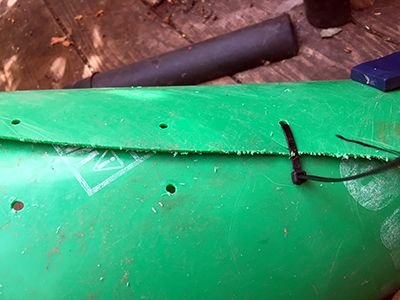
Drill holes one opposing sides of the bucket along the seam. I used a 5/16 bit – large enough to get the zip tie through, but not so large that the lock end pulled through. Just to ensure hold, I drilled five sets of holes and then threaded them shut with zip ties. You’re going to want to secure your DIY kill cone to something before you use it to process
That’s pretty much it. You’ve now got a home made poultry processing cone and have saved a ton of money. I had everything on hand, so this project cost me nothing. Assuming you don’t have a 5-gallon bucket laying around, they’re cheap and plenty at any home improvement store, usually running around $5 dollars or so.
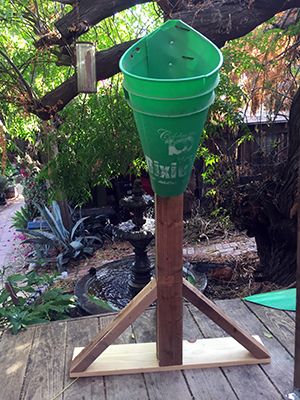
Great write up!! Did you screw it into the stand?
Downvoting a post can decrease pending rewards and make it less visible. Common reasons:
Submit
I did, two screws to stabilize it and realized pretty quick I need support in the front when you actually put a turkey in the processing cone.
Downvoting a post can decrease pending rewards and make it less visible. Common reasons:
Submit
makes sense!
Downvoting a post can decrease pending rewards and make it less visible. Common reasons:
Submit
Downvoting a post can decrease pending rewards and make it less visible. Common reasons:
Submit
Well hello!
Downvoting a post can decrease pending rewards and make it less visible. Common reasons:
Submit
resteemed, upvoted, tweeted and shared to facebook!! Yay!!
Downvoting a post can decrease pending rewards and make it less visible. Common reasons:
Submit