Introduction
Hello everyone Anidel here for another easy and practical tutorial for your perusal. Today I would like to share with you how to build you own multi system emulator using the the linux based lakka open-source software.
Requirement
- Lakka software
- win32diskimager
- 8 GB Empty USB pendrive
- Computer with a Dual-core class or up processor, 2 GB of RAM and 80GB of Hard disk space.
- 7-zip compressed file extractor
Procedure
Step 1 download the required files for the installation
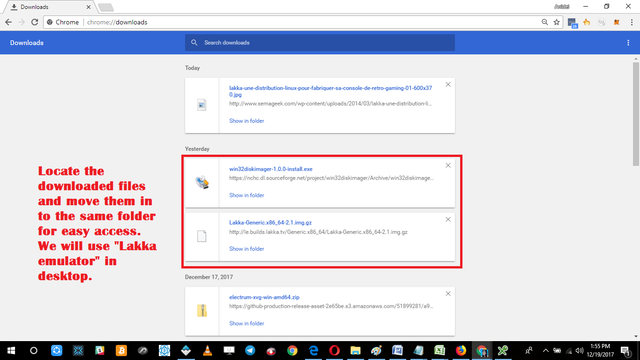
We can download lakka here and the USB image writer here.
Step 2: Install the Disk Imager
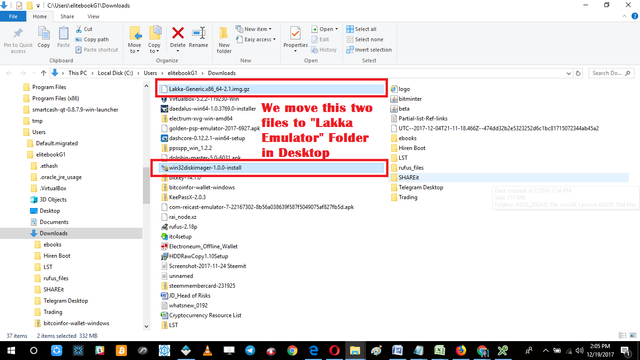
After downloading the necessary files we organize them and put them in an easily accessible folder. Like most of my tutorial I like to put them in a folder in Desktop. The name of the folder in this tutorial is "Lakka emulator."
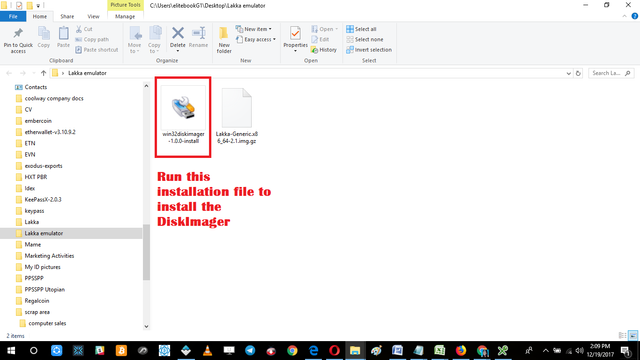
Now that we have organized them in a folder in desktop we begin to install image disk imager. Just double click on the file called "win32diskimager-1.0.0-install" to start the installetion process as shown below.
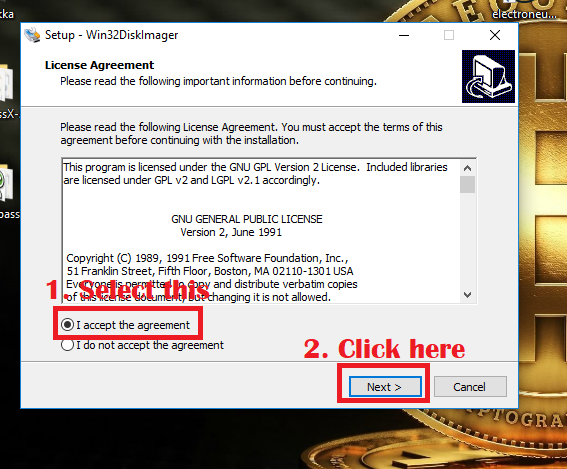
The first page will just ask you to accept the license agreemnt. Just select I accept and click on next to continute to the next window.
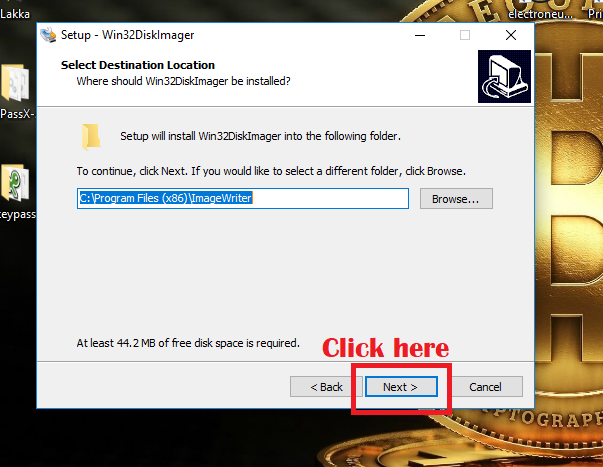
The next window will ask you where to install the program. I like to keep them in default settings so we just click the "next" button.
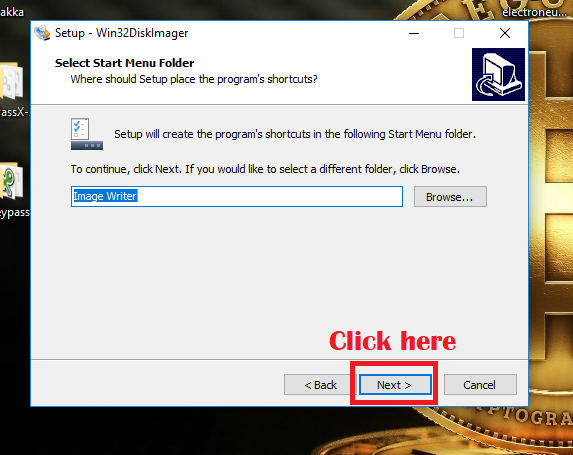
Then it will ask you to enter the preferred shortcut name. Again we want to keep them at default settings so we just click "next" button here.
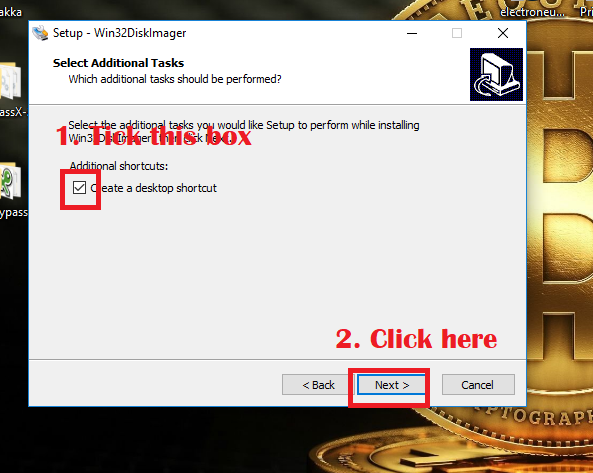
The next window will ask us if we want to create a shorcut of the disk imager in desktop. We want to easily access it so we click yes. Normally I would like to hide this type of program since it can destroy the content of a USB. But for our purposes we will create a shortcut for convenience.
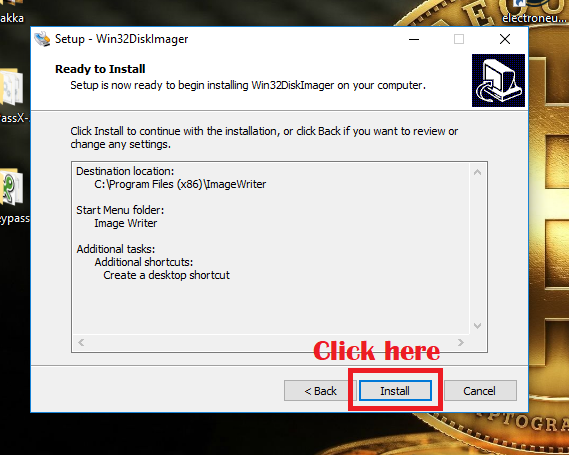
The next window will just show as a quick summary of the settings of the program you are going to install. If everything is in order you may click install the install button. Once click it will go through the installation process.
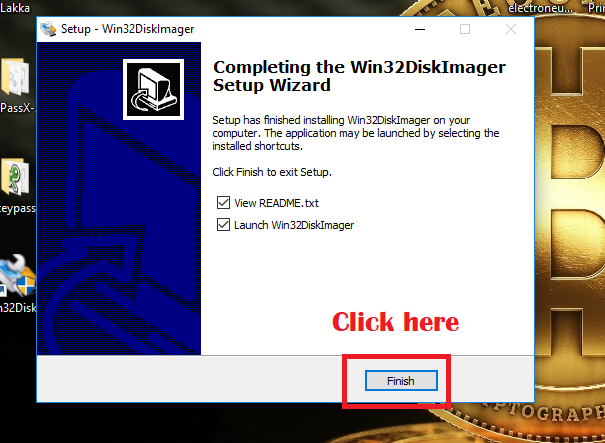
Once you reached the screenshot below you may now finish. If you dont' want to run the program during this time just untick the box "Launch Win32DiskImager" shown below.
Step 3 Creation of the Lakka USB bootable drive
Once we are done installing the Disk Imager program we extract the "Lakka-Generic.x86_64-2.1.img.gz" compressed image file. You can use 7-zip to extract the image. Since I have intalled the 7-zip already the easiest way to extract the file is by Right-Clicking on the compressed image file and navigate through the menu until you each "extract here selection" as shown in the screen capture below.
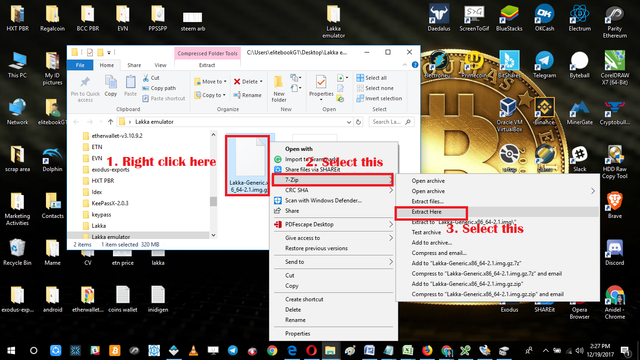
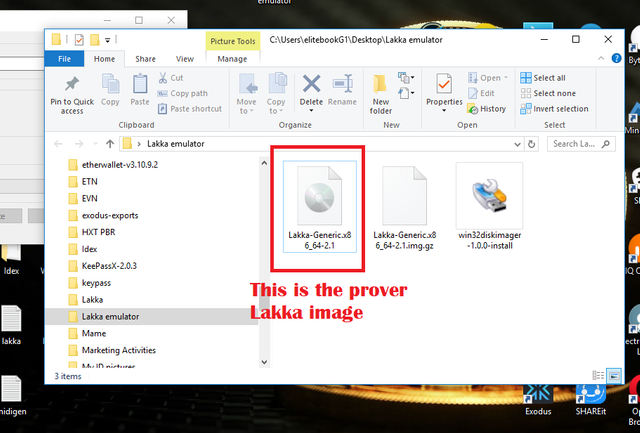
Once you click on the extract here selection it will extract the "Lakka-Generic.x86_64-2.1" image file to the same folder where the compressed image is locate (Lakka emulator in Desktop).
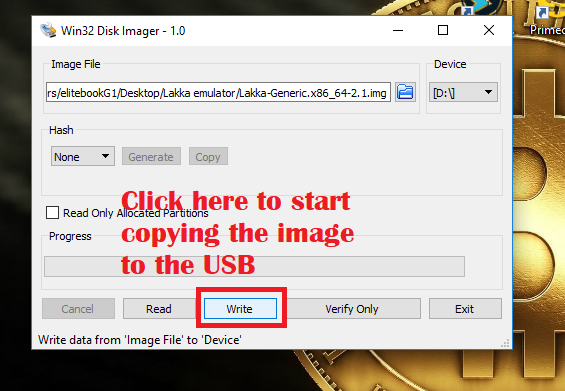
Now that we have the image extracted we can now start to start cloning the image file to the USB drive. Just follow the instruction given below in the screenshots.
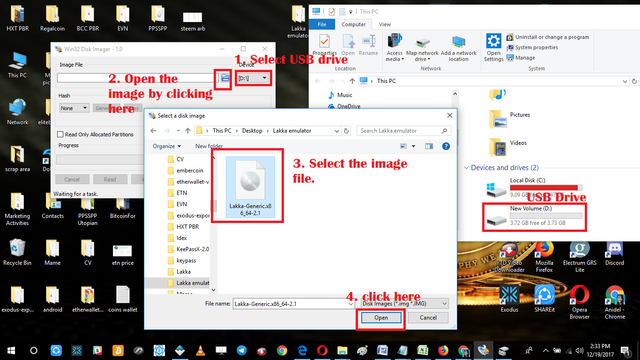
One we have properly selected the image we will be sent back to the main window of Disk Imager with the selected image file. All we have to do here is to if the image file is correct and the target is drive is correct. Be careful not to overwrite the wrong folder.
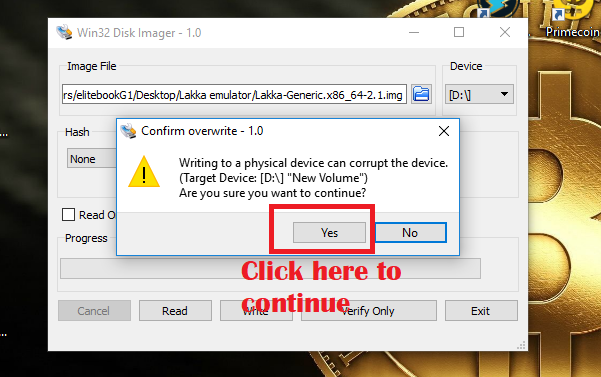
A warning message will be sent to remind you that you are formatting drive and it may become corrupt (which is highly improbable).
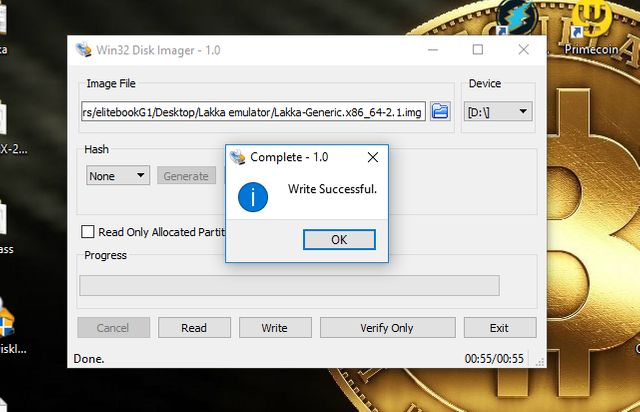
When you reach this part you have successfully made the bootable multi system emulator lakka.
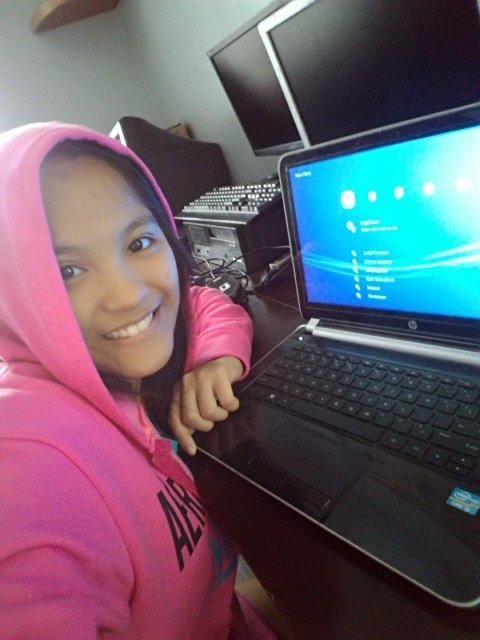
To test the USB I used my other laptop to boot the USB. Just make sure that you boot from the USB for it to work.
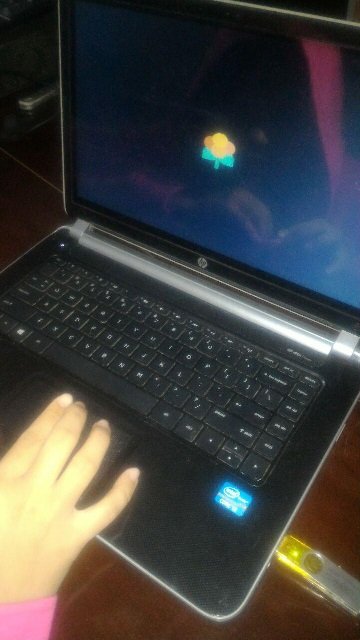
The system loaded perfectly! The PS3 like dashboard runs smooth as silk.
That's it for now. I hope you found my tutorial helpful until next time good bye!
Posted on Utopian.io - Rewarding Open Source Contributors
Hey @ankarlie I am @utopian-io. I have just upvoted you!
Achievements
Suggestions
Get Noticed!
Community-Driven Witness!
I am the first and only Steem Community-Driven Witness. Participate on Discord. Lets GROW TOGETHER!
Up-vote this comment to grow my power and help Open Source contributions like this one. Want to chat? Join me on Discord https://discord.gg/Pc8HG9x
Downvoting a post can decrease pending rewards and make it less visible. Common reasons:
Submit
Thank you for the awesome upvote.
Downvoting a post can decrease pending rewards and make it less visible. Common reasons:
Submit
Thank you for the contribution. It has been approved.
You can contact us on Discord.
[utopian-moderator]
Downvoting a post can decrease pending rewards and make it less visible. Common reasons:
Submit
Thanks for the approval :)
Downvoting a post can decrease pending rewards and make it less visible. Common reasons:
Submit
good business friends, hopefully quickly received
Downvoting a post can decrease pending rewards and make it less visible. Common reasons:
Submit
Thanks for your encouragement. I hope so as well :)
Downvoting a post can decrease pending rewards and make it less visible. Common reasons:
Submit
Thanks for this information @ankarlie
Downvoting a post can decrease pending rewards and make it less visible. Common reasons:
Submit
You are most welcome sir :)
Downvoting a post can decrease pending rewards and make it less visible. Common reasons:
Submit
Astig, meron pala nito sa computer haha, galing para syang retroarch :-)
Downvoting a post can decrease pending rewards and make it less visible. Common reasons:
Submit
Yeah parehas sila ng retroarch kasi parehas lang kasi sila based sa libretro heheheh
Downvoting a post can decrease pending rewards and make it less visible. Common reasons:
Submit
Congratulations! This post has been upvoted from the communal account, @minnowsupport, by ankarlie from the Minnow Support Project. It's a witness project run by aggroed, ausbitbank, teamsteem, theprophet0, someguy123, neoxian, followbtcnews/crimsonclad, and netuoso. The goal is to help Steemit grow by supporting Minnows and creating a social network. Please find us in the Peace, Abundance, and Liberty Network (PALnet) Discord Channel. It's a completely public and open space to all members of the Steemit community who voluntarily choose to be there.
If you would like to delegate to the Minnow Support Project you can do so by clicking on the following links: 50SP, 100SP, 250SP, 500SP, 1000SP, 5000SP. Be sure to leave at least 50SP undelegated on your account.
Downvoting a post can decrease pending rewards and make it less visible. Common reasons:
Submit