Bitrix24 website can create landing pages or complex and simple sites.
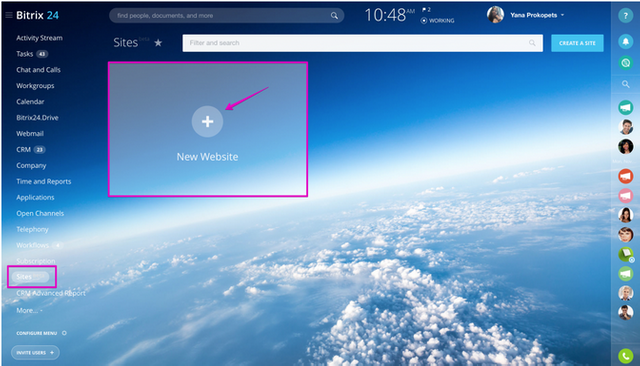
Go to Bitrix24 Sites and click on New Website:
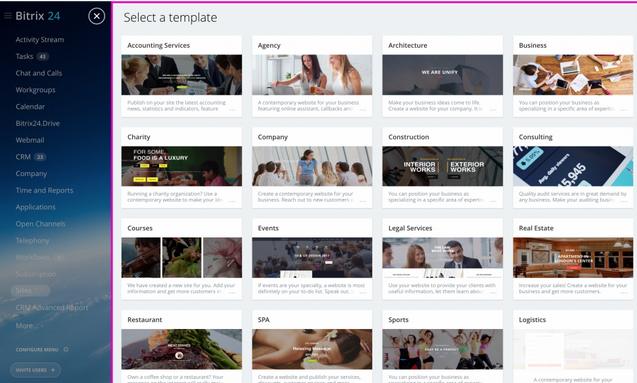
Select one of the predesigned Site Templates:
You will be automatically redirected to the Site Builder page:
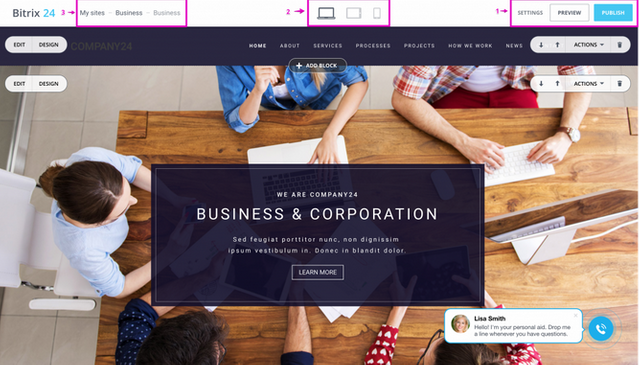
Settings, Preview & Publish tabs
Site Settings: opens main site settings such as: page address, rich formatting for media links, page meta tags, page background, layout type, amalytics, search engines, custom HTML & CSS
Preview: opens website preview. Publish: publish your website to make it available in the internet.
Site Views
This section allows you to switch between site desktop, tablet & mobile phone views to check how the website will be optimized for each device type.
Navigation Menu
The navigation menu shows where you're currently located & which site page you're working on. For example, My Sites > Business > Business says that you're inside Bitrix24 Site Builder tool (My Sites), working on Business Site Template, inside default Business page for this website type. To go back to Bitrix24 Sites Builder click on My Sites.
Site Page Blocks
Each site page consists of the site blocks. Different site blocks contain different information: e.g. prices block, clients block, about us block, contact information block, etc.
You can delete, edit settings or customize design of the default blocks, move them up & down on the site page or add new blocks.
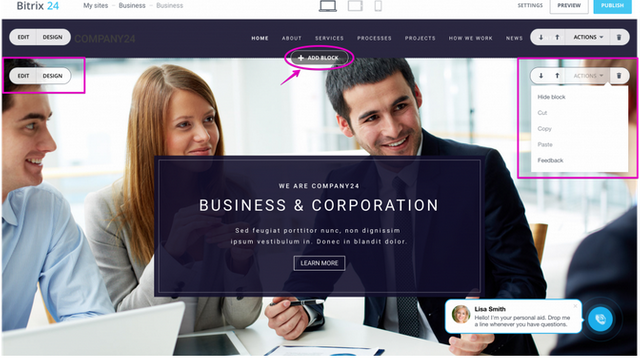
Please note that each site block has it's own Edit, Design & Actions tabs.
Actions: actions menu allows to hide, cut, copy or paste block.
Up & Down Arrows: use these arrows to move block up or down the site page.
Trash: click on trash to delete page block you don't need.
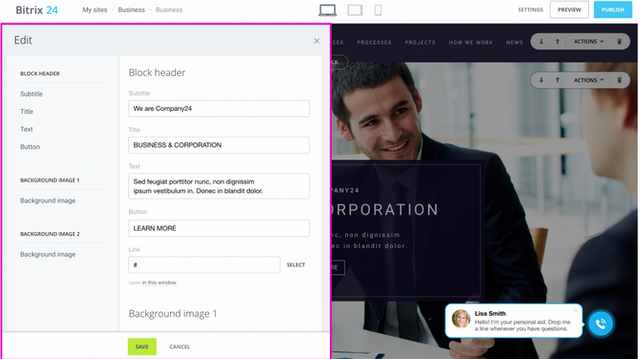
Edit Block: this tab opens main block content settings such as - block header, title, text, button, link, background image, etc. (options set depends on the block type).
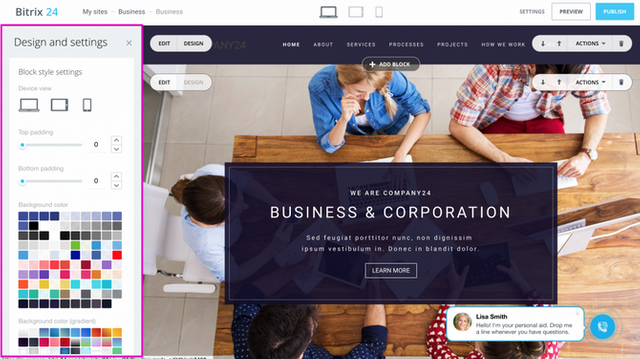
Design: open way block - device wallpeper, click up & down, desktop color. Note that you can apply a desktop to a blog where no images are set as background
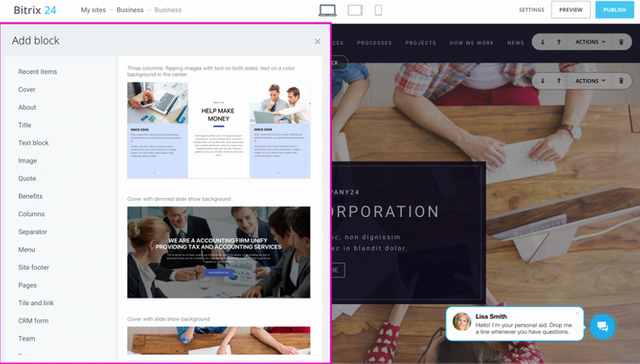
Add Block To Site Page
Use Add Block option to add more blocks to the site page. The Add Block menu allows to select column type, add benefits, separators, menu, footer, cover, about , title, prices, partners, etc.
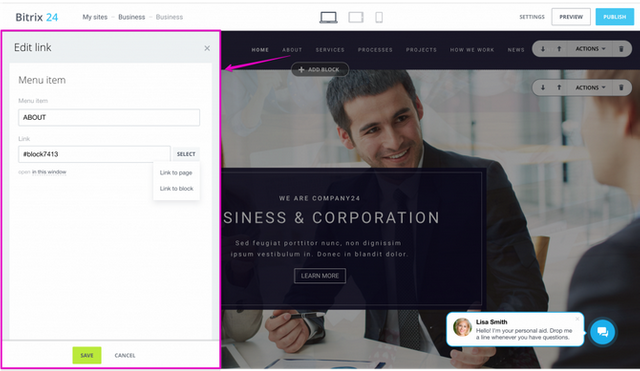
Site Menu Items
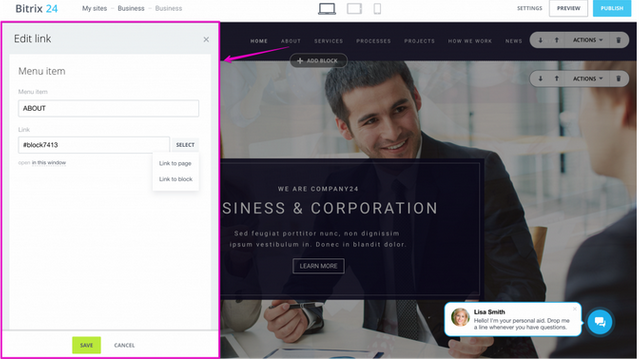
To link top level site menu items to pages or blocks click on the menu item & select page or block in the Link option.
Site CRM Widget
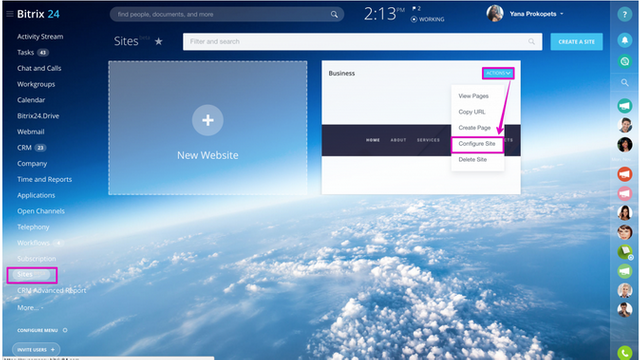
In case you'd like your site visitors to be automatically added to your Bitrix24 CRM, you do need to take advantage of the Sites & Widget integration. By default, the Site template already has widget activated. You can find this setting option under Sites > Actions (for your site template) > Configure Site:
Website Settings will appear - go to Website Widget line to select one of the configured widgets. Please remember you need to configure CRM widget separately form CRM Widget.
Posted on Utopian.io - Rewarding Open Source Contributors
Congratulations! - As you follow @fisheggs bot your post has randomly been selected for an upvote.

Downvoting a post can decrease pending rewards and make it less visible. Common reasons:
Submit
The @OriginalWorks bot has determined this post by @baroen96 to be original material and upvoted it!
To call @OriginalWorks, simply reply to any post with @originalworks or !originalworks in your message!
Downvoting a post can decrease pending rewards and make it less visible. Common reasons:
Submit
Your contribution cannot be approved because it does not follow the Utopian Rules.
You can contact us on Discord.
[utopian-moderator]
Downvoting a post can decrease pending rewards and make it less visible. Common reasons:
Submit