Repository
https://github.com/dmlloyd/openjdk
What Will I Learn?
This tutorial will teach you how to create a College App in Java GUI using NetBeans.
Requirements
- A desktop computer or laptop with Windows, Mac OS, Linux or Ubuntu Os is required.
- The Java Software Development Kit must be installed on your system
- Netbeans IDE should also be installed on your system
Difficulty
- Intermediate
Tutorial Contents
Building an app in Java GUI usually seems like one of the simplest things to do as all you need to do is to drag and drop and the computer automatically writes the needed codes for you. In this tutorial, we are going to be building a College App. The aim of this tutorial is to create an app where college students (of the institution you are creating the app for) can visit, register and view timetables, as well as news updates concerning the school.
This tutorial assumes that you possess a preliminary knowledge of Java, therefore we won’t have to be going over the basics of creating a new project. However, let’s go over how to create a Java JFrame form just in the likelihood that you do not know how to create it.
Creating a JFrame Form.
A JFrame is a container which is able to hold another container which holds other objects.
- Once you have created a new project, simply hover over the new project and right click. Click on the “New” tab and select “Java Package”
- Save the package with a suitable name.
- Next, you hover over the new package and right click. Choose the “New” option and click on the “JFrame Form”. Save it with whatever you wish to and a new window with a small JFrame will open up.
And there’s how to create the JFrame which we will be working with on this project.
So we are done with that. Now when you are attempting to create an application, the best thing to do is visualize how it would look like in your head and then draw up the whole outlook of the app either on paper or with one of our graphics design apps like corel draw or photoshop. The idea is to have a mockup of some sort you can follow while creating your app.
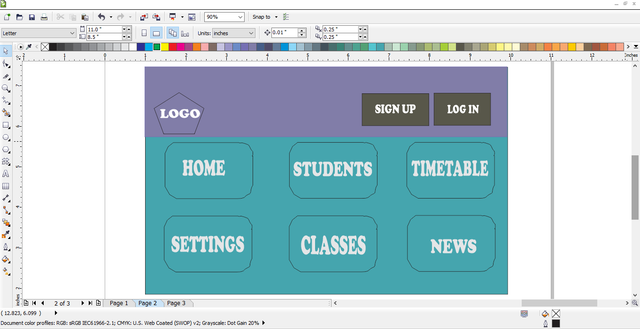
For the purpose of this tutorial, I have created a design for our College App. Below is a picture of how our Management System’s home page will look like once we are done creating it.
.png)
Screenshot of Coreldraw mockup
After creating your JFrame form, a Jframe would appear automatically in your Netbeans. Simply drag it around the edges to fit into the size you would want your app to be like.
If you want to create your JFrame manually, here is the code to create the JFrame
   //code for creating our jframe
        JFrame frame = new JFrame();
   //code for setting our jframe visible
        frame.setVisible(true);
   //code for setting the height and width of our Jframe
        frame.setSize(new Dimension (800, 500));
   //code for disabling the resizing of our project
        frame.setResizable(false);
   //code for setting the position of our Jframe
        frame.setLocationRelativeTo(null);
   //code for setting the default close operation of our JFrame
        frame.setDefaultCloseOperation(JFrame.EXIT_ON_CLOSE);
   //code for setting our JFrame's title
        frame.setTitle("Utopian College App");
JPanels, Colors and More Jpanels!!
Simply put, a JPanel is a container which has the ability to hold objects, while in turn is held in place by JFrames. As such a JFrame can hold a Jpanel but a Jpanel cannot hold a JFrame.
Here’s the code to manually create a JPanel and add to our JFrame
    //Building our Jpanel
    //code for creating our JPanel
        JPanel panel = new JPanel();
    //code for adding Jpanel to Jframe
        frame.getContentPane().add(panel);
    //code for setting background color to JPanel
        panel.setBackground(Color.getHSBColor(0xa2, 0xbf, 0xfe));
    //code for setting a size to our JPanel
        panel.setSize(new Dimension (800, 150));
Moving On
If you look at the Corel Draw mockup of our Utopian College App, you will realize that we sort of have two panels, one for our Logo and which also holds the Sign Up and the Log In buttons.
The second panel holds every other button-like panels that will link us to other pages within our Utopian College App.
Setting up our panels
From the swing containers palette at the right hand side of your screen, simply drag and drop one panel unto your already created JFrame. Expand its size to fit the length as well as the width of your Jframe.
After that is done, right click on your Jpanel and scroll down to properties. Click on Background and choose your preferred color. This will give your Jpanel a background color. This JPanel is the panel that will hold our JButtons
Next, we need a second JPanel that will hold our Logo and the links to our Sign Up and Log in pages. Simply drag the panel onto the previous panel and expand the width to fit in to the others. Now shrink the height so that it looks just like in the screenshot below.
Normally, you can create just one Jpanel for everything but because we are trying to use two different colors here, we simply have to make use of two panels.
Importing Our Logo
The importance of a logo within your app cannot be overemphasized. When creating an official app like this for a College, you need to get a hold of their Logo and import it into the app. Most often, a logo is always placed at the top left area of the app or in the top center are, but it can be placed anywhere.
For the purpose of this tutorial, we have created a Logo for our College app which we will be importing right away.
First of all, create a folder where your images will be added in the Source Package of your project by right clicking on the “Source Package” and clicking on “New” before finally choosing “folder”. Rename it to “images”.
The next thing to do is to add a JLabel. This JLabel is simply the container that will hold our Logo. Drag the JLabel from the swing containers palettes and drop it at the position where you want you logo to be.
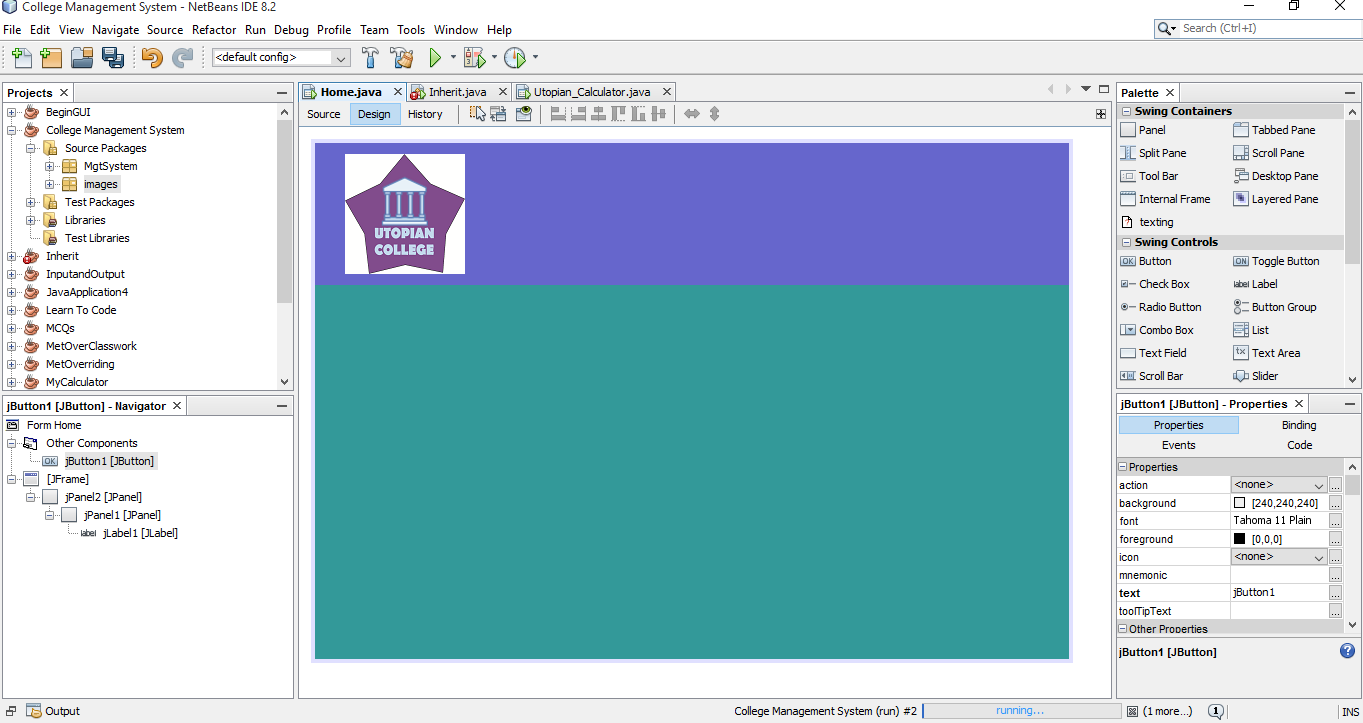
Right click over the new JLabel and go to properties. You’d see an icon tab. Click on it and select the “External Image” radio button. This will open up your desktop so that you can select your logo. A size of 100 x 100 or lower is best suited for this purpose.
Import this logo into the folder you have just created for that purpose. This will ensure that even when you move your project files, the images will still be present within the project.
.png)
Here’s a screenshot of how it looks like now.
Our Sign In and Log In Buttons
To create our Log in and sign in buttons, we simply drag and drop two buttons from the palette onto our first panel. You can edit the size of your JButton or increase it as you so wish. As we did with our panels, you can add colours to your JButton. Simply go to its properties and change the background colour.
In addition to that, we can edit the text in our JButton by double clicking on it or going through the properties tab and clicking on text to clear the previous text.
Write your “Sign Up” and play around the properties tab. You can change the font size, font style or the font-family. Do the same for your Log In Button and edit it accordingly.
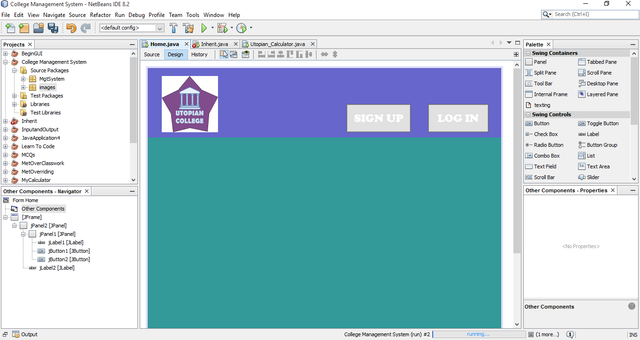
Here's what it looks like after the addition.
.png)
Screenshot
******* Intermission **********
We are progressing. You can relax at this point in time and take in a sip of coffee or chew on some chocolates.
******* Intermission Over **********
Now let’s work on our second JPanel. This JPanel holds all our other buttons that will eventually link out to other important pages in this College App. The same thing as we did with the JButtons will apply here except that we will be importing some icons.
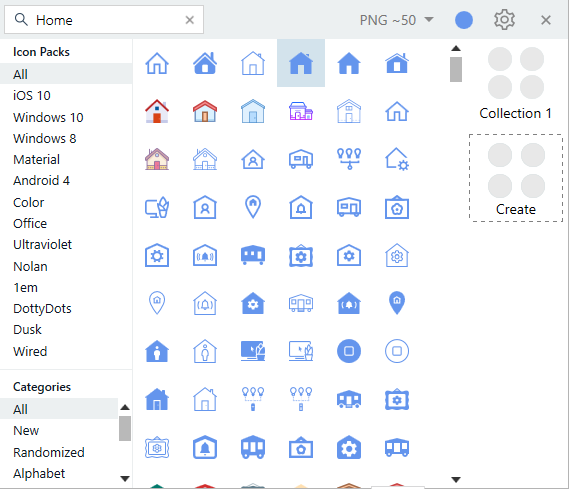
This is where your Icons8 will come in. Download the Icons8 app from Icons8 and install on your system. Whenever you need to use it, just open it up and you will see the icon at the bottom right corner of your screen.
Here’s a screenshot of what it looks like:
.png)
You can choose from different icons in the list, change the colors of your icons and even choose different sizes as well.
Importing your Icons into your project
It’s easy to import your icons from the Icons8 app to your images folder in your project. After setting the properties you want your icons to bear, simply right click on the icon of your choice and save it to any folder of your choice or directly to the images folder of your project if you can find it.
You can also search for icons of your choice by the use of hints, like Home, Settings, students, etc. These searches will give you icons similar to your search phrase.
Rinse and repeat this process for all the icons you want to make use of in your project.
Importing Icons into your JButtons
We want all of our JButtons in our 2nd container to bear Icons. These icons will give our College App a more mature look and feel and also help to explain what each button is used for to users of the app.
Once you are done creating your Jbutton, go to the properties tab of your JButton and choose Icon. Then select External or Internal depending on how/where you saved the icons. The Icons will then be imported into your button.
When you import an icon into your button, whatever text you place inside will be pushed to the right which won’t make it look very presentable.
To fix this, go to the properties section of your JButton and scroll down to verticalTextPosition and set it to appear at the bottom. You can also set the vertical position of all objects held in the button. Simply click on Vertical Position and choose either top, bottom or center.
Rinse and Repeat.
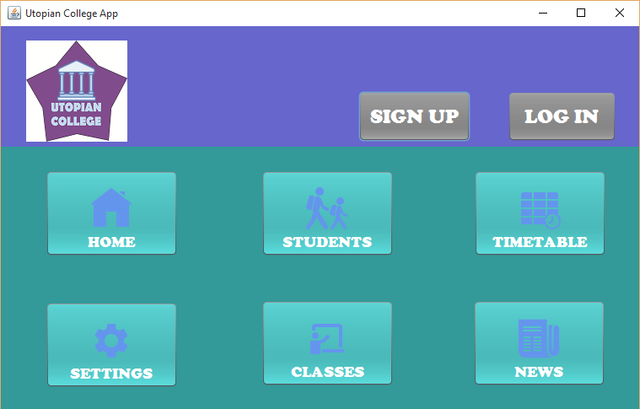
Once you have edited for the first button, do the same for the rest of the buttons we need for this Management system. At the end of the day, we have something like this –
Screenshot of our completed app landing page
.png)
Looks very much like our mockup!! Nice work guys. With this, we come to the end of the first Episode of this series. In our next class, we will work on forms for all the buttons we have created and interlink it so that they can be accessible from our landing page, with focus on the "Home button" while adding the so many components that can be seen in the Home Screen of a College Management System.
Thank you all for reading. Thanks for your time. I still remain your humble Java Tutor, CurtWriter.
Link to GitHub Tutorial -
https://github.com/curtwriter/Utopian-College-App
Curriculum
- This is the first episode of the series.
Proof of Work Done
https://github.com/curtwriter/Utopian-College-App/tree/master/src/MgtSystem
Thank you for your contribution.
Please see this tutorial as a good example.
Your contribution has been evaluated according to Utopian rules and guidelines, as well as a predefined set of questions pertaining to the category.
To view those questions and the relevant answers related to your post,Click here
Need help? Write a ticket on https://support.utopian.io/.
Chat with us on Discord.
[utopian-moderator]
Downvoting a post can decrease pending rewards and make it less visible. Common reasons:
Submit