Introduction
This is a tutorial of an open source Arduino library, which lets you smooth the noise from analog readings in Arduino microcontrollers, solving one of the biggest troubles of analog inputs, with ease. I will show you how to install the library to Arduino IDE and make an example project with the library, throughout this tutorial while giving information about noise concept in electronics.
What Will I Learn?
In this tutorial you will learn:
- General knowledge about noise in electronics.
- How to install ResponsiveAnalogRead library to Arduino IDE.
- How to use ResponsiveAnalogRead library and how to use Its functions.
- How to apply noise smoothing project using the library functions.
Requirements
This tutorials requirements are:
- Arduino UNO or equivalent microprocessor.
- Arduino IDE (Download here)
- ResponsiveAnalogRead Arduino library (Download here)
- A potentiometer (or a some sort of an analog input), Breadboard, Jumper wires.
Difficulty
This tutorials difficulty is:
- Basic
Tutorial Contents
What is Noise in Electronics
Noise, in electronics, is the unwanted signals that interfere with the information signal that is to be transmitted electronically. Noise in electronics is caused by several different effects. Noise is caused mainly from the parts being not ideal, random transmission events of electrons, sun disturbing the ionosphere, and atmospheric noise caused by weather and static electricity. There are many noise types in electronics, which can be classified as, white noise, pink noise, brown noise, shot noise, thermal noise, flicker noise, intermodulation noise, interference and static noise. Noise can be eliminated in different ways, by using a Faraday cage, using capacitive coupling (filters), by shielding cables, notch filters and avoiding ground loops. In this particular project we'll filter (smoothen) noise by using a mathematical procedure, by averaging the readings, to eliminate the noise using an Arduino library.

Analog noise in televisions. Image Source (Royalty free)
How to Install ResponsiveAnalogRead Library to Arduino IDE
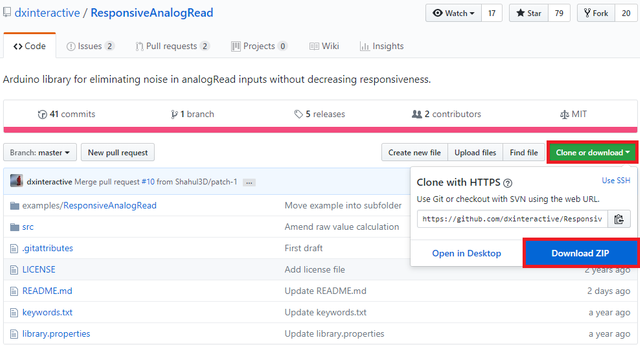
1. Download the library from https://github.com/dxinteractive/ResponsiveAnalogRead.
2. Open Arduino IDE. Then go to and select Sketch->Include Library->Add .ZIP Library.
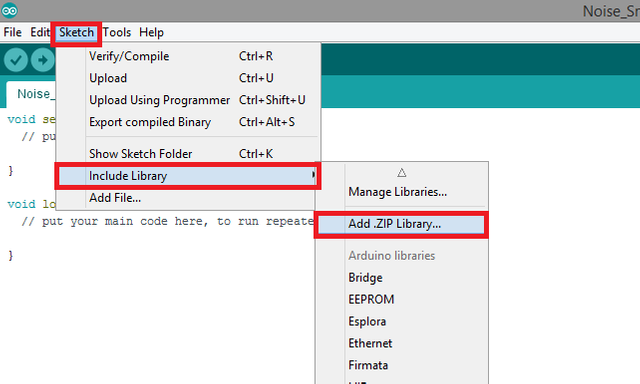
3. Choose ResponsiveAnalogRead-master.zip file and click to Open.
An Example Project Using ResponsiveAnalogRead Arduino Library
I'll show you step by step how to use the ResponsiveAnalogRead Arduino library with a simple example. In this example project, we will make our Arduino microcontroller read from an analog source and smoothen the raw data with the library functions, in order to have a noise free reading. See the steps for how to do these actions. Connections for analog source (potentiometer) to Arduino is shown below.
If you use this library in your other projects please tell in the comments.
Connection diagram for analog source (potentiometer) to Arduino. Made with Fritzing.
1. Open a new sketch and save it as "Noise_Smooth”.
2. To add our library to our sketch, type #include <ResponsiveAnalogRead.h> at the beginning of the code.

3. Then define an constant integer value for the analog input pin. You can add multiple inputs. Then add the smoothing object. If you added multiple inputs to smooth, you should add multiple smoothing objects and set their pins respectively (eg: ResponsiveAnalogRead analogOne(A1, true); ResponsiveAnalogRead analogTwo(A2, true); ).

4. In the void setup() function start the serial connection at 9600 baud rate.

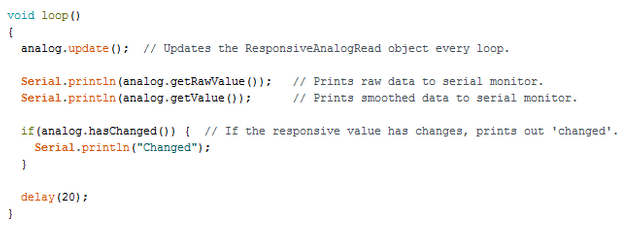
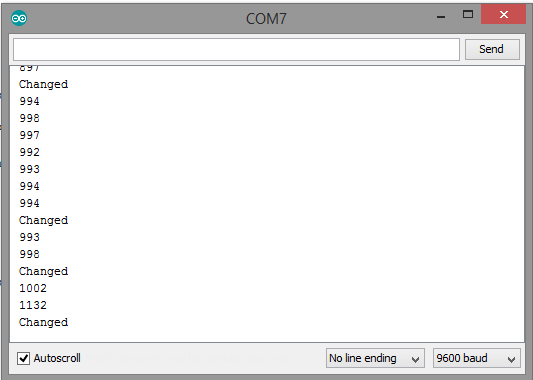
5. In the void loop() function, add the library function that updates the ResponsiveAnalogRead (smoothing) object every loop. Then add two print commands that the first one prints raw data to serial monitor and the second one prints smoothed data to serial monitor. Add an If condition afterwards, that will trigger when the responsive value changes. Make it print “Changed” to the serial monitor. Add a delay at the end of the loop.
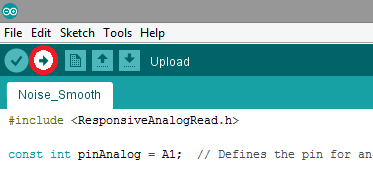
6. Click “Verify” and then “Upload” in order to compile and execute your codes. You should see a readings screen like this. Make sure your COM port and board setting is set right. Please double check the ground connections and all your wirings before running the code.
Conclusion
In this tutorial I’ve shown how to install “ResponsiveAnalogRead” Arduino library, written by GitHub user “dxinteractive” to Arduino IDE, showing how to use the library functions with an example, while giving information about noise in electronics.
I hope that you enjoyed this tutorial and the information that I’ve given. Thank you for reading.
If you want more information about the library and the source use the link below.
Github: https://github.com/dxinteractive/ResponsiveAnalogRead
Code
#include <ResponsiveAnalogRead.h>

const int pinAnalog = A1;  // Defines the pin for analog input.

ResponsiveAnalogRead analog(ANALOG_PIN, true);


void setup()
{
  Serial.begin(9600);  // Starts serial connection at 9600 baud rate.

}

void loop()
{
  analog.update();  // Updates the ResponsiveAnalogRead object every loop.

  Serial.println(analog.getRawValue());   // Prints raw data to serial monitor.
  Serial.println(analog.getValue());      // Prints smoothed data to serial monitor.

  if(analog.hasChanged()) {  // If the responsive value has changes, prints out 'changed'.
    Serial.println("Changed");
  }

  delay(20);
}
Posted on Utopian.io - Rewarding Open Source Contributors
Oh man this is going to come in useful - I have had so many issues with this in the past, even with a simple light or temperature sensor - and my solutions were pretty crappy to be honest!
Downvoting a post can decrease pending rewards and make it less visible. Common reasons:
Submit
I am more than happy to help you!
Downvoting a post can decrease pending rewards and make it less visible. Common reasons:
Submit
Thank you for the contribution. It has been approved.
You can contact us on Discord.
[utopian-moderator]
Downvoting a post can decrease pending rewards and make it less visible. Common reasons:
Submit
Hey @drencolha I am @utopian-io. I have just upvoted you!
Achievements
Suggestions
Get Noticed!
Community-Driven Witness!
I am the first and only Steem Community-Driven Witness. Participate on Discord. Lets GROW TOGETHER!
Up-vote this comment to grow my power and help Open Source contributions like this one. Want to chat? Join me on Discord https://discord.gg/Pc8HG9x
Downvoting a post can decrease pending rewards and make it less visible. Common reasons:
Submit