
Repository: https://github.com/square/retrofit
What will I Learn?
In this tutorial, you will learn the following:
- Implement the retrofit library in making network request
- Create an Android client for HTTP requests against the GitHub API.
- Consume the GitHub API and get required data (User repositories).
- Display results based on s query in a List
- Sort the search result of user repository
- Use of Custom Array Array Adapters
Requirements
To successfully complete this tutorial, you will need the following:
- A laptop with any operating system such as Windows OS, Mac OSX and Linux
- Android Studio Installed AndroidStudio
- Internet access
- Knowledge of Java programming and Android Studio IDE
- Android Device or Emulator for Testing
Difficulty
- Intermediate
Tutorial Content
Retrofit is A type-safe REST client for Android and Java, according to the official page Retrofit Retrofit makes use of annotations to describe HTTP requests, URL parameter replacement and query parameter support is integrated by default. In later tutorials we’ll look at some of the other cool features of retrofit in more detail.
Step 1 : Set Up Your Android Project
To begin this tutorial, lets first a new project with the android studio IDE
Step 2 : Define gradle dependency
- Set Retrofit as a dependency for your project. Define Retrofit and its dependencies in your
build.gradle.
dependencies {


   // Retrofit

    compile 'com.squareup.retrofit2:retrofit:2.4.0'


   compile 'com.squareup.retrofit2:converter-gson:2.4.0'


}
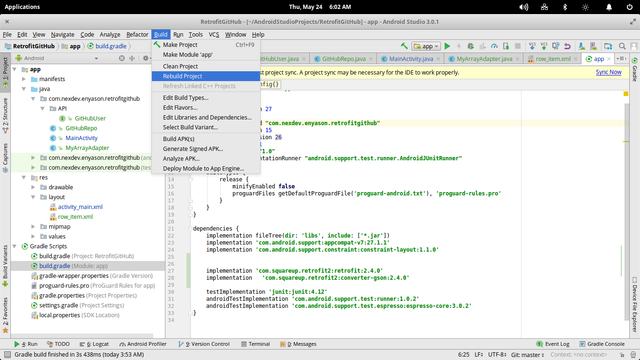
- Run the command to build your code, the build system will download and provide the library for your project.
Step 3 : Set Android’s Network Permission
Retrofit makes an internet request to an API (GitHub) which is running in a server. Making such request from an android application, requires the Internet Permission . This permission is defined within the AndroidManifest.xml file.
<uses-permission android:name="android.permission.INTERNET" /> Step 4 : And ListView to the activity_main.xml file
<?xml version="1.0" encoding="utf-8"?>

<RelativeLayout

    xmlns:android="http://schemas.android.com/apk/res/android"

    xmlns:app="http://schemas.android.com/apk/res-auto"

    xmlns:tools="http://schemas.android.com/tools"

    android:layout_width="match_parent"

    android:layout_height="match_parent"

    tools:context="com.nexdev.enyason.retrofitgithub.MainActivity">

   <ListView

       android:id="@+id/repo_list"

       android:layout_width="match_parent"

       android:layout_height="match_parent"/>


   <ProgressBar

       android:layout_centerInParent="true"

       android:layout_width="wrap_content"

       android:layout_height="wrap_content"

      android:id="@+id/pb_main"/>

</RelativeLayout>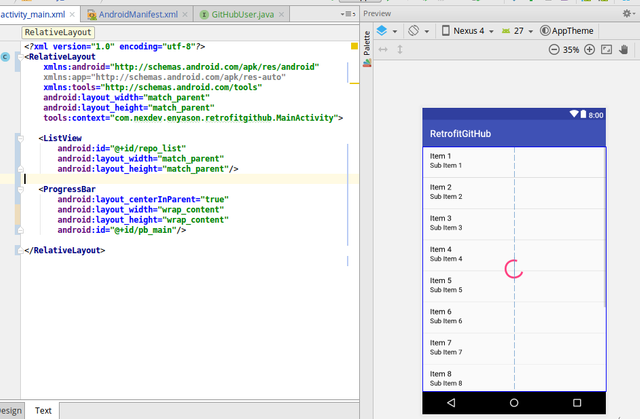
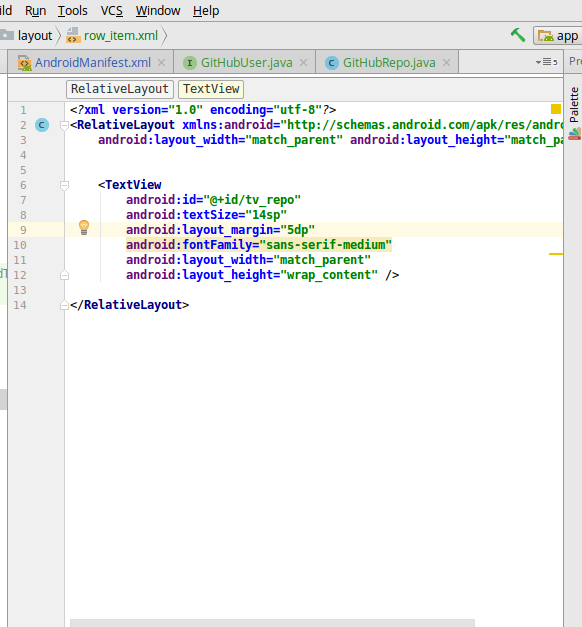
Step 5 : Create a Row Item Layout
Each item from the response is display using this layout
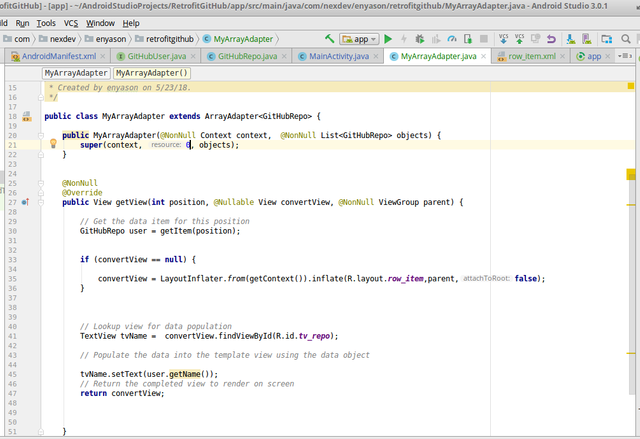
Step 6 : Create a Custom ArrayAdapter
This custom array adapter is to help populate the listview with data. Having a custom adapter makes customization easy for us.We can have a complicated row view and use java Objects as our list Type.
Step 7 :Describe API Endpoints
Before we can start making requests, we need to describe the API endpoints we want to interact with. In this tutorial we’ll just describe a simple GitHub endpoint. First, you have to create an interface and define required methods.
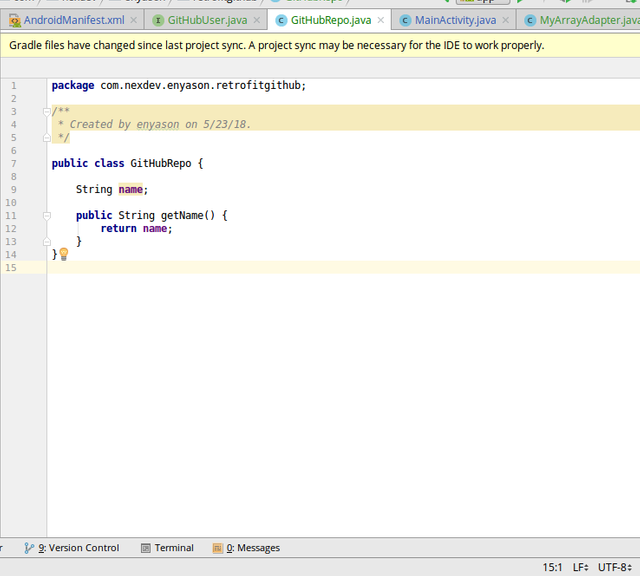
- Create and Object Model using POJO i.e Plain Olde Java Object
public class GitHubRepo {


    String name;

    public String getName() {

        return name;

    }}
- Create an interface to define a GitHub User
The following code defines the GitHubUser and a method repoForUser to request the list of repositories for a given user. The @GET annotation declares that this request uses the HTTP @GET method. The code snippet also illustrates the usage of Retrofit’s path parameter replacement functionality. In the defined method the {user} path will be replaced with the given variable values when calling the repoForUser method.
public interface GitHubUser {

   @GET("/users/{user}/repos")

    Call<List<GitHubRepo>> repoForUser(@Path("user") String user);


}

Step 8 : Create Retrofit REST Client from the Retrofit Class
After describing the API interface and the object model, it’s time to prepare an actual request. To do this, we use Retrofit class. After that we use a builder to set some general options for all requests, i.e. the base URL or the converter.
// set up retrofit builder object


Retrofit.Builder builder = new Retrofit.Builder()

        .baseUrl("https://api.github.com")

        .addConverterFactory(GsonConverterFactory.create());
//create retrofit object


Retrofit retrofit = builder.build();
//instance of our github user


GitHubUser gitHubUser = retrofit.create(GitHubUser.class);
Step 9 : Do the Actual Network Request
Here you also use your user object. However, here you don’t pass your callback as the last parameter. You use the client to get a call object. Once you’ve invoked .enqueue on the created call object the request will be made by Retrofit. This request is done asynchronously in order not to block the UI Thread.
 @Override

  public void onResponse(Call<List<GitHubRepo>> call, Response<List<GitHubRepo>> response) {


progressBar.setVisibility(View.INVISIBLE);


// return the response to a list object


 List<GitHubRepo> list = response.body();


                MyArrayAdapter arrayAdapter = new MyArrayAdapter(MainActivity.this,list);


// setup the adapter


  repoListView.setAdapter(arrayAdapter); // attach adapter to list view

            }
            @Override


            public void onFailure(Call<List<GitHubRepo>> call, Throwable t) {


                progressBar.setVisibility(View.INVISIBLE);


            }


        });
Application Demo
Proof of Work Done
The source code for this tutorial is found here gitHub
I like your tutorial but some part are hard to read, here is some tips from me:
Downvoting a post can decrease pending rewards and make it less visible. Common reasons:
Submit
alright @drsensor
thanks for the correction
Downvoting a post can decrease pending rewards and make it less visible. Common reasons:
Submit
Hey @drsensor
Here's a tip for your valuable feedback! @Utopian-io loves and incentivises informative comments.
Contributing on Utopian
Learn how to contribute on our website.
Want to chat? Join us on Discord https://discord.gg/h52nFrV.
Vote for Utopian Witness!
Downvoting a post can decrease pending rewards and make it less visible. Common reasons:
Submit
@enyason Your post is amazing plz keep my points next time in your mind if possible.
1-Try to explain coding in detail.
2-Try to write code instead of putting images this will make more easier for peoples to undersatnd
Downvoting a post can decrease pending rewards and make it less visible. Common reasons:
Submit
thanks @helpers for the correction
Downvoting a post can decrease pending rewards and make it less visible. Common reasons:
Submit