What Will I Learn?
- Widgets in Kivy
- Develop Custom Widgets
Requirements
- OOP with Python
- Grip over Python Basics
Difficulty
- Intermediate
Tutorial Contents
- Introduction to Kivy Widgets
- Working with Widgets
- Develop Custom Widgets
Introduction to Kivy Widgets
In our tutorial #1 we discussed about **Label **and Button class, these both are the widgets in Kivy.
Widgets are the elements that we used to develop our application's in GUI. As in our previous tutorial we set the Label and Button and also Input field in our application's window. Kivy places all its widgets in kivy.uix module, this module contains all the classes for creating and managing all the widgets. You can check all the widgets this module contained from kivy site.
A Widget can contain multiple widgets within it this is done through indentation. To make it simple, you can say it is like a container that can contains other container in it. The main class of widget is Widget Class, and all the other widget are inherited from Widget Class . You can say all the other widgets in kivy are child classes of Widget class.
Root Widget
As we talked above that widgets can contain other widget, the outer most widget in your code is known as the root widget. And every .kv file contains a single root widget. Follow we are going to practice it in our code, that will make more clear to you.
Working with Widgets
First set the working environment, create a new file with name main.py and save it in the working directory. What will be you working directory, we've explained in our previous tutorial, check it out.
First of all, import the kivy in your file and the version of the kivy
import kivy
kivy.require('1.9.0')
Inorder to complete our working environment import the kivy App.
# import the App
from kivy.app import App
To start work with widget you need to import the **Widget **class from the kivy.uix
# import the Widget Class
from kivy.uix.widget import Widget
Now we are ready to work with widgets.
Next, create a new .kv file with name widgets.kv , we'll do all the kivy language stuff within this file.
First define the root widget that'll contain all the other widget.
# root widget
<TheWidget>:
Now we'll put the input widget within our application.
<TheWidget>:

    TextInput:
        hint_text: "I'm an input box!"
Now, move to our main.py file to run this code.
First inherit the widget class through another class, name it same as you root widget. As you can see our root widget is <TheWidget>: So, our new class name will be TheWidget
# widget class
class TheWidget(Widget):
    pass
Remain the widget class empty.
Now show this widget in your application's widow
import kivy

kivy.require('1.9.0')

from kivy.app import App
from kivy.uix.widget import Widget


class TheWidget(Widget):
    pass


class WidgetsApp(App):
    # This returns the content we want in the window
    def build(self):
        # Return a the TheWidget Class
        return TheWidget();


if __name__ == "__main__":
    widgetsapp = WidgetsApp()
    widgetsapp.run()
We've discussed about App class and build() method in details in our previous tutorial, if you are confuse here and want to understand these lines of code then check our our Tutorial #1 Basics.
After writing the code press Ctrl + Shift + F10 in order to run the code.
Output:
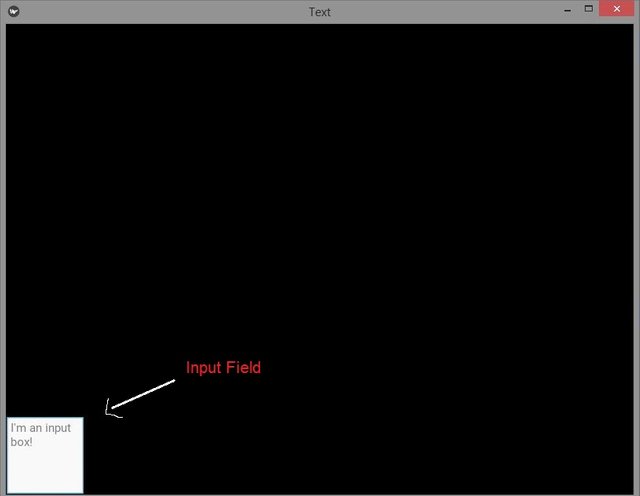
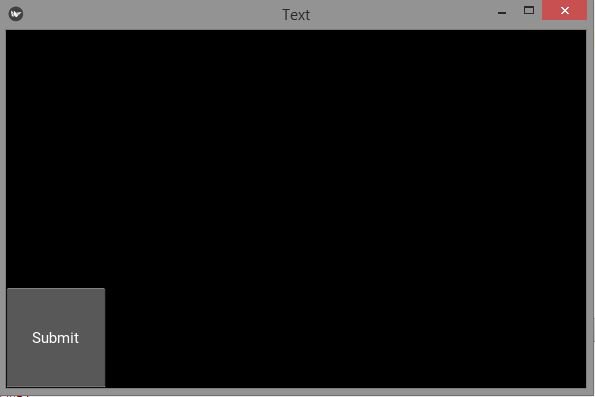
You can our input field look weird and its position is bottom left corner, this is the default position of the widget. Every new widget you define will be on that position. As if we add another widget in our window. This time we gonna add a button widget
<TheWidget>:

    TextInput:
        hint_text: "I'm an input box!"

    Button:
        text: "Submit"
Write the above code and run the app.
Output:
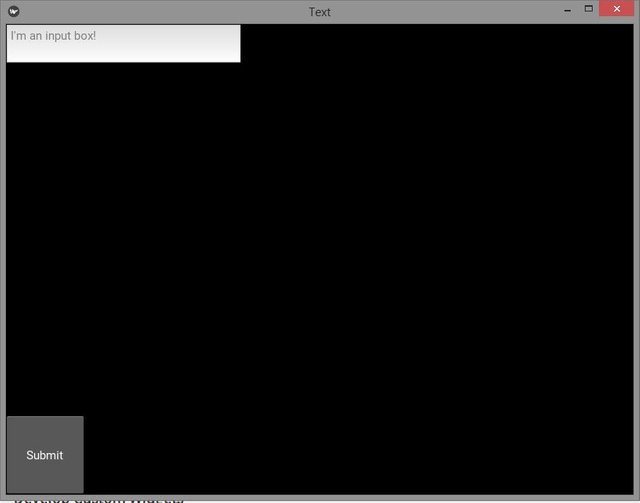
You can see our input field become invisible because our button widget jump over it. Now change the sizes and position of the widget that they look nicer and user friendly.
<TheWidget>:

    TextInput:
        hint_text: "I'm an input box!"
        pos: 0, 550
        size: 300,50
    Button:
        text: "Submit"
Output:
You can see our input widget changes it position. Now, same like this change the the size and position of the Button widget.
<TheWidget>:

    TextInput:
        hint_text: "I'm an input box!"
        pos: 0, 550
        size: 300,50

    Button:
        text: "Submit"
        font_size: 16
        pos: 310, 550
        size: 100,50
Output:
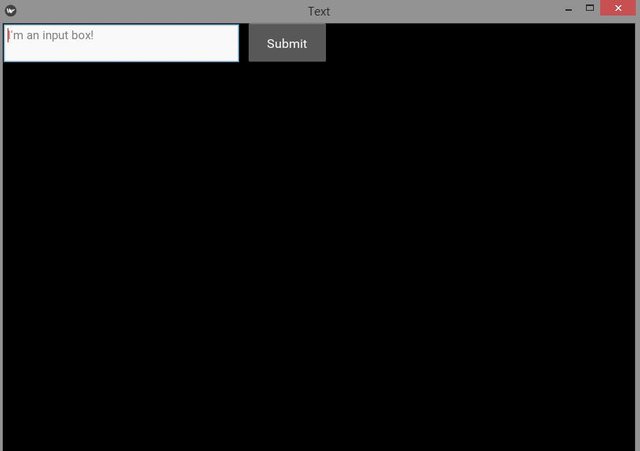
You can see the both of our widgets are well positioned and sized.
Now we are going to do some interesting stuff with our widgets, when you click on the button it shows the message of submitted and clears the input field. To do this write this code.
<TheWidget>:

    TextInput:
        id: inp
        hint_text: "I'm an input box!"
        pos: root.x, (root.height / 2) + 250
        size: 300,50
        color: .10,.9,1,2

    Label:
        id: label
        text: ""
        pos: root.x + 400, 525
        color: 244, 65, 223,1

    Button:
        text: "Submit"
        font_size: 16
        pos: root.x + 310, (root.height / 2) + 250
        size: 100,50
        on_press: inp.text = ""
        on_press: label.text = "Submitted"
Output:
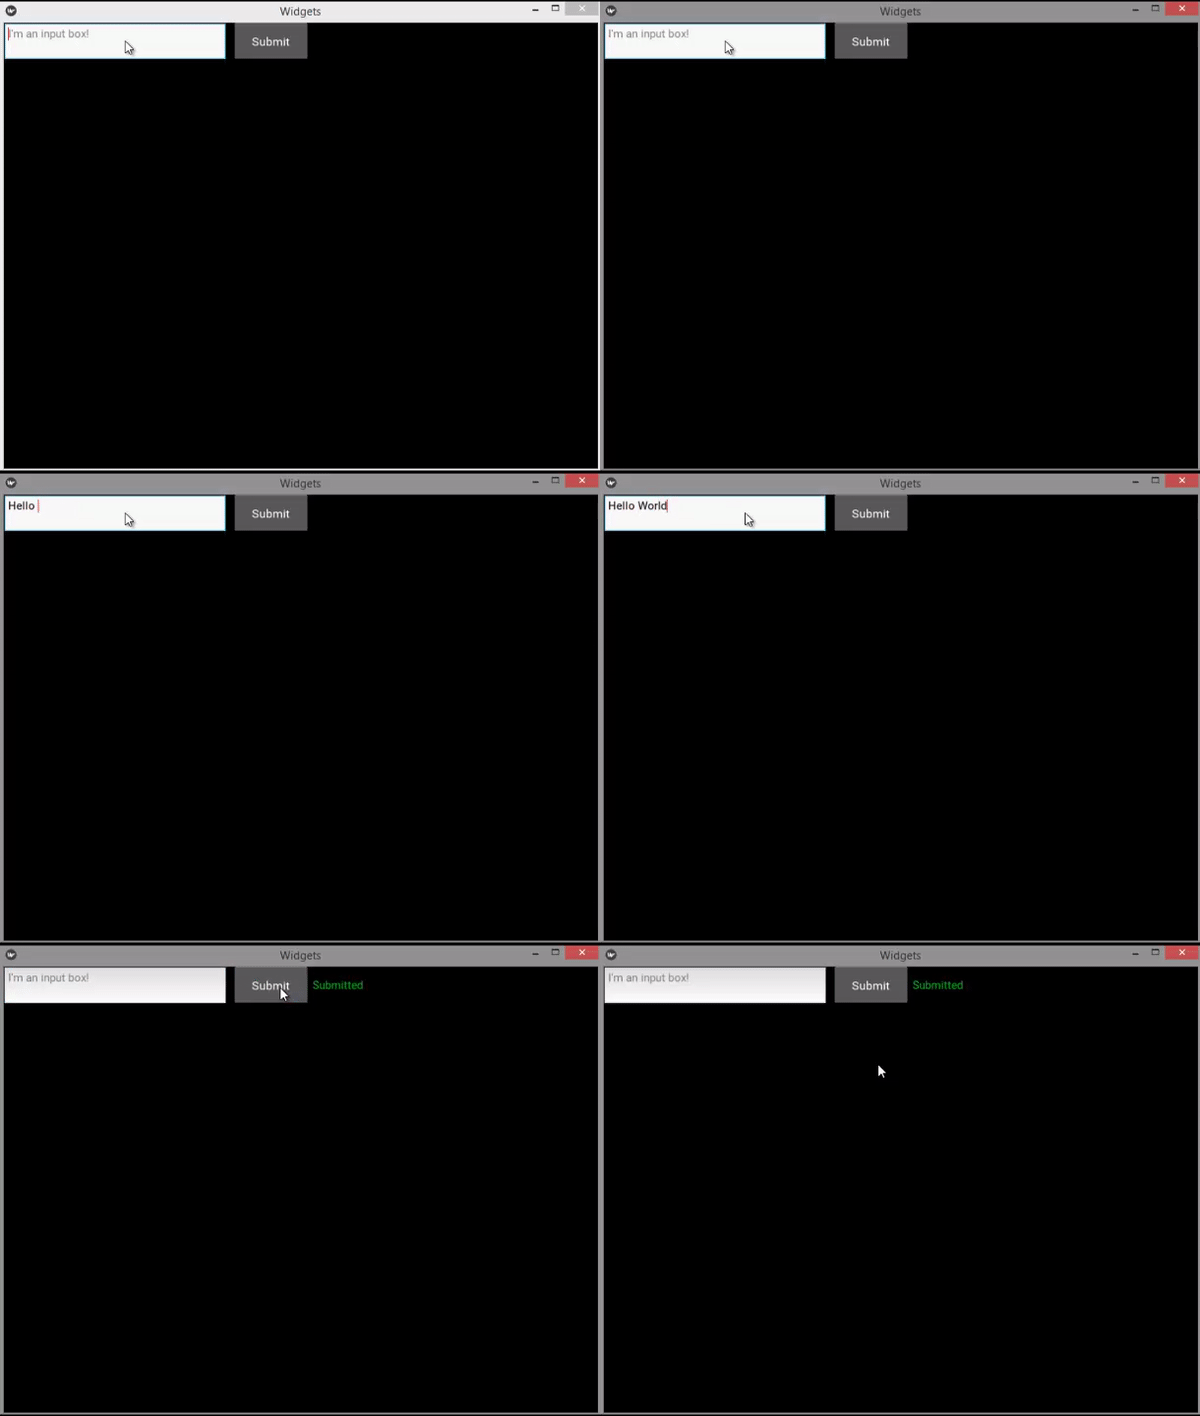
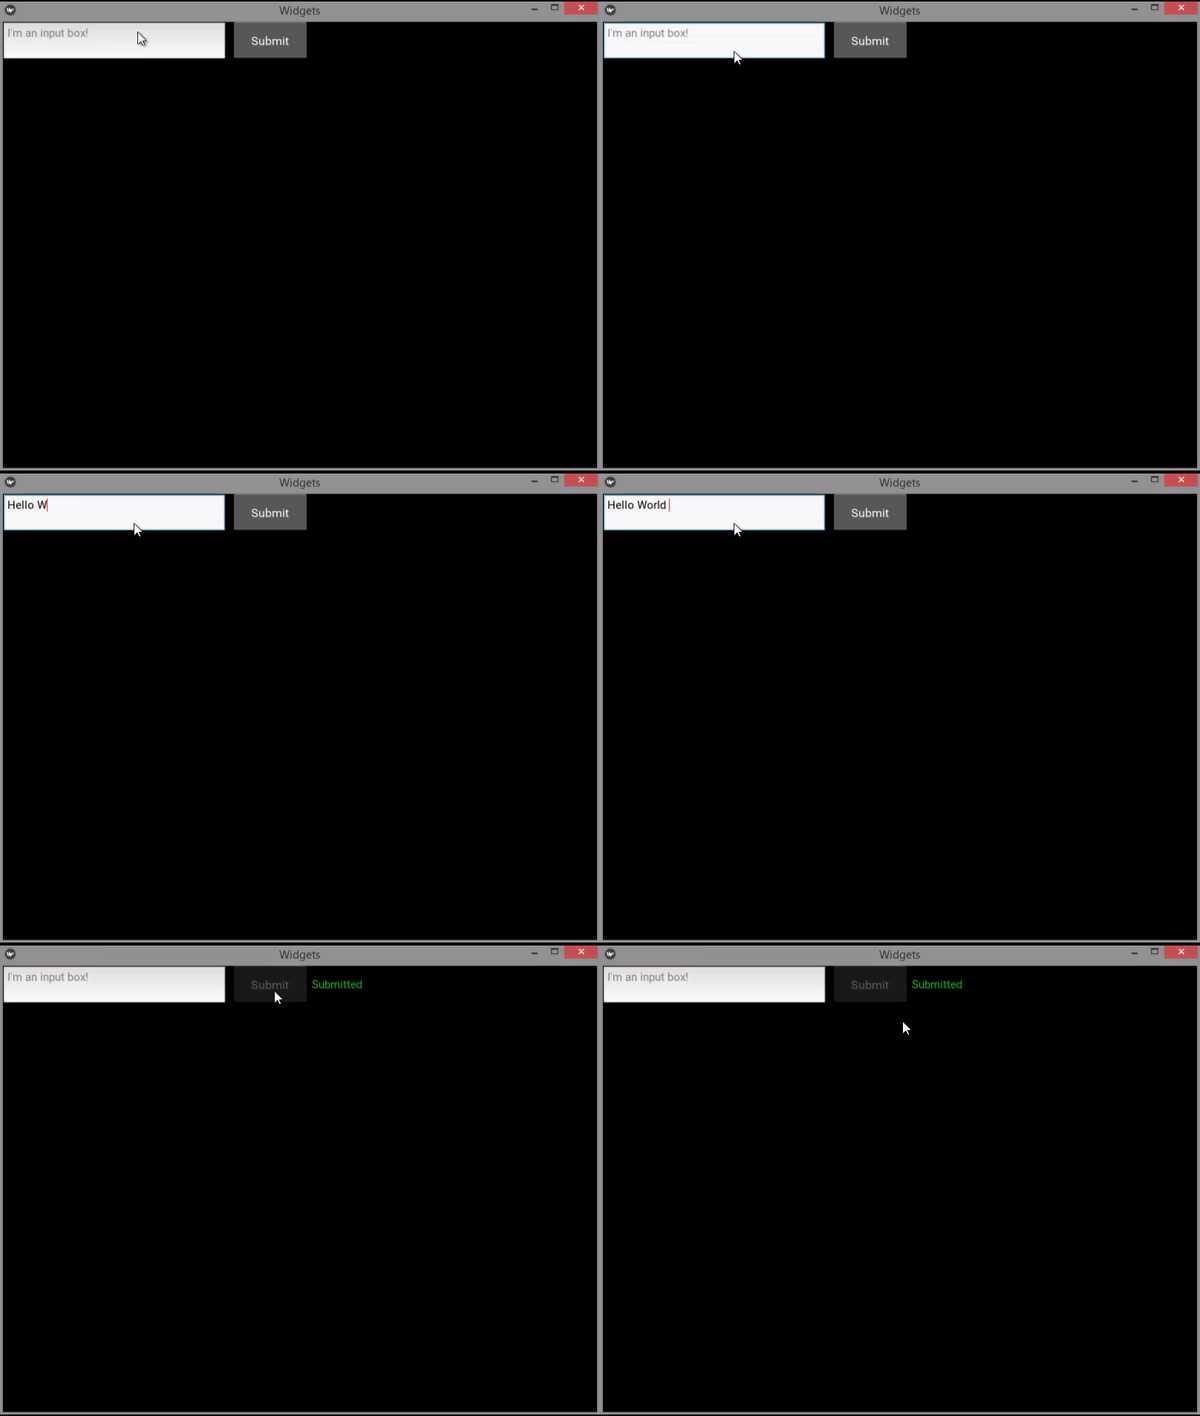
You can see our input cleared after clicking the button widget and also shows us the message after clicking. But you can again click the button after submitting the value. Make the button disable when you submitted your value. Add this line of code in our button widget.
# disable the button after pressing it
on_press: self.disabled = True
Source Code:
####### main.py #######

import kivy

kivy.require('1.9.0')

from kivy.app import App
from kivy.uix.widget import Widget


class TheWidget(Widget):
    pass


class WidgetsApp(App):
    # This returns the content we want in the window
    def build(self):
        # Return a the TheWidget Class
        return TheWidget();


if __name__ == "__main__":
    widgetsapp = WidgetsApp()
    widgetsapp.run()
####### widgets.py #######

<TheWidget>:

    TextInput:
        id: inp
        hint_text: "I'm an input box!"
        pos: root.x, (root.height / 2) + 250
        size: 300,50
        color: .10,.9,1,2

    Label:
        id: label
        text: ""
        pos: root.x + 400, 525
        color: 244, 65, 223,1
    Button:
        text: "Submit"
        font_size: 16
        pos: root.x + 310, (root.height / 2) + 250
        size: 100,50
        on_press: inp.text = ""
        on_press: label.text = "Submitted"
        on_press: self.disabled = True
Develop Custom Widget
Kivy also allow you to create your own custom widgets, As if we want t o use the multiple input widgets in the application of same size then create a custom widget and place all general properties in it and use it whenever you want in you program
# input field custom widget
<CustTextInput@TextInput>:
    size: 300,50
    color: .10,.9,1,2

# button custom widget
<CustButton@Button>:
    font_size: 16
    size: 100,50
Here above we create custom widget of the input and button widget. Now use these widget in your root widget. To use it just use the text before the @ sing in the widget.
<TheWidget>:

    CustTextInput:
        id: inp
        hint_text: "First Name"
        pos: root.x, (root.height / 2) + 250

    CustTextInput:
        id: inp2
        hint_text: "Last Name"
        pos: root.x, (root.height / 2) + 180


    Label:
        id: label
        text: ""
        pos: root.x + 400, (root.height / 2) + 190
        color: 244, 65, 223,1
    CustButton:
        text: "Submit"
        pos: root.x + 310, (root.height / 2) + 210
        on_press: inp.text = ""
        on_press: inp2.text = ""
        on_press: label.text = "Submitted"
        on_press: self.disabled = True
Output:
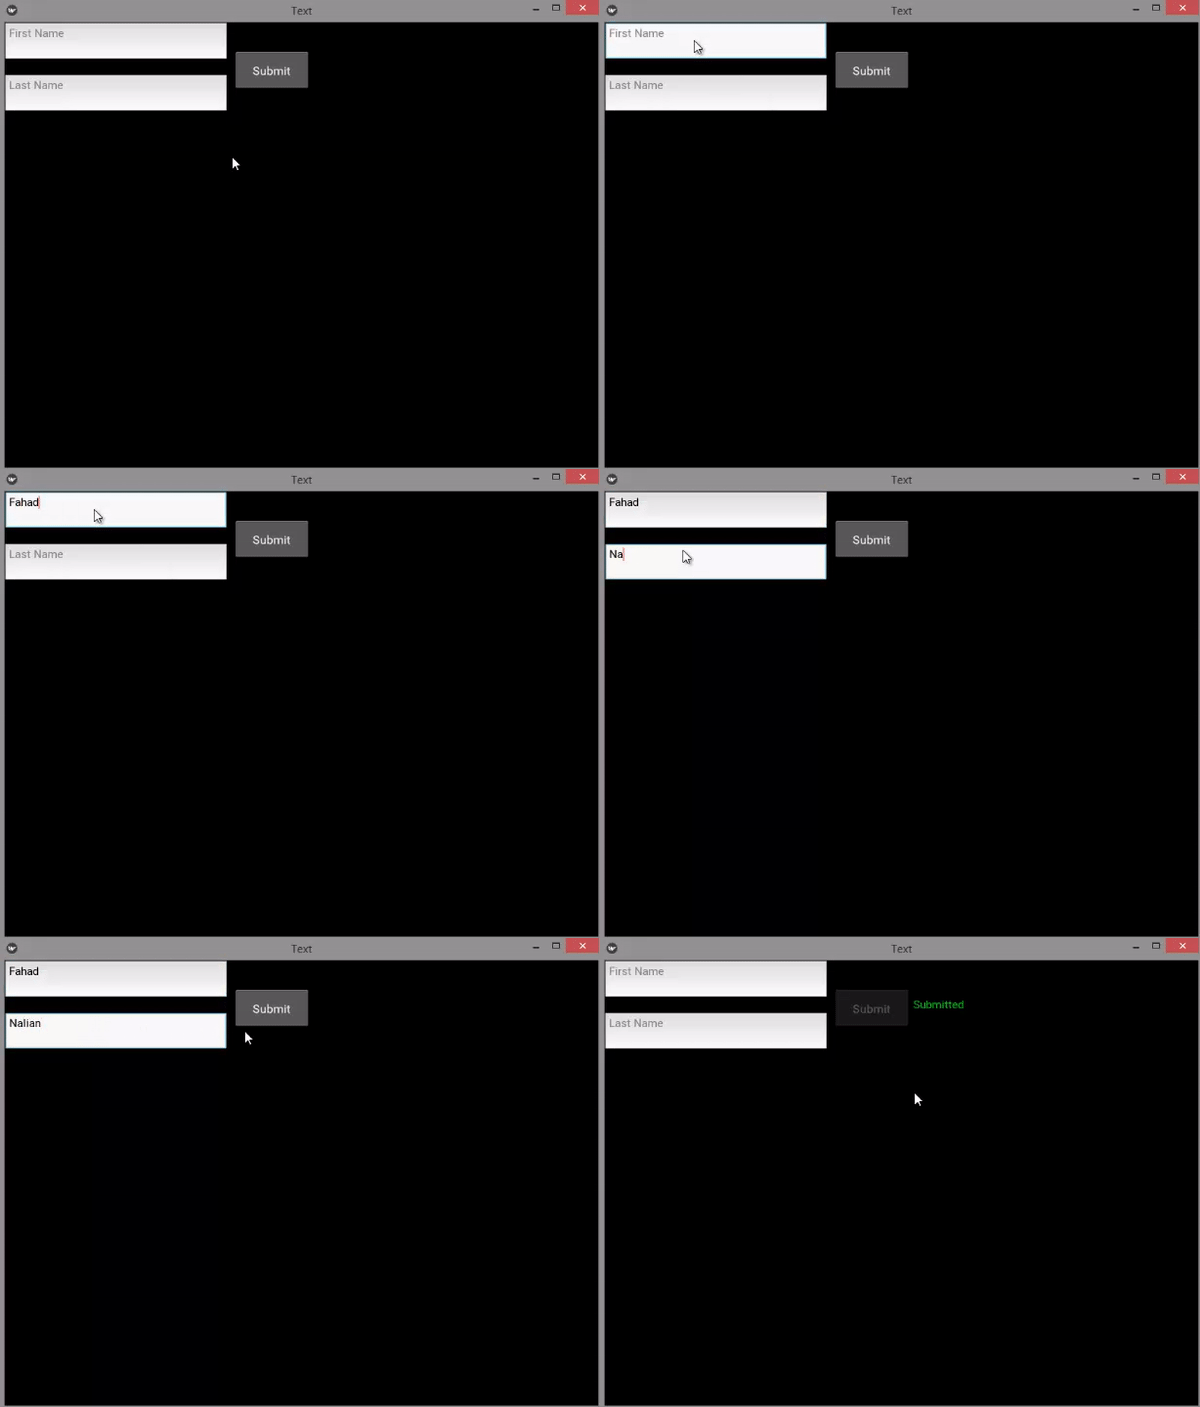
Source Code:
#### main.py ####

import kivy

kivy.require('1.9.0')

from kivy.app import App
from kivy.uix.widget import Widget


class TheWidget(Widget):
    pass


class WidgetsApp(App):
    # This returns the content we want in the window
    def build(self):
        # Return a the TheWidget Class
        return TheWidget();


if __name__ == "__main__":
    widgetsapp = WidgetsApp()
    widgetsapp.run()
####widgets.kv####

<CustTextInput@TextInput>:
    size: 300,50
    color: .10,.9,1,2

<CustButton@Button>:
    font_size: 16
    size: 100,50

<TheWidget>:

    CustTextInput:
        id: inp
        hint_text: "First Name"
        pos: root.x, (root.height / 2) + 250

    CustTextInput:
        id: inp2
        hint_text: "Last Name"
        pos: root.x, (root.height / 2) + 180


    Label:
        id: label
        text: ""
        pos: root.x + 400, (root.height / 2) + 190
        color: 244, 65, 223,1
    CustButton:
        text: "Submit"
        pos: root.x + 310, (root.height / 2) + 210
        on_press: inp.text = ""
        on_press: inp2.text = ""
        on_press: label.text = "Submitted"
        on_press: self.disabled = True
Posted on Utopian.io - Rewarding Open Source Contributors
Your contribution cannot be approved because it does not follow the Utopian Rules.
Submissions focused on the use of functions that are already well documented in the project documentation will be rejected.
You can contact us on Discord.
[utopian-moderator]
Downvoting a post can decrease pending rewards and make it less visible. Common reasons:
Submit
Awesome, I'm wondering, do you have a video to help with this?
Downvoting a post can decrease pending rewards and make it less visible. Common reasons:
Submit