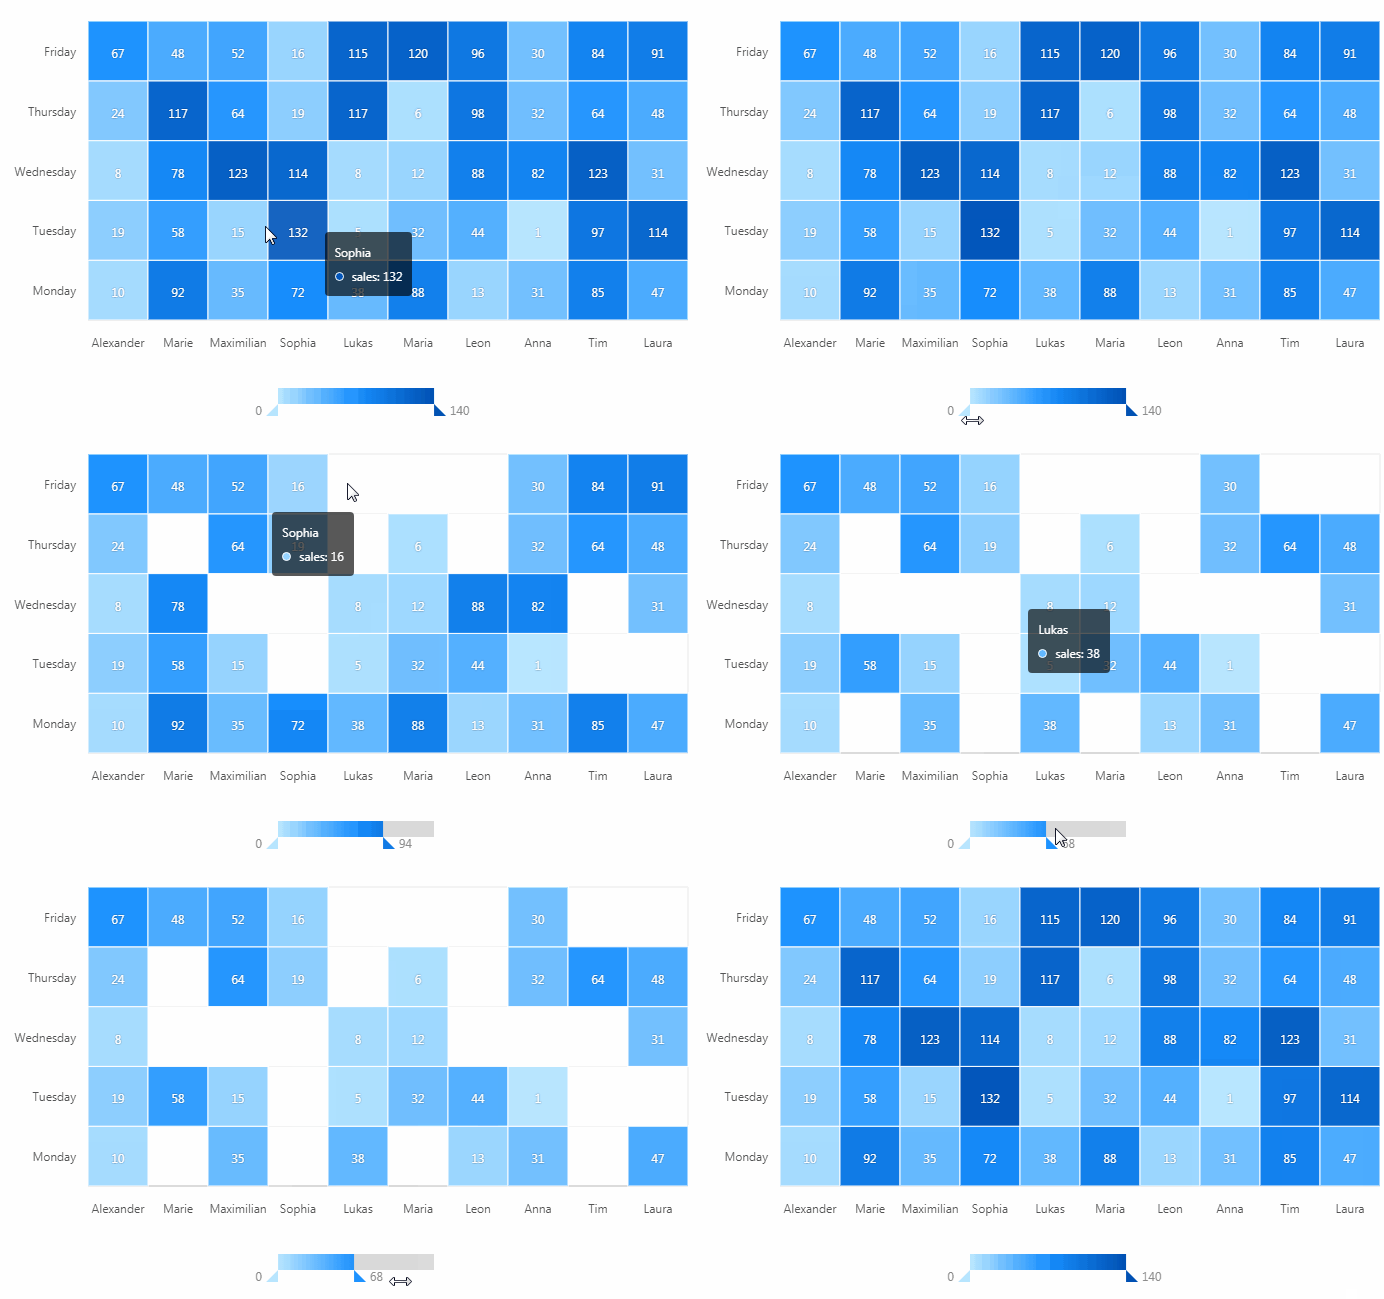
Summary:
G2 is a set of graphically-based graphical syntax that is data-driven and highly user-friendly and extensible, allowing users to build a wide variety of interactive statistics without having to worry about detailed implementation details chart.
G2 是一套基于可视化编码的图形语法,以数据驱动,具有高度的易用性和扩展性,用户无需关注各种繁琐的实现细节,一条语句即可构建出各种各样的可交互的统计图表。
您将从这个教程中学到什么
- 如何引入js文件
- 如何定义容器
- 如何定义数据
- 如何引用数据
- 如何定义提示框
- 如何渲染图表
学习此教程的必备条件
教程难度
- 中等难度

教程内容
演示效果
1. 知识点A - 如何引入js文件
<script src="https://gw.alipayobjects.com/os/antv/assets/g2/3.0.4-beta.2/g2.min.js"></script>
<script src="https://gw.alipayobjects.com/os/antv/assets/data-set/0.8.3/data-set.min.js"></script>
使用内嵌对js文件进行引入,用于后期图表使用。
2. 知识点B - 如何定义容器
<div id="heatmapchart"></div>
使用定义容器,用于展示图表。容器名:heatmapchart。
3. 知识点C - 如何定义数据
  const data = [[0, 0, 10], [0, 1, 19], [0, 2, 8], [0, 3, 24], [0, 4, 67], [1, 0, 92], [1, 1, 58], [1, 2, 78], [1, 3, 117], [1, 4, 48], [2, 0, 35], [2, 1, 15], [2, 2, 123], [2, 3, 64], [2, 4, 52], [3, 0, 72], [3, 1, 132], [3, 2, 114], [3, 3, 19], [3, 4, 16], [4, 0, 38], [4, 1, 5], [4, 2, 8], [4, 3, 117], [4, 4, 115], [5, 0, 88], [5, 1, 32], [5, 2, 12], [5, 3, 6], [5, 4, 120], [6, 0, 13], [6, 1, 44], [6, 2, 88], [6, 3, 98], [6, 4, 96], [7, 0, 31], [7, 1, 1], [7, 2, 82], [7, 3, 32], [7, 4, 30], [8, 0, 85], [8, 1, 97], [8, 2, 123], [8, 3, 64], [8, 4, 84], [9, 0, 47], [9, 1, 114], [9, 2, 31], [9, 3, 48], [9, 4, 91]];
  const source = [];
  for(let i = 0; i < data.length; i ++) {
    const item = data[i];
    const obj = {};
    obj.name = item[0];
    obj.day = item[1];
    obj.sales = item[2];
    source.push(obj);
  }
- const: 用于定义数组。
- data:定义为数组名。
- 格式:[行值,列值,数值]
4. 知识点D - 如何引用数据
  const chart = new G2.Chart({
    id: 'heatmapchart',
    forceFit: true,
    height: window.innerHeight,
    padding: [ 20, 80, 120, 85 ]
  });
  chart.source(source, {
    name: {
      type: 'cat',
      values: ['Alexander', 'Marie', 'Maximilian', 'Sophia', 'Lukas', 'Maria', 'Leon', 'Anna', 'Tim', 'Laura']
    },
    day: {
      type: 'cat',
      values: ['Monday', 'Tuesday', 'Wednesday', 'Thursday', 'Friday']
    }
  });
- chart:创建一个chart实例,返回一个Chart对象,建议在单个容器上只初始化一个Chart实例。
- container:定于数据从heatmapchart数组取值。
- forceFit: 定义图表的宽度自适应开关,默认为 false,设置为 true 时表示自动取 dom(实例容器)的宽度。
- height: 定义图表高度。
- window.innerHeight: 获取页面可用高度。
- padding:定义间距。
- source:定义为chart装载数据,返回chart对象。
- type:指定数据类型,可声明的类型为:identity、linear、cat、time、timeCat、log、pow
- name:定义X轴数据基准
- day:定义Y轴数据基准
5. 知识点E - 如何定义坐标轴
  chart.axis('name', {
    tickLine: null,
    grid: {
      align: 'center',
      lineStyle: {
        lineWidth: 1,
        lineDash: null,
        stroke: '#f0f0f0'
      }
    }
  });
  chart.axis('day', {
    title: null,
    grid: {
      align: 'center',
      lineStyle: {
        lineWidth: 1,
        lineDash: null,
        stroke: '#f0f0f0'
      },
      showFirstLine: true
    }
  });
- axis:坐标轴配置,该方法返回 chart 对象。
- title:定义标题。
- grid:设置坐标轴网格线的样式,网格线与坐标轴线垂直。
- align:设置对齐方式。
- lineStyle:当网格类型type为line时,使用 lineStyle 设置样式
- lineWidth:定义线的宽度。
- lineDash:网格线的虚线配置,第一个参数描述虚线的实部占多少像素,第二个参数描述虚线的虚部占多少像素,值为null,表示不配置。
- stroke:设置网格线颜色。
6. 知识点F - 如何渲染图表
  chart.polygon()
    .position('name*day')
    .color('sales', '#BAE7FF-#1890FF-#0050B3')
    .label('sales', {
      offset: -2,
      textStyle: {
        fill: '#fff',
        shadowBlur: 2,
        shadowColor: 'rgba(0, 0, 0, .45)'
      }
    })
    .style({
      lineWidth: 1,
      stroke: '#fff'
    });
  chart.render();
- polygon:创建多边形,返回一个 geom 对象。
- position:将数据值映射到图形的位置上的方法。position 属性会对多个字段进行数据的映射。以chart.interval().position('xy') 为例,interval代表柱状图,即最后需要生成柱状图,而position代表位置,position('x*y')代表数据在图形中的位置由x和y这两个维度的变量决定,(x1,y1) 这样的数值对,最后就会被转换为画布上对应的坐标点。
- color:定义坐标轴文本的颜色
- label:定义坐标轴文本的样式。
- shadowBlur:定义阴影模糊度。
- shadowColor:定义阴影颜色。
- render:用于将图表渲染至画布。
完整代码
<html lang="en">
<head>
    <meta charset="UTF-8">
    <title>色块图</title>
</head>
<body>
<div id="heatmapchart"></div>
<script src="https://gw.alipayobjects.com/os/antv/assets/g2/3.0.4-beta.2/g2.min.js"></script>
<script src="https://gw.alipayobjects.com/os/antv/assets/data-set/0.8.3/data-set.min.js"></script>
<script>
  const data = [[0, 0, 10], [0, 1, 19], [0, 2, 8], [0, 3, 24], [0, 4, 67], [1, 0, 92], [1, 1, 58], [1, 2, 78], [1, 3, 117], [1, 4, 48], [2, 0, 35], [2, 1, 15], [2, 2, 123], [2, 3, 64], [2, 4, 52], [3, 0, 72], [3, 1, 132], [3, 2, 114], [3, 3, 19], [3, 4, 16], [4, 0, 38], [4, 1, 5], [4, 2, 8], [4, 3, 117], [4, 4, 115], [5, 0, 88], [5, 1, 32], [5, 2, 12], [5, 3, 6], [5, 4, 120], [6, 0, 13], [6, 1, 44], [6, 2, 88], [6, 3, 98], [6, 4, 96], [7, 0, 31], [7, 1, 1], [7, 2, 82], [7, 3, 32], [7, 4, 30], [8, 0, 85], [8, 1, 97], [8, 2, 123], [8, 3, 64], [8, 4, 84], [9, 0, 47], [9, 1, 114], [9, 2, 31], [9, 3, 48], [9, 4, 91]];
  const source = [];
  for(let i = 0; i < data.length; i ++) {
    const item = data[i];
    const obj = {};
    obj.name = item[0];
    obj.day = item[1];
    obj.sales = item[2];
    source.push(obj);
  }
  const chart = new G2.Chart({
    id: 'heatmapchart',
    forceFit: true,
    height: window.innerHeight,
    padding: [ 20, 80, 120, 85 ]
  });
  chart.source(source, {
    name: {
      type: 'cat',
      values: ['Alexander', 'Marie', 'Maximilian', 'Sophia', 'Lukas', 'Maria', 'Leon', 'Anna', 'Tim', 'Laura']
    },
    day: {
      type: 'cat',
      values: ['Monday', 'Tuesday', 'Wednesday', 'Thursday', 'Friday']
    }
  });
  chart.axis('name', {
    tickLine: null,
    grid: {
      align: 'center',
      lineStyle: {
        lineWidth: 1,
        lineDash: null,
        stroke: '#f0f0f0'
      }
    }
  });
  chart.axis('day', {
    title: null,
    grid: {
      align: 'center',
      lineStyle: {
        lineWidth: 1,
        lineDash: null,
        stroke: '#f0f0f0'
      },
      showFirstLine: true
    }
  });
  chart.polygon()
    .position('name*day')
    .color('sales', '#BAE7FF-#1890FF-#0050B3')
    .label('sales', {
      offset: -2,
      textStyle: {
        fill: '#fff',
        shadowBlur: 2,
        shadowColor: 'rgba(0, 0, 0, .45)'
      }
    })
    .style({
      lineWidth: 1,
      stroke: '#fff'
    });
  chart.render();
</script>
</body>
</html>
最终效果

系列课程
- 如果您喜欢我的教程,可以在我的个人档案页面,获取更多信息。
If you like my tutorial , You can check out your profile for more such tutorials. - 您可以使用zqz-tutorial标签快速查看我发布的所有教程
You can use the "zqz-tutorial" tag to see all the tutorials I've posted.
Posted on Utopian.io - Rewarding Open Source Contributors
Thank you for the contribution. It has been approved.
You can contact us on Discord.
[utopian-moderator]
Downvoting a post can decrease pending rewards and make it less visible. Common reasons:
Submit
thank you very much
Downvoting a post can decrease pending rewards and make it less visible. Common reasons:
Submit
Your contribution cannot be approved because it does not follow the Utopian Rules.
It is taken from the official examples.
You can contact us on Discord.
[utopian-moderator]
Downvoting a post can decrease pending rewards and make it less visible. Common reasons:
Submit
Approve is not my ability, but I can upvote you.
Downvoting a post can decrease pending rewards and make it less visible. Common reasons:
Submit
你一定是一个软件工程师!
Downvoting a post can decrease pending rewards and make it less visible. Common reasons:
Submit