
Repository
https://github.com/jcodec/jcodec
What Will I Learn?
- How to create a screen recording application
- How to capture audio from system microphone while recording
- How to merge the captured audio with the video frames
Requirements
- System Requirements : Java JDK, Eclipse IDE or Netbeans IDE
- OS Support for Java : Windows, mac OS, Linux
- Required Knowledge : A fair knowledge of Java
Resources for Java and this tutorial
- Oracle Website: https://www.oracle.com/index.html
- Java Docs : http://www.oracle.com/technetwork/java/javase/documentation/api-jsp-136079.html
- JCodec Library : http://jcodec.org/
- Timer and TimerTask : https://www.journaldev.com/1050/java-timer-timertask-example
- Java Sound API : https://docs.oracle.com/javase/tutorial/sound/accessing.html
- FFmpeg : https://www.ffmpeg.org
- FFmpeg Commands : https://www.labnol.org/internet/useful-ffmpeg-commands/28490/
- FFmpeg Installation guide : https://github.com/adaptlearning/adapt_authoring/wiki/Installing-FFmpeg
Difficulty
- Basic
Tutorial Duration 30- 35 Minutes
Tutorial Content
This tutorial series covers how to make a recording software using Java Technology.
Recap of Part 1
- We implemented screen capturing using Java Robot class.
- The captured screens were stored in an ArrayList and then,
- Looped through the List to get the stored frames ready for encoding
- The encoding was achieved using JCodec library
Recap of Part 2
- We Created a simple GUI for Our Recording program
- We Implemented a Time Counter Class to manage the stop watch
- We Implemented the Screen recording task using the TimerTask Class
- Adjusted the Frame Rate to make video more natural
For this tutorial (Part 3), we are going to implement the audio support for our screen recording program. We will be getting audio input from the system microphone and then merge it with the audio-less video frames we created.
The following steps will guide us into integrating the audio feature on our software:
- Record Audio input from System microphone, using Java Sound API
- Convert the video output in MP4 to AVI using FFmpeg
- Merge the recorded audio file in AAC format with the AVI video file
STEP 1 : Record Audio Input From System
To achieve audio recording, we are going to make use of the Java Sound API. Since audio capturing and recording will take some time to process completely thus blocking the current thread, we are going implement the operations in a separate thread outside the UI thread.
Create a class extending Thread
Initialize recording
public class AudioRecorder extends Thread {
    ...
    private void initRecording() {

        System.out.println("begin sound test...");

        try {

            //define audio format
            AudioFormat audioFormat = new AudioFormat(AudioFormat.Encoding.PCM_SIGNED, 44100, 16, 2, 4, 44100, false);

            //build line info with audio format
            DataLine.Info info = new DataLine.Info(TargetDataLine.class, audioFormat);

            mic = (TargetDataLine) AudioSystem.getLine(info); // initialize the mic line
            mic.open(); //open the line for recording

            System.out.println("recording initialized...");

        } catch (LineUnavailableException ex) {

            ex.printStackTrace();

            }
        }

    ...

    }
Code explanation
- The initRecording method is where we initialize the line to start recording
- An Audio format is defined to specify the kind of input we need from the TargetDataLine . In our case, our audio format has support for .wav audio extension (WAV).
- We now build a DataLine.Info object with TargetDataLine and audio format as its parameters. This object contains information of a specific line based on the audio format defined. Also info such as name, vendor and description of line can be retrieved from here.
- We initialize the TargetDataLine with variable mic by requesting a line from the AudioSystem class.
mic = (TargetDataLine) AudioSystem.getLine(info); mic.open();allocate the system resource to the line
Start Recording
public class AudioRecorder extends Thread {
    ...
private void statRecording() {

        try {
              mic.start(); // start reading from line

            //get audio input streams from the line
            AudioInputStream audioInputStream = new AudioInputStream(mic);

            File f = new File("audio_output.wav"); // craete a wav file

            //write to file
            AudioSystem.write(audioInputStream, AudioFileFormat.Type.WAVE, f);
            System.out.println("done writing to file");

        } catch (IOException ex) {
            ex.printStackTrace();
        }

    }

    @Override
    public  void run() {

        initRecording();
        statRecording();

    }

    ...

    }
Code explanation
- In the startRecording method, we call
mic.start();to start reading from the line. - The AudioInputStream is an input stream with a specified audio format and length. It is instantiated with the TargetDataLine that is (mic) as its parameter. Here we get the audio input streams from the line.
- We create a new .wav file were the input streams from the TargetDataLine will be stored.
- We use the AudioSystem class to write the audio input stream to the file.
- In the run method of the Thread, we call
initRecording();andstatRecording();to start recording in this thread
Stop Recording
public void stopRecording() {
        mic.stop();
        mic.close();
        System.out.println("Recording ended");

    }
Code explanation
mic.stop();the line stops reading audio inputsmic.close();the mic closes the line and releases system resources
STEP 2 : Set Up FFmpeg on System

What is FFmpeg?
FFmpeg is a complete, cross-platform solution to record, convert and stream audio and video. At its core is the FFmpeg program itself, designed for command-line-based processing of video and audio files, widely used for format trans-coding, basic editing (trimming and concatenation), video scaling, and video post-production effects source
Before we proceed , lets first get the FFmpeg set on the PC
Installing FFmpeg on Linux
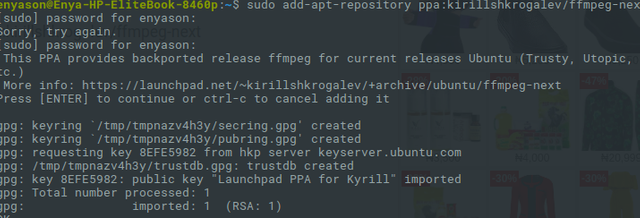
This Recording software is built on linux (Elementary OS) so i decide to show installation of FFmpeg on this distro. Open the command terminal and put the following commands
Add the PPA repository
sudo add-apt-repository ppa:kirillshkrogalev/ffmpeg-nextoutput image
Update local repository index
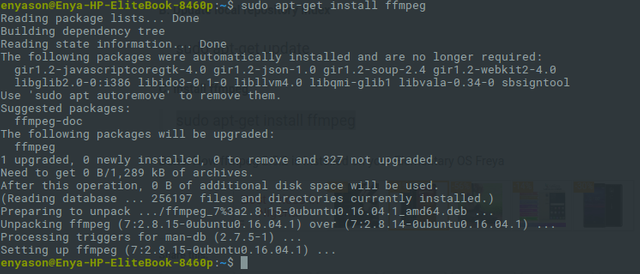
sudo apt-get updateInstall ffmpeg
sudo apt-get install ffmpeg
output image
Windows users should follow this link for guide on how to install FFmpeg on their PC
https://www.wikihow.com/Install-FFmpeg-on-Windows
Basic Commands with FFmpeg in the Command Terminal
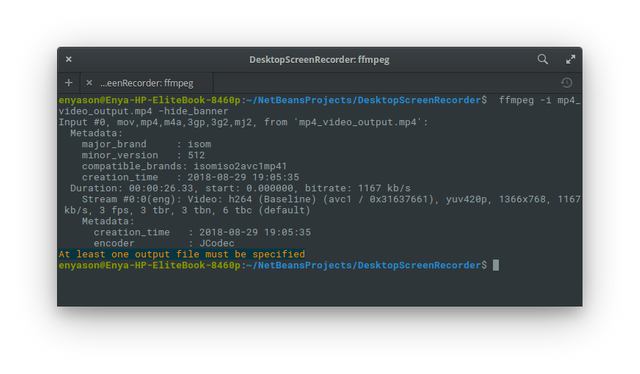
1. Getting audio/video file information
To display your media file details, run:
$ ffmpeg -i mp4_video_output.mp4 -hide_banner
output image
2. Converting video files to different formats
FFmpeg is a powerful audio and video converter, we can convert media files between different formats. To convert mp4 file to avi file, run:
$ ffmpeg -i mp4_video_output.mp4 avi_video_output.avi
3. Merge Video and Audio File
With FFmpeg, we can with ease merge an audio-less video file with an audio file. This Functionality interest us more as this is exactly what we need in our Screen recording Software to merge the audio tracks from the microphone and the video frames.
ffmpeg -i mp4_video_output.mp4 -i audio_output.wav -c:v copy -c:a aac -strict experimental output.mp4
You may be wandering how this will work from our program interface owing to the fact that the above commands are run from the command terminal. Well luckily for us we can access the terminal runtime environment from Java directly. With this we can execute raw FFmpeg commands directly. Another way to do this is to use a Java FFmpeg Wrapper Library.
STEP 3 : Convert Initial MP4 output to AVI
Another question may be why are we converting our initial MP4 output to AVI ? The answer is this:
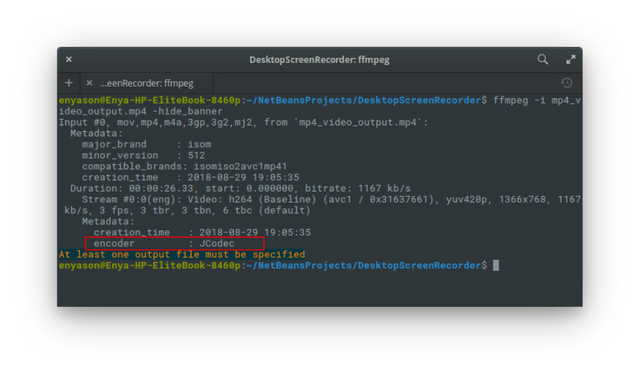
The initial Mp4 was encoded by the JCodec encoder and trying to merge the audio and video always give a faulty output. After much research and experimenting, i discovered that the Fault was from the JCodec encoder. The Video frames are always on hold till the audio tracks are done playing.
Trick I applied
I converted the initial Mp4 output having a Jcodec Encoder to AVI format
The code below output the properties of the Mp4 showing its Codec
$ ffmpeg -i mp4_video_output.mp4 -hide_banneroutput image with jcodec encoder
Merge the video output in AVI format with the audio in ACC , giving it an Mp4 output
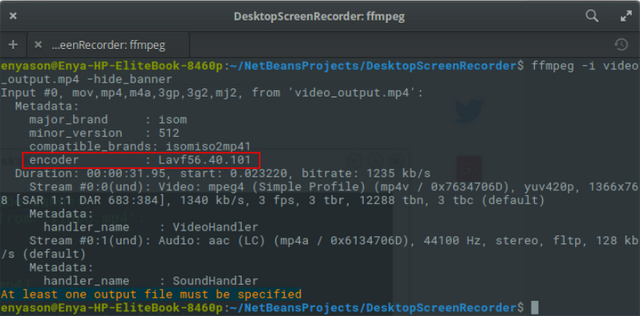
The command below does this conversion. See the output image below to see the new codec use to encode the final output in Mp4 format. See red rectangle area.
ffmpeg -i mp4_video_output.mp4 -i audio_output.wav -c:v copy -c:a aac -strict experimental output.mp4output image with Lavf56.40.101 encoder
Implementing the above conversion from Java
This method will be used to execute any FFmpeg commands.
     public static void executeFfMpeg(String exec) {

        Runtime runtime = Runtime.getRuntime();

        try {
            Process process = runtime.exec(exec);

            int exitVal = process.waitFor();
            System.out.println("Exited with error code " + exitVal);

        } catch (IOException ex) {
            ex.printStackTrace();
        } catch (InterruptedException ex) {
            ex.printStackTrace();
        }

    }
Code explanation
- The executeFfMpeg method is a static method of ExecFfmpeg class which accepts a FFmpeg query as String and then executes.
- We initialize the runtime object using
Runtime.getRuntime();With this we get access to the program runtime environment. - We call the execute method of the runtime object, passing the FFmpeg query received from the method params
runtime.exec(exec);This returns a process object which could be used to gain information of that particular process and also control it . process.waitFor();this line of code causes the current thread to wait until the process is terminated. It returns an integer value showing the termination status. 0 usually represent normal termination.
For the conversion from Mp4 to AVI the String below will be used at any time
String execConvertToAVI = "ffmpeg -i mp4_video_output.mp4 -q:v 0 avi_video_output.avi";
STEP 4 : Merge AAC Audio with AVI Video
Basically the merging of these two formats will still be done by the executeFfMpeg method shown above. The Only difference with the conversion implementation is the FFmpeg command passed into the method. Below is the command passed into the method.
String execMuxAudioVideo = "ffmpeg -i avi_video_output.avi -i audio_output.wav -c:v copy -c:a aac -strict experimental video_output.mp4";
STEP 5 : Update MainScreenRecorderFrame
After implementing Audio sound recording, Video Format conversion and Audio and Video Merging in separate classes, we have to integrate it into our existing program.
Update buttonStartRecordingActionPerformed method of the MainScreenRecorderFrame
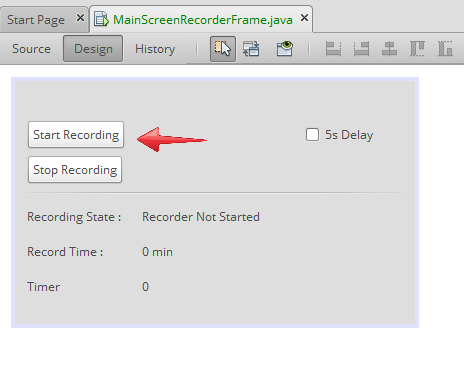
This method is executed when the start recording button is click
private void buttonStartRecordingActionPerformed(java.awt.event.ActionEvent evt) { initScreenRecorderObjects("mp4_video_output"); scheduleTimerTasks(); audioRecorder = new AudioRecorder(); audioRecorder.start(); }Code explanation
- Here we initialize screen recording objects and also scheduling the timer tasks. Check Part 2 for complete tutorial if you are not clear on what happens here with those two methods.
- Now after we must have initialized screen recording objects, we create a new instance of our AudioRecorder class.
- We then call start() form the AudioRecoder instance to start audio recording.
- Update buttonStopRecordingActionPerformed method of the MainScreenRecorderFrame
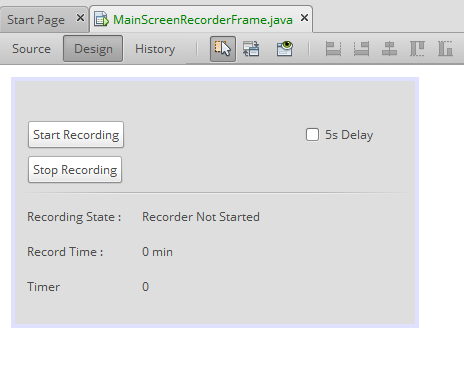
This method is triggered when the stop button is clicked
 private void buttonStopRecordingActionPerformed(java.awt.event.ActionEvent evt) {
        if (isRecording) {

            stopScreenRecording();
            audioRecorder.stopRecording();

            ExecFfmpeg.executeFfMpeg(execConvertToAVI);
            ExecFfmpeg.executeFfMpeg(execMuxAudioVideo);
        }

        isRecording = false;

    }
complete source code
Code explanation
- The method has an IF block which is executed if the program is currently recording
- In the block,
stopScreenRecording();is called to stop screen recording whileaudioRecorder.stopRecording();is called to stop the audio recording. - At this line the audio and screen recording has stopped and audio saved as audio_output.aac to directory and screen recording saved as mp4_video_output_mp4 to directory as well.
ExecFfmpeg.executeFfMpeg(execConvertToAVI);this line of code takes the saved video file in mp4 format and converts to AVI format as avi_video_output.aviExecFfmpeg.executeFfMpeg(execMuxAudioVideo);this line of code does the actual merging of the audio_ouput.wav and the avi_video_output.avi , saving it as video_ouput.mp4
STEP 6 : Program Testing
With steps one to 5 completed, we can now proceed to testing of the software.
Testing the software gives the output video below
Curriculum
- How to Build a Program for PC Screen Recording(Video) with Java - Part 1
- How to Build a Program for PC Screen Recording(Video) with Java - Part 2
Proof of Work
The complete source code can be found on gitHub
https://github.com/enyason/DesktopScreenRecorder
Thank you for your contribution.
Good tutorial and very simple code.
Thank you for your work.
Your contribution has been evaluated according to Utopian policies and guidelines, as well as a predefined set of questions pertaining to the category.
To view those questions and the relevant answers related to your post, click here.
Need help? Write a ticket on https://support.utopian.io/.
Chat with us on Discord.
[utopian-moderator]
Downvoting a post can decrease pending rewards and make it less visible. Common reasons:
Submit
Thank you for your review, @portugalcoin!
So far this week you've reviewed 6 contributions. Keep up the good work!
Downvoting a post can decrease pending rewards and make it less visible. Common reasons:
Submit
thanks @portugalcoin for reviewing my post
Downvoting a post can decrease pending rewards and make it less visible. Common reasons:
Submit
Hey, @ideba!
Thanks for contributing on Utopian.
We’re already looking forward to your next contribution!
Get higher incentives and support Utopian.io!
Simply set @utopian.pay as a 5% (or higher) payout beneficiary on your contribution post (via SteemPlus or Steeditor).
Want to chat? Join us on Discord https://discord.gg/h52nFrV.
Vote for Utopian Witness!
Downvoting a post can decrease pending rewards and make it less visible. Common reasons:
Submit