Repository
https://github.com/igormuba/EthereumFrontEnd/tree/master/class4
What will I learn?
- Adding libraries to our React app
- Creating, exporting and importing components
- Working with React-Bootstrap
Requirements
- Chrome or Brave Browser
- Metamask browser extension
- Node/NPM
- Ganache
Difficulty
- Intermediary.
Introduction
It is recommended (but not strictly necessary) that you have followed my previous tutorial so that you can not just have the code, but understand what we've been doing so far.
I have been away from Steem for over 1 month, so it is understandable that you may not have the code from the previous class. So, if you don't want to take a refresher on the previous tutorial, or you have just landed in this one without following the others, you can just clone the code on Github from the previous class, to make sure we are "on the same page".
Also, the code for the ERC20 token we are using for this tutorial can be found here. Keep in mind this is a very basic token, with not many security and efficiency features. We just want something that we can easily and quickly use to build an interface on top of.
Bootstrap
You can actually use any CSS/Javascript library you want. I, personally, prefer Bootstrap. Bootstrap is an open source CSS library, and it has support for React! With this, you can either prototype or build production apps quickly and easily. It gives you many components out of the box. You can use those components to build a beautiful and all around complete interface. You can read more about React-Bootstrap from their Github page.
I am using this one for this tutorial because is the one I am more familiar with.
To get started, cd to your project directory and do:
npm install react-bootstrap bootstrap
This will give you the React-Bootstrap components. But you still need to do one more thing. On their documentation, they state clearly "we don't ship with any included CSS". That means, you will get the components, but they won't have Bootstrap styles. That is because Bootstrap is not version dependent. It is highly compatible with browsers, systems, and versions of its own JS and CSS, but that means you have to provide the CSS version you want to use (maybe you like a previous version, so you are free to use it).
On this tutorial, I will use the recommended and latest CSS version. To do that, on your React project folder, find the folder called public, and inside index.html add:
<link
  rel="stylesheet"
  href="https://maxcdn.bootstrapcdn.com/bootstrap/4.3.1/css/bootstrap.min.css"
  integrity="sha384-ggOyR0iXCbMQv3Xipma34MD+dH/1fQ784/j6cY/iJTQUOhcWr7x9JvoRxT2MZw1T"
  crossorigin="anonymous"
/>
So your file will look like this:
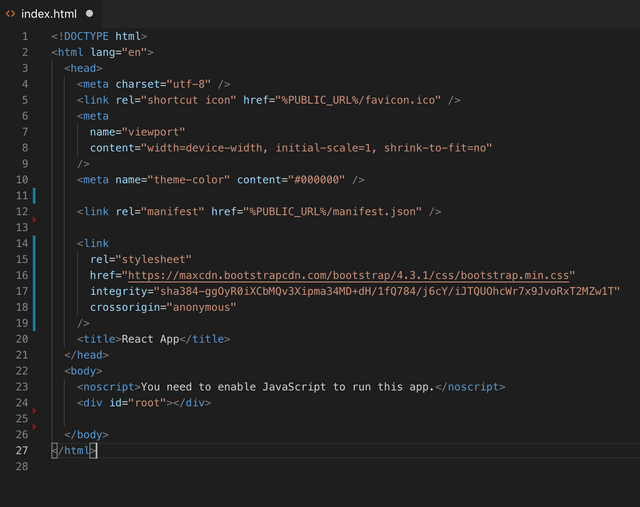
Wait, isn't everything in React a JSX component?
The previous section opens a great window for me to explain a bit better about how React works.
The file we have just edited to add some global CSS is the index. See the index.html as the "outermost box". Everything you code in React will be rendered inside there!
Notice the div declared as:
<div id="root"></div>
There is where every page will be rendered! From there on, everything is a component inside the root div. Further on this course, you will make components inside components. Furthermore, you will understand why every react component has to "return" or "render" a single div, and everything must be inside a single div.
Just be mindful that everything we will do will be rendered inside this very root div, the outermost react "box"!
Our first React component
As said before, React-Bootstrap gives us many components for free.
So far our app looks like:
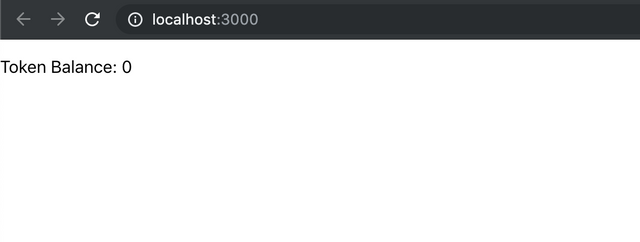
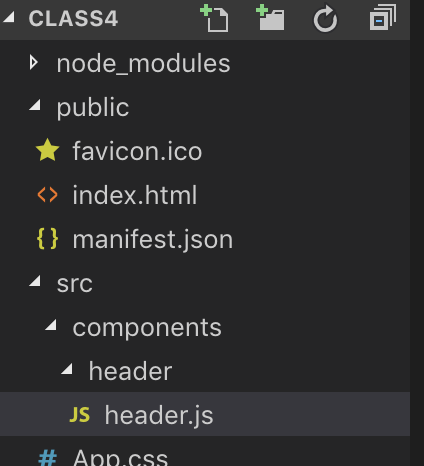
It doesn't look like a real app. By adding a nabber we can give more life to it. To add a navbar you just need to import the component from React-Bootstrap and use it. But we want to make things clean. So, create a new directory, called components, inside the src folder. Inside this folder create a new one called header. Seems like too much work for a simple navbar, but down the road having a folder for each component will be useful, as a single component may have multiple subcomponents!
Inside there you can then create the header.js (remember, everything Is JSX!).
This folder structure looks like:
Pro Tip:
The new components come, as expected, empty:

There is nothing scarier for an artist than a blank canvas, you know, when you stare into the abyss long enough, the abyss stares back at you. But you don't have to stare at it. Most code editors offer an autocomplete tool for free.
In my case, I am using VS Code form Microsoft, so, if I type RCC (React Class Component):
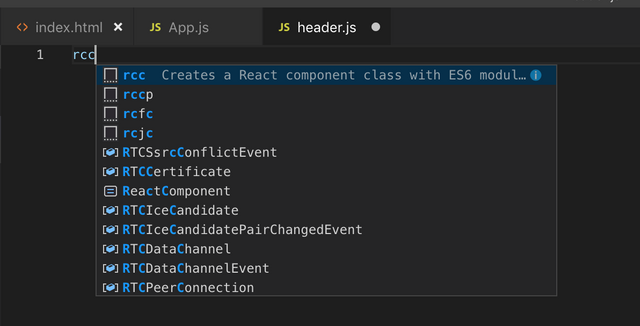
It will already give me a boilerplate so that I have to do less typing! Check it:
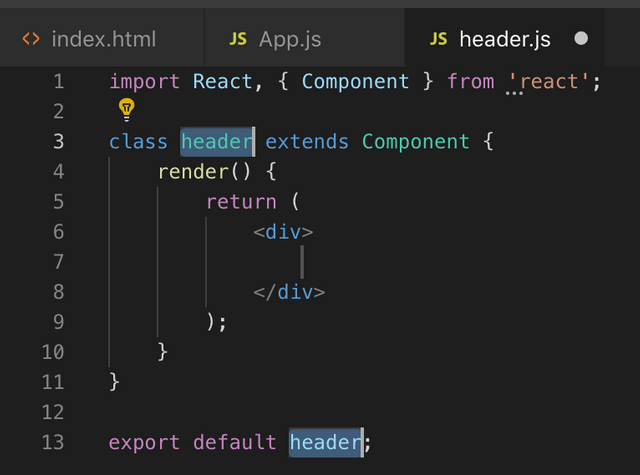
Just remember to rename the header to Header (capitalize it). This is not a convention, like camelCase, this is actually necessary if you don't, React will throw errors at you!
Adding a Navbar
First, on our Header component, we import the Navbar from bootstrap:
import Navbar from "react-bootstrap/Navbar";
Now, see that on the class Header you will see what I have discussed before:
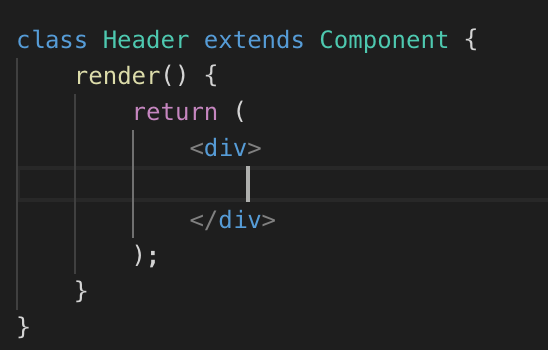
The components return a single div, so everything we will build will be inside that Div. Also, keep in mind THIS IS NOT HTML! It is JSX, which is made to look like HTML and will, eventually, be "compiled" to HTML. It looks like it, but it is not! So, if, for example, you give a div a class as <div class="container"> it will throw you an error when running it, because class is a JavaScript reserved word. In this case, you should call it className, as <div className="container">. Keep that in mind when coding JSX!
As we have already imported the Navbar component, you can create a navbar(inside the div!) with:
<Navbar bg="dark" variant="dark">

</Navbar>
Before we add components inside the Navbar (components inside components!) let's see it on our interface.
You won't see it there yet because we have created the new component, but we didn't say for the main app component to render this component!
For this, on the App.js import our Header component with:
import Header from './components/header/header';
And inside the App div component add the self-closing Header component:
<Header/>
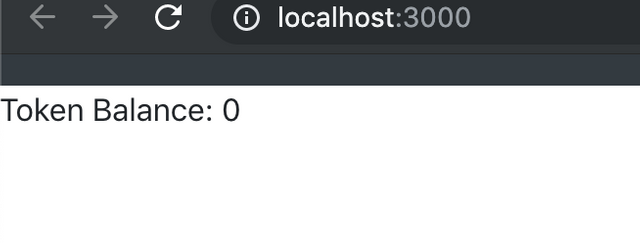
If you restart the server now you will see a very, very, small Navbar without nothing on it:
Adding components to the Navbar
Remember that everything on React is a component? To add more information to the Navbar, such as navigation links, you also need to import those components.
So, back on our header.js, do:
import Nav from 'react-bootstrap/Nav';
And inside the Navbar component on the component div, you can start adding more information.
Let's start with a logo:
<Navbar.Brand href="#home">ERC20</Navbar.Brand>
And add two links (this is why we have imported Nav):
<Nav className="mr-auto">
    <Nav.Link href="#home">Home</Nav.Link>
    <Nav.Link href="#home">Transfer</Nav.Link>
</Nav>
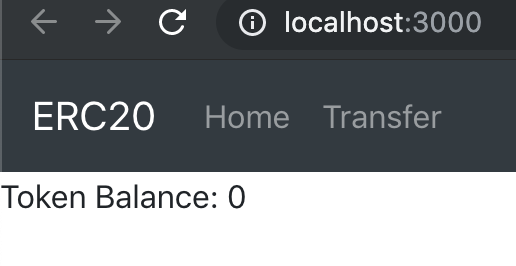
Now, if you save everything, restart the server and reload the page, you will be able to see the navbar we have built, with the name we have given it (ERC20) and the link to the "home" and "transfer" pages (we will build those later):
And there you have it. Now we have React-Bootstrap on our app, so we can make things prettier! After all, blockchain is not for geeks and programmers, users deserve pretty interfaces, and that is why this series is about making front ends for dapps!
Series curriculum
Beneficiaries
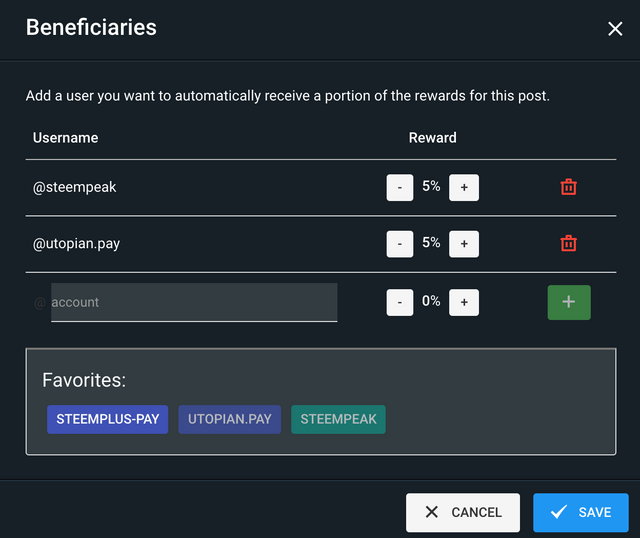
This post has as beneficiaries
- @utopian.pay with 5%
- @steempeak with 5%
using the SteemPeak beneficiary tool:
Thank you for your contribution @igormuba.
After reviewing your tutorial we suggest the following points listed below:
Again an excellent tutorial for the open source community. Good job!
Interesting explanation how to apply React-Bootstrap and you are quite right the blockchain users deserve more beautiful interfaces.
Thank you for your work in developing this tutorial.
Looking forward to your upcoming tutorials.
Your contribution has been evaluated according to Utopian policies and guidelines, as well as a predefined set of questions pertaining to the category.
To view those questions and the relevant answers related to your post, click here.
Need help? Chat with us on Discord.
[utopian-moderator]
Downvoting a post can decrease pending rewards and make it less visible. Common reasons:
Submit
Thank you for your review, @portugalcoin! Keep up the good work!
Downvoting a post can decrease pending rewards and make it less visible. Common reasons:
Submit
Hey, @igormuba!
Thanks for contributing on Utopian.
We’re already looking forward to your next contribution!
Get higher incentives and support Utopian.io!
Simply set @utopian.pay as a 5% (or higher) payout beneficiary on your contribution post (via SteemPlus or Steeditor).
Want to chat? Join us on Discord https://discord.gg/h52nFrV.
Vote for Utopian Witness!
Downvoting a post can decrease pending rewards and make it less visible. Common reasons:
Submit
Hi, @igormuba!
You just got a 0.27% upvote from SteemPlus!
To get higher upvotes, earn more SteemPlus Points (SPP). On your Steemit wallet, check your SPP balance and click on "How to earn SPP?" to find out all the ways to earn.
If you're not using SteemPlus yet, please check our last posts in here to see the many ways in which SteemPlus can improve your Steem experience on Steemit and Busy.
Downvoting a post can decrease pending rewards and make it less visible. Common reasons:
Submit