What Will I Learn?
Because in this tutorial i will create login system using php code and mysql as database, you will be learn both of that in one package ... Let's see what we got after learn this tutorial
You will learn how to create table in mysql database using phpmyadmin,
You will learn how to connect your php to database,
You will learn how to create function using php code,
You will learn how to validate your login system using php
Requirements
You need to understand basic of XAMPP and Phpmyadmin,
You need to understand basic of PHP programming language,
You need to understand basic of HTML language,
You need to understand basic of SQL language
Difficulty
- Basic
Tutorial Contents
I think every websites must have a login system, because that's why this login system is very important not only the website using login system ... but smartphone too have a login system to keep the content still safe from people who are not have access on it ...
This time I will try to share how to make system login in website using php as programming language and mysql as database ...
But everyone have their own way to make login system ... this time I will create the login system using function in php ...
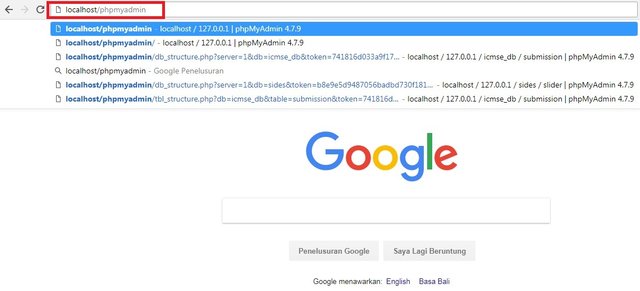
First we need to create a database using phpmyadmin, let's type localhost/phpmyadmin in the search bar of your browser... before that you need to start your xampp first or you canot access that url.
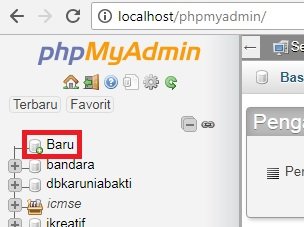
Next it will open the main view of phpMyAdmin, please create a new database by clicking the Baru or Create in English ...
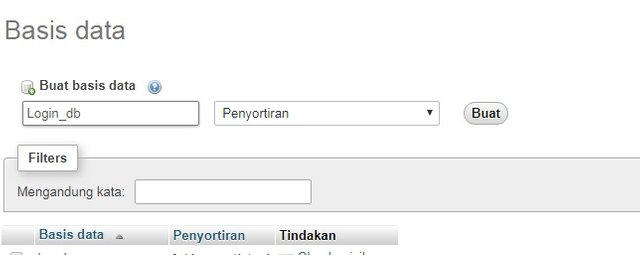
after that let's create your databse name... here i use login_db as my databse name... then clik the buat button or create in english...
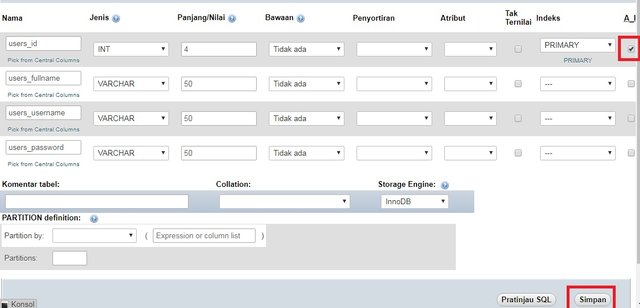
after that let's create your table name... here i use uses as my table name... and specify the number of columns in your table ... here i create 4 for my column number, because i will create
users_id for column one , users_fullname for column two, user_username for column three, users_password for coloumn four, if you not understand ... just follow first...
after that just click go button at the bottom right

after that just follow this image, make sure auto increment (A_I) checked for auto fill that column, after that just click simpan button or save in english
until here we have finished creating the database and table that we will use to create our login system
let's create one folder called login on your htdocs(xampp), inside that's folder create three files... first file i called connection.php second file i called function.php three file i called login.php .... as you can see this image showing what we have created on tree structure...
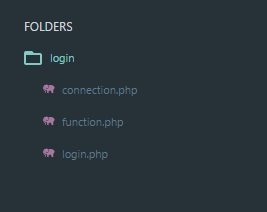
to connect our login system using php programming language let's copy this code into connection .php file where we have been created
<?php
$connection = mysqli_connect('localhost', 'root', '', 'login_db');
if (!$connection) {
    echo 'connection failed';
}
mysql_connect(); is function for connection our aplication to our mysql database.
in mysql_connect(); we have three parameters first is 'localhost' for our host, second 'root' is our username of mysql database, third '' is empty value for our password database, because my database have no password i just create like this '' fourth 'login_db' is the name of our database where we have been created...
in the login.php file lets copy this code
<?php
include "function.php";
    $loginSuccess = "";
    $loginFail = "";
    if (isset($_POST['login'])) {
        if(login_process($_POST['username'], $_POST['password'])){
            $loginSuccess = 'Login Success';
        }else{
            $loginFail = 'Login Failed';
        }
    }
?>

<!DOCTYPE html>
<html lang="en">
<head>
    <meta charset="UTF-8">
    <title>login Page</title>
    <style>
        body {
  background: #2d343d;
}

.login {
  margin: 20px auto;
  width: 300px;
  padding: 30px 25px;
  background: white;
  border: 1px solid #c4c4c4;
}

h1.login-title {
  margin: -28px -25px 25px;
  padding: 15px 25px;
  line-height: 30px;
  font-size: 25px;
  font-weight: 300;
  color: #ADADAD;
  text-align:center;
  background: #f7f7f7;

}

.login-input {
  width: 285px;
  height: 50px;
  margin-bottom: 25px;
  padding-left:10px;
  font-size: 15px;
  background: #fff;
  border: 1px solid #ccc;
  border-radius: 4px;
}
.login-input:focus {
    border-color:#6e8095;
    outline: none;
  }
.login-button {
  width: 100%;
  height: 50px;
  padding: 0;
  font-size: 20px;
  color: #fff;
  text-align: center;
  background: #f0776c;
  border: 0;
  border-radius: 5px;
  cursor: pointer;
  outline:0;
}

.login-lost
{
  text-align:center;
  margin-bottom:0px;
}

.login-lost a
{
  color:#666;
  text-decoration:none;
  font-size:13px;
}

    </style>
</head>
<body>
    <form class="login" action="" method="post">
    <h1 class="login-title">Login</h1>
    <?php if ($loginSuccess != '') {
        echo '<h4 style="color:green">'.$loginSuccess.'</h4>';
    }elseif($loginFail != ''){
        echo '<h4 style="color:red">'.$loginFail.'</h4>';
    } ?>
    <input type="text" class="login-input" name="username" placeholder="Username" autofocus>
    <input type="password" class="login-input" name="password" placeholder="Password">
    <input type="submit" name="login" value="Login" class="login-button">
  </form>
</body>
</html>
and in the function.php file lets copy this code
<?php
include "connection.php";

function login_process($username,$password){
    $username = escape($username);
    $password = escape($password);

    global $connection;
    $query = "SELECT * FROM users WHERE users_username = '$username' AND users_password = '$password'";
    $result = mysqli_query($connection, $query);
  if (mysqli_num_rows($result) > 0) {
    return true;
  }
}

function escape($data){
  global $connection;
  $data = trim($data);
  $data = mysqli_real_escape_string($connection, $data);
  $data = htmlspecialchars($data, ENT_QUOTES);
  $data = strip_tags($data);
  return $data;
}

?>
lets insert our data into our database first,
open our phpmyadmin and click tambahkan or **insert **in english...

after you fill the form, just click go button

after that lets test our login system, type** localhost/login/login.php** at your browser search bar like this: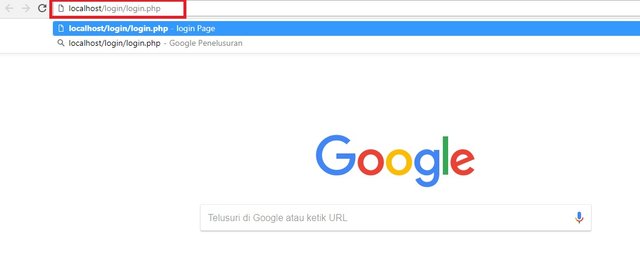
type your usernmae and password at the form and click login button
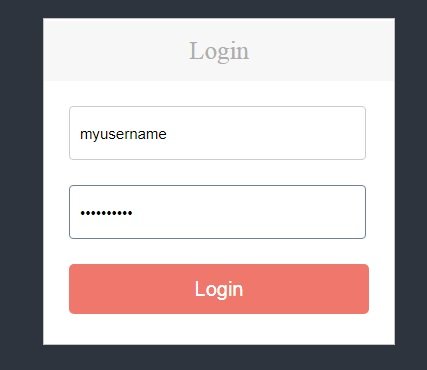
Posted on Utopian.io - Rewarding Open Source Contributors
Your contribution cannot be approved because it does not follow the Utopian Rules.
Need help? Write a ticket on https://support.utopian.io.
Chat with us on Discord.
[utopian-moderator]
Downvoting a post can decrease pending rewards and make it less visible. Common reasons:
Submit
Hey @portugalcoin, I just gave you a tip for your hard work on moderation. Upvote this comment to support the utopian moderators and increase your future rewards!
Downvoting a post can decrease pending rewards and make it less visible. Common reasons:
Submit
✅ @instink, congratulations on making your first post! I gave you a $.05 vote!
Will you give me a follow? I'll follow you back in return!
Downvoting a post can decrease pending rewards and make it less visible. Common reasons:
Submit
Congratulations @instink! You have completed some achievement on Steemit and have been rewarded with new badge(s) :
Click on any badge to view your own Board of Honor on SteemitBoard.
For more information about SteemitBoard, click here
If you no longer want to receive notifications, reply to this comment with the word
STOPDownvoting a post can decrease pending rewards and make it less visible. Common reasons:
Submit