
Source
Introduction
One of the most relevant subjects at the moment of programing on Php, is working with databases and tables. The world's most popular open source database management system used is MySQL. Before we start programming in php, we must know how to create MySQL databases and tables.
What Will I Learn?
In this tutorial you will learn how to create MySQL databases and tables using phpmyadmin
- You will learn how to create MySQL databases
- You will learn how to create MySQL tables
- You will learn how to insert data into MySQL tables using phpmyadmin.
Requirements
Let’s start by mentioning that is necessary that you must have previously installed XAMPP. The version we are going to use in this example is 5.6.30 for Windows.
Is necessary that you know a little of databases, however, if you don’t… we’ll learn on the way.
Difficulty
- Basic
Tutorial Contents
Once you have XAMPP installed. Open your XAMPP Control Panel
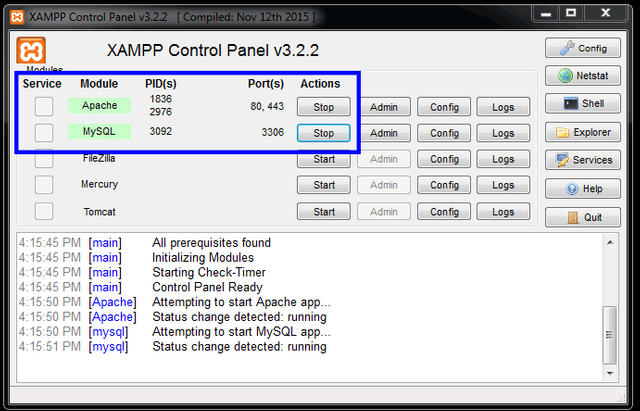
Make sure that Apache and MySQL server are on. If not, click on Start button to do it.
We open the default browser and place the following address
It will open a window just as the one we see below
Let’s create our new database for this example. We click on where the arrow No.1 indicates (New) and on the right side of the window we introduce the new name of the database and the collation. This is a weird word to indicate the type of code we want to use for the string values. Also, collation is a set of rules that defines how to compare and sort character strings. Collation tells database how to perform string matching and sorting. For our case we’ll use uft8_general_ci. This will sort in Unicode order (case-insensitive) and it works for most languages.
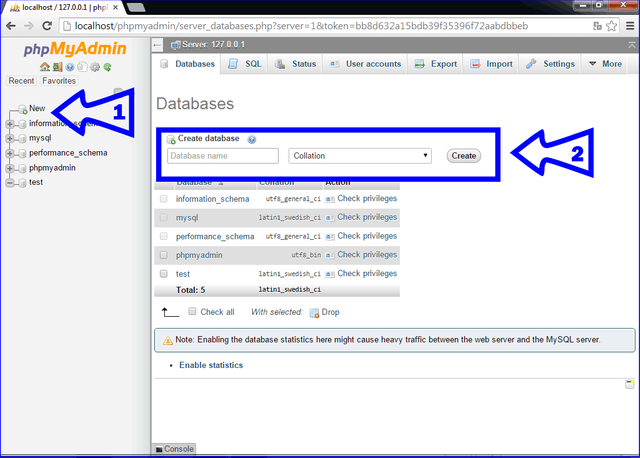
As we see on the next image, we'll type the name test1 for our database name and select the collation uft8_general_ci. Click on create, to obviously create our database.

CONGRATULATIONS! You have created your first MySQL database (It wasn’t so hard, was it?)
Let’s proceed to create a table. Assuring ourselves that you’re on the correct database, note that on the left side is shaded our database test1. Then on the right side we put the name of our first table: payments. Which it will have 4 fields (columns). We click on Go to begin defining our table.
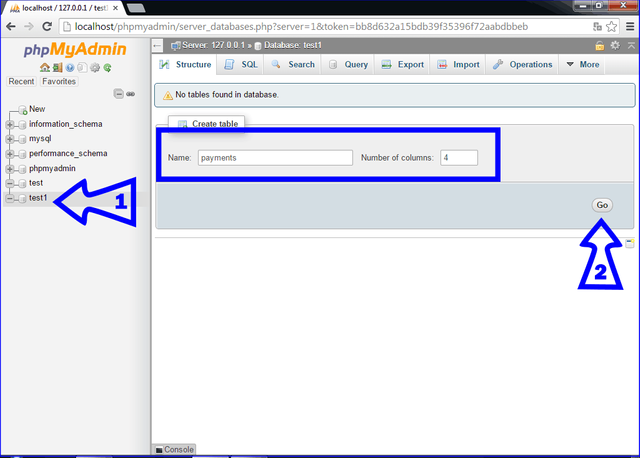
In the next image, we declare the 4 fields for our table payments: employee_id, name, salary and payday.
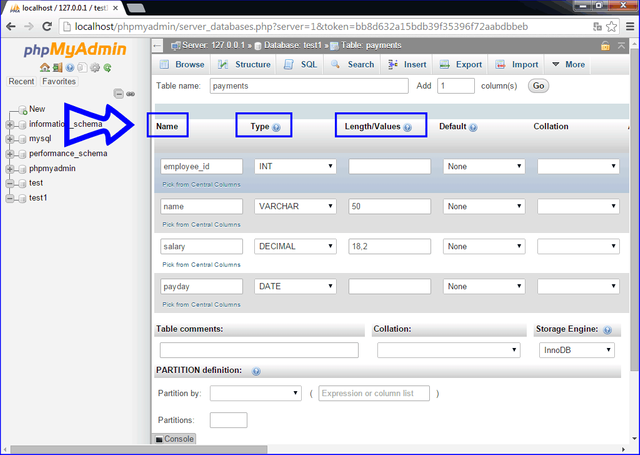
As we can see, the employee_id field is defined as an integer number (INT). The name field, is defined type VARCHAR, since it will contain alphabetic and numeric characters. Let's set a lenght (size) of 50 characters (for this example). The salary field, being a numeric value with fractional part, we define it as DECIMAL (18.2), since it will have 3 positions for the fractional part (the decimal separator point and 2 fractional numbers) and the other 15 positions for the integer part. You should always think ahead, when you design a field and its size, giving slack to your future values. Finally, we define the payday field as DATE. There are many other ways to declare a date field. However, we will work with DATE.
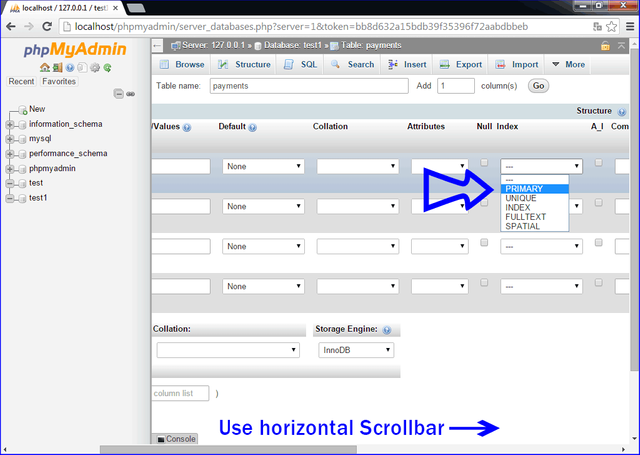
We must not forget to define the key field of the table, there must always be one. For this case, our key field will be the employee_id. For that, we move the horizontal scroll bar to the right and locate the Index column and on the same row where the employee_id field is located. We select the PRIMARY value, to define this field as the primary index field. As seen in the following image.
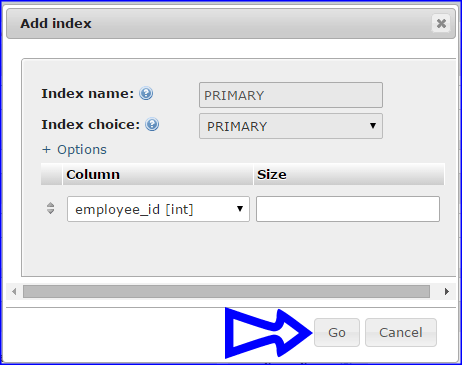
A small window will appear, indicating if we want to create the key field, click on Go
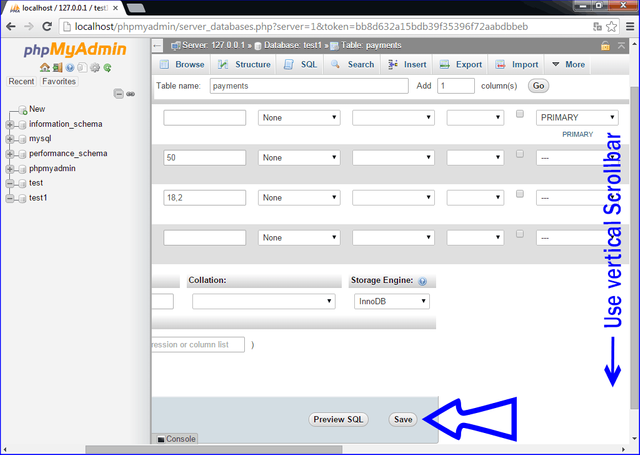
Finally, we move the vertical scroll bar completely downwards, to find the Save button and press it to create our table
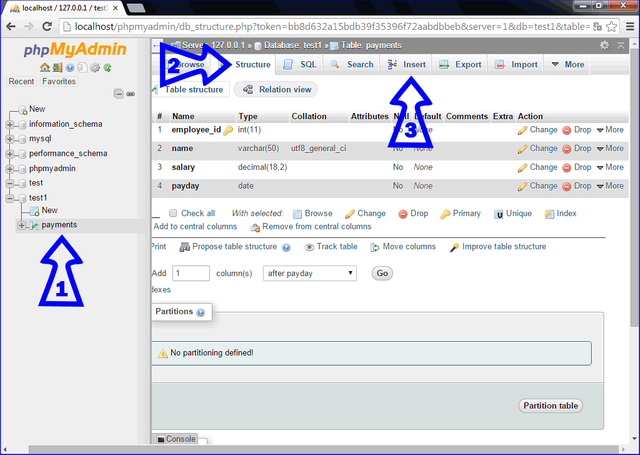
Congratulations! You have already created a MySQL table!!!
As we can see, from the left side, we can see the tables that our database contains. On the right side, we can see the structure of the table we have selected (payments). We can observe the small yellow key next to the field, indicating that it is a key field.
Let’s proceed to insert information into our payment table, by clicking on Insert (arrow #3).
We fill in the Value text fields all the information for our new record. The date field, as can be seen, must be filled in that way (year-month-day). However, we can use the symbol we see next to thin blue arrow to display a calendar in order to choose the date we want. We must click on the Go button to save the data.
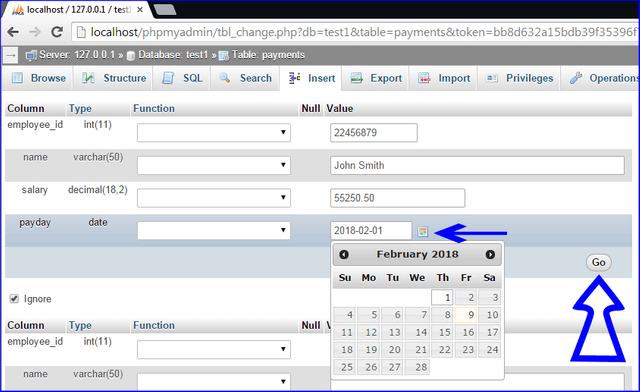
Very good!!! You have inserted 1 row of information into the table. Nice.
As you can see in the image below, for those who want to enter into the world of MySQL statement, you can see the INSERT INTO command. The phpmyadmin, was responsible for calling the command to enter the information.
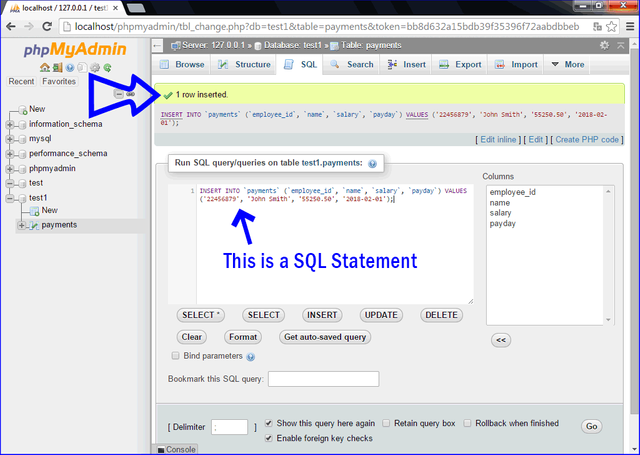
Let’s proceed to insert three more records… Using SQL statement textarea.
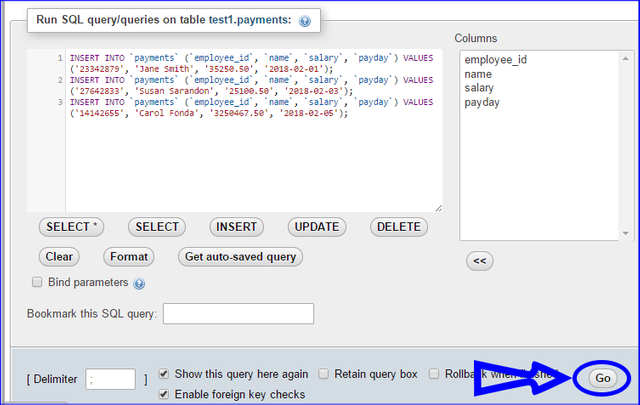
As you can see, once you click Go button, It will be inserted three more records into the payments table.
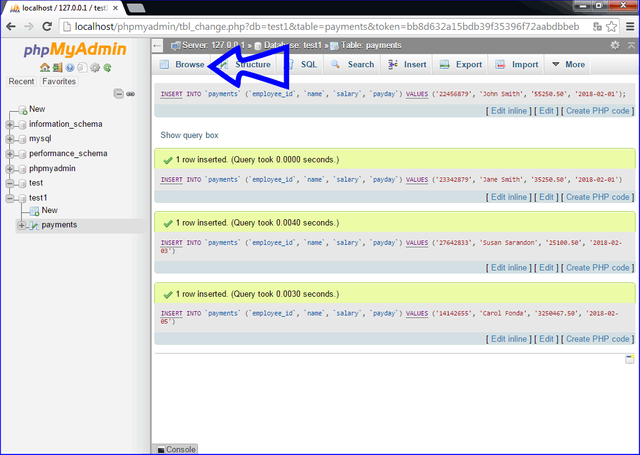
Click on Browse to see all the records we saved.
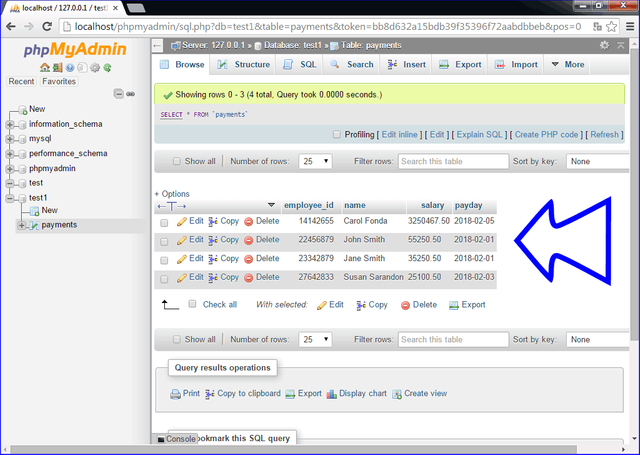
OK! We can already see above that our table has grown! It has 4 records!
We can see that phpmyadmin, used the command SELECT * from 'payments' to generate the query, we’ll do that as well later. If you want to change a value or delete a record, simply click on the Edit or Delete links of any records.
Excellent! You finally get to the end of this first part. I hope you like it.
In the next tutorials, we'll see how to perform a php script to read a MySQL table.
Curriculum
Posted on Utopian.io - Rewarding Open Source Contributors
@jadams2k18, I always try to support who contribute to open source project, upvote you.
Downvoting a post can decrease pending rewards and make it less visible. Common reasons:
Submit
Your contribution cannot be approved because it is a duplicate. It is very similar to a contribution that was already accepted here.
You can contact us on Discord.
[utopian-moderator]
Downvoting a post can decrease pending rewards and make it less visible. Common reasons:
Submit