(This tutorial is for MacOS only)
What is Hexo
Hexo A fast, simple & powerful blog framework. It's based on Node.js which is really fast. All features of GitHub Flavored Markdown are supported. It also has a powerful plugin system. My blog uegeek is now using Hexo instead of Wordpress.
Install Hexo
I recommand you read through Hexo Documentation first to have some general understanding.
1.Prepare the environment
Install Node.js

You can use nvm to install Node.js. Open the terminal in you Mac and type cURL or Wget command:
cURL:
$ curl -o- https://raw.githubusercontent.com/creationix/nvm/v0.33.2/install.sh | bash
Wget:
wget -qO- https://raw.githubusercontent.com/creationix/nvm/v0.33.2/install.sh | bash
Once nvm is installed, restart the terminal and run the following command to install Node.js: nvm install stable
Of course, you can also go to Node.js website and download the latest version.
Install Git

Install it with Homebrew can be time saving.
Follow Github's guide and creat a new SSH key:
$ mkdir ~/.ssh
$ cd ~/.ssh
$ ssh-keygen -t rsa -C "[email protected]" # you should use your email
$ pbcopy < ~/.ssh/id_rsa.pub
Now, the content of id_rsa.pub is copied by using the pdcopy command.
Login to github and go to ssh setting page. Click "Add an SSH Key". In Title, fill your computer's name. In the Key part, paste the content copied by pdcopy command. You can see how to generate a key in this page
$ git config --global user.name "yourusername
$ git config --global user.email "youremail"
3.Install Hexo
$ npm install -g hexo-cli
If you get some error about root permissions, add sudo ahead:
$ sudo npm install -g hexo-cli
Config Hexo
Enter the folder where you want to put your website content and initilize Hexo:
$ hexo init
$ npm install
After that you'll get these files in your folder:
.
├── _config.yml     #配置文件
├── package.json    #应用程序数据
├── scaffolds
├── source          #网站内容
|   ├── _drafts     #草稿
|   └── _posts      #文章
└── themes          #主题
There're more configuration details you can look up in Hexo's documentation。
Migrate from Wordpress
First, you should install Hexo's plugin hexo-migrator-wordpress :
$ npm install hexo-migrator-wordpress --save
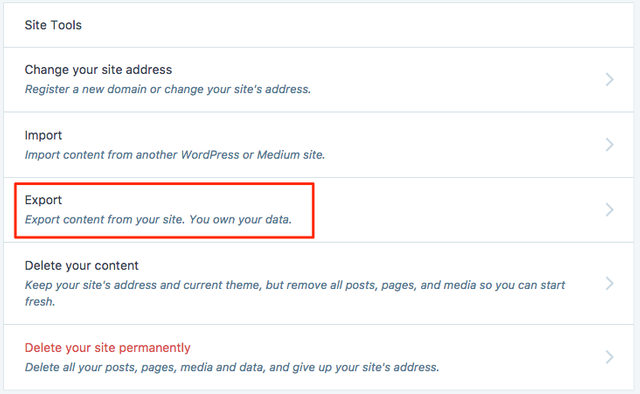
Login to your Wordpress account, export all the items from "Tool-Export".


For more information: Export — Support — WordPress.com
Then import this export file to Hexo:
$ hexo migrate wordpress <source>
source is where the Wordpress export file stores in.
Congrats! Now your posts are in Hexo's _posts category.
Start a Local Lost to Test
Now you can generate your site by simply type command:
$ hexo generate
Then start your local hexo server:
$ hexo server
If you get this means it worked:
Hexo is running at http://0.0.0.0:4000/. Press Ctrl+C to stop.
Go and check in your browser through http://0.0.0.0:4000/. Say hello to your new blog :)
Choose a Theme
There're plenty of beautiful themes in Themes | Hexo page.
Download the ones you like: git clone https://github.com/xxxx themes/xxx
To start using your theme, modify the theme setting in your site’s _config.yml. A theme should have the following structure:
├── _config.yml
├── languages
├── layout
├── scripts
└── source
Your can make many tweaks in theme _config.yml until you're happy about the features and styles.
Install plugins
Search
hexo-generator-search provides a search engine to your site.
Install:
$ npm install hexo-generator-search --save
Feed
hexo-generator-feed can generate Atom 1.0 or RSS 2.0 feed.
Install:
$ npm install hexo-generator-feed --save
Sitemap
There's a nice doc about sitemap plugin
Install:
$ npm install hexo-generator-seo-friendly-sitemap --save
Embed PDF
You can check this one: hexo-pdf
Install
$ npm install --save hexo-pdf
When you want to insert a pdf to your post, just add:
{% pdf http://7xov2f.com1.z0.glb.clouddn.com/bash_freshman.pdf %}
Config Github and Deploy
Creat a new repository use the same name as your username, and end up with “.github.io”.
Then enter into repo's Settings, find GitHub Pages and click Launch automatic page generator. This step will generate github page.
Now you should find Deployment settings in site _config.yml(not theme yml) and make some adjustment:
deploy:
  type: git
  repo: [email protected]:yourname/yourname.github.io.git
  branch: master
If you want to deploy by git, try npm install hexo-deployer-git --saveto install a plugin.
If you get these errors:
npm ERR! Darwin 15.2.0
npm ERR! argv "/usr/local/bin/node" "/usr/local/bin/npm" "install" "hexo-deployer-git" "--save"
npm ERR! node v4.2.4
npm ERR! npm  v2.14.12
npm ERR! shasum check failed for /var/folders/n4/m1w5r2rj3y77vpn_s6g87s180000gn/T/npm-8320-c250e6be/registry.npmjs.org/moment/-/moment-2.11.0.tgz
npm ERR! Expected: 584f5fb87c1f637f12937edce127dde2d206d705
npm ERR! Actual:   f3f4cb5f46c790b29b9b7bdce8435fe70ad58dbd
npm ERR! From:     https://registry.npmjs.org/moment/-/moment-2.11.0.tgz
.
You can try install by npm install hexo-deployer-git . Then npm install hexo-deployer-git --save.
After installation complete, use the deploy command in your Hexo directory:
hexo d
If deployment is ok, you can access yourname.github.io to see if it is working.
Set up Domain Name
Creat CNAME file in Github
In order to bound to your domain name, you should creat a CNAME file(without suffix) in Hexo's "public" folder. In the CNAME file put your domain name. Then your domain name can be pointed to Github server.
The deployment should take effect after several minutes.
DNS Settings
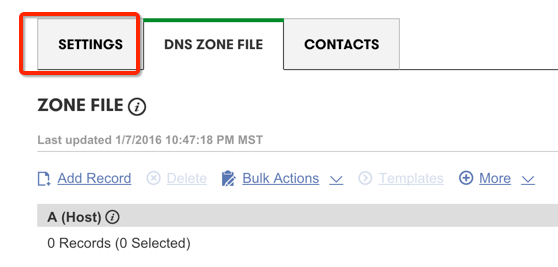
Go to your domain name provider to check DNS settings. For example, my bought my domain in Godday. And I find this instructions.

Other commands
| commands | action |
|---|---|
hexo new [layout] <title> | creat a new post |
hexo publish [layout] <filename> | publish a draft |
hexo g | generate files |
hexo d | deploy |
hexo clean publish [layout] <filename> | clean up the catche files(db.json) and files generated before (public). |
hexo s | start local server |
Posted on Utopian.io - Rewarding Open Source Contributors
Your contribution cannot be accepted as it has been established that you engaged in plagiarism in the earlier contribution. We are in the process of banning you from utopian.io.
Downvoting a post can decrease pending rewards and make it less visible. Common reasons:
Submit
Hi, shreyasgune. There must be some misunderstanding. The day before yesterday I posted an article written by myself, I can give every proof.
You can check that article I push to my Github at Jul 4, 2016: 2016.Fab.note/3_Assignment.md at master · kidult00/2016.Fab.note
The thing is, I've made two mistakes as a novice to Utopia:
I have deleted the post as soon as I realize I got the wrong account. And I absolute learn the rules hard by my mistake.
So can I have one more chance and ** not be banned from utopian**?
Thank you for your time and patience.
Downvoting a post can decrease pending rewards and make it less visible. Common reasons:
Submit
Your contribution cannot be approved because it does not follow the Utopian Rules.
You can contact us on Discord.
[utopian-moderator]
Downvoting a post can decrease pending rewards and make it less visible. Common reasons:
Submit