The SD Card Module is used for transferring data to and from the memory card. It works either on 3.3V or 5V, most of Arduino boards now use logic level shifter to accommodate 3.3V modules such SD Card Adapter.
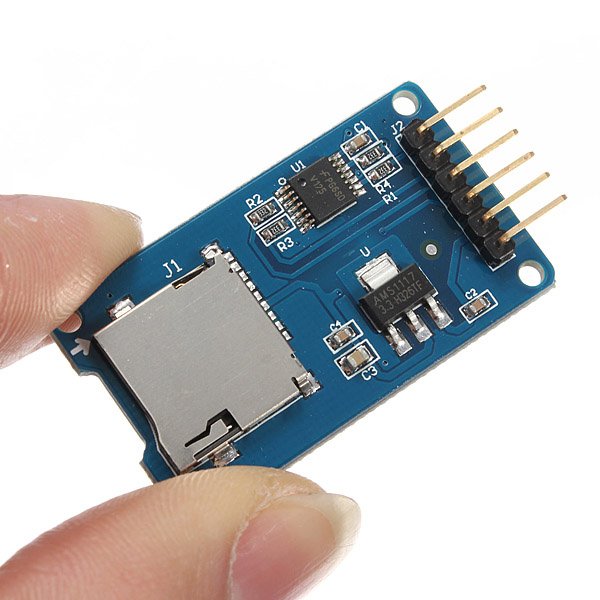
image source
What Will I Learn?
This tutorial aims to:
- Interfacing SD Card Adapter Module to Arduino Uno
- Create, Write, Read and Delete file into SD Card
Software Requirements
Hardware Requirements
- Arduino Uno
- SD Card Adapter Module
- SD Card
- Connecting Wires
Difficulty
- Basic
Tutorial Contents
Step 1: Physical Connection
The SD Card Adapter is a module that uses SPI (Serial Peripheral Interface) to communicate with Arduino. Which by default, we need to use the hardware SPI pins of our Arduino Uno from pin 11-13.
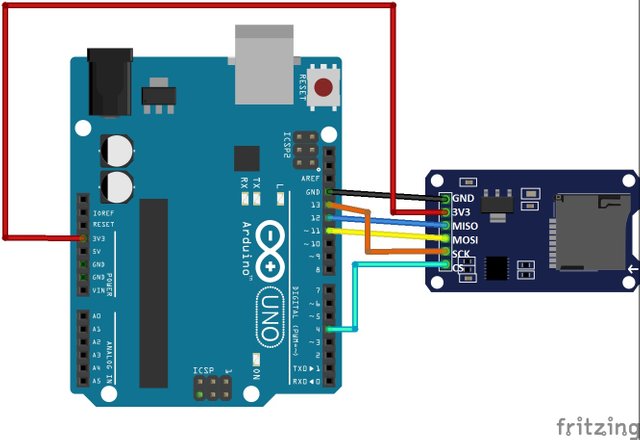
circuit developed using fritzing.
Connect the following:
| SD Card Adapter Module | Arduino Uno |
|---|---|
| SCK | pin 13 |
| MISO | pin 12 |
| MOSI | pin 11 |
| CS | pin 4 |
| 3V3 | 3.3V |
| GND | GND |
Step 2: Software Connection
- Connect the USB Cable from Arduino Uno to a PC/Laptop
- Open your Arduino IDE
- Change your board to Arduino Uno: Go to Tools > Board: > Arduino/Genuino Uno
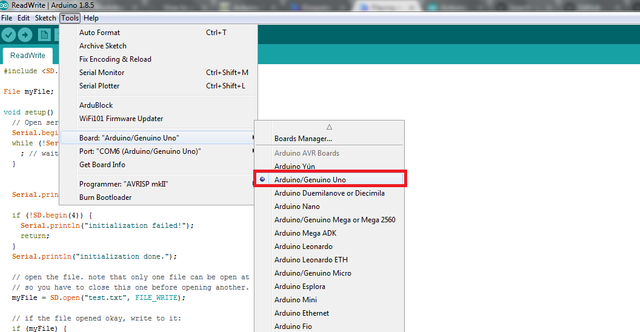
- Also, change the Port settings: Go to Tools > Port: > COM6 (Arduino/ Genuino Uno)
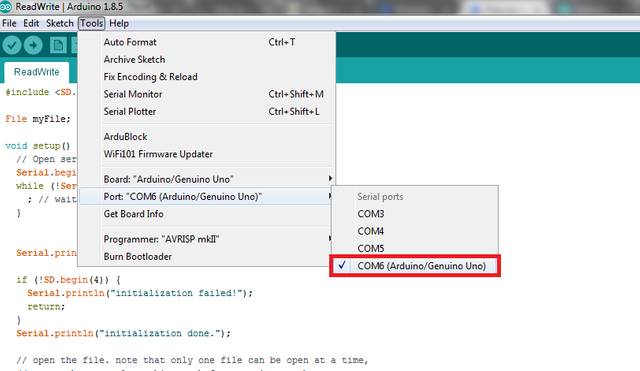
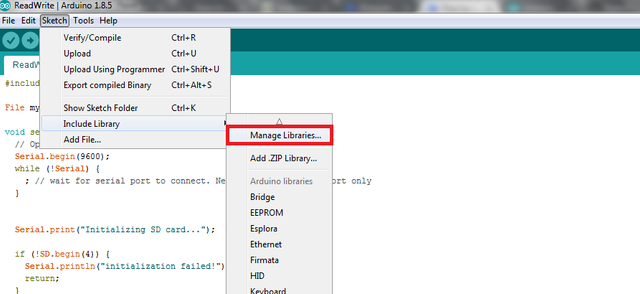
- And install the SD library this makes initialization, reading and writing of the SD card easy. Go to Sketch > Include Library > Manage Libraries
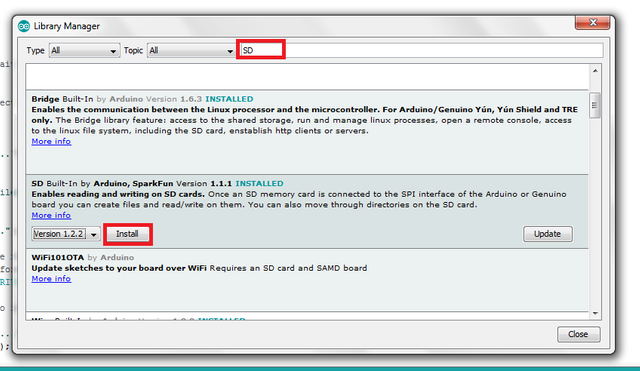
- A new window will appear and search for "SD" then click Install.
Step 3: The Code
Include the SD library to use the functions inside on it. And also the SPI to communicate the module to the Arduino Board
#include <SD.h>
#include <SPI.h>
Create a variable myFile with data type File (a function inside the library SD)
File myFile;
Code inside the setup() function:
void setup() {
}
Open serial communications and wait for port to open and connect
Serial.begin(9600); //to open the serial communication
 while (!Serial) {
    ;  //wait until its connected
}
Initializing the SD Card
Serial.print("Initializing SD card. . .");
  if (!SD.begin(4)) {      //This opens the communication of CS pin to the Arduino Board and if it is not connected the initialization will failed.
    Serial.println("Initialization failed!");
    return;
  }
// And if successful this will print.
  Serial.println("Initialization done.");
Create and open the file, note that only one file can be open at a time, so you must close the file after opening it.
 Serial.println("Creating test.txt. . ." );
myFile = SD.open("test.txt", FILE_WRITE);  //test.txt is the file name to be created and FILE_WRITE is a command to create file.
myFile.close();  //Closing the file
Check if the file is successfuly created
if (SD.exists("test.txt")) { // If the file test.txt exist.
    Serial.println("The test.txt exists.");
  } else { // And if not
    Serial.println("The test.txt doesn't exist.");
  }
If the file was successfully created, we can now write on it.
 if (myFile) {
    Serial.print("Writing to test.txt...");
    myFile.println("Testing 1, 2, 3."); //Input the *Testing 1, 2, 3.* inside the file.
    myFile.close(); // Close the file after opening
    Serial.println("Done."); //Display this if the file was successfully written.
  }
else { // And if not display error message.
   Serial.println("Error opening test.txt");
  }
Re-open the file to read the text inside on it.
myFile = SD.open("test.txt"); \\Open the file
  if (myFile) {
    Serial.println("test.txt:");
    while (myFile.available()) { // If the file is present execute loop until done.
        Serial.write(myFile.read()); //Reading the text inside the file
    }
    myFile.close(); //Close the file after opening
  } else { //Display message if it was unsuccessfully opened.
    Serial.println("Error opening test.txt");
  }
To delete the file
  Serial.println("Removing test.txt...");
  SD.remove("test.txt"); // remove is a function in SD library to delete a file
  if (SD.exists("test.txt")) { //If the file still exist display message exist
    Serial.println("The test.txt exists.");
  } else { //If the file was successfully deleted display message that the file was already deleted.
    Serial.println("The test.txt doesn't exist.");
  }
There is no code inside the loop since we have nothing to do after the setup.
void loop() {
}
- After copying the code, compile it and click the check button to Verify or press Ctrl+R
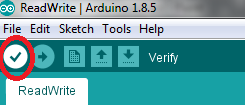
- And then check the mesage below if it has no error

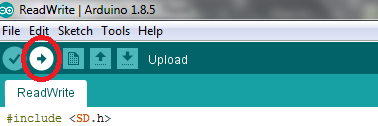
- Then you can now upload the program, just click the arrow-sign or press Ctrl+U
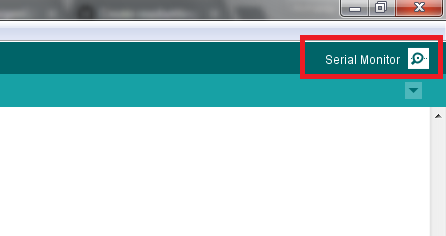
- After uploading click the serial monitor to see the output or press Ctrl+Shift+M
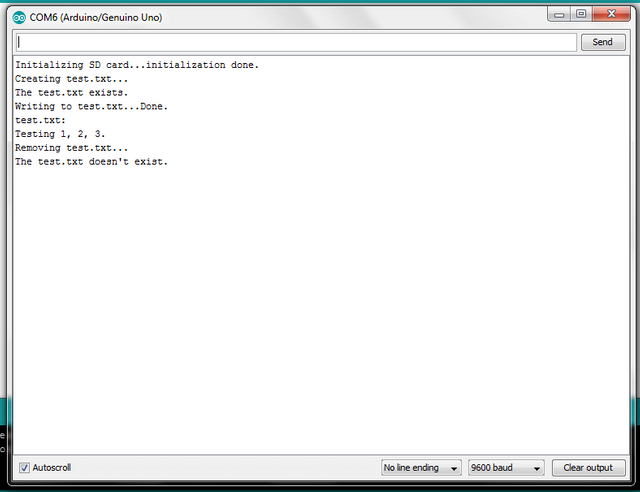
- And a new window will pop-up that displays the output
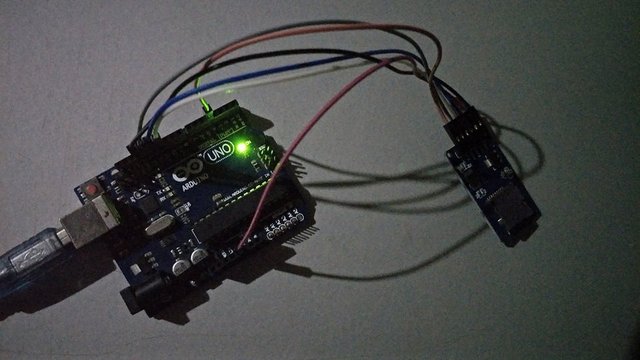
My Circuit
Curriculum
You can also check my previous tutorials in:
- Interfacing RFID RC522 Reader to Arduino: A step-by-step guide on lighting up LED
- Playing music in Arduino using SD Card Module
Thanks for reading and Happy coding!
Posted on Utopian.io - Rewarding Open Source Contributors
Great contribution sir !
Downvoting a post can decrease pending rewards and make it less visible. Common reasons:
Submit
Great Contribution :)
Downvoting a post can decrease pending rewards and make it less visible. Common reasons:
Submit
Thank you for the contribution. It has been approved.
Important Note: Explaining the code snippets would make tutorial better and differ from just copy-paste tutorial. I would appreciate if you edit this one and being careful with future ones.
Good work!
You can contact us on Discord.
[utopian-moderator]
Downvoting a post can decrease pending rewards and make it less visible. Common reasons:
Submit
Thank You sir, and i will do better for the next tutorial.
Downvoting a post can decrease pending rewards and make it less visible. Common reasons:
Submit
Hey @kimp0gi I am @utopian-io. I have just upvoted you!
Achievements
Suggestions
Get Noticed!
Community-Driven Witness!
I am the first and only Steem Community-Driven Witness. Participate on Discord. Lets GROW TOGETHER!
Up-vote this comment to grow my power and help Open Source contributions like this one. Want to chat? Join me on Discord https://discord.gg/Pc8HG9x
Downvoting a post can decrease pending rewards and make it less visible. Common reasons:
Submit