Image Link
What is Arduino UNO ?
Arduino UNO is a microcontroller board which can be connected on a computer using a USB cable, or it can be supply by Ac-to-Dc Adapter. Uno has 14 output and input pins, on that 14, 6 of them can be used as a PWM outputs.
To download the latest Arduino IDE : Pls click here
What will i learn in following this tutorial ?
- How to use Arduino Uno and Arduino IDE
- Control the LED sequentially
Components Needed
- Arduino Uno
- (4) Jumping Wires
- (3) LED Blue , Green , Red
- Breadboard
- (3) 220 ohms resistor
- USB cable

Difficulty
- Easy
Tutorial :
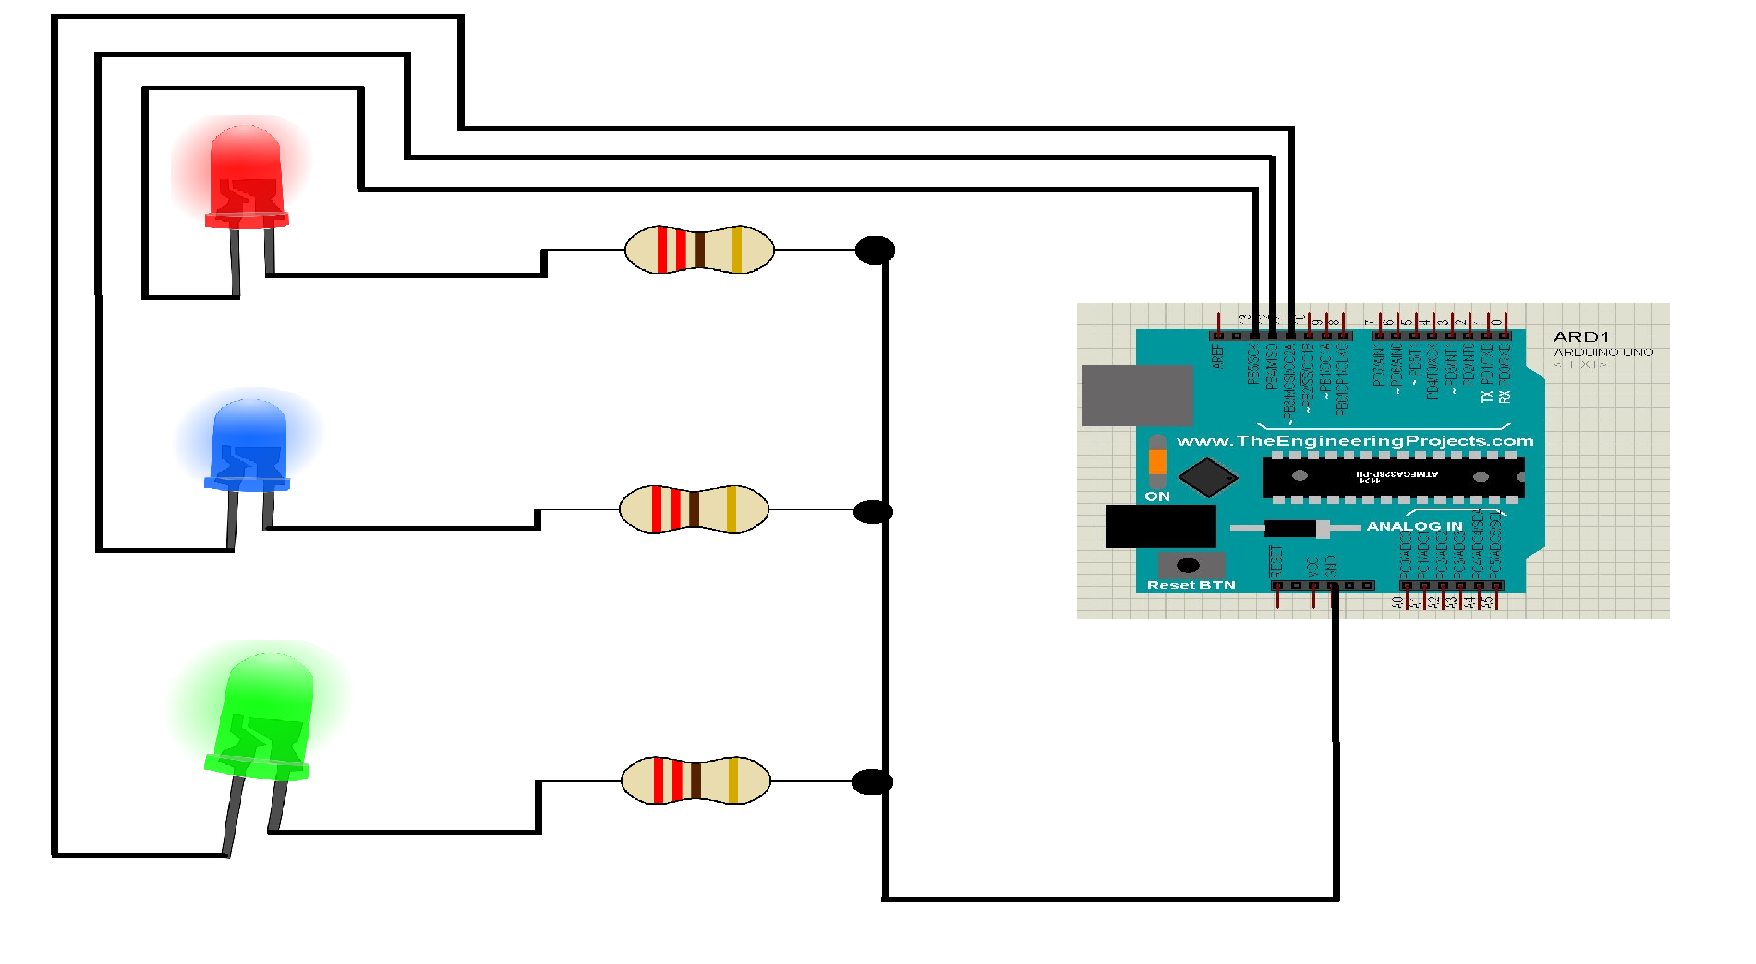
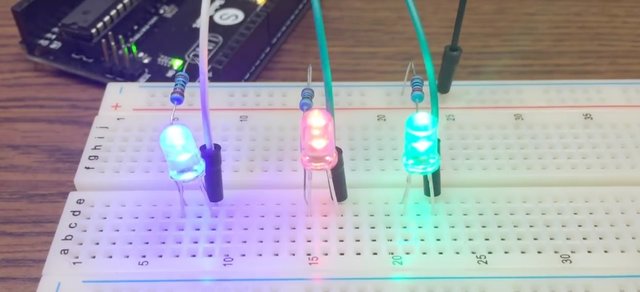
Step 1 : Physical Connection of LED to Arduino UNO.

Connect the following :
- VCC to 5V of Arduino Uno
- Led to Resistor
- Resistor to Ground
- Blue LED on pin 13 of Arduino
- Green LED on pin 12 of Arduino
- Red LED on pin 11 of Arduino

Step 2 : Connection of Arduino IDE to Arduino UNO
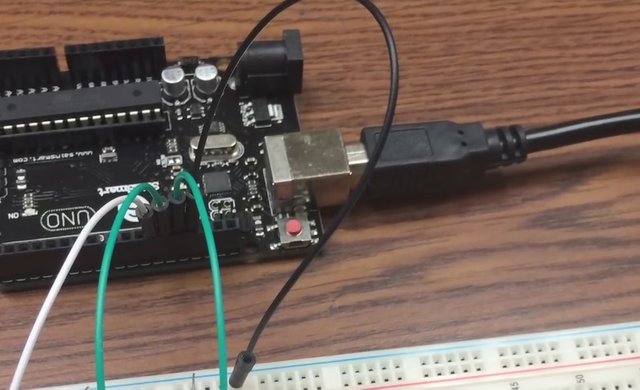
Connect the Arduino UNO using the USB cable to a computer.

Open your Arduino IDE, go to Tools > Board > and choose Arduino/Genuino Uno.

Step 3 : The Code
- Just follow the codes below.

int LED1 = 13;
int LED2 = 12;
int LED3 = 11;

void setup()
 {
   pinMode(LED1, OUTPUT);
   pinMode(LED2, OUTPUT);
   pinMode(LED3, OUTPUT);
}


void loop()
 {
  digitalWrite(LED1, HIGH);
  delay(200);
  digitalWrite(LED2, HIGH);
  delay(200);
  digitalWrite(LED3, HIGH);
  delay(200);
  digitalWrite(LED1, LOW);
  delay(300);
  digitalWrite(LED2, LOW);
  delay(300);
  digitalWrite(LED3, LOW);
  delay(300);
}
Step 4 : Compile and Run
- After compiling, don't forget to upload the sketch before running.


Remember that the LED has two tails, the short tail will be the negative and the long tail will be the positive. If you have change the code, compile and upload it again so that the latest code will run.
Failure is not a hindrance to success, yet Failure is a success because you learn something from it.
Posted on Utopian.io - Rewarding Open Source Contributors
bra imong code ipasud nas code block
Downvoting a post can decrease pending rewards and make it less visible. Common reasons:
Submit
Thank you for the contribution. It has been approved.
You can contact us on Discord.
[utopian-moderator]
Downvoting a post can decrease pending rewards and make it less visible. Common reasons:
Submit
Thank you sir for the approval
Downvoting a post can decrease pending rewards and make it less visible. Common reasons:
Submit
Hey @loydjayme25 I am @utopian-io. I have just upvoted you!
Achievements
Suggestions
Get Noticed!
Community-Driven Witness!
I am the first and only Steem Community-Driven Witness. Participate on Discord. Lets GROW TOGETHER!
Up-vote this comment to grow my power and help Open Source contributions like this one. Want to chat? Join me on Discord https://discord.gg/Pc8HG9x
Downvoting a post can decrease pending rewards and make it less visible. Common reasons:
Submit
Thank you sir
Downvoting a post can decrease pending rewards and make it less visible. Common reasons:
Submit
hala garaa loyd hhahahaha grats brother
Downvoting a post can decrease pending rewards and make it less visible. Common reasons:
Submit
I feel the hype hahaha utopian na this.
Downvoting a post can decrease pending rewards and make it less visible. Common reasons:
Submit
hahaha datu!
Downvoting a post can decrease pending rewards and make it less visible. Common reasons:
Submit