INTRODUCTION
There are many arguments about whether or not to store images and blobs generally in mongodb. In some cases it is the only option, particularly if you are using Heroku and mLabs. This tutorial will store a binary image in mongodb using the Expressjs templating engine. Expressjs can be a deep and confusing domain but we’ll use only two of its key features, routes and views. This tutorial will NOT use mongdb GridFS, in the interests of keeping things as simple as possible. We’ll limit our image file size to < 2MB and avoid needing helper libraries like this. Two important points to consider about the general approach.
- Hosting user-uploaded files on disk is not a viable solution in Heroku’s hosted nodejs environment. If you need to do this, you’ll have to introduce Amazon AWS S3 into the mix. Not difficult, just more code.
- Passing or sharing mongodb documents from your server-side nodejs to your browser-side app in native JS is not a great idea. You will be foregoing the sophisticated caching capabilities of your browser and proxy servers; both intended to speed up network transit and response times.
GETTING SETUP
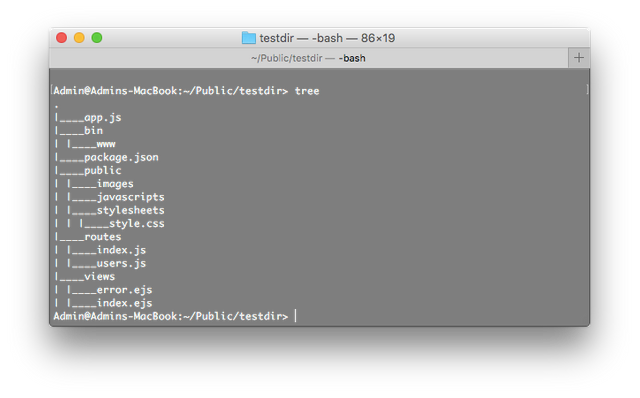
Assuming you have nodejs and Express installed you can stub out a templated app. We'll use Express Application Generator to get a directory structure and some file templates going. We'll also install nodemon, a useful utility which restarts the nodejs service each time you save a file change.
sudo npm install express-generator nodemon -g
We are choosing to use the ejs templating engine instead of the default Jade engine. If you’re unfamiliar with Jade, it looks weird. A bit like going straight to Coffeescript and bypassing Javascript.
express --ejs testdir
You have now created template files and directories in testdir

Install two additional NPM packages,
install mongodb multer --save
Run this to make sure packages and dependencies are up to date.
npm install
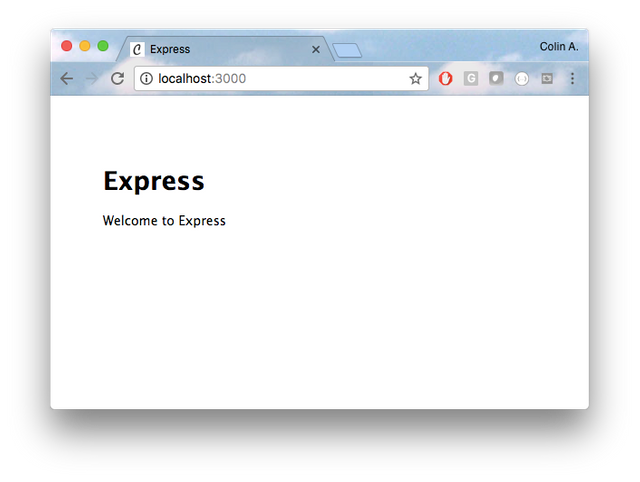
Now start your node service from within your testdir and you should be able to access it from your browser with http://localhost:3000 (or whatever port it starts on)
nodemon -e js,ejs bin/www

Creating an Image Uploader to Mongodb
Only two files are really needed for this tutorial,
- routes/index.js
- views/index.ejs
Open each in your code editor and we’ll start with views/index.ejs. This is the minimum HTML necessary to get a ‘choose file’ button and file selector going. It also includes a text field for some user entered meta data.
<form action="/uploadpicture" method="POST" enctype="multipart/form-data">
<input type="file" name="picture" accept="application/x-zip-compressed,image/*">
<input class="form-control" type="text" name="description" placeholder="Description or Message">
<input class="btn btn-primary" type="submit" value="submit">
</form>
Save this file and then open routes/index.js. You should notice in your console that modemon has detected the file change and restarted the node service.
We’re now going to create a new route called /uploadpicture in routes/index.js. You’ll want it to look something like this,
express = require('express')
   , router = express.Router()
   , MongoClient = require('mongodb').MongoClient
   , ObjectId = require('mongodb').ObjectId
   , fs = require('fs-extra')
   // Your mongodb or mLabs connection string
   , url = 'mongodb://username:[email protected]:29459/yourdb'
   , multer = require('multer')
   , util = require('util')
   , upload = multer({limits: {fileSize: 2000000 },dest:'/uploads/'})
// Default route http://localhost:3000/
router.get('/', function(req, res){ res.render('index'); });
// Form POST action handler
router.post('/uploadpicture', upload.single('picture'), function (req, res){
if (req.file == null) {
   // If Submit was accidentally clicked with no file selected...
  res.render('index', { title:'Please select a picture file to submit!'); });
} else {
MongoClient.connect(url, function(err, db){
   // read the img file from tmp in-memory location
   var newImg = fs.readFileSync(req.file.path);
   // encode the file as a base64 string.
   var encImg = newImg.toString('base64');
   // define your new document
   var newItem = {
      description: req.body.description,
      contentType: req.file.mimetype,
      size: req.file.size,
      img: Buffer(encImg, 'base64')
   };
db.collection('yourcollectionname')
   .insert(newItem, function(err, result){
   if (err) { console.log(err); };
      var newoid = new ObjectId(result.ops[0]._id);
      fs.remove(req.file.path, function(err) {
         if (err) { console.log(err) };
         res.render('index', {title:'Thanks for the Picture!'});
         });
      });
   });
   };
});
One important note here is that we’re converting the binary image file (jpg) into a text string that is base64 encoded. This is not the nodejs default (utf-8). The reason for this is not well documented according to Google but will become apparent in the next step.
Accessing Stored Images in Mongodb
We’ll call a mongodb method called .findOne() to access our image using the unique mongodb ObjectId _id. This value will be passed as a parameter on the REST URL.
Minor changes to the following code will allow you to use any other unique identifier such as a username or image filename.
You can append this code into the same routes/index.js used in the previous section.
router.get('/picture/:picture', function(req, res){
// assign the URL parameter to a variable
var filename = req.params.picture;
// open the mongodb connection with the connection
// string stored in the variable called url.
   MongoClient.connect(url, function(err, db){
   db.collection('yourcollectionname')
// perform a mongodb search and return only one result.
// convert the variabvle called filename into a valid
// objectId.
     .findOne({'_id': ObjectId(filename)}, function(err, results){
// set the http response header so the browser knows this
// is an 'image/jpeg' or 'image/png'
    res.setHeader('content-type', results.contentType);
// send only the base64 string stored in the img object
// buffer element
         res.send(results.img.buffer);
      });
   });
});
To test this, log into your mongodb and look at your Collection. You hopefully have some documents uploaded from the earlier section and should see objects something like this,
{
"_id": {
    "$oid": "58f8bd6a343aff254131cb17"
    },
"description": "Foo!",
"contentType": "image/jpeg",
"size": 1239201,
"img": "<Binary Data>"
}
Select and copy an ObjectId ($oid). In this example, 58f8bd6a343aff254131cb17.
In the browser, paste this ObjectID into the REST query string,
http://localhost:3000/picture/58f8bd6a343aff254131cb17
Hopefully, you’ll see your jpeg image rendered in the browser. It will have come out of your mongodb Collection, passed through your nodejs route, traversed the network and arrived safely at your browser for rendering and caching.
Posted on Utopian.io - Rewarding Open Source Contributors
Thank you for the contribution. It has been approved.
You can contact us on Discord.
[utopian-moderator]
Downvoting a post can decrease pending rewards and make it less visible. Common reasons:
Submit
Hey @manishmike10, I just gave you a tip for your hard work on moderation. Upvote this comment to support the utopian moderators and increase your future rewards!
Downvoting a post can decrease pending rewards and make it less visible. Common reasons:
Submit
Hey @morningtundra I am @utopian-io. I have just upvoted you!
Achievements
Suggestions
Get Noticed!
Community-Driven Witness!
I am the first and only Steem Community-Driven Witness. Participate on Discord. Lets GROW TOGETHER!
Up-vote this comment to grow my power and help Open Source contributions like this one. Want to chat? Join me on Discord https://discord.gg/Pc8HG9x
Downvoting a post can decrease pending rewards and make it less visible. Common reasons:
Submit
Hi! I am a robot. I just upvoted you! I found similar content that readers might be interested in:
https://nyquist212.wordpress.com/2017/04/21/using-nodejs-expressjs-to-upload-and-save-image-files-into-mongodb-part-23/comment-page-1/
Downvoting a post can decrease pending rewards and make it less visible. Common reasons:
Submit