Today, I will show you how to build your own solar tracker on Arduino, which may be interesting school project or an efficient power source.
What Will I Learn?
- You will learn how does solar tracker works
- You will learn how to build a solar tracker
- You will learn how to measure resistance of the light detecting resistor using Arduino
Requirements
- Arduino board
- Servo
- 2x light detecting resistors
- 2x 10k resistors
- Breadboard or PCB board
- Wires
- 3x Solar panels
- Cardboard or other material
Difficulty
- Intermediate
Tutorial Contents
Construction
Circuit diagram:
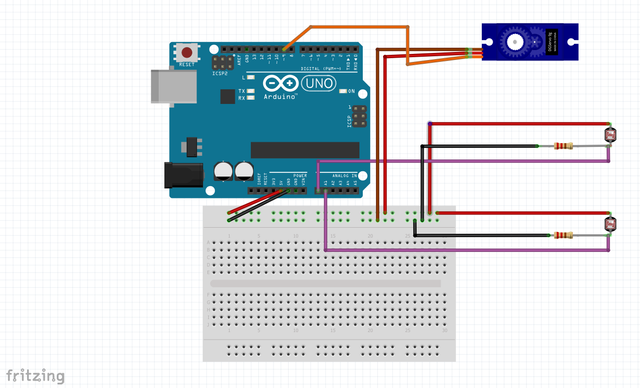
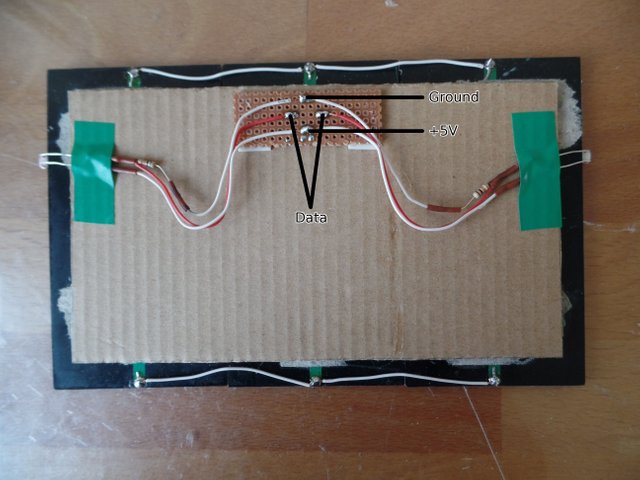
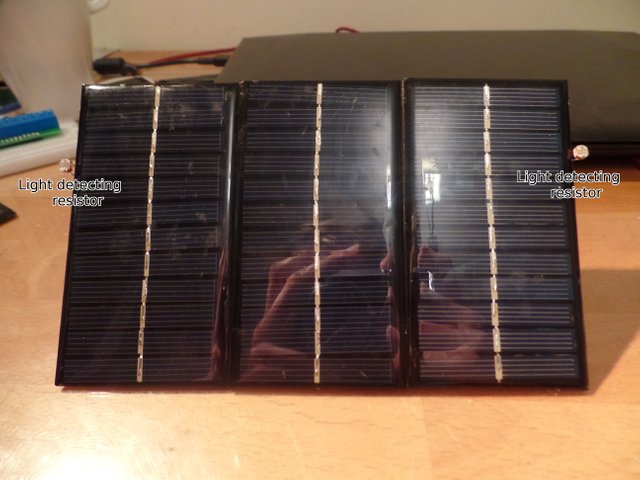
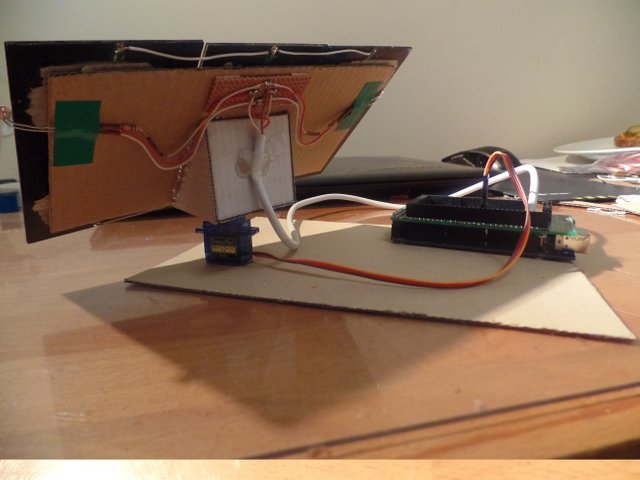
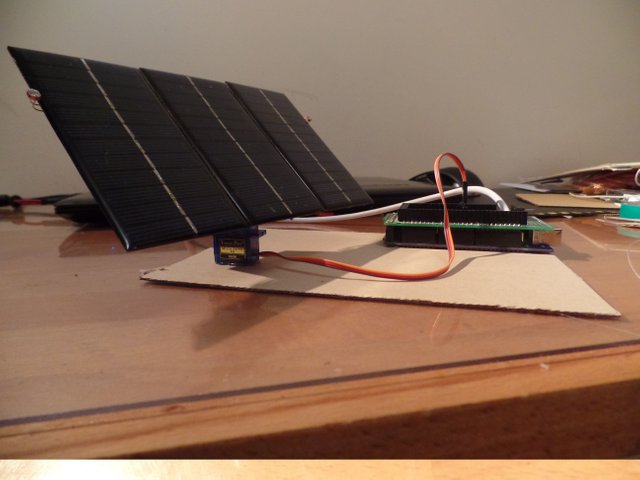
Connect your solar panels with cardboard to make a frame. Then attach sensors circuit to the PCB board on the panels. If you don't want to solder, you can use breadboard as well.
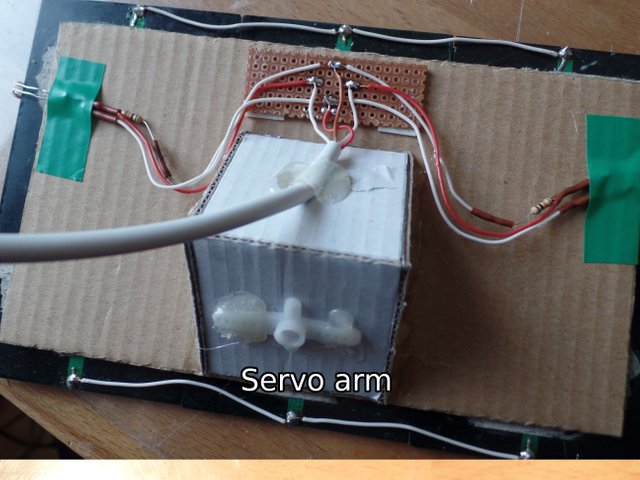
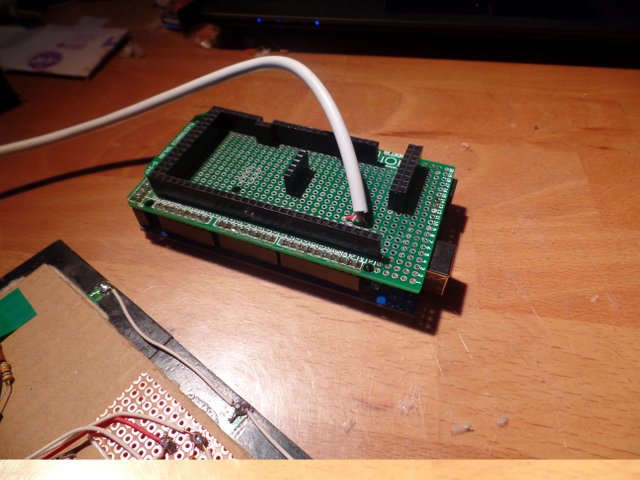
Make a cardboard chassis which will keep the panels at angle of 45° on the servo. Then connect sensors with pins on your Arduino (I used PCB Arduino shield, but breadboard would be great as well).
Attach servo on the stable surface and connect it to the Arduino. Then, attach panels to the servo.
Program
Our program has to compare the resistance of sensors using analog pins, then if one of them is greater, Arduino will move the servo to the moment of equal resistance, which means, that the same amount of light goes to both sides of the panels. This is the most efficiency position.
#include <Servo.h>

Servo myservo;

int val = 83;             //position of the servo
int analog1 = A0;         //pins where sensors are connected
int analog2 = A1;
int tol = 8;              //tolerance, if smaller, tracker will be more sensitive
int time = 7;             //time between each step, if smaller, servo will be faster

void setup()
{
  pinMode(analog1, INPUT);  //configuration of the pins
  pinMode(analog2, INPUT);
  myservo.attach(9);      //set the pin where servo is connected
  myservo.write(val);     //set servo in the initial position
  delay(1000);            //wait one second to avoid too fast movement
}

void loop()
{
  int photo1 = analogRead(analog1);   //variables where data from sensors are stored
  int photo2 = analogRead(analog2);

  if(photo1 - photo2 > tol || photo2 - photo1 > tol)    //if difference between sensors is higher than tolerance - to avoid chaotic movement
  {
    if(photo1 > photo2 && val >= 0)   //if there is more light on the right side and servo isn't in its maximal position
    {
      val--;                          //current servo position - 1
      myservo.write(val);             //set servo in the new position
    }

    if(photo1 < photo2 && val <= 165) //if there is more light on the left side and servo isn't in its maximal position
    {
      val++;                          //current servo position + 1
      myservo.write(val);             //set servo in the new position
    }
  }

  delay(time);                        //wait a few milliseconds to avoid too fast movement
}
Here you can see how it works:
Thank you for reading! Hope this tutorial will help you.
Posted on Utopian.io - Rewarding Open Source Contributors
Your contribution cannot be approved because it does not follow the Utopian Rules.
Related Rule:
You can contact us on Discord.
[utopian-moderator]
Downvoting a post can decrease pending rewards and make it less visible. Common reasons:
Submit
Hey @roj, I just gave you a tip for your hard work on moderation. Upvote this comment to support the utopian moderators and increase your future rewards!
Downvoting a post can decrease pending rewards and make it less visible. Common reasons:
Submit
czesc Janku
bardzo fajny post. nie wiedzialem ze jestes programista
Downvoting a post can decrease pending rewards and make it less visible. Common reasons:
Submit
Dziękuję! Hobbystycznie zajmuję się programowaniem, szczególnie lubię łączyć to z elektroniką. Pod moim poprzednim postem spytałeś który język jest moim ulubionym. Najbardziej lubię C++ i to jemu poświęcam najwięcej czasu, ale ostatnio stawiam moje pierwsze kroki z pythonem. Swego czasu napisałem prostą grę na C++, może kiedyś to tutaj opiszę ;)
Downvoting a post can decrease pending rewards and make it less visible. Common reasons:
Submit
napisz o tej grze :) moze moglbym ja zobaczyc? :)
a czy temat programowania pod technologie blockchain to tez Twoje hobby? ten topic wydaje sie byc coraz popularniejszy i zapewne programisci w swiecie krypto beda bardzo wkrotce cenieni
Downvoting a post can decrease pending rewards and make it less visible. Common reasons:
Submit