What Will I Learn?
- You will learn to Connect your program to a mysql database
- You will learn to retrieve data from database into jtable
Requirements
- Netbeans IDE
- XAMPP Server
- Basic Knowledge of Java
Difficulty
- Intermediate
Tutorial Contents
I'll be explaining the easy way out to connecting to a sql database using the mysql-connector API.
First we have to create the project to hold all the files and API to be used in the process.
Creating the project
Click on new Project, from the file menu.
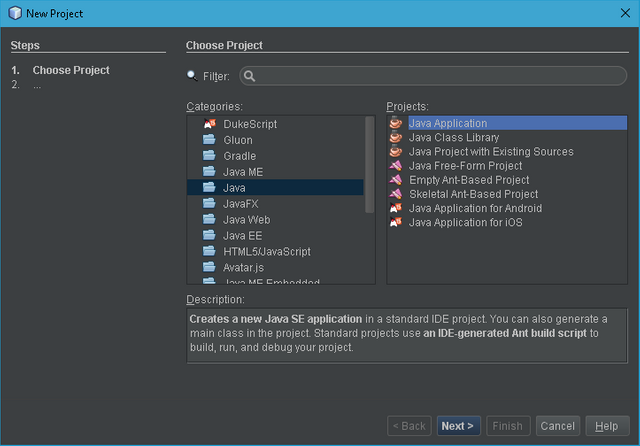
Click on Java Application and Click Next, You should see this.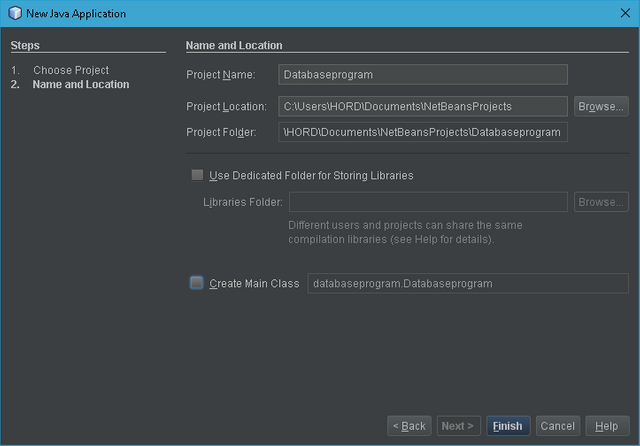
Now input the name of the application and uncheck the create main class option, then finish. We are done creating the application project, now we add the API to be used which I have previously downloaded from Sourceforge.
Adding the API to Library
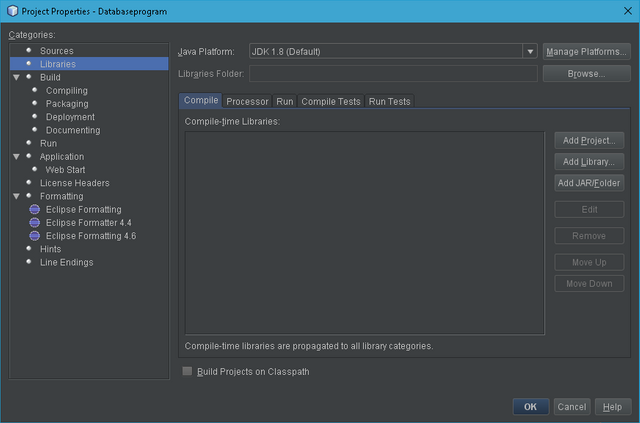
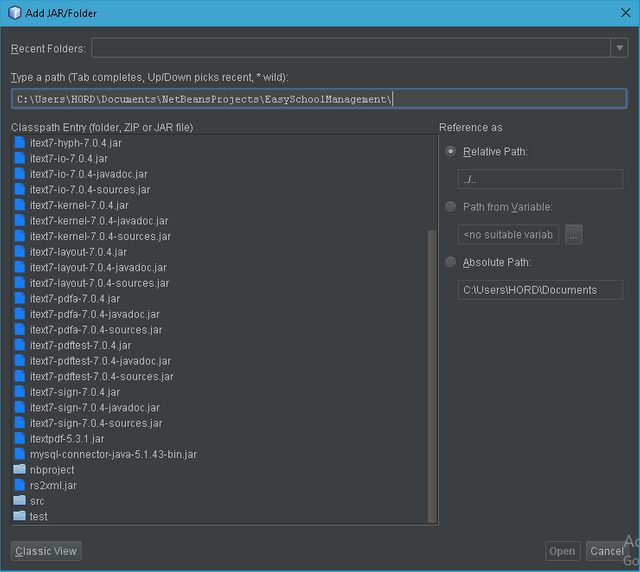
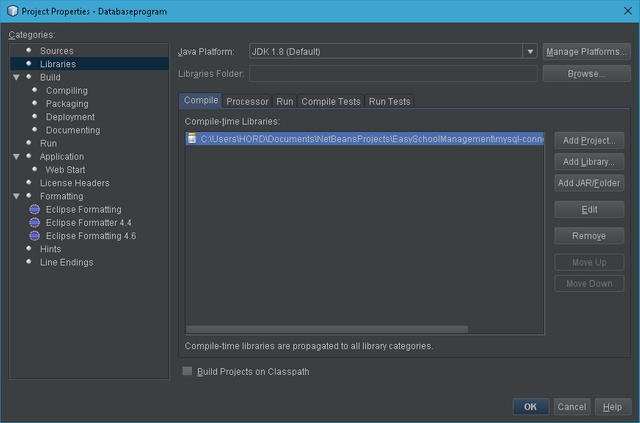
The MySQL Connector API to be used can be downloaded from Here. Once download is complete, right click on source packages and select properties, go to libraries and add jar file. You can now select the downloaded file from the location which it is held.
Steps are outlined in the screenshots below.
Do the same for the RS2XML Jar file which can be downloaded from Here, this API would recieve ResultSet data from data in database for use in the program.
Creating Connection Class file
To create a class file for connecting to the database, first right click on Source Packages, select class file and name it as shown in the steps below.
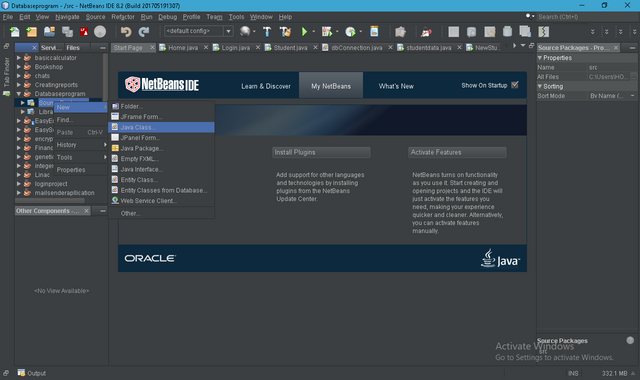
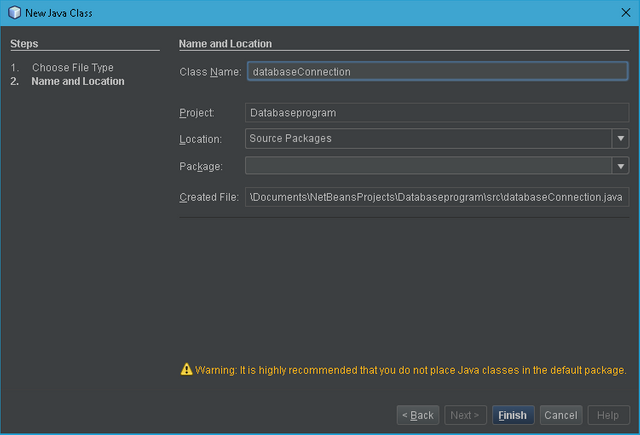
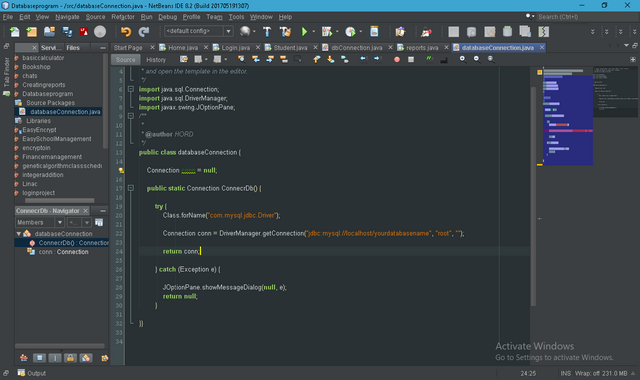
Your Screen should now look like this.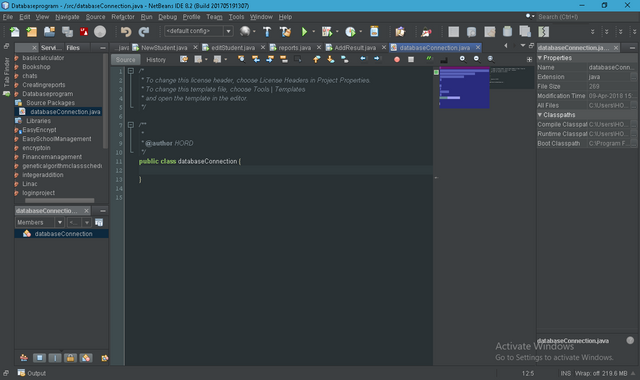
- First import the following
import java.sql.Connection; //This imports the connection class from the API
import java.sql.DriverManager; //This imports the driver manager class, to select the appropriate driver for the connection
import javax.swing.JOptionPane;
The import statement in Java allows to refer to classes which are declared in other packages to be accessed without referring to the full package name
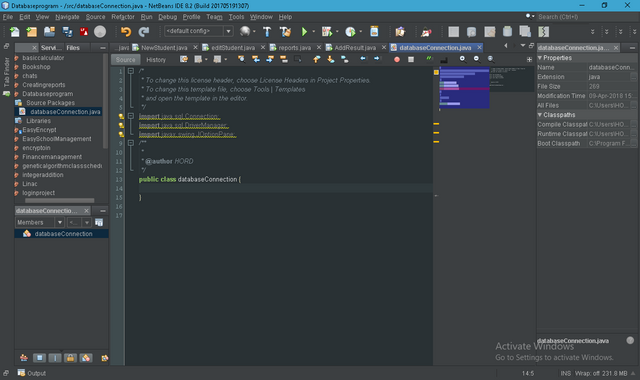
Next we add the rest of the code;
Connection conn = null; //creates a connection to the datatbase engine
    public static Connection ConnecrDb() {
        try {
            Class.forName("com.mysql.jdbc.Driver"); //Calls for mysql driver
            Connection conn = DriverManager.getConnection("jdbc:mysql://localhost/yourdatabasename", "root", ""); // Connects to database using URL with username and password, which is currently default.
            return conn; //Retuns a connection with datatabse.
        } catch (Exception e) { //catches and exception error if any
            JOptionPane.showMessageDialog(null, e); // Shows error inform of a dialog.
            return null;
        }
}
Creating Frame to hold data
To create a frame to hold data, follow the following steps.
Right click on source packages, select Jframe Form, Name it and click finish.
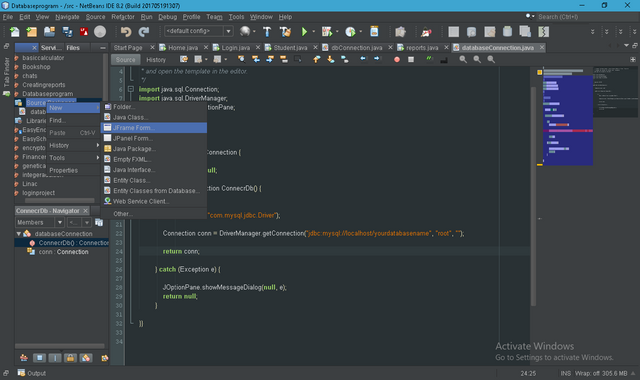
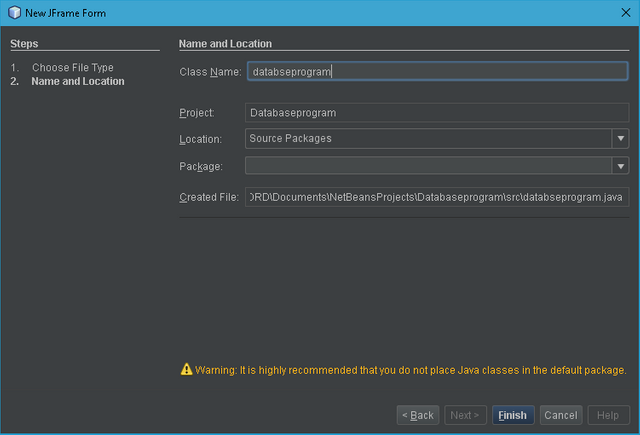
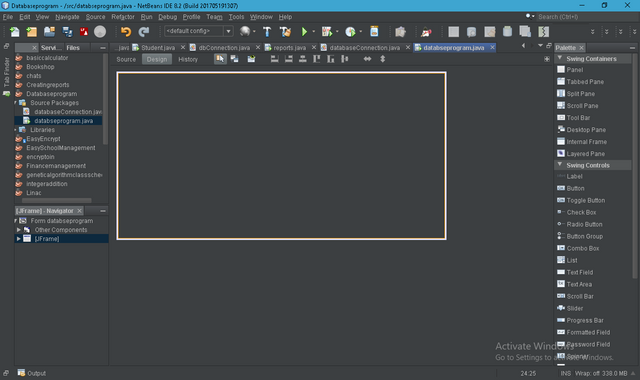
Now from the pallete on the right part of the screen in the design view select a table and drop in the frame.I have renamed my table to table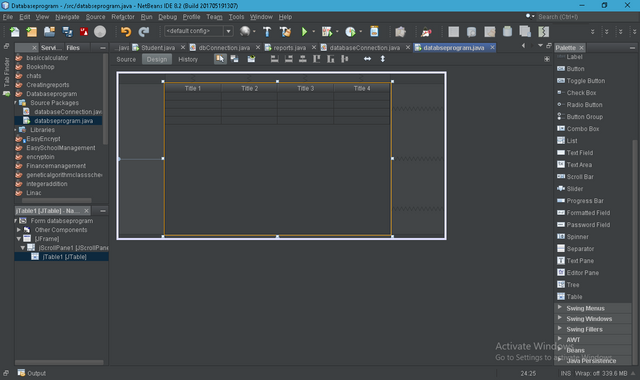
Creating Method to collect Data
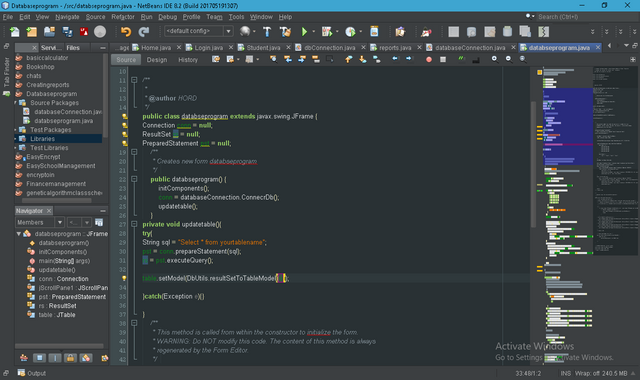
The program won't work without the codes to make it so, first we do the imports as previously.
import java.sql.Connection;
 //Imports connection as previously
import java.sql.PreparedStatement;
//Imports class that passes statement to sql
import java.sql.ResultSet;
//Import class that Receives feedback from the statement passed
import net.proteanit.sql.DbUtils;
//Imports class that does transfer of data
After this is done already, then we call the required methods in.
Connection conn = null; //creates a connection
ResultSet rs = null; // creates a resultset reciever
PreparedStatement pst = null; //statement preparer
Then call the connection class that has just being created;
conn = databaseConnection.ConnecrDb();
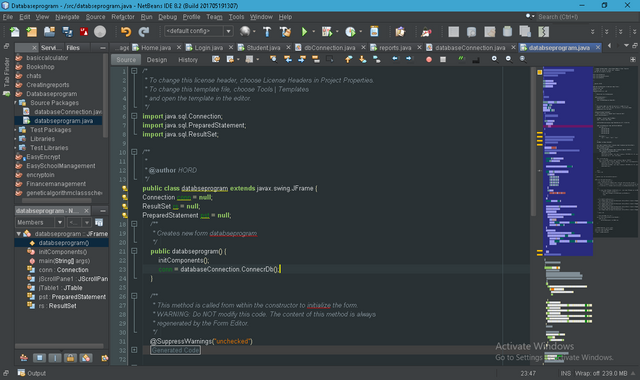
Now we add the rest of the code, but first I this is how I have renamed the table.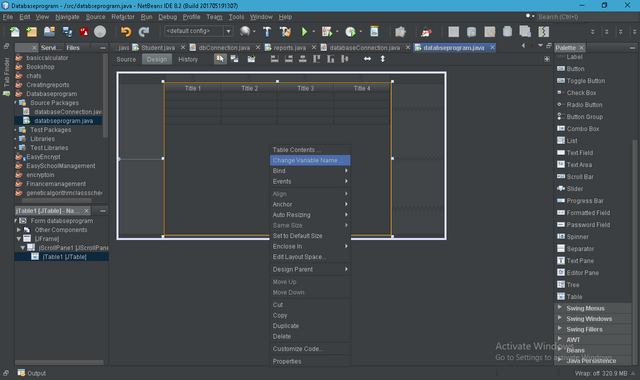
The rest of the code, First we add this beneath the class callupdatetable();, then we tell the system what the method does.
private void updatetable(){
//Every sql statement has to be surronded by a try and catch block to handle the code and also release errors out.
try{
String sql = "Select * from yourtablename"; // This creates a string to carry the SQL statement, The `yourtablename` there is the name of the table I have created in the database before writing this program.
pst = conn.prepareStatement(sql); //This prepares the sql statement and passes the statement to the database.
rs = pst.executeQuery(); //This part receives data from the database result from the query passed.

table.setModel(DbUtils.resultSetToTableModel(rs)); //Data is arranged on table as in database

}catch(Exception e){
JOptionPane.showMessageDialog(null, e);
} //In case of errors, this catch section picks up the errors and passes them

}
Output done
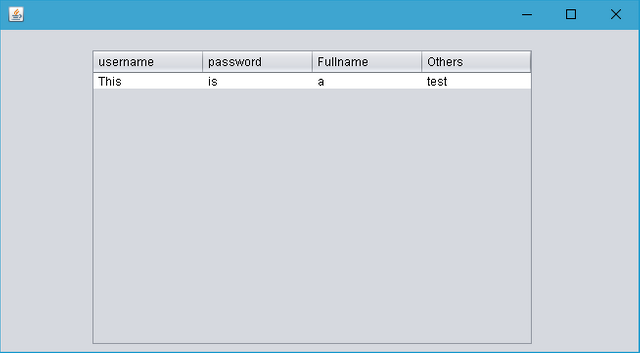
Here we have data from database in our program. If you followed the steps carefully you should have this.
Thanks for following, Good Job.
Posted on Utopian.io - Rewarding Open Source Contributors
Nice post
Downvoting a post can decrease pending rewards and make it less visible. Common reasons:
Submit
Thanks @wondo
Downvoting a post can decrease pending rewards and make it less visible. Common reasons:
Submit
Hey @official-hord I am @utopian-io. I have just upvoted you!
Achievements
Utopian Witness!
Participate on Discord. Lets GROW TOGETHER!
Up-vote this comment to grow my power and help Open Source contributions like this one. Want to chat? Join me on Discord https://discord.gg/Pc8HG9x
Downvoting a post can decrease pending rewards and make it less visible. Common reasons:
Submit