Repository
Tank Fire Game Using HTML SVG (Part-1)
What Will I Learn?
- You will learn how to build games using
HTML5 SVG. - You will learn to create svg objects more easily using
Pablojs. - You will learn to move the svg object.
- You will learn to access a family with more than one svg object.
- You will learn to reach the keyboard keys in
jquery.
Requirements
Difficulty
- Basic
Tutorial Contents
We will enter into the construction of a tank game on this article. We will draw our tank and move this tank.
So our article was divided into two parts.
In the first part I will determine the playing field and draw the tank.
In the second part I will move our tank according to the keyboard keys.
Let's start.
Create Playground
First, we will prepare the playground.
I will use bootstrap to make it easier to prepare the playing field and I should use jquery and pablojs libraries.
<head>
    <meta charset="UTF-8">
    <meta name="viewport" content="width=device-width, initial-scale=1.0">
    <meta http-equiv="X-UA-Compatible" content="ie=edge">
    (html comment removed: include bootstrap)
    <link href="https://stackpath.bootstrapcdn.com/bootstrap/4.1.3/css/bootstrap.min.css" rel="stylesheet"
    integrity="sha384-MCw98/SFnGE8fJT3GXwEOngsV7Zt27NXFoaoApmYm81iuXoPkFOJwJ8ERdknLPMO" crossorigin="anonymous">
    (html comment removed: include jquery)
    <script src="https://ajax.googleapis.com/ajax/libs/jquery/3.3.1/jquery.min.js"></script>
    (html comment removed: include pablo.js)
    <script src="./pablo.js"></script>
    (html comment removed: include custom script file)
    <script src="script.js"></script>

    <title>Tank Fire Game</title>
</head>
I will define the container in the <body> because I want to center the page.
Let's define the jumbotron in it and let's write the game name in center.
<body>
   <div class="container">
     <div class="jumbotron text-center text-primary"><h1>TANK FIRE GAME</h1></div>
     <div id="ground">
     </div>
   </div>
</body>
Screenshot 1
We can determine the playing area by giving style to the ground area.
<style>
    #ground {
        height: 700px;
        width:1100px;
        border: 1px solid #060;
        background-color: #ECF0F1;
    }
    </style>
I set the width of the play area to 700px and the height to 1100px.
We will use these values to make sure that the svg elements do not go out later.
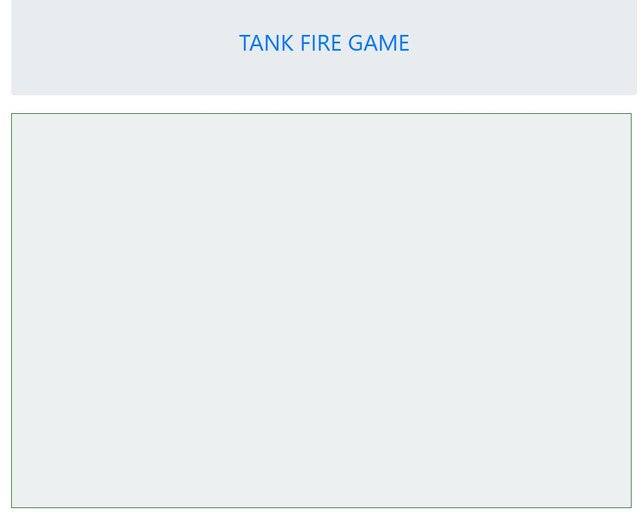
The playing field is as follows.
Screenshot 2
Draw Tank
Since the tank does not consist of one svg object, we need to link several svg objects together.
We can define a function to perform this operation. This function can draw other parts according to a main value.
First, we will examine the svg objects we need to create.
Screenshot 3

As you can see, the tank is formed by joining the above five objects.
We must place the body and hood objects on top of each other to combine these objects, and we must place other objects with reference to the midpoints.
We have to redesign these parts according to the direction of the tank and we must unite them.
Direction Up
We need to look at the picture below to draw a tank going up.
Screenshot 4

We draw up an upturn tank by plotting the svg elements as shown in this figure.
We are accessing the coordinates of the upper left point by doing x-20 and y-20 because the body area is 40x40 and because it is the exact center point center.
We can draw the other parts of the tank with this logic.
Direction Down
Screenshot 5

Change the y coordinates of the gun object needed to create the downward position of the tank.
Direction Left and Right
We have to redesign all the parts to adjust the left and right directions.
In such a drawing, the left and right sides are set up and down. I will carry the rectangle on the left side up and the rectangle on the right side down.
I also need to change the height and width.
Screenshot 6

We are now ready to write our codes.
Open the script file and write the page loading code for jquery, then create the svg object.
$(function(){

var svg = Pablo('#ground').svg({ //create svg with height and width
         width: 1100,
        height: 700
      });

});
Combine all the parts into one function.
This function must be such a function that x, y coordinates and direction properties must be taken as external parameters.
Let's check the direction variable in this function and draw the tank into this function.
function tankBuilder(x,y,direction){


if(direction=="up"){

  body=svg.rect({//draw body for up
    x:x-20,
    y:y-20,
    width:40, height:40,
    fill: '#6ab04c',
  });

  sideLeft=svg.rect({//draw sideLeft for up
    x:x-28,
    y:y-25,
    width:8, height:50,
    fill: '#2c3e50',
  });


  sideRight=svg.rect({//draw sideRight for up
    x:x+20,
    y:y-25,
    width:8, height:50,
    fill: '#2c3e50',
  });

  hood=svg.circle({//draw hood for up
    cx: x,
    cy: y,
    r: 10,
    fill:  '#2c3e50'
   });

   gun=svg.rect({//draw gun for up
     x:x-2,
     y:y-30,
     width:4, height:25,
     fill: '#2c3e50',
   });
}

if(direction=="down"){

   body=svg.rect({//draw body for down
    x:x-20,
    y:y-20,
    width:40, height:40,
    fill: '#6ab04c',
  });

  sideLeft=svg.rect({//draw sideLeft for down
    x:x-28,
    y:y-25,
    width:8, height:50,
    fill: '#2c3e50',
  });


  sideRight=svg.rect({//draw sideRight for down
    x:x+20,
    y:y-25,
    width:8, height:50,
    fill: '#2c3e50',
  });

   hood=svg.circle({//draw hood for down
    cx: x,
    cy: y,
    r: 10,
    fill:  '#2c3e50'
   });

    gun=svg.rect({//draw gun for down
     x:x-2,
     y:y+5,
     width:4, height:25,
     fill: '#2c3e50',
   });
}
if(direction=="left"){

  body=svg.rect({//draw body for left
   x:x-20,
   y:y-20,
   width:40, height:40,
   fill: '#6ab04c',
 });

 sideLeft=svg.rect({//draw sideLeft for left
   x:x-25,
   y:y-28,
   width:50, height:8,
   fill: '#2c3e50',
 });


 sideRight=svg.rect({//draw sideRight for left
   x:x-25,
   y:y+20,
   width:50, height:8,
   fill: '#2c3e50',
 });

  hood=svg.circle({//draw hood for left
   cx: x,
   cy: y,
   r: 10,
   fill:  '#2c3e50'
  });

   gun=svg.rect({//draw gun for left
    x:x-26,
    y:y-2,
    width:25, height:4,
    fill: '#2c3e50',
  });
}
if(direction=="right"){

  body=svg.rect({//draw body for right
   x:x-20,
   y:y-20,
   width:40, height:40,
   fill: '#6ab04c',
 });

 sideLeft=svg.rect({//draw sideLeft for right
   x:x-25,
   y:y-28,
   width:50, height:8,
   fill: '#2c3e50',
 });


 sideRight=svg.rect({//draw sideRight for right
   x:x-25,
   y:y+20,
   width:50, height:8,
   fill: '#2c3e50',
 });

  hood=svg.circle({//draw hood for right
   cx: x,
   cy: y,
   r: 10,
   fill:  '#2c3e50'
  });

   gun=svg.rect({//draw gun for right
    x:x,
    y:y-2,
    width:25, height:4,
    fill: '#2c3e50',
  });

}

}
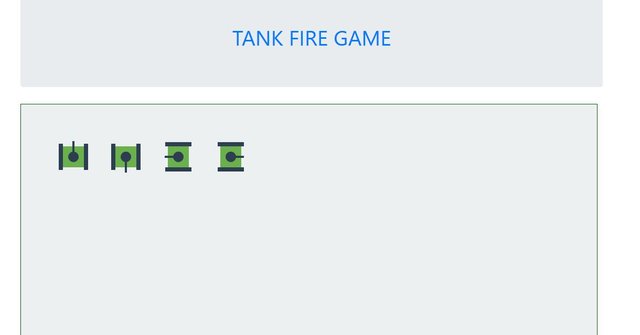
Now that we have created the function to draw a tank, we can print it on the screen.
  tankBuilder(100,100,"up");
  tankBuilder(200,100,"down");
  tankBuilder(300,100,"left");
  tankBuilder(400,100,"right");
Screenshot 7
Tank Movement
There are two steps to moving the tank.
The first step is to capture the moment when the selected keys of the keyboard are pressed and redraw the center points of the tank by moving a certain unit in this direction.
The second step is to erase the old tank.
I will use keydown() function in jquery to catch keyboard keys.
With the keydown() method, we can capture the keystroke of the key on the keyboard.
Here are the keys we need to know are expressed by numbers. We have access to with the which feature.
The number keys of the arrow keys are down.
left--->37
up---->38
right--->39
down--->40
We can set directions relative to this number.
Let's go coding.
First of all keep the initial values of the tank variable and draw one tank.
var tankX=550;
var tankY=600;
var tankDirection="up";

tankBuilder(tankX,tankY,tankDirection);
Let's catch the key stroke from the keyboard and redraw the tank in that direction.
  $(document).keydown(function(event){
  //37 left  - 38  up - 39  right - 40  down

     var code =  event.which;//I get the key number value

     if(code==37){

       tankX=tankX-3;
       tankBuilder(tankX,tankY,"left");

     }
     if(code==38){

       tankY=tankY-3;
       tankBuilder(tankX,tankY,"up");
     }
     if(code==39){

       tankX=tankX+3;
       tankBuilder(tankX,tankY,"right");
     }
     if(code==40){

       tankY=tankY+3;
       tankBuilder(tankX,tankY,"down");
     }


  });
I changed the variable X and y according to the key pressed and redrawed the tank.
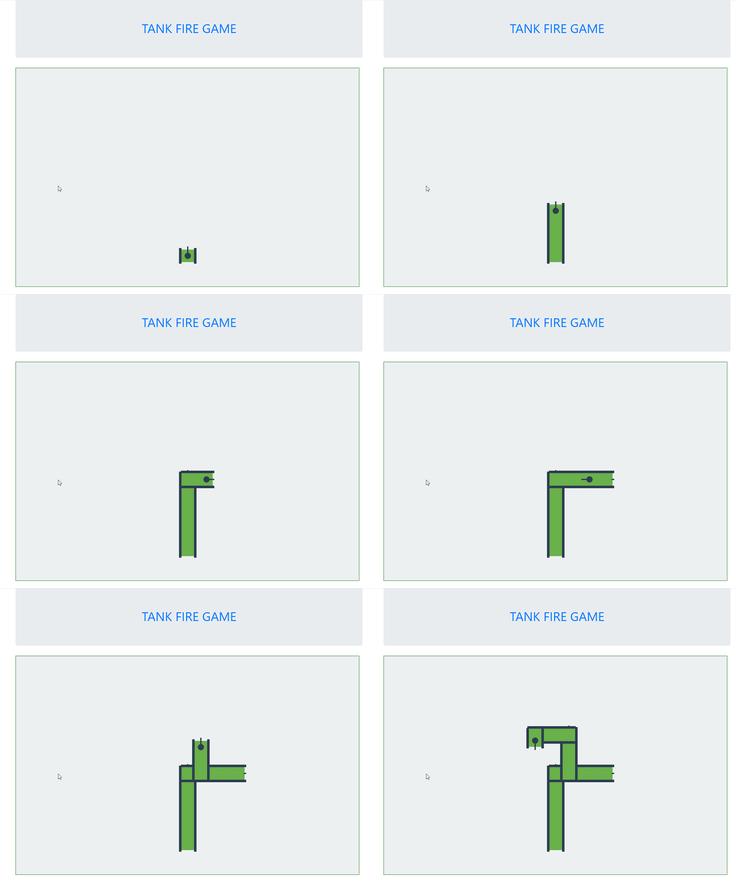
Screenshot 8

There is something wrong with the above picture.
We have to delete the old tank objects when the arrow keys are pressed to overcome this problem.
We need to delete the body, sideLeft, sideRight, hood and gun objects when each key is pressed.
   if(code==37){

       body.remove();
       sideLeft.remove();
       sideRight.remove();
       hood.remove();
       gun.remove();
       tankX=tankX-3;
       tankBuilder(tankX,tankY,"left");

     }
     if(code==38){
       body.remove();
       sideLeft.remove();
       sideRight.remove();
       hood.remove();
       gun.remove();
       tankY=tankY-3;
       tankBuilder(tankX,tankY,"up");
     }
     if(code==39){
       body.remove();
       sideLeft.remove();
       sideRight.remove();
       hood.remove();
       gun.remove();
       tankX=tankX+3;
       tankBuilder(tankX,tankY,"right");
     }
     if(code==40){
       body.remove();
       sideLeft.remove();
       sideRight.remove();
       hood.remove();
       gun.remove();
       tankY=tankY+3;
       tankBuilder(tankX,tankY,"down");
     }
Screenshot 9

So that we got the tank to move.


Congratulations @onepice! You have completed the following achievement on the Steem blockchain and have been rewarded with new badge(s) :
Click on the badge to view your Board of Honor.
If you no longer want to receive notifications, reply to this comment with the word
STOPDo not miss the last post from @steemitboard:
Downvoting a post can decrease pending rewards and make it less visible. Common reasons:
Submit
Hi @onepice!
Your post was upvoted by @steem-ua, new Steem dApp, using UserAuthority for algorithmic post curation!
Your post is eligible for our upvote, thanks to our collaboration with @utopian-io!
Feel free to join our @steem-ua Discord server
Downvoting a post can decrease pending rewards and make it less visible. Common reasons:
Submit
Hey, @onepice!
Thanks for contributing on Utopian.
We’re already looking forward to your next contribution!
Get higher incentives and support Utopian.io!
Simply set @utopian.pay as a 5% (or higher) payout beneficiary on your contribution post (via SteemPlus or Steeditor).
Want to chat? Join us on Discord https://discord.gg/h52nFrV.
Vote for Utopian Witness!
Downvoting a post can decrease pending rewards and make it less visible. Common reasons:
Submit