[English]
Hello .... Everyone !!! today I will make a tutorial how to design logo with GIMP. Logo is a picture or sketch that has a certain meaning, and represents a meaning of the company, region, organization, product, country, institution, and other things. Logo is also an abbreviation and easy to remember as a substitute of the real name. Okay ... let's start the tutorial ... !!
Open the GIMP app, create a new layer by selecting (File - New Layer) and set the layer size to 800, 800 high.
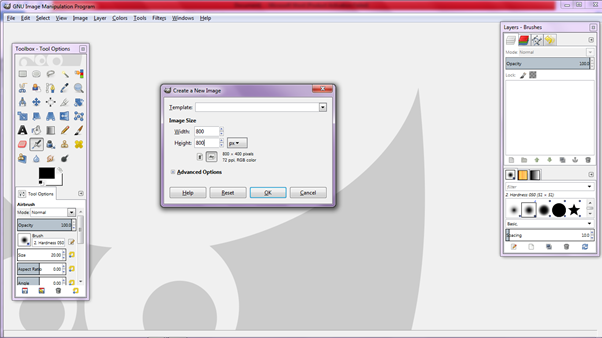
Next step, create a new layer by clicking on Layer-Brushes and (Create a New Layer).
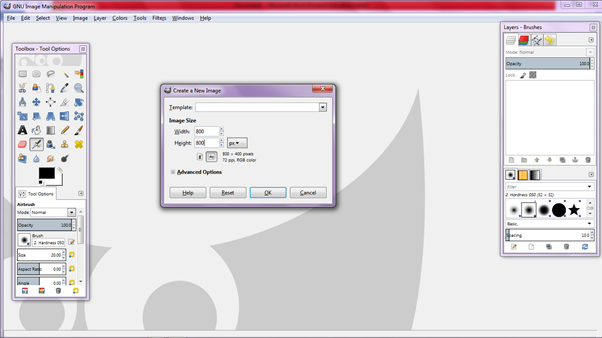
Set the layer size to 800 and 800 widths, functioning for the size of the layer according to the background.
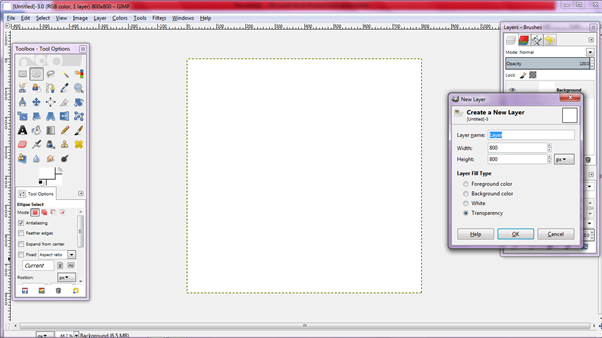
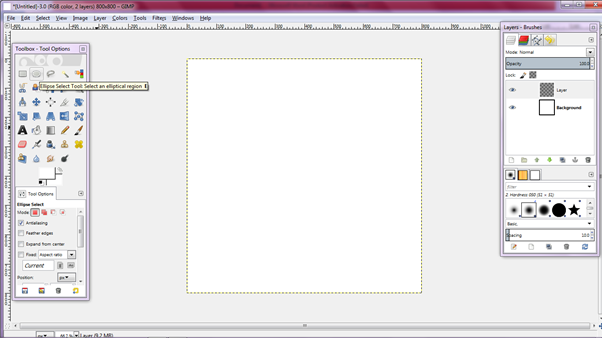
Select the Ellipse Select Tool in the Toolbox or press (E) on the keyboard to make the selection a circle on the layer.
And click on Freground & Background Colors on the Toolbox to change the color as needed.
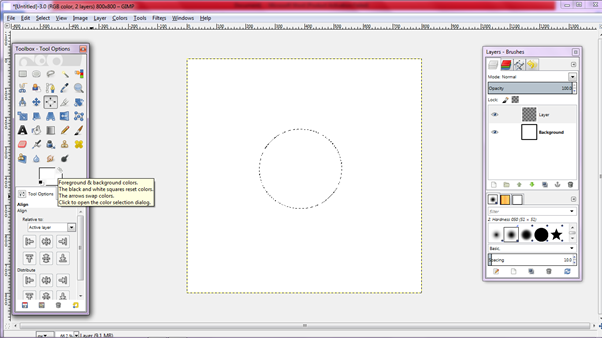
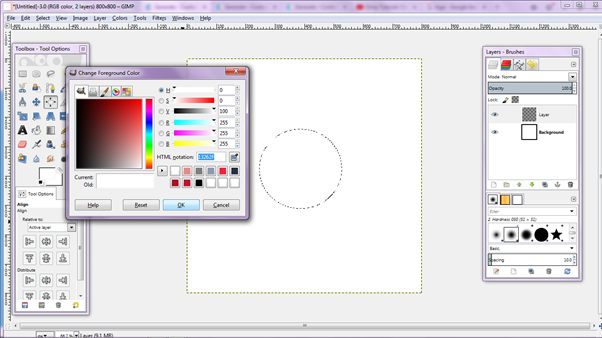
Masukan nilai warna pada HTML notations dengan kode warna “13262F” dan klik OK.
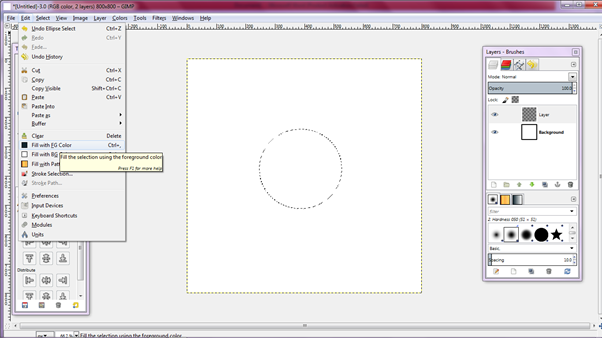
Next step select (Edit - Fill with FG Color) to give color to circle selection.
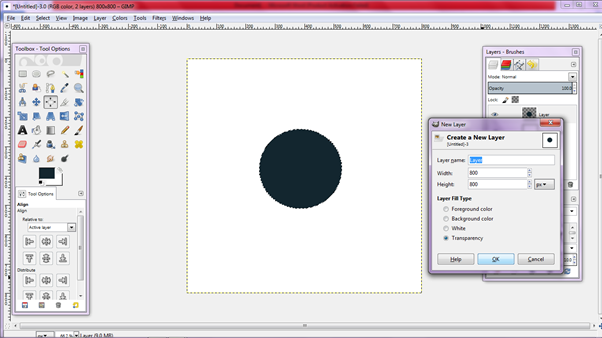
Add a new layer on Layers-Brushes with 800 and 800 inch wide layers.
Then select (Select - Grow) on the menu to make a new selection larger than the previous circle selection.
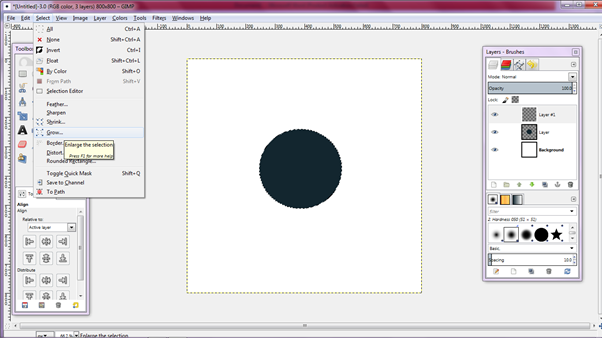
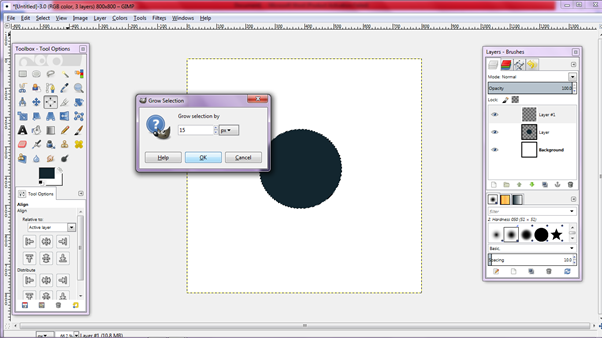
Set the selection size to be created with Grow Selection: 15px and click OK.
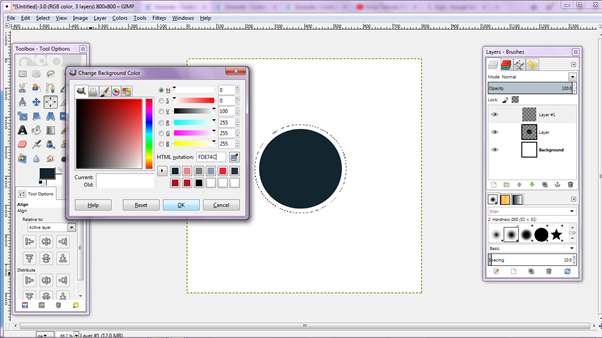
Next give color to the selection of the circle that has been created by selecting Freground & Background Colors on Toolbox with color code "FDE74C".
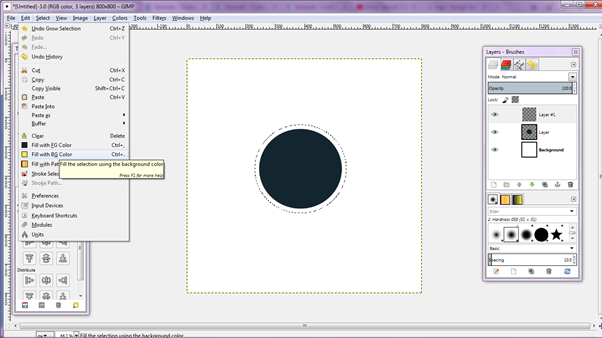
And select (Edit - Fill with Bgcolor) then the circle will have the color according to the previous color code.
In Layer-Brushes select Layer # 1 and drag the layer below the layer.
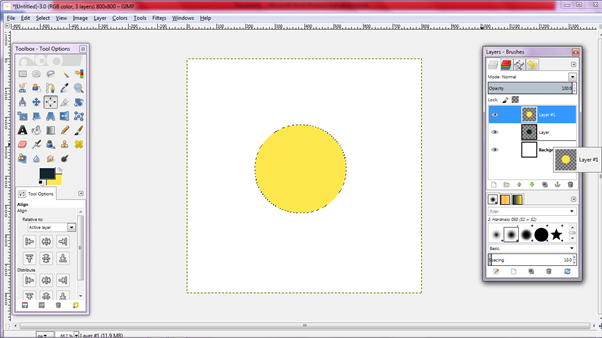
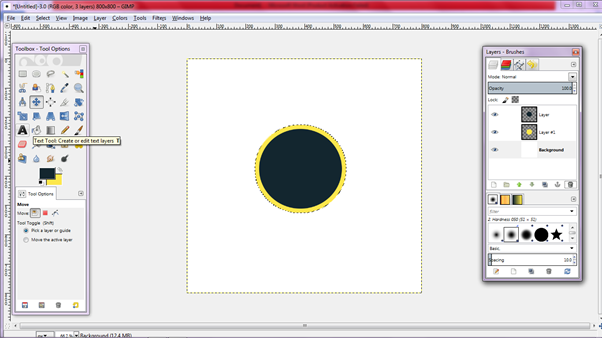
And select Text Tool in Toolbox or press "T" on text input keyboard.
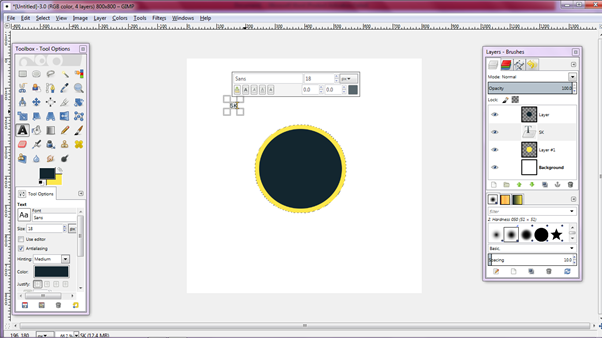
Press **CTRL + A **on text to block all text and decrease text size with Font size: 180 and Font Type: Mistral.
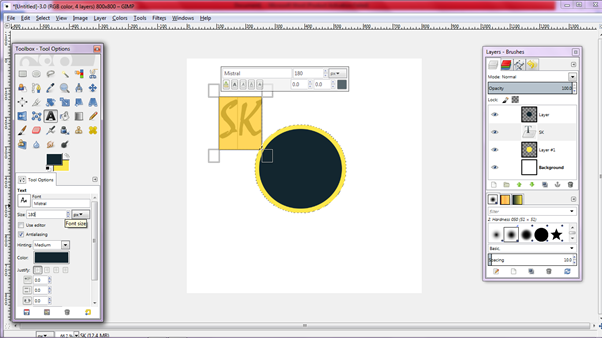
Atur posisi teks di tengah lingkaran dengan menggunakan Move Tool.
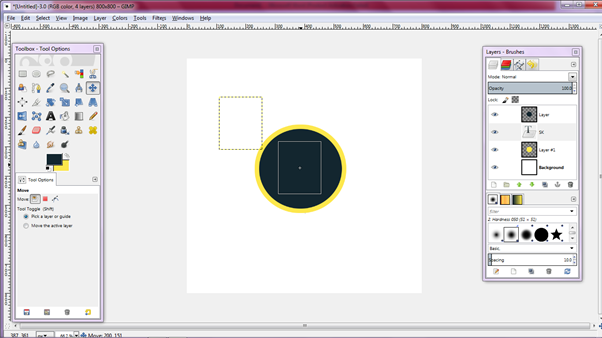
And remove the selection on the layer by select (Select - None) on the menu.
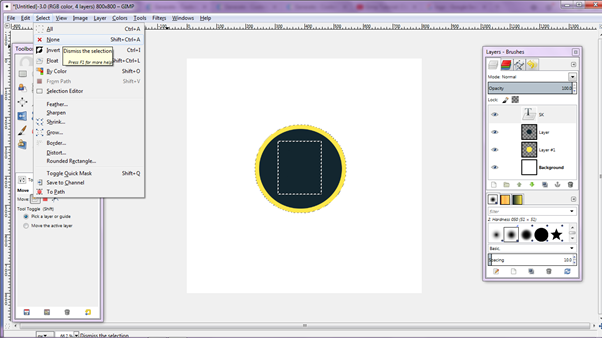
In Layer -Brushes, right-click on select Text (Alpha to Selection) which serves to make a selection of text.
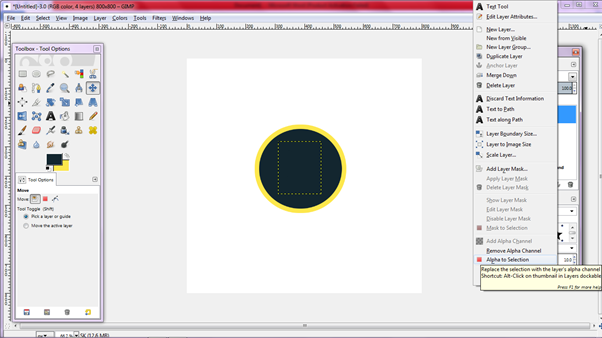
And in Layers - Brushes choose Layered, then press Delete on the keyboard and remove the eye mark on the text.
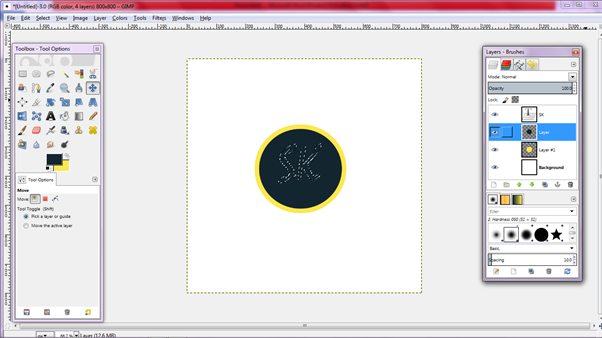
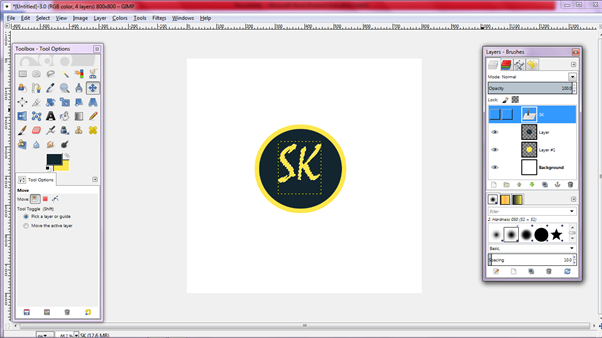
Eliminate selection of text by selecting (Select - None) on the layer menu.
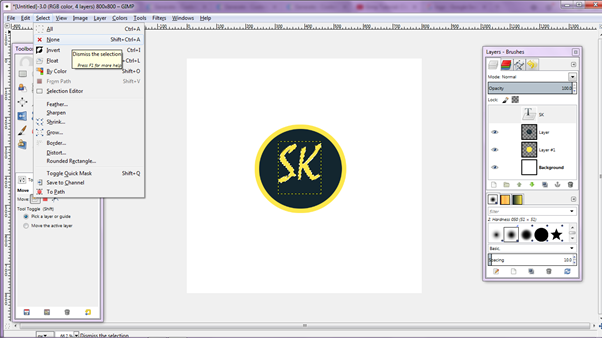
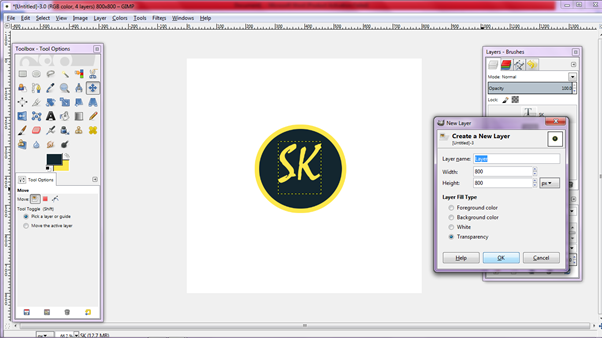
Add a layer on a new layer in Layers-Brushes with a layer size of 800 wide and 800 height.
And select Rectangle Select Tool in Toolbox and drag on layer under text.
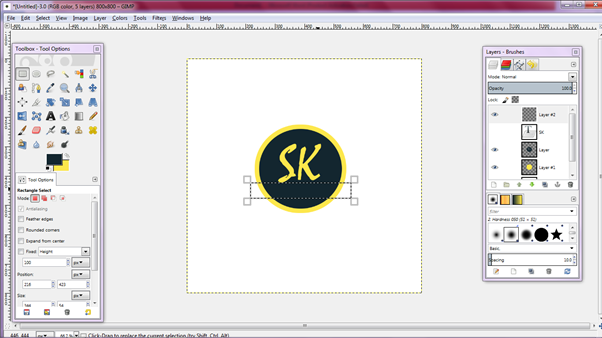
Next give color to Rectangle with select (Edit - Fill With Bg Color) then Rectangle will have color.
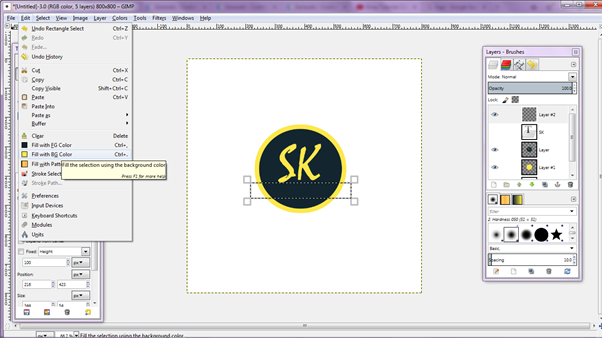
Add another new layer to Layers-Brushes with 800 and 800 inch wide layers.
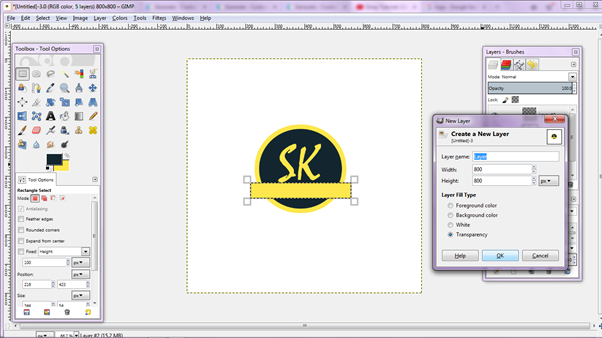
Select the Rectangle Select Tool with a size larger than the previous Rectangle.
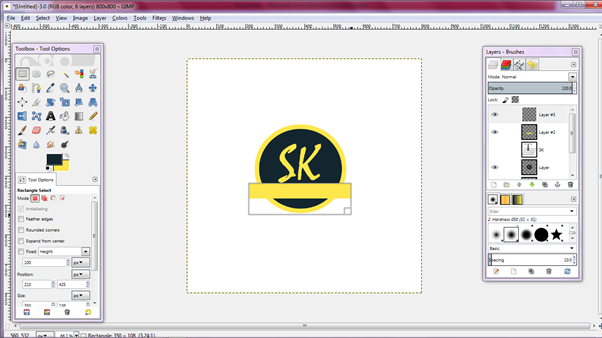
And next step choose layer and layer # 1 in Layer-Brushes, then hit delet on keyboard.

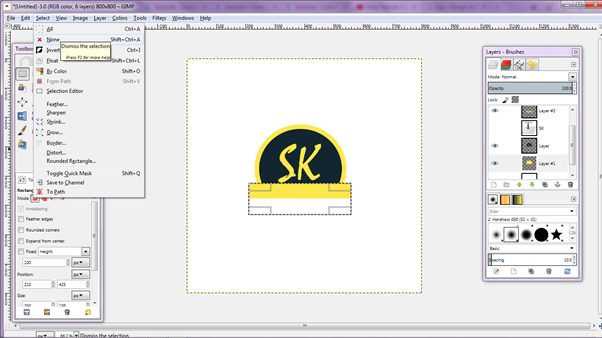
In Toolbox select Text Tool, input text and set text size with Font Size: 46 and Font Type: Free Neu Bold.
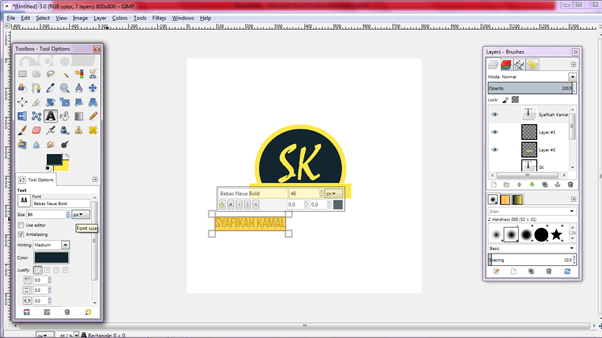
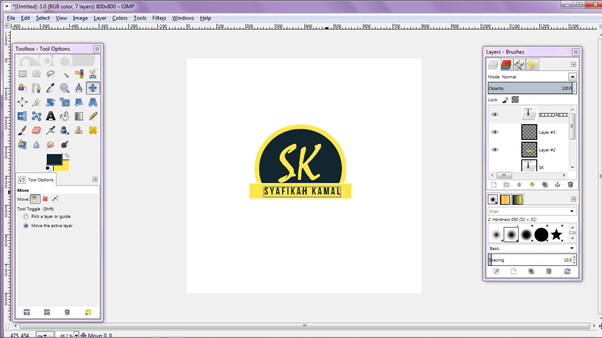
Set the text position in the middle of the Rectangle by selecting Move Tool to move the text position.
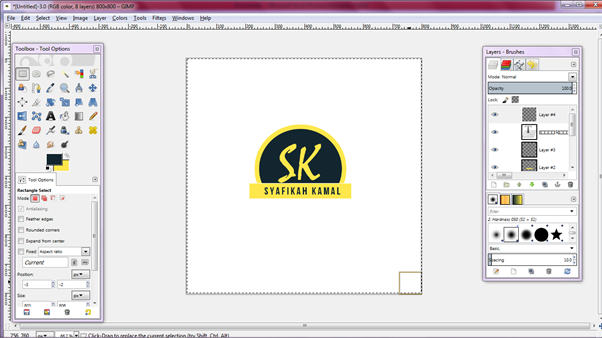
And add a new layer, select Rectangle Select Tool and drag the size with the background.
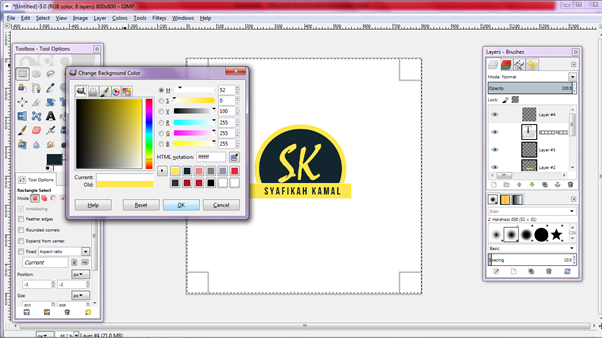
Then change the color on Freground & Background Colors to white.
Then on Toolbox select Blend Tool and change Shape to Linear, and drag the line on the layer.
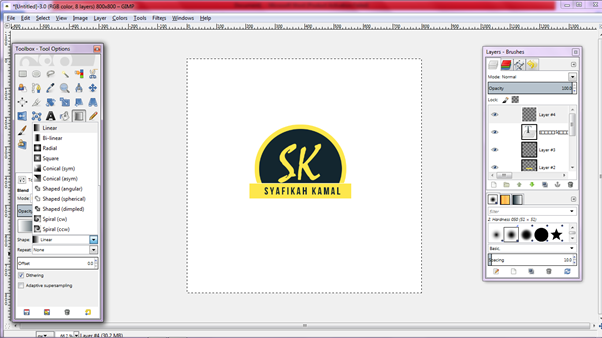
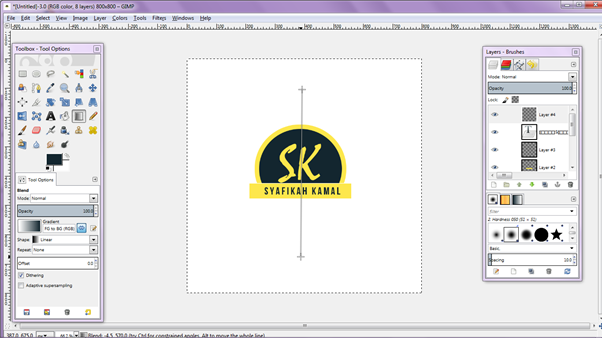
And the final step drag layer # 3 on Layer - Brushes down Layer # 1 to make the logo above the backgroud.
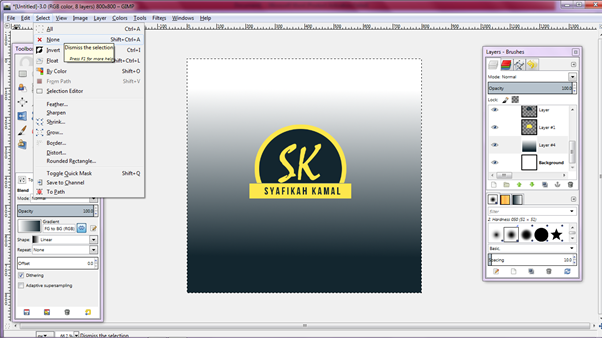
And here's the final result :

[Indonesia]
Hello.... Semuanya !!! hari ini saya membuat tutorial bagaimana mendesain logo dengan GIMP. Logo adalah sebuah gambar atau sketsa yang mempunyai arti tertentu, dan mewakili suatu arti dari perusahaan, daerah, organisasi, produk, negara, lembaga, dan hal lainnya. Logo merupakan juga singkatan dan mudah diingat sebagai pengganti dari nama sebenarnya. Oke... ayo kita mulai tutorialnya... !!
Buka aplikasi GIMP, buat layer baru dengan pilih (File – New layer) dan atur ukuran layer dengan lebar 800, tinggi 800.

Langkah selanjutnya, buat layer baru dengan klik pada Layer-Brushes dan (Create a New Layer).

Atur ukuran layer dengan lebar 800 dan tinggi 800, berfungsi untuk ukuran pada layer sesuai dengan background.

Pilih Elipse Select Tool pada Toolbox atau tekan (E) pada keyboard yang berfungsi untuk membuat seleksi berupa lingkaran pada layer.

Dan klik Freground & Background Colors pada Toolbox untuk menganti warna sesuai dengan kebutuhan.

Masukan nilai warna pada HTML notations dengan kode warna “13262F” dan klik OK.

Langkah selanjutnya pilih (Edit – Fill with FG Color) untuk memberikan warna pada seleksi lingkaran.

Tambahkan layer baru pada Layers-Brushes dengan ukuran layer lebar 800 dan tinggin 800.

Kemudian pilih (Select – Grow ) pada menu untuk membuat seleksi baru yang lebih besar dari pada seleksi lingkaran sebelumnya.

Atur ukuran seleksi yang akan dibuat dengan Grow Selection : 15px dan klik OK.

Selanjutnya berikan warna pada seleksi lingkaran yang telah dibuat dengan pilih Freground & Background Colors pada Toolbox dengan kode warna “FDE74C”

Dan pilih (Edit – Fill with BG Color) maka lingkaran tersebut akan mempunyai warna sesuai dengan kode warna sebelumnya.

Pada Layer-Brushes pilih Layer #1 dan tarik layer tersebut dibawah layer.

Dan pilih Text Tool pada Toolbox atau tekan “T” pada keyboard masukan teks.


Tekan CTRL + A pada teks untuk memblok semua teks dan aturun ukuran teks dengan Font size : 180 dan Font Type : Mistral.

Atur posisi teks di tengah lingkaran dengan menggunakan Move Tool.

Dan hilangkan seleksi pada layer dengan pilih (Select – None) pada menu.

Pada Layer –Brushes, klik kanan pada Text pilih (Alpha to Selection) yan berfungsi untuk membuat seleksi pada teks.

Dan pada Layers – Brushes pilih Layer, kemudian tekan Delete pada keyboard dan hilangkan tanda mata pada teks.


Hilangkan seleksi pada teks dengan pilih (Select – None ) pada menu layer.

Tambahkan layer pada layer baru pada Layers-Brushes dengan ukuran layer lebar 800 dan tinggin 800.

Dan pilih Rectangle Select Tool pada Toolbox dan tarik pada layer dibawah text.

Selanjutnya berikan warna pada Rectangle dengan pilih (Edit – Fill With Bg Color) maka Rectangle akan mempunya warna.

Tambahkan lagi layer baru pada Layers-Brushes dengan ukuran layer lebar 800 dan tinggin 800.

Pilih Rectangle Select Tool dengan ukuran lebih besar dari Rectangle sebelumnya.

Dan langkah selanjutnya pilih layer dan layers #1 pada Layer-Brushes, kemudian tekan delet pada keyboard.


Pada Toolbox pilih Text Tool, masukan teks dan aturun ukuan teks dengan Font Size : 46 dan Font Type : Bebas Neu Bold.

Atur posisi teks di tengah Rectangle dengan pilih Move Tool untuk memindahkan posisi teks.

Dan tambahkan layer baru, pilih Rectangle Select Tool dan tarik seukuran dengan background.

Kemudian ubah warna pada Freground & Background Colors menjadi warna putih.

Dan selanjutnya pada Toolbok pilih Blend Tool dan ubah Shape menjadi Linear, dan tarik garis pada layer.


Dan langkah terakhir tarik layer #3 pada Layer – Brushes kebawah Layer #1 untuk membuat logo berada di atas backgroud.

Dan inilah hasil akhir :

Posted on Utopian.io - Rewarding Open Source Contributors
Your contribution cannot be approved because it does not follow the Utopian Rules.
-There are too many quality contributions related to GIMP.
-Your contribution is very simple for GIMP
You can contact us on Discord.
[utopian-moderator]
Downvoting a post can decrease pending rewards and make it less visible. Common reasons:
Submit
i am sorry,
for me this tutorial is not simple
thank you
Downvoting a post can decrease pending rewards and make it less visible. Common reasons:
Submit