[English]
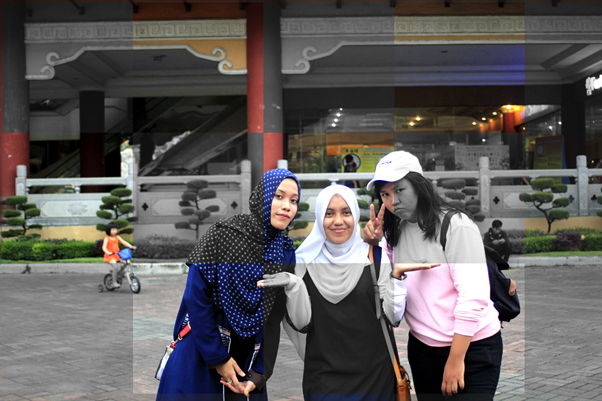
Hello friends ...... !!! tutorial this time is to create black and white grid effect on photo. You can use your photo that you like and can directly practice it. And I'm here using my picture to create a black-and-white checkerboard effect.
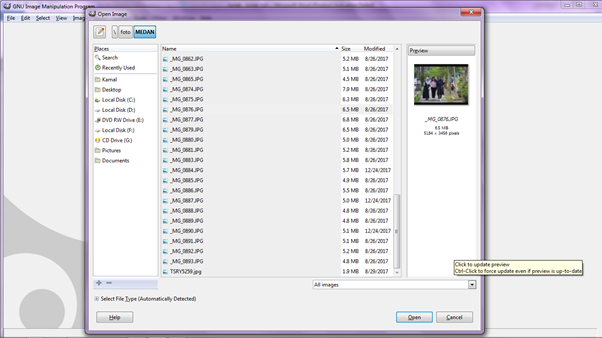
Open GIMP, choose (File - Open) select the image you want to edit.
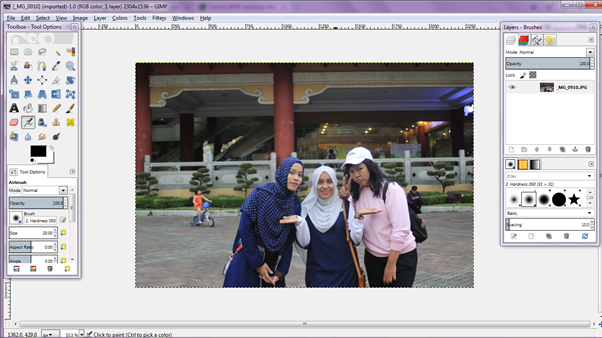
Then will appear the photo you want to edit and you give effect.
Then will appear the photo you want to edit and you give effect.
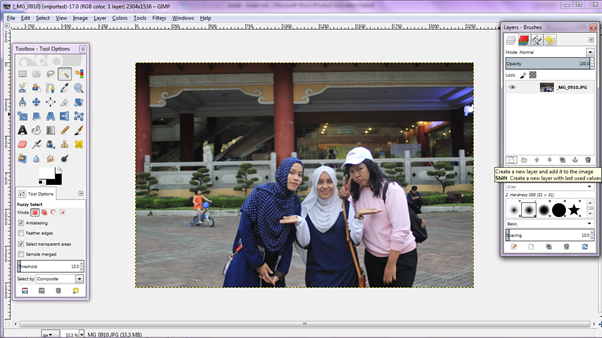
Click on Layer-Brushes select (New Layers - Transparent) which is used to create checkerboard effect on your photo .
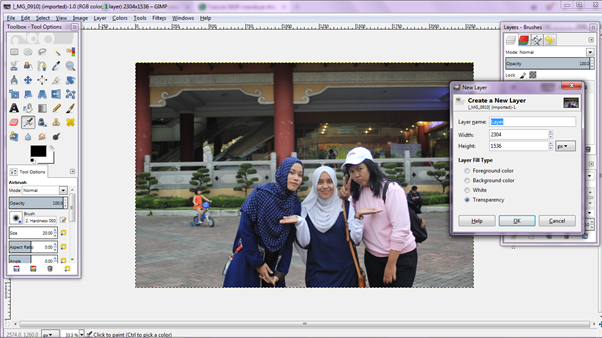
Set the size of the layer as needed, here using the width: 2304 and height: 1536.
Set the size of the layer as needed, here using the width: 2304 and height: 1536.
Select the newly added layers, select (Render - Pattern - Grid) to specify how many boxes will be used in the drawing and the size of the box set in the image.
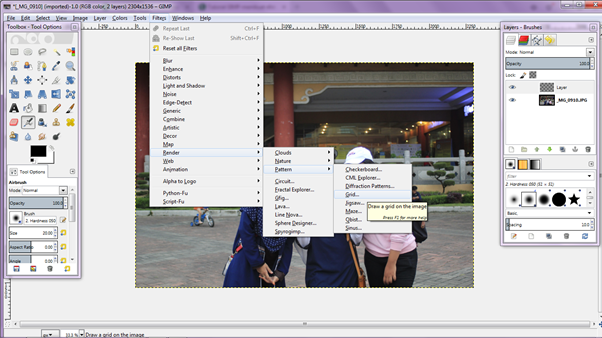
Set the size of the box to be made as you wish, here the box size is 500px and 500px wide.
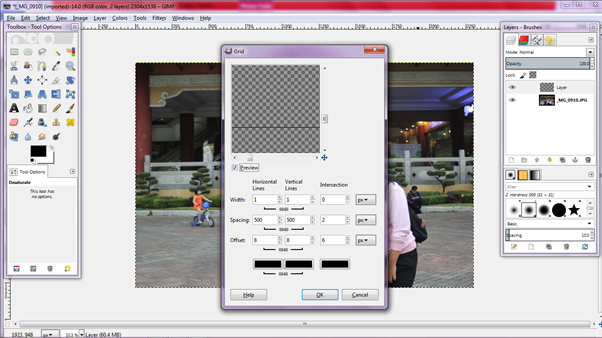
Press "U" on the keyboard to call the Fuzzy Select Tool used for the selection of each box that will be given black and white effect on your photo .
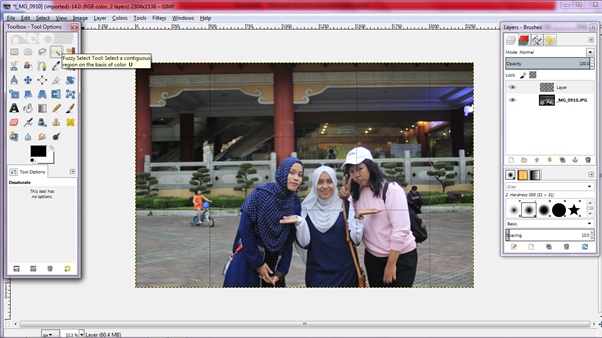
Click on the photo layers, press "Shift" to add selection to the layers to be given effect.
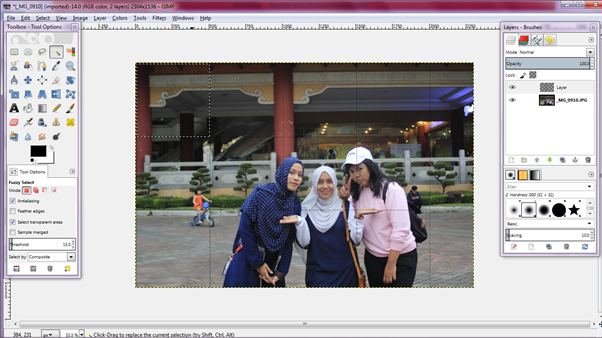
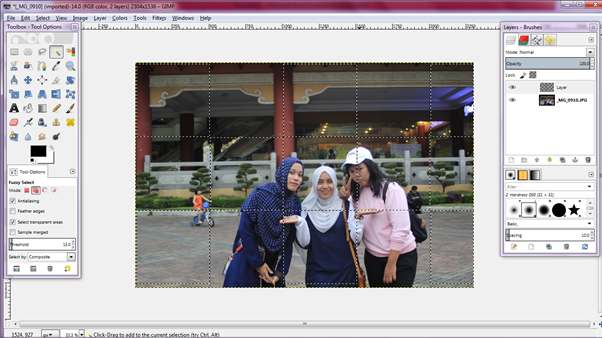
Select the photo layers in Layer - Brushes to give a black and white effect that will be applied to your photo.
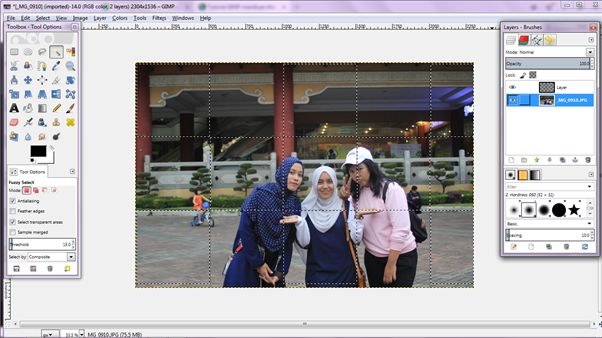
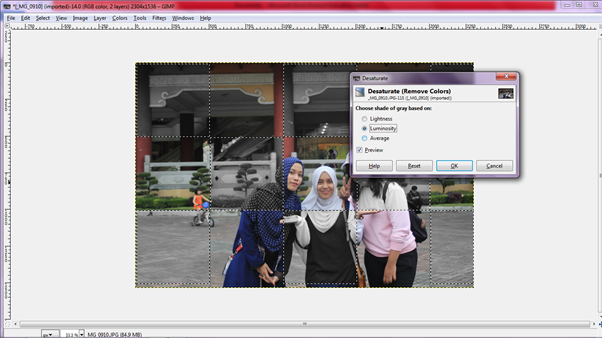
Select (Colors - Desaturate) then the black and white effect will be visible on your photo.
Next select the box that has no black-and-white effect using Fuzzy Select Tool, the steps corresponding to before the one used in black and white effect.
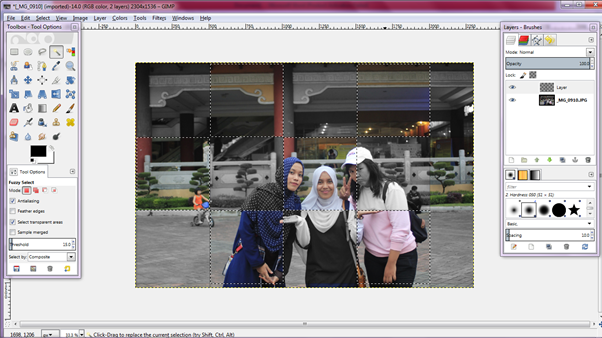
Choose (Color - Brightness-Contrast) to give a brighter photo effect to the photo and give a different effect on the side effects.
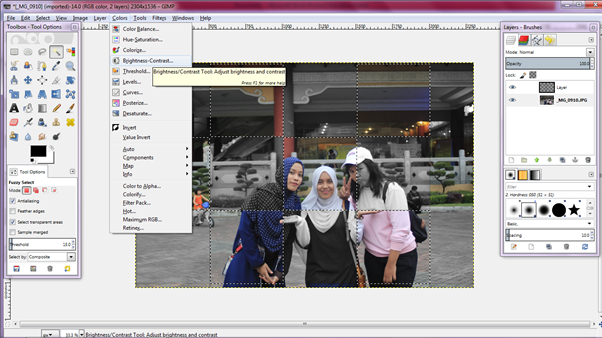
Adjust the contrast to your liking so that the previous effect is more noticeable.
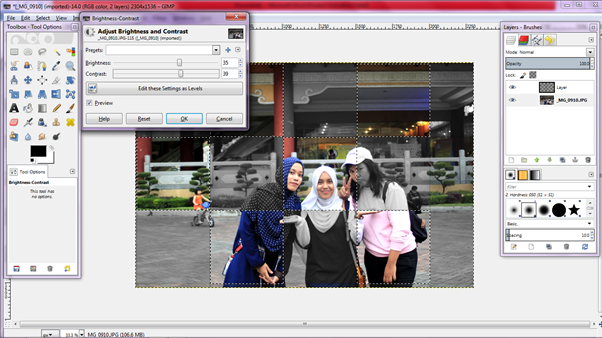
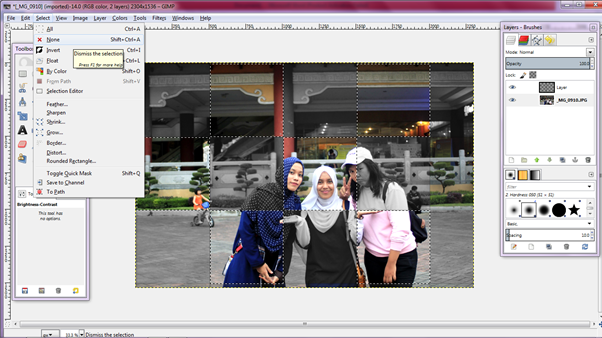
To see the results on the photo, then remove the selection in the selected photo (Select - None).
For the final step of removing the grid that is on the photo by selecting the grid on Layer-Brushes, click on the eye to remove the grid.
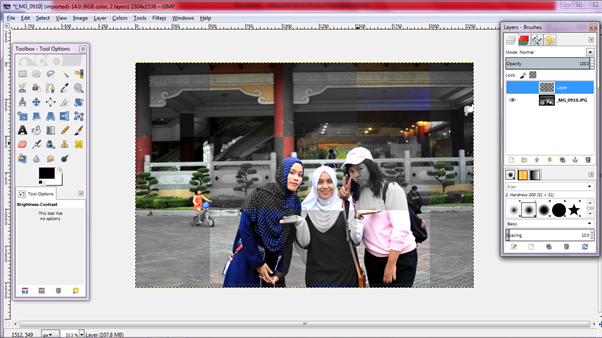
And here is the final result :
[Indonesia]
Hello teman–teman ...... !!! tutorial kali ini adalah membuat efek kota-kotak hitam putih pada foto. Kamu bisa pakai foto kamu yang kamu suka dan bisa langsung mempraktekkannya. Dan aku disini menggunakan fotoku untuk membuat efek kotak-kotak hitam putih.
Buka GIMP , pilih (File – Open) pilih gambar kamu yang akan kamu edit.
Maka akan tampil foto yang akan kamu edit dan kamu beri efek.

Maka akan tampil foto yang akan kamu edit dan kamu beri efek.

Klik pada Layer-Brushes pilih (New Layers – Transparent ) yang di gunakan untuk membuat efek kotak-kotak pada foto kamu.
Atur ukuran layer sesuai dengan kebutuhan, disini menggunakan ukuran lebar : 2304 dan tinggi : 1536.

Atur ukuran layer sesuai dengan kebutuhan, disini menggunakan ukuran lebar : 2304 dan tinggi : 1536.
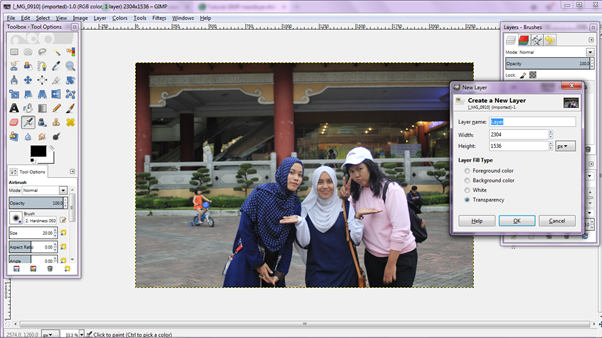
Pilih layers baru yang sudah ditambahkan, pilih (Render – Patternt – Grid) untuk menentukan berapa kotak yang akan digunakan pada gambar dan ukuran kotak yang di atur pada gambar .

Atur ukuran kotak yang akan dibuat sesuai dengan yang kamu inginkan, disini ukuran kotak tinggi 500px dan lebar 500px.

Tekan “U” pada keyboard untuk memanggil Fuzzy Selec Tool yang digunakan untuk seleksi setiap kotak yang akan diberikan efek hitam putih pada foto kamu.

Klik pada layers foto, tekan “Shift” untuk menambah seleksi pada layers yang akan diberikan efek.


Pilih layers foto pada Layer – Brushes untuk memberikan efek hitam – putih yang akan diterapkan pada foto kamu.

Pilih (Colors – Destaturate ) maka efek hitam putih akan kelihatan pada foto kamu.

Selanjut select kotak yang belum ada efek hitam – putih menggunakan Fuzzy Select Tool, langkahnya sesuai dengan sebelum yang di gunakan pada efek hitam - putih.

Pilih (Colors – Brightness-Contrass ) untuk memberikan efek fotok lebih terang pada foto dan memberikan efek beda pada efek di sampingnya.

Atur contras sesuai dengan kamu inginkan hingga efek sebelumnya lebih terlihat bedanya.

Untuk melihat hasil pada foto, maka hilangkan terlebih dahulu seleksi yang ada pada foto dengan pilih (Select – None).

Untuk langkah terakhir menghilangkan grid yang ada pada foto dengan pilih grid pada Layer-Brushes, klik pada mata untuk menghilangkan grid.

Dan berikut ini adalah hasil akhir :

Posted on Utopian.io - Rewarding Open Source Contributors
Your contribution cannot be approved yet because it is not as informative as other contributions. See the Utopian Rules. Please edit your contribution and add try to improve the length and detail of your contribution (or add more images/mockups/screenshots), to reapply for approval.
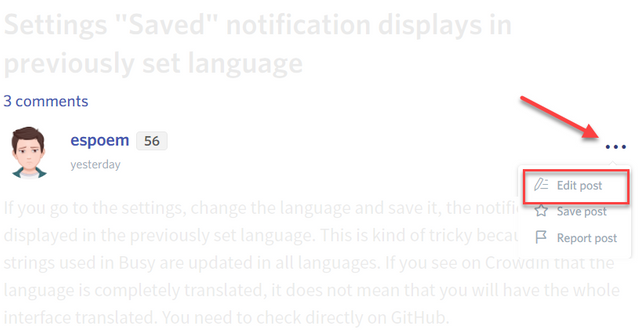
You may edit your post here, as shown below:
You can contact us on Discord.
[utopian-moderator]
Downvoting a post can decrease pending rewards and make it less visible. Common reasons:
Submit
i have edited
please check again
thank you
Downvoting a post can decrease pending rewards and make it less visible. Common reasons:
Submit
Please add more visual detail
Downvoting a post can decrease pending rewards and make it less visible. Common reasons:
Submit
i have finished add more visual detail
please ckeck again
thank you
Downvoting a post can decrease pending rewards and make it less visible. Common reasons:
Submit
Your contribution cannot be approved because it does not follow the Utopian Rules.
-There are too many quality contributions related to GIMP.
-Your contribution is very simple for GIMP
You can contact us on Discord.
[utopian-moderator]
Downvoting a post can decrease pending rewards and make it less visible. Common reasons:
Submit
i have fill follow the utopian rules
thank you
Downvoting a post can decrease pending rewards and make it less visible. Common reasons:
Submit