CREATE AND PROTECT EMAIL LINKS ON WEB PAGES FROM WEB CRAWLERS

What Will I Learn?
In this tutorial, you will learn the following
- What is a Web crawler
- Different techniques to hide emails on web pages from web crawlers
Requirements
For this tutorial, you will need the following
- A PC/laptop with any Operating system such as Linux, Mac OSX, Windows OS
- Text editor
- Google Chrome browser
Difficulty
- Basic
Tutorial Contents
This tutorial will teach you how to display email addresses on web pages while hiding the addresses from web crawlers.
A web crawler (also known as a web spider or web robot) is a program or automated script which browses the World Wide Web in a methodical, automated manner. This process is called Web crawling or spidering.
Web crawlers can be used to extract emails on web pages. The process of email extraction is called email harvesting. There are many software applications that will search the web for email address in other to collect recipients for email campaigns, business or database growth and this is quite unfortunate because there are many reasons you would want to share an email address on a website but you don't want that address's inbox to fill up with unwanted mails and spam mails.
In this tutorial, you will learn a few ways to display your email address on web pages while decreasing the probability that a web crawler can find and harvest that email address. You will learn the following techniques:
- Using CSS pseudo-classes to display content in a page
- Using Unicode-bidi and direction properties to reverse text
- Encoding text with character entities
- Creating and running an inline Js function
- Detecting and assembling links with JavaScript
You will learn these five different techniques and choose whichever one is good for you.
So let's start right away. The first option we will look at is the css pseudo-classes option.
1. Using CSS pseudo-classes to display email in a page
This option allows us to display an e-mail address in a webpage without the code being present in the html file. So create a project folder and name it "create and protect email". In your project folder. create a new file called css_pseudo.html and save. Also create a style.css file and add this just for styling to make the page attractive.
html { padding: 35px; }

body { margin: 40px; font-family: georgia; font-size: 16px; line-height: 22px; background-color: rgba(13, 66, 17, 0.92);  }

article { border-left: 20px solid #76e092; padding: 30px 50px 8px 35px; background-color: #fff; }

h2 { margin: 0px 0px 12px 0px; }

p { margin: 0px 0px 16px 0px; }

.e-l { color: #009cf7; }

.content { margin: 50px 0px; }
Now this css_pseudo.html file has a link to the style.css file. Inside of the body area we have an article element with three elements inside: an h2, a paragraph tag, and a paragraph tag with a class of e-l. Now for the class, it is safer not to use the term e-mail or contact us, or anything that a web crawler could use to determine what the content might be. So let's stick with e-l.
<!DOCTYPE html>
<html>
  <head>
    <meta charset="utf-8">
    <title></title>
    <link rel="stylesheet" href="style.css">
  </head>
  <body>

      <article>

          <h2>Option 1: CSS Pseudo Classes</h2>

          <p>

              Lorem ipsum dolor sit amet, consectetur adipisicing elit, sed do eiusmod tempor incididunt ut labore et dolore magna aliqua. Ut enim ad minim veniam, quis nostrud exercitation ullamco laboris nisi ut aliquip ex ea commodo consequat. Duis aute irure dolor in reprehenderit in voluptate velit esse cillum dolore eu fugiat nulla pariatur. Excepteur sint occaecat cupidatat non proident, sunt in culpa qui officia deserunt mollit anim id est laborum.

          </p>

          <p>Contact Us</p>
          <p class="e-l">Email me</p>

      </article>

  </body>
</html>
Let me explain what we will be doing here
We will replace the "Email me" text with the content that we define inside of a CSS pseudo-class, then we will define a CSS rule that will target the e-l class. We'will use the before pseudo class, and set content to tutors@ Then the browser will display the "tutors@" text inside of that paragraph with the class of e-l. Then we'll run another CSS rule, target the after pseudo class and add "tutorial.com". So the user is going to see the e-mail address of [email protected], but that e-mail address will not be present in the html code.
So back in our css_pseudo.html file, follow these steps;
Remove the "Email me" text in the p tag
Add a css styling in the style tag in the head tag. We'll write a CSS rule that will target that e-l class
So add the following code in the style tag
      .e-l:before {
          content: 'tutors@';
      }

</style>
As soon as you do this, you'll see in the browser the word tutors@showing up inside of that paragraph element.
Next, add the following code to complete the email address
.e-l:after {
content: 'tutorial.com';
}
And so now in the browser we can see the full e-mail address [email protected].
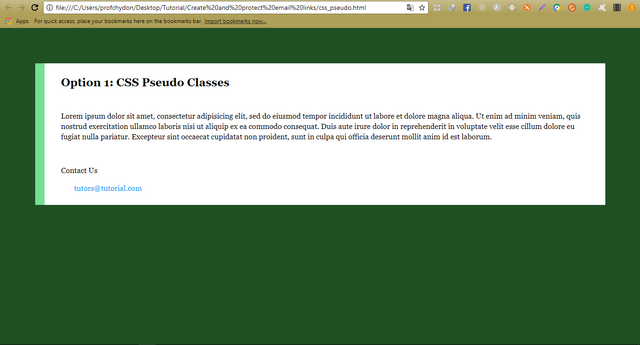
Now the way we've written this, we would have to create a custom class for each e-mail address we need in a page. So what we will do now, is to assign this text to be on data elements on the individual elements, so we can have more than one link on a page. So let's first add some attributes to our paragraph element, then we'll modify the CSS. So in the paragraph with class="e-l" , type in the following data-user="tutors" and data-domain="tutorial.com"
So you should have something like this:
Copy and paste the class="e-l" and change data-user="tutors" to data-user="support" you should have two p tags. One with data-user="tutors" and the other with data-user="support"
So since we haven't modified the CSS, we still see [email protected] showing up twice in the browser.
Now let's modify the CSS. in the style tag, modify the .e-l:before styling by replacing 'tutors@' with attr(data-user)'@' also modify .e-l:after styling by replacing 'tutorial.com' with attr(data-domain). So you should have this
   <style media="screen">

         .e-l:before {
             content: attr(data-user)'@';
         }

         .e-l:after {
             content: attr(data-domain);
         }

       </style>
So your final code view should be
<!DOCTYPE html>
<html>
  <head>
    <meta charset="utf-8">
    <title></title>
    <link rel="stylesheet" href="style.css">
    <style media="screen">

      .e-l:before {
          content: attr(data-user)'@';
      }

      .e-l:after {
          content: attr(data-domain);
      }

    </style>
  </head>
  <body>

      <article>

          <h2>Option 1: CSS Pseudo Classes</h2>

          <p class="content">

              Lorem ipsum dolor sit amet, consectetur adipisicing elit, sed do eiusmod tempor incididunt ut labore et dolore magna aliqua. Ut enim ad minim veniam, quis nostrud exercitation ullamco laboris nisi ut aliquip ex ea commodo consequat. Duis aute irure dolor in reprehenderit in voluptate velit esse cillum dolore eu fugiat nulla pariatur. Excepteur sint occaecat cupidatat non proident, sunt in culpa qui officia deserunt mollit anim id est laborum.

          </p>

          <p>Contact Us</p>

          <p class="e-l" data-user="tutors" data-domain="tutorial.com"></p>
          <p class="e-l" data-user="support" data-domain="tutorial.com"></p>

      </article>

  </body>
</html>
Refresh your page and you will have this
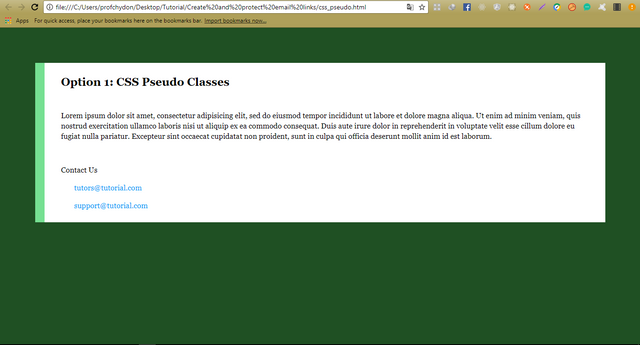
So now we can have any number of e-mail listings in our html webpage and one CSS rule will modify each one based on the data that we put in those html elements. If we add another p tag with a different data, we get a new email listing.
This approach provides a quick and compatible way to display e-mail addresses on a webpage while hiding it from most e-mail crawlers. Now the downside to this approach, is that users can't select the text of the e-mail address, and copy and paste it into their e-mail client. Nor can they click on these links and have that start an e-mail for them. Later on in the course, we will be discussing how to create interactive links where we manipulate the html after it's been loaded from the server, but still maintain an active hyperlink for the users.
The next option is to make use of unicode-bidi and direction properties to reverse text
2. Unicode-bidi and direction properties to reverse text
Using this option, the email is coded into the html page in a reverse format and using the css directional properties, it will styled to visually display the proper way but what exist in the code is a reverse of the exact email. So if we are to display [email protected], what will be coded into our web page will be moc.lairotut@srotut.
Let's start right away. Create a new file called unicode.html, copy and paste the following code
<!DOCTYPE html>
<html>
  <head>
    <meta charset="utf-8">
    <title></title>
    <link rel="stylesheet" href="style.css">
    <style media="screen">


    </style>
  </head>
  <body>

      <article>

          <h2>Option 2: Unicode-bidi and direction properties to reverse text</h2>

          <p class="content">

              Lorem ipsum dolor sit amet, consectetur adipisicing elit, sed do eiusmod tempor incididunt ut labore et dolore magna aliqua. Ut enim ad minim veniam, quis nostrud exercitation ullamco laboris nisi ut aliquip ex ea commodo consequat. Duis aute irure dolor in reprehenderit in voluptate velit esse cillum dolore eu fugiat nulla pariatur. Excepteur sint occaecat cupidatat non proident, sunt in culpa qui officia deserunt mollit anim id est laborum.

          </p>

          <p>Contact Us</p>

          <p class="e-l"></p>


      </article>

  </body>
</html>
Let me explain what we will be doing here
So what we're going to do here is put the email address in this paragraph element, but we will put all of the characters in in reverse. So we are will have all the characters in [email protected] typed in reverse as moc.lairotut@srotut, then we will add a CSS class that will set the property of unicode-bidi, or unicode bi-directional, we will set a bi-directional override, then set the direction to be from right to left. What this is going to do is take all of the characters inside of that paragraph element, and show them in reverse order so the user will see the text [email protected].
So back in the unicode.html file, type the email in the paragraph tag but remember to type it in reverse
<p class="e-l">moc.lairotut@srotut</p>
Now in the browser you will see the character in a reverse format.
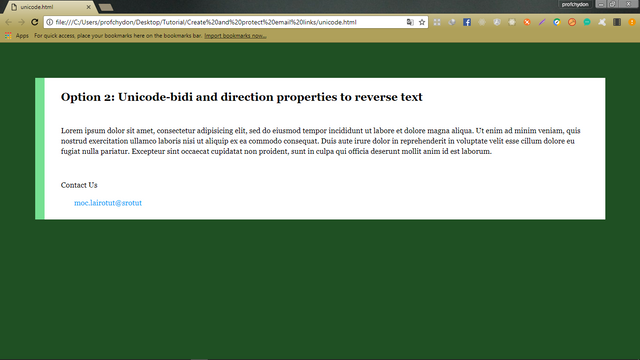
Then in the style tag add the following codes to display the email properly.
<style media="screen">

      .e-l {
          unicode-bidi: bidi-override;
          direction: rtl;
          text-align: left;
      }

    </style>
unicode-bidi: bidi-override; - here, we set the unicode bi-directional property to bi-directional override
direction: rtl; - here, we set the direction to rtl meaning (right to left).
Now since we are targeting a paragraph element which has a display type of block, the paragraph element in the page takes up the entire available width, so we have two ways that we can get around the fact that [email protected] is aligning to the right. The first is to set the css property display : inline or text-align : left.
Copy and paste the paragraph tag with the email and change the email to moc.lairotut@troppus
<p class="e-l">moc.lairotut@srotut</p>
<p class="e-l">moc.lairotut@troppus</p>
You can have as many emails as possible with one css style doing the work.
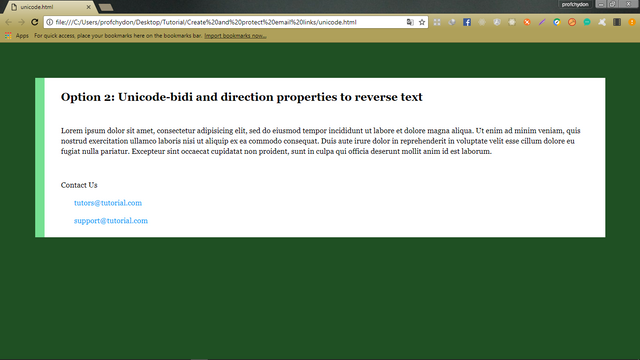
Now one downside to this approach is that if a user goes over to your webpage, selects and copies the email address, composes a new email in their email client, and then pastes in your email address, the pasted email address is gonna come in in reverse. That's because the html in the page is actually in reverse order. So if you will use this approach, I would recommend going back to our CSS file, and disable the ability for users to be able to select this text. So inside of this CSS, add the following CSS properties that will disable selection.
-webkit-user-select: none;
-moz-user-select: none;
-ms-user-select: none;
-user-select: none;
So your final code view should be
<!DOCTYPE html>
<html>
  <head>
    <meta charset="utf-8">
    <title></title>
    <link rel="stylesheet" href="style.css">
    <style media="screen">

      .e-l {
          unicode-bidi: bidi-override;
          direction: rtl;
          text-align: left;
          -webkit-user-select: none;
          -moz-user-select: none;
          -ms-user-select: none;
          -user-select: none;
      }

    </style>
  </head>
  <body>

      <article>

          <h2>Option 2: Unicode-bidi and direction properties to reverse text</h2>

          <p class="content">

              Lorem ipsum dolor sit amet, consectetur adipisicing elit, sed do eiusmod tempor incididunt ut labore et dolore magna aliqua. Ut enim ad minim veniam, quis nostrud exercitation ullamco laboris nisi ut aliquip ex ea commodo consequat. Duis aute irure dolor in reprehenderit in voluptate velit esse cillum dolore eu fugiat nulla pariatur. Excepteur sint occaecat cupidatat non proident, sunt in culpa qui officia deserunt mollit anim id est laborum.

          </p>

          <p>Contact Us</p>

          <p class="e-l">moc.lairotut@srotut</p>
          <p class="e-l">moc.lairotut@troppus</p>


      </article>

  </body>
</html>
Right now, the user wont be able to copy the email address on the web page.
Another way to hide your email address in a webpage from a web crawler is to encode all the characters of your email address.
3. Encoding text with character entities
This technique is one of the quickest ways to hide your email address in a webpage from a web crawler is to encode all the characters of your email address. Using this technique, the email address characters inside the "e-l" class is encoded and represented as encoded entities.
So create a new file called encode.html, copy and paste the following codes
<!DOCTYPE html>
<html>
  <head>
    <meta charset="utf-8">
    <title></title>
    <link rel="stylesheet" href="style.css">

  </head>
  <body>

      <article>

          <h2>Option 3: Encoding text with character entities </h2>

          <p class="content">

              Lorem ipsum dolor sit amet, consectetur adipisicing elit, sed do eiusmod tempor incididunt ut labore et dolore magna aliqua. Ut enim ad minim veniam, quis nostrud exercitation ullamco laboris nisi ut aliquip ex ea commodo consequat. Duis aute irure dolor in reprehenderit in voluptate velit esse cillum dolore eu fugiat nulla pariatur. Excepteur sint occaecat cupidatat non proident, sunt in culpa qui officia deserunt mollit anim id est laborum.

          </p>

          <p>Contact Us</p>

          <p class="e-l" href="mailto:[email protected]">Email me</p>


      </article>

  </body>
</html>
So now we are going to encode [email protected] and represent each character as encoded entity. You can search for site on google for email encoding websites, you have list of options to choose from.
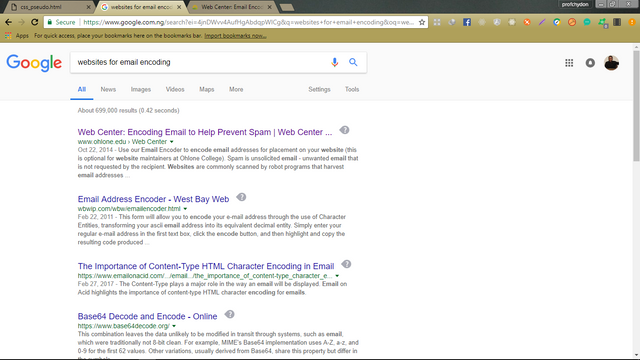
I made use of the first search result. Click on the link and in the regular email address textbox as seen in the image below, type in the email to be encoded. That is; [email protected]
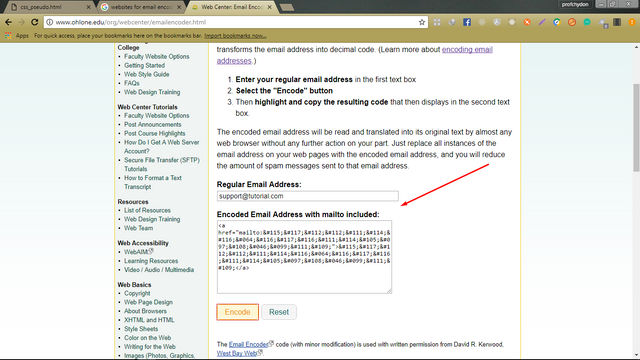
Note, the encode result has an anchor () tag, but in our tutorial we are making use of a paragraph tag. So copy the entire encoded result
<a href="mailto:support@tutorial.com">support@tutorial.com</a>
and paste in the paragraph tag. Next href="mailto:[email protected]" in the paragraph tag so we don't leave anything in an email format on the web page. So now we have this
<p class="e-l"><a href="mailto:support@tutorial.com">support@tutorial.com</a></p>
Refresh your browser and the encoded characters will be displayed as an email address.
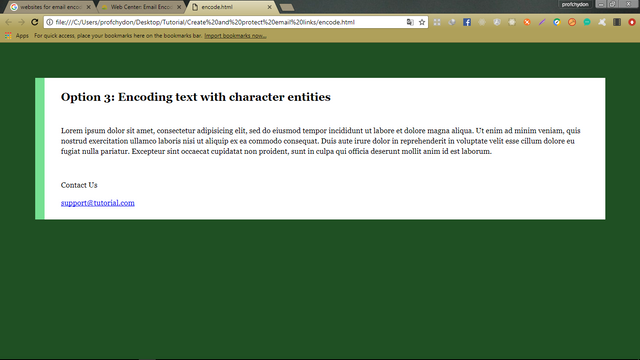
If you're working on a website that's using some back end server language like PHP or ASP.NET or something similar, you'll want to look and see if those individual languages have some type of URL encoding function. PHP, for example has a function called URL Encode. What you can do is put your full email address in the scripts and then when these get processed on the server, the encoded entities are what are actually sent down to the browser.
So encoding your email addresses will go a long way in hiding your email address in browsers, while maintaining an actionable link for your users.
Next, we'll talk about using JavaScript to manipulate the HTML after the HTML's been loaded into the browser.
4. Creating and running an inline JS function
JavaScript can be used to inject an email address into the HTML page after the page has been loaded from a server. Since web crawlers do not process the JavaScript files to see their final result, this method is very effective for keeping your email safe in a web page.
Create a new file js.html, copy and paste the following html code
<!DOCTYPE html>
<html>
  <head>
    <meta charset="utf-8">
    <title></title>
    <link rel="stylesheet" href="style.css">

  </head>

  <script type="text/javascript">

  </script>

  <body>

      <article>

          <h2>Option 4: Creating and running an inline js function </h2>

          <p class="content">

              Lorem ipsum dolor sit amet, consectetur adipisicing elit, sed do eiusmod tempor incididunt ut labore et dolore magna aliqua. Ut enim ad minim veniam, quis nostrud exercitation ullamco laboris nisi ut aliquip ex ea commodo consequat. Duis aute irure dolor in reprehenderit in voluptate velit esse cillum dolore eu fugiat nulla pariatur. Excepteur sint occaecat cupidatat non proident, sunt in culpa qui officia deserunt mollit anim id est laborum.

          </p>

          <p>Contact Us</p>

          <p><a class="e-l" href="mailto:[email protected]">Email me</a> </p>


      </article>

  </body>
</html>
Notice that will now have a script tag where we will put our javascript codes. So down in the body area we have our article element and we have a paragraph tag with our anchor link in the article tag. What we will be doing is taking out this anchor link and the HTML code, breaking our email address into pieces and then re-injecting that content with JavaScript. So we will be replacing that anchor link text with an inline JavaScript call. We'll have a script element and then inside of the script element, we'll have a Function call. We'll call this function makeLink and we'll send three parameters along with this Function call.
Now it doesn't matter what we call those individual variables inside of this Function call, but what is important is the three pieces of data. So we're gonna breakout the "support "which will be the user. The first part of the domain which is "tutorial "and the second part of the domain which the ".com". We will send these as three individual values makeLink('support' , 'tutorial' , 'com'). When that Function call is made, those three values then get sent to our Function. Our Function in turn will then construct an anchor link. So we'll set an anchor tag, href="mailto. We'll put the user value in. We'll add the @ symbol with JavaScript. Put in the first part of the domain, add in then dot, and then put in com. Then the result of this function will be to replace the makeLink JavaScript call in line with this entire anchor link. It's the processing of this JavaScript file that the web crawlers are not doing so they never get to see the full address of [email protected].
Solet's begin. Back in the js.html file, select and cut the entire anchor tag and leave the paragraph tag empty. In the script tag, create a function called makeLink(), now we will write the entire anchor tag will just cut now in the p tag. Add a document.write in the makeLink function, copy and paste the anchor tag in the string quotes. So should have this
  <script type="text/javascript">

    function makeLink() {
        document.write('<a class="e-l" href="mailto:[email protected]">Email me</a>');
    }

  </script>
Back in the p tag, add a script tag and call the makeLink() function in there.
<p> <script type="text/javascript"> makeLink(); </script> </p>
When you run the file in your browser, you will see the "Email me" as a hyperlink which you can click to load up your email app. But what's happening here is the function call here is dynamically writing the anchor tag. While the result looks the same in the browser, what's happening is very different. Now an email crawler, since all of this content is in the HTML page, can still see this string. It can still see [email protected]. Even though it's not in a hyperlink, this might still be found by a web crawler. So we will break our email address up into individual pieces.
The first thing we'll do is come down into our makeLink function call and break up those individual pieces into three variables. In the makeLink() in our p tag, break the email into three variables and add as parameters in the function. So we have
<p> <script type="text/javascript"> makeLink('support' , 'tutorial' , 'com'); </script> </p>
Now in our makeLink function call, we're sending three extra pieces of data. So we need to catch these pieces of data in our function. Back in the script tag in the head where we defined our function, add three parameters to the makeLink() function. makeLink(user , domain_begin, domain_end)
So when the makeLink function is called, "support " will become the value of "user", "tutorial " will become the value of "domain_begin", and "com " will become the value of "domain_end". Next in our document.write() we will break the string and add our variables concatenating them to make a single string.
Recall that we have this presently
document.write('<a class="e-l" href="mailto:[email protected]">Email me</a>');
So, replace support with the variable user , tutorial with domain_begin and com with domain_end
document.write('<a class="e-l" href="mailto:'+user+'@'+domain_begin+'.'+domain_end+'">Email me</a>');
Now the value of the first parameter, second parameter and third parameter are being captured as variables and then re-injected into our email address. No where in this script now do you see the full address [email protected]. Similar to what we did earlier with the CSS rules, since we have the values being sent from the HTML area, we can create any number of email links within our HTML page, calling one single JavaScript function file and having the JavaScript re-inject our email addresses.
Let's add a new p tag and change the user variable to tutors
<p> <script type="text/javascript"> makeLink('support' , 'tutorial' , 'com'); </script> </p>
At this point, we are still seeing Email me instead of the email address. So copy this '+user+'@'+domain_begin+'.'+domain_end+' and replace the Email me text.
document.write('<a class="e-l" href="mailto:'+user+'@'+domain_begin+'.'+domain_end+'"> '+user+'@'+domain_begin+'.'+domain_end+' </a>');
So our final, code view should be:
<!DOCTYPE html>
<html>
  <head>
    <meta charset="utf-8">
    <title></title>
    <link rel="stylesheet" href="style.css">

  </head>

  <script type="text/javascript">

    function makeLink(user, domain_begin, domain_end) {
        document.write('<a class="e-l" href="mailto:'+user+'@'+domain_begin+'.'+domain_end+'"> '+user+'@'+domain_begin+'.'+domain_end+' </a>');
    }

  </script>

  <body>

      <article>

          <h2>Option 4: Creating and running an inline js function </h2>

          <p class="content">

              Lorem ipsum dolor sit amet, consectetur adipisicing elit, sed do eiusmod tempor incididunt ut labore et dolore magna aliqua. Ut enim ad minim veniam, quis nostrud exercitation ullamco laboris nisi ut aliquip ex ea commodo consequat. Duis aute irure dolor in reprehenderit in voluptate velit esse cillum dolore eu fugiat nulla pariatur. Excepteur sint occaecat cupidatat non proident, sunt in culpa qui officia deserunt mollit anim id est laborum.

          </p>

          <p>Contact Us</p>

          <p> <script type="text/javascript"> makeLink('support' , 'tutorial' , 'com'); </script> </p>

          <p> <script type="text/javascript"> makeLink('tutors' , 'tutorial' , 'com'); </script> </p>


      </article>

  </body>
</html>
Refresh your browser and the email addresses will be displayed.
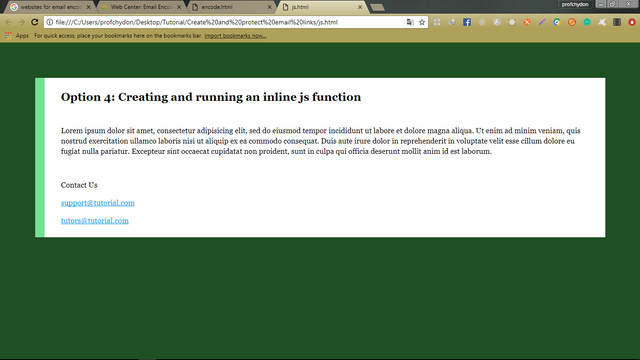
Using this approach allows us to manipulate the HTML in the browsers ram after the HTML has been loaded from the server. Next we'll take this approach one step further and manipulate all email links in a page instead of manually calling a JavaScript function for each email address we want to list.
5. Detecting and assembling links with JavaScript
In the last technique, we used an inline JavaScript function call to create an email address for each element we wanted to show on the page. In this technique, we're simply going to create our email links first, then we will use JavaScript to search for all of those links and then re-inject our email address.
So create a new file called assembling.html, copy and paste the following code
<!DOCTYPE HTML>
<html>
    <head>
        <meta charset="utf-8">
        <title></title>
        <link rel="stylesheet" href="style.css">
    </head>
    <body>

        <article>
            <h2>Option 5: Detecting and assembling links with JavaScript </h2>

            <p class="content">

                    Lorem ipsum dolor sit amet, consectetur adipisicing elit, sed do eiusmod tempor incididunt ut labore et dolore magna aliqua. Ut enim ad minim veniam, quis nostrud exercitation ullamco laboris nisi ut aliquip ex ea commodo consequat. Duis aute irure dolor in reprehenderit in voluptate velit esse cillum dolore eu fugiat nulla pariatur. Excepteur sint occaecat cupidatat non proident, sunt in culpa qui officia deserunt mollit anim id est laborum.

            </p>

            <p><a class="e-l" href="#">Email me</a></p>

        </article>

        <script type="text/javascript">

            var elinks = document.getElementsByClassName('e-l');
            var total_elinks = elinks.length;
            for( var i=0; i < total_elinks; i++ ){
                var part1 = elinks[i].getAttribute('data-ep1');
                var part2 = elinks[i].getAttribute('data-ep2');
                var part3 = elinks[i].getAttribute('data-ep3');
            }

        </script>

    </body>
</html>
Now, this document is structured a little bit differently than the last. We still have a link in the heading area here to our style.css, but what we have down under the content, a JavaScript file right before the end of the document.
The reason we're doing this is we will be setting up our anchor links in the content area and then search for all of those elements using JavaScript. So we have to have this script that's searching for the elements show up after all of the elements have been loaded into the browser. Now if you're using a JavaScript framework that has a document ready option, like jQuery, you can then put the JavaScript at the top of the page, but in this tutorial, we're going to use straight JavaScript and we're just going to put the script at the bottom of the page.
Now the basic idea of what we are going to be doing is going back and finding all of these anchor links and replacing the href="#", which is a self link, with an email address that we want to provide to our users. We will be manipulating the DOM, or the document object model of our page. After we load all of the anchor tags with those hrefs equaling a # sign, we will go back through the document with JavaScript, we will then search for each one of these elements and find these data attributes that we are going to add to each link.
We will name these attributes something that doesn't have the word email in them. So data-ep1 for email part one, email part two and email part three. Then when we find these in JavaScript, we will take the values, and put together our own email address. So we will set the href of each of those individual links. To the first variable, we will add the @ symbol. We'll add the second variable, add a period, and then we'll add the third variable. Once we have our brand new email address we will then replace the text of "Email me" with the value of that email address.
So the users will have clickable email addresses for any number of email addresses in a page and web crawlers that are looking at your page won't see the full email address.
Let's begin. Back in our assembing.html file, we have our anchor link, we have our class of e-l, href= "#" so we want the web crawler to see this link when the page loads so it thinks that it doesn't link anywhere. Now let's add some data attributes into this anchor link. So we'll add the first attribute, which will be data-ep1, which will match this variable name down in the script and set it to support and we will add data-ep2 and set it to tutorial then data-ep3 and set it to com.
<p><a class="e-l" href="#" data-ep1="support" data-ep2="tutorial" data-ep3="com">Email me</a></p>
Now we have our three pieces of data on this anchor link.
Down here in our JavaScript, where we have this code
<script type="text/javascript">

            var elinks = document.getElementsByClassName('e-l');
            var total_elinks = elinks.length;
            for( var i=0; i < total_elinks; i++ ){
                var part1 = elinks[i].getAttribute('data-ep1');
                var part2 = elinks[i].getAttribute('data-ep2');
                var part3 = elinks[i].getAttribute('data-ep3');
            }

</script>
What we're first doing is declaring a variable called elinks. We're setting this equal to document.getElementsByClassName, and then we're putting in the class name of e-l. So by setting this variable to document.getElementsByClassName, we'll collect all of the anchor links that are found on this HTML page. And these will all be stored in an array, which means one variable with multiple sets of values. Next we will set a variable called total_elinks, then we're going to point to the elinks variable.length. This is JavaScript's way of getting the total number of elements that have been found. Then we have a for loop, and we're setting a variable inside of the for loop of i for index. We are going to set this to 0. Then we are going to see if 0, or whatever value the index is, is less than the total number of elinks that we found. This way the script knows how many times it needs to run the for loop to modify all of our links, and then each time this runs, we'll set the index to ++, which will add 1 to it, which will iterate that value. So once this variable is not less than the total number of links, the script will stop running.
Then inside the script, we will get the three email parts. So part1, part2, and part3 are going to equal the elinks with the square brackets and the letter i, which targets the individual item of the array. We will get the attribute of data 1. So the first time this runs, the 0 number that's found, which is the first number in an array, we're gonna go into the elink zero value, get data-ep1, ep2, and ep3. So this script will already find all of those individual anchor links and gather this data. What we're going to do is create a new variable, and we're gonna put together our email address.
So in the for loop, below var part3, create a new variable newAddress, and we will put our email address back together based on those values of those variables and assign it to this variable.
Add this new variable in the for loop
var newAddress = part1+'@'+part2+'.'+part3;
So this string concatenates the parts of our email address with the parts of text we don't want the web crawler to see. Now with our email address created, inside of this for loop, we're then going to update each one of the links that we found all this data inside of.
Below the newAddress variable, add the following code
elinks[i].setAttribute('href' , 'mailto:'+newAddress);
Now the href is going to equal mailto: [email protected]. Also we need to manipulate the innerHTML of the p tag. So add this code
elinks[i].innerHTML = newAddress;
At this point your final code view should be
<!DOCTYPE HTML>
<html>
    <head>
        <meta charset="utf-8">
        <title></title>
        <link rel="stylesheet" href="style.css">
    </head>
    <body>

        <article>
            <h2>Option 5: Detecting and assembling links with JavaScript </h2>

            <p class="content">

                    Lorem ipsum dolor sit amet, consectetur adipisicing elit, sed do eiusmod tempor incididunt ut labore et dolore magna aliqua. Ut enim ad minim veniam, quis nostrud exercitation ullamco laboris nisi ut aliquip ex ea commodo consequat. Duis aute irure dolor in reprehenderit in voluptate velit esse cillum dolore eu fugiat nulla pariatur. Excepteur sint occaecat cupidatat non proident, sunt in culpa qui officia deserunt mollit anim id est laborum.

            </p>

            <p><a class="e-l" href="#" data-ep1="support" data-ep2="tutorial" data-ep3="com">Email me</a></p>

        </article>

        <script type="text/javascript">

            var elinks = document.getElementsByClassName('e-l');
            var total_elinks = elinks.length;
            for( var i=0; i < total_elinks; i++ ){
                var part1 = elinks[i].getAttribute('data-ep1');
                var part2 = elinks[i].getAttribute('data-ep2');
                var part3 = elinks[i].getAttribute('data-ep3');
                var newAddress = part1+'@'+part2+'.'+part3;
                elinks[i].setAttribute('href' , 'mailto:'+newAddress);
                elinks[i].innerHTML = newAddress;
            }

        </script>

    </body>
</html>
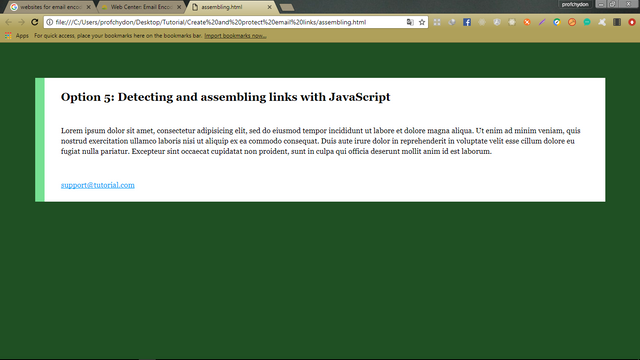
Cross check to make sure you missed nothing. Load this page in your browser and you should see
Now if we decide to add more emails on the web page, just duplicate the p tag and change data-ep1 to the name. So if i add these
<p><a class="e-l" href="#" data-ep1="tutors" data-ep2="tutorial" data-ep3="com">Email me</a></p>
<p><a class="e-l" href="#" data-ep1="help" data-ep2="tutorial" data-ep3="com">Email me</a></p>
I will have them displayed on the web page
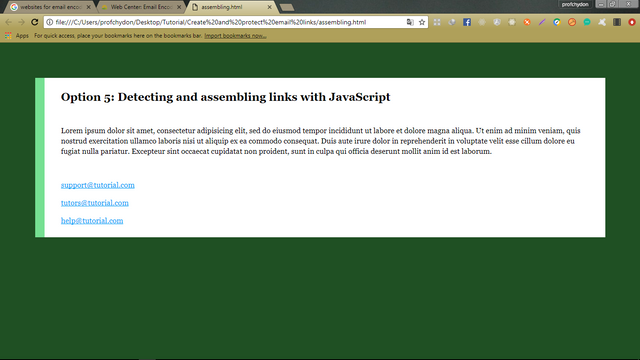
So in this technique, by searching through our document and finding all of the anchor links and putting pieces of data on the individual anchor links, we can use a single JavaScript function to manipulate any number of email links into interactive email links that the user can use but still have our email addresses hidden from web crawlers.
You can choose to use which ever technique you like, however i will recommend you always work with the last two techniques.
You can access the complete code for this tutorial in the github repo
Posted on Utopian.io - Rewarding Open Source Contributors
Thank you for the contribution. It has been approved.
You can contact us on Discord.
[utopian-moderator]
Downvoting a post can decrease pending rewards and make it less visible. Common reasons:
Submit
Hey @scipio, I just gave you a tip for your hard work on moderation. Upvote this comment to support the utopian moderators and increase your future rewards!
Downvoting a post can decrease pending rewards and make it less visible. Common reasons:
Submit
Hey @profchydon I am @utopian-io. I have just upvoted you!
Achievements
Community-Driven Witness!
I am the first and only Steem Community-Driven Witness. Participate on Discord. Lets GROW TOGETHER!
Up-vote this comment to grow my power and help Open Source contributions like this one. Want to chat? Join me on Discord https://discord.gg/Pc8HG9x
Downvoting a post can decrease pending rewards and make it less visible. Common reasons:
Submit