What will I learn?
- Selecting image from gallery and displaying the selected image
- Using firebase storage to add image
- Adding image link in firebase database.
Requirement
- A PC/laptop with any Operating system such as Linux, Mac OSX, Windows OS
- Preinstalled Android Studio, Android SDK and JDK
Note: This tutorial is performed in Android Studio on the laptop with Windows 10 Home, 64 bit OS
Difficulty
Anybody with basic knowledge of Android can grasp the tutorial.
Tutorial Content
In our previous tutorial we learnt to register user to the firebase using firebase authentication using email/password and we also successfully added user’s data that is email, password in the firebase database. Now in this series we will be adding user profile picture in firebase storage and the link in the database so that we can easily access the user’s profile image in our chatting application. So let us begin.
In order to add profile picture of user we must allow the user to select the picture first. So will will be passing the implicit intent to the gallery and user will select the desired picture. In order to achieve this let us open activity_signup.xml and add a ImageView their.
<ImageView
    android:id="@+id/show_user_profile"
    android:src="@drawable/ic_add_profile"
    android:layout_width="match_parent"
    android:layout_height="200dp" />
When the user will press on this ImageView we will pass the implicit intent to the gallery of the user’s device and let the user select the desired image. After the user selects the image the selected image will be displayed in the imageview.
In order to pass the implicit intent let us add click listener in the imageview
showUserProfile.setOnClickListener(new View.OnClickListener() {
    @Override
    public void onClick(View view) {
        Intent intent = new Intent();
            // Show only images, no videos or anything else
        intent.setType("image/*");
        intent.setAction(Intent.ACTION_GET_CONTENT);
            // Always show the chooser (if there are multiple options available)
        startActivityForResult(Intent.createChooser(intent, "Select Picture"), PICK_IMAGE_REQUEST);

    }
});
This allows users to select the image from the gallery. Here we should also override startActivityForResult() method so that we can handle the event once the user picks the image
@Override
public void onActivityResult(int requestCode, int resultCode, Intent data) {
    super.onActivityResult(requestCode, resultCode, data);

    if (requestCode == PICK_IMAGE_REQUEST && resultCode == RESULT_OK && data != null && data.getData() != null) {

        uri = data.getData();

        try {
            bitmap = MediaStore.Images.Media.getBitmap(getApplicationContext().getContentResolver(), uri);
            // Log.d(TAG, String.valueOf(bitmap));
            Toast.makeText(this, "hey you selected image" + bitmap, Toast.LENGTH_SHORT).show();
            showUserProfile.setImageBitmap(bitmap);
            //ImageView imageView = (ImageView) findViewById(R.id.imageView);
            //imageView.setImageBitmap(bitmap);
        } catch (IOException e) {
            e.printStackTrace();
        }
    }
}
Here, when the user picks up his/her desired image then this method is called and if the data is not null we will be receiving the data by data.getData(). This returns the uri of the image and we will then convert this image into bitmap so that we can display it in the ImageView. Let us run this application and see what happens.
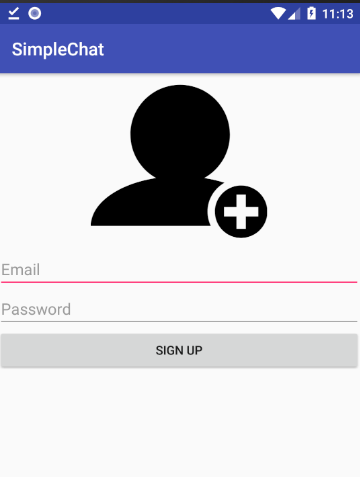
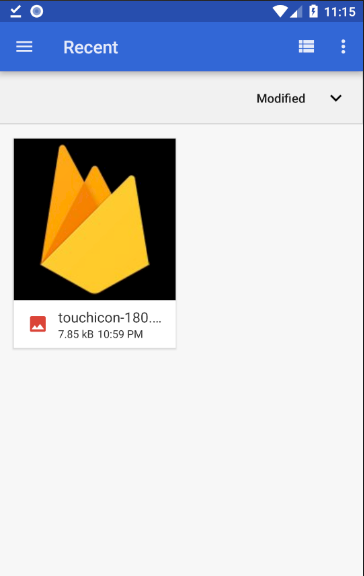
Here initially this screen pops up. Now if the user presses on the image then user will be navigated to select the image.
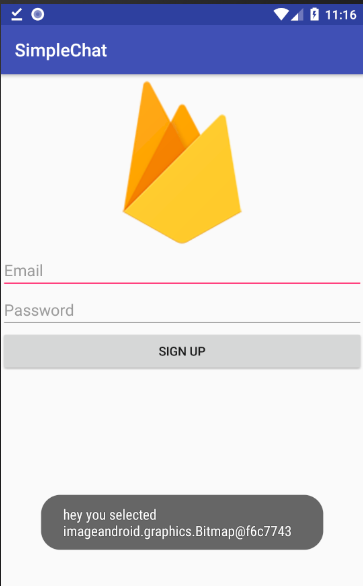
And finally if the user selects the image then the selected image will be displayed in the imageview along with the Toast message like this:
We successfully let our user select the image now we have to upload this particular image to firebase database if the user presses the signup button. In order to upload image to firebase storage we must initially convert our bitmap to byte array so that it will be easy for us to upload the image.
ByteArrayOutputStream bytes = new ByteArrayOutputStream();
bitmap.compress(Bitmap.CompressFormat.JPEG, 100, bytes);
byte[] data = bytes.toByteArray();

FirebaseStorage.getInstance().getReference().child("simpleChat").child(firebaseUser.getUid())
        .child("profilePic")
        .putBytes(data)
        .addOnSuccessListener(new OnSuccessListener<UploadTask.TaskSnapshot>() {
            @Override
            public void onSuccess(UploadTask.TaskSnapshot taskSnapshot) {


            }
        });
Here we are getting the instance of FirebaseStorage and pushing our image in a folder named simpleChat followed by userId and the name of our image will be profilePic. onSuccessListener is called if the upload task is successful. We can get the image url simply by:
String url=taskSnapshot.getDownloadUrl().toString();
After we get the profile picture url of user then only we will be uploading the user data in the server. We will now be creating our own user so that we can add yhe desired properties on user. If we pushed the fieebaseUser object to server then we will only have fixed no of attributes available. So let us create a new Java class and name it User.java
public class User {

    private String emailAddress;
    private String userId;
    private String profilePic;

    public User(String emailAddress, String userId, String profilePic) {
        this.emailAddress = emailAddress;
        this.userId = userId;
        this.profilePic = profilePic;
    }

    public String getEmailAddress() {
        return emailAddress;
    }

    public void setEmailAddress(String emailAddress) {
        this.emailAddress = emailAddress;
    }

    public String getUserId() {
        return userId;
    }

    public void setUserId(String userId) {
        this.userId = userId;
    }

    public String getProfilePic() {
        return profilePic;
    }

    public void setProfilePic(String profilePic) {
        this.profilePic = profilePic;
    }
}
For now we will only be adding emailAddress, profilePic and userId as we will only require this three
for now. Now finally we will add the user information to the firebase database by:
String url=taskSnapshot.getDownloadUrl().toString();
User user=new User(firebaseUser.getEmail(),firebaseUser.getUid(),url);
FirebaseDatabase.getInstance().getReference().child("simpleChat").child("users")
        .child(firebaseUser.getUid()).setValue(user);
Here we are creating adding our own user we created to the firebase database. There are multiple ways of setting value in firebase database. We can simply push string value in the firebase database but the most simple and elegant way is to directly push our object.
The final code of SignUpActivity looks like this:
public class SignupActivity extends AppCompatActivity {

    EditText emailEt,passwordEt;
    Button signUp;
    String email,password;
    FirebaseAuth auth;
    ImageView showUserProfile;
    private final Integer PICK_IMAGE_REQUEST=1;
    Bitmap bitmap;
    Uri uri;
    @Override
    protected void onCreate(Bundle savedInstanceState) {
        super.onCreate(savedInstanceState);
        setContentView(R.layout.activity_signup);
        initView();
        defineView();
        addCLicklistener();
    }

    private void defineView(){
        emailEt=findViewById(R.id.email_et);
        passwordEt=findViewById(R.id.password_et);
        signUp=findViewById(R.id.signup_btn);
        showUserProfile=findViewById(R.id.show_user_profile);

    }
    private void initView(){
        auth=FirebaseAuth.getInstance();

    }

    private boolean validate(){
        boolean isValid=false;
        email=emailEt.getText().toString();
        password=passwordEt.getText().toString();
        if(TextUtils.isEmpty(email))
            emailEt.setError("Required");
        else if(TextUtils.isEmpty(password))
            passwordEt.setError("Required");
        else if(uri==null)
            Toast.makeText(this, "Please select the image", Toast.LENGTH_SHORT).show();
        else
            isValid=true;
        return isValid;
    }
    private void addCLicklistener(){
        signUp.setOnClickListener(new View.OnClickListener() {
            @Override
            public void onClick(View view) {
                if(validate())
                    registerUserToDatabse();
            }
        });
        showUserProfile.setOnClickListener(new View.OnClickListener() {
            @Override
            public void onClick(View view) {
                Intent intent = new Intent();
                    // Show only images, no videos or anything else
                intent.setType("image/*");
                intent.setAction(Intent.ACTION_GET_CONTENT);
                    // Always show the chooser (if there are multiple options available)
                startActivityForResult(Intent.createChooser(intent, "Select Picture"), PICK_IMAGE_REQUEST);

            }
        });

    }
    private void registerUserToDatabse(){

        auth.createUserWithEmailAndPassword(email,password).addOnCompleteListener(SignupActivity.this, new OnCompleteListener<AuthResult>() {
            @Override
            public void onComplete(@NonNull Task<AuthResult> task) {
                Toast.makeText(SignupActivity.this, "succesfully created user::email is:"+ task.getResult().getUser().getEmail(), Toast.LENGTH_SHORT).show();
                addUserInDatabse(task.getResult().getUser());
            }
        });


    }

    private void addUserInDatabse(final FirebaseUser firebaseUser){

        ByteArrayOutputStream bytes = new ByteArrayOutputStream();
        bitmap.compress(Bitmap.CompressFormat.JPEG, 100, bytes);
        byte[] data = bytes.toByteArray();

        FirebaseStorage.getInstance().getReference().child("simpleChat").child(firebaseUser.getUid())
                .child("profilePic")
                .putBytes(data)
                .addOnSuccessListener(new OnSuccessListener<UploadTask.TaskSnapshot>() {
                    @Override
                    public void onSuccess(UploadTask.TaskSnapshot taskSnapshot) {
                        String url=taskSnapshot.getDownloadUrl().toString();
                        User user=new User(firebaseUser.getEmail(),firebaseUser.getUid(),url);
                        FirebaseDatabase.getInstance().getReference().child("simpleChat").child("users")
                                .child(firebaseUser.getUid()).setValue(user);

                    }
                });


    }

    @Override
    public void onActivityResult(int requestCode, int resultCode, Intent data) {
        super.onActivityResult(requestCode, resultCode, data);

        if (requestCode == PICK_IMAGE_REQUEST && resultCode == RESULT_OK && data != null && data.getData() != null) {

            uri = data.getData();

            try {
                bitmap = MediaStore.Images.Media.getBitmap(getApplicationContext().getContentResolver(), uri);
                // Log.d(TAG, String.valueOf(bitmap));
                Toast.makeText(this, "hey you selected image" + bitmap, Toast.LENGTH_SHORT).show();
                showUserProfile.setImageBitmap(bitmap);
                //ImageView imageView = (ImageView) findViewById(R.id.imageView);
                //imageView.setImageBitmap(bitmap);
            } catch (IOException e) {
                e.printStackTrace();
            }
        }
    }
}
Now before running our app please clear the previous authenticated user and clear the database too as we have changed the structure of the database. Go to authentication tab and press on option menu and delete user

Clear all the user. Similarly go on database tab and click on cross button
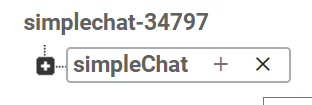
After you press on the cross button you will be shown a popup and select delete button there:
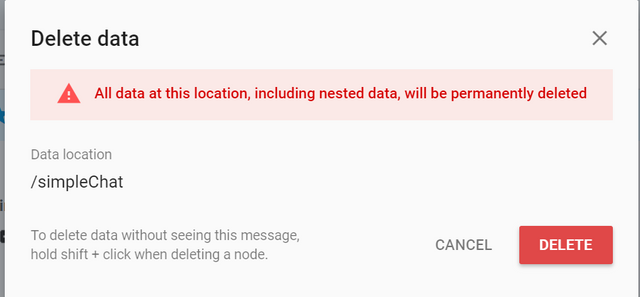
Now as your database is cleared go to the storage tab and press on getStarted there
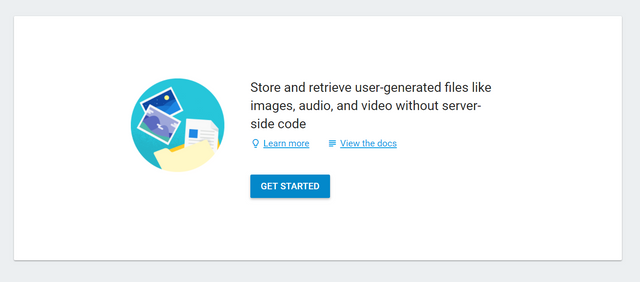
By this you are enabling you firebase Storage service.
let us run the application:
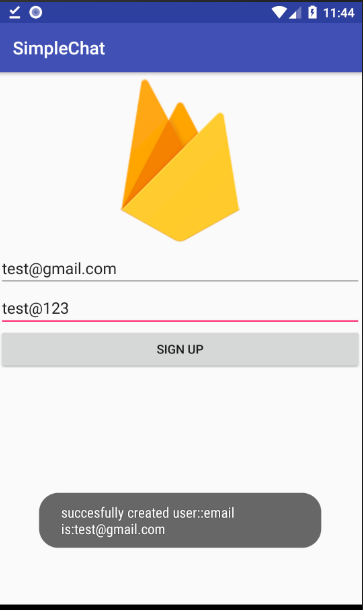
Here we successfully created the user. Now let us view our database:

We successfully added user with his/her profile picture. Now we can get the profile picture simply by getting the link.
Now let us view our storage
Firebase stores every child in the form of folders. Here simpleChat is our main parent folder

Inside simpleChat folder we have created a new folder that is user_id so that we can identify each user’s picture

And finally we have named our image profilePic

If we clicked the image then we can view our image
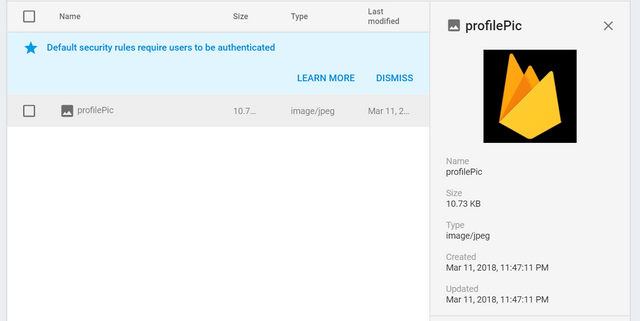
Hence here we successfully registered user and added his/her profile picture to the firebase. Now in next session we will be refining our view and also we will be allowing our user to login.
All above codes are available in my Github. Click here to download.
Curriculam
Using firebase Database to create a chat application in Android : Part I
Posted on Utopian.io - Rewarding Open Source Contributors
Thank you for the contribution. It has been approved.
You can contact us on Discord.
[utopian-moderator]
Downvoting a post can decrease pending rewards and make it less visible. Common reasons:
Submit
Hey @programminghub I am @utopian-io. I have just upvoted you!
Achievements
Community-Driven Witness!
I am the first and only Steem Community-Driven Witness. Participate on Discord. Lets GROW TOGETHER!
Up-vote this comment to grow my power and help Open Source contributions like this one. Want to chat? Join me on Discord https://discord.gg/Pc8HG9x
Downvoting a post can decrease pending rewards and make it less visible. Common reasons:
Submit