Hey beta.thunkable.com is a open source platform where you can make your own app very easily. Today I am going to share a auto impression app making tutorials. Just follow my tutorials. Its totally free.
What Will I Learn?
- How to work with beta.thunkable.com
- How to make auto impression app
- Knowledge on beta.thunkable.com
Requirements
- computer
- Internet Connection
- Any browser
Difficulty
- Basic
Tutorial Contents
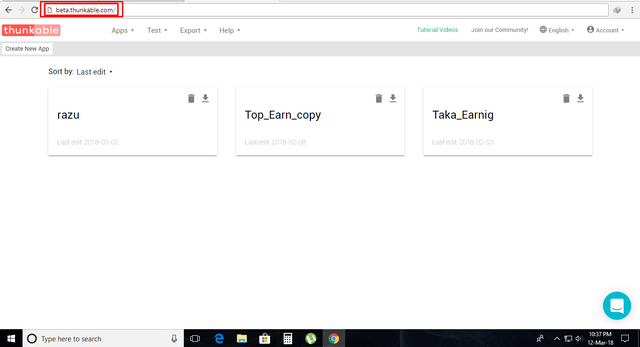
To start work. You have to go beta.thunkable.com. First open your browser then open a new tab then put that url and press Enter. You have to log in with your google id. Simply just sign in. Then it will take you in to the main page.

After sign in you will see this interface. If you new on beta.thunkable then don't see any app there. Now click on Create New App. A new interface will come.
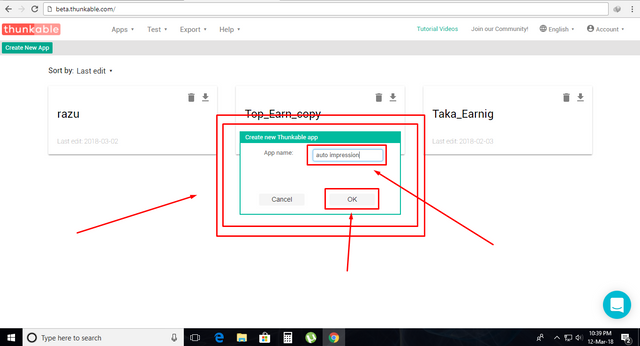
Look a box came there. Now put your app name there. I set my app name auto impression. You can choose your. Then click on Ok

This interface will come. This is the main page. We work here to create our app. Look on the left site. All needed things are there. And look on right side you can customize here which you drag from left side.
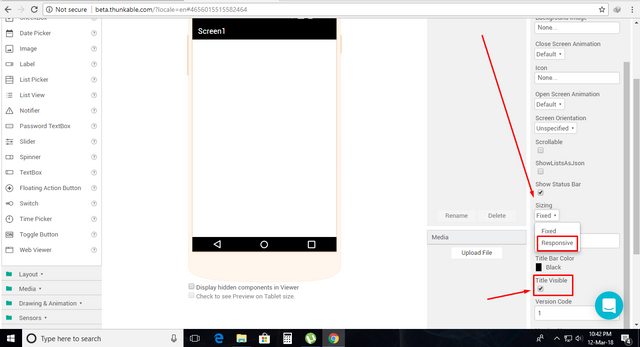
Now look bottom of right side. Set the screen size to responsive. Also check out the title visible.

Look I set that. Size is set to be responsive so that this app can use any screen size of android device. And check out the title visible so thak title bar hide and we get a big space to set our admob banner ad.
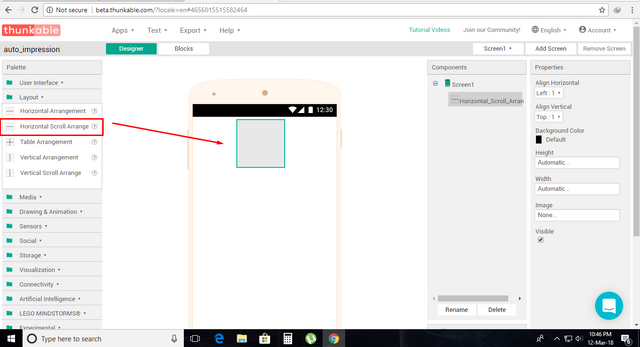
Now look on left side. Drag Horizontal Scroll Arrange to the main screen. We set admob banner ad in the Horizontal Scroll Arrange.
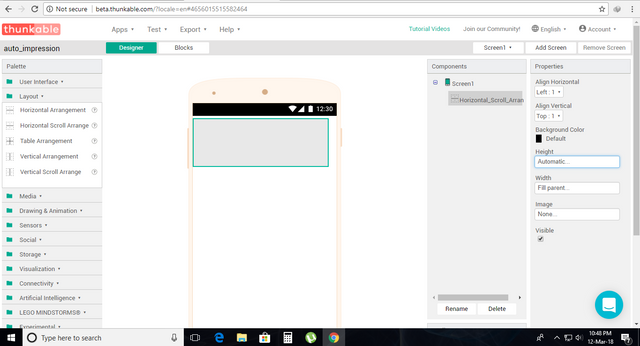
Now look on right side. Set the Height to automatic. And also set the width to Fil percentage. So that Horizontal Scroll Arrange's size take the full width of phone screen.
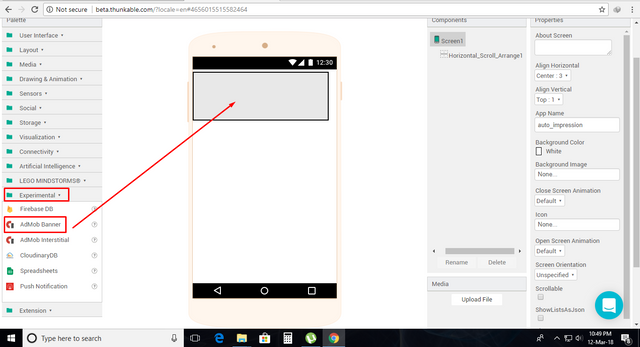
Now look on left side Click Experimental. You will see Admob Banner. Now drag it into Horizontal Scroll Arrange .
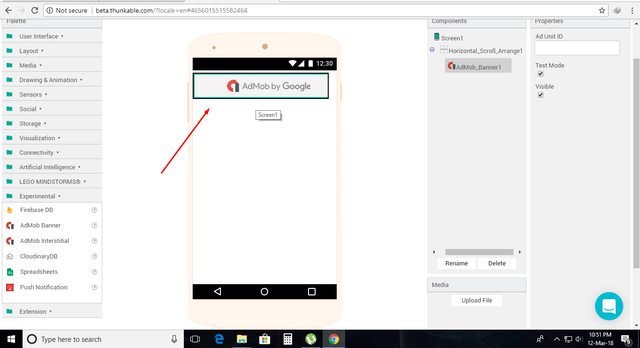
Look on the app screen. Admob is there.
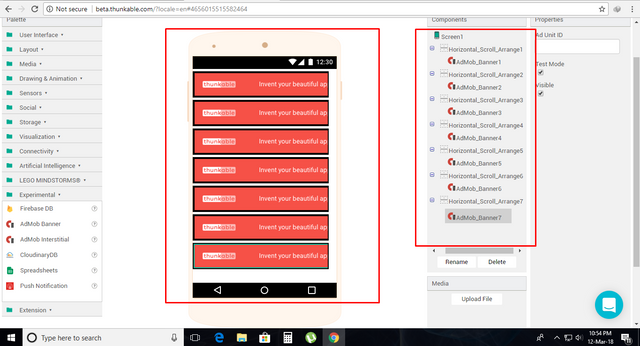
Now do the same process for 7 time and add 7 admob ad in the screen. It's same process. Don't worry.
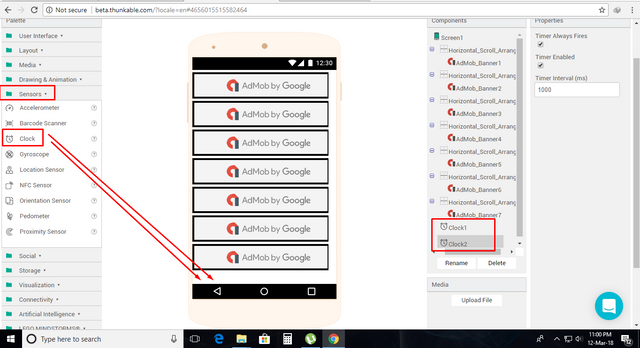
Now click on sensors and drag clock in the screen for two times. Its needed for auto impression.
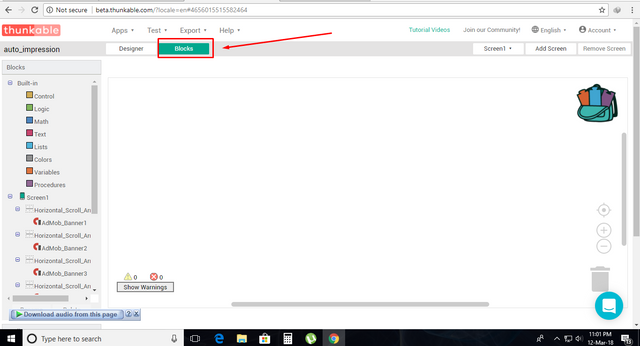
We have done all things in designer. Now click on block.
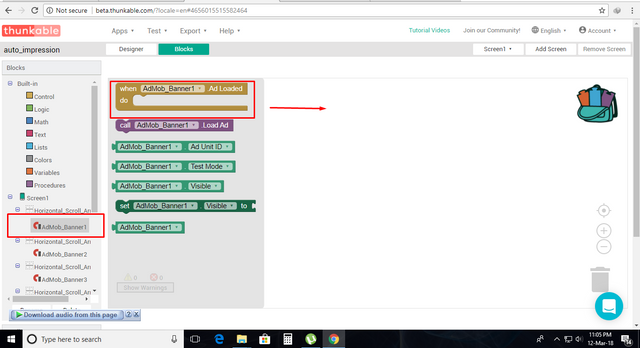
Look bottom of the left side. Click admob banner 1 now click when Admob_Banner1 Ad Loaded drag it to block screen.
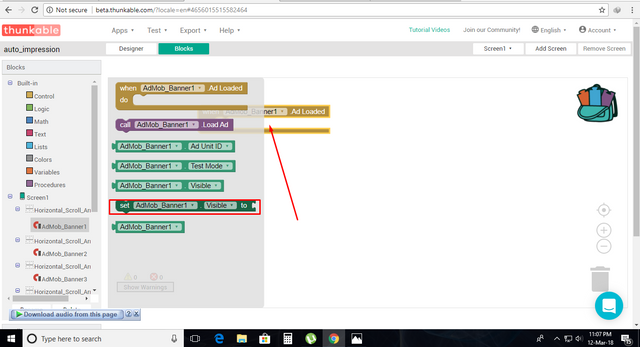
Now drag this into Ad loaded.

Now click logic and take true and place visible to true.

Like this.
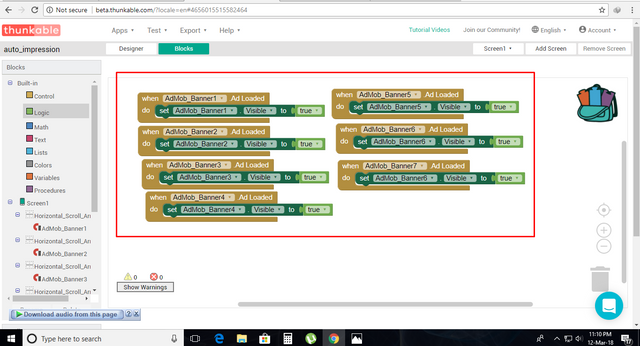
Now do this for all admob ad. You have to do this for seven time. Cause we set 7 admob ad.
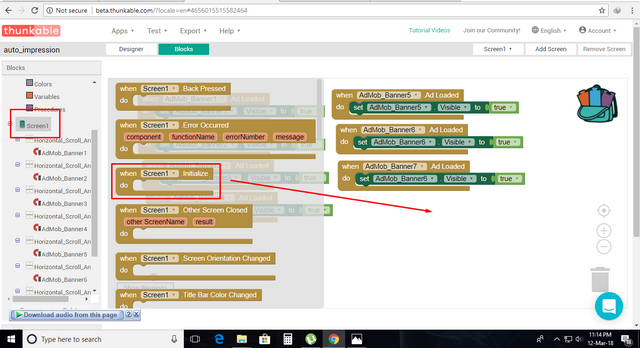
Now click on screen1, and take when Screen1 Initialize into block screen. Cause we have to run our ad for impression.
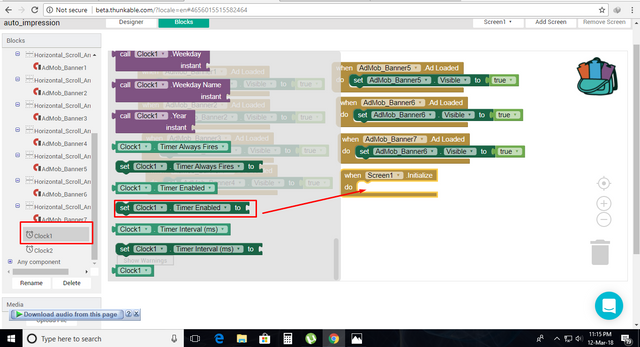
Now click on clock 1 and take set clock1 timer enabled to and set in to there I mark.

Now set clock1 timer enabled to false and copy it now set clock2 time enabled to true. And call your first 3 admob ad like the screen shot. Now again go to clock2 and take when clock2 timer in the block screen. Now set the clock2 timer enabled to false and clock1 timer enabled to true and call last 4 admob ad like the screen shot. Now we have done. Now just set your ad unit and export the apk install. Download this project from here don't worry it's open source and free for all.
Posted on Utopian.io - Rewarding Open Source Contributors
Your contribution cannot be approved because it does not follow the Utopian Rules.
Related Rule:
Clarifications and Suggestions:
You can contact us on Discord.
[utopian-moderator]
Downvoting a post can decrease pending rewards and make it less visible. Common reasons:
Submit
thanks bal
Downvoting a post can decrease pending rewards and make it less visible. Common reasons:
Submit
Hey @roj, I just gave you a tip for your hard work on moderation. Upvote this comment to support the utopian moderators and increase your future rewards!
Downvoting a post can decrease pending rewards and make it less visible. Common reasons:
Submit