What Will I Learn?
Things we could learn from it
• Create a database using MS Access
• Create a Windows Form Project using Visual Studio 2013
• Connect the Windows Form Project to the database
• How to Insert data from Windows Form Project to database
Requirements
Simple materials to follow this tutorial
• Installed Visual Studio 2013 in to your desktop/laptop
• Installed Microsoft Office with MS Access in your desktop/laptop
Difficulty
- Basic
Tutorial Contents
The contents of this tutorial are learning on how to create a database using MS Access, how to create a Windows Forms Application and connect to the database and inserting a data to the database.
Let's Start
CREATE A DATABASE USING MS ACCESS
Open Microsoft Office
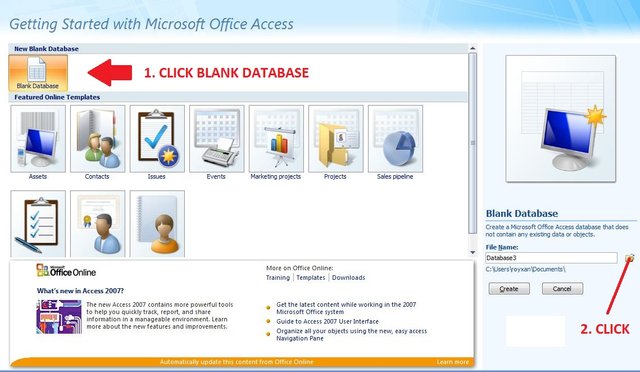
- Click Blank Database to create a fresh database without any data
- Click Folder icon
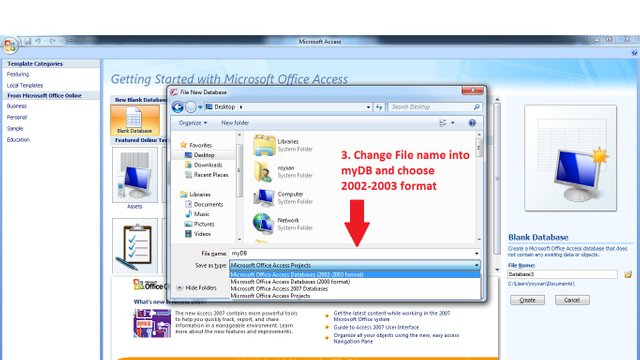
3.Change file name into myDB and choose Microsoft Office Access Database (2002-2003 format) and click OK.
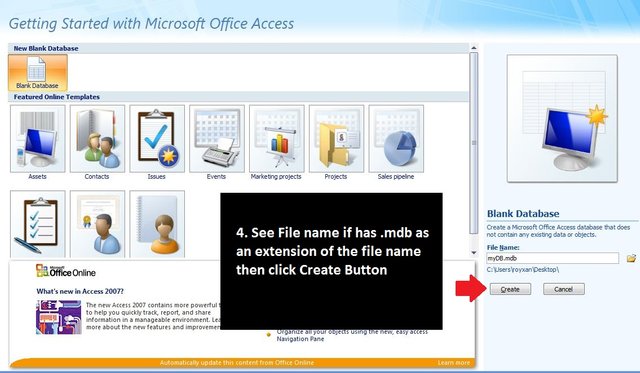
4.See file name if has .mdb as an extension of the file name you created and then click Create button.
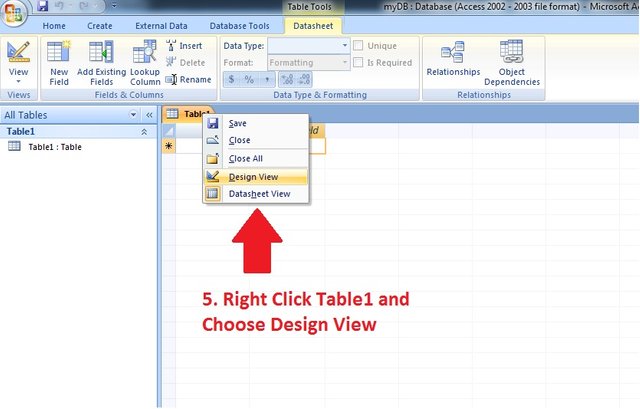
5.Right click Table1 and choose Design View to add some entities to our table.
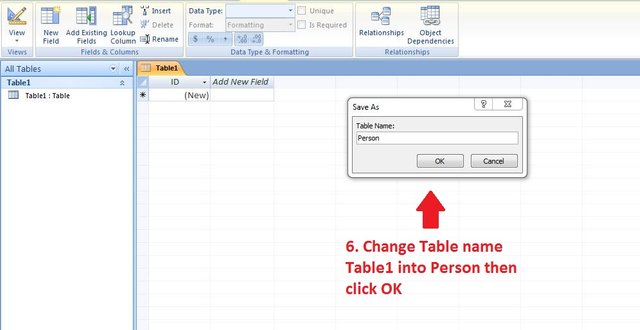
6.Change Table name Table1 into Person then click OK.
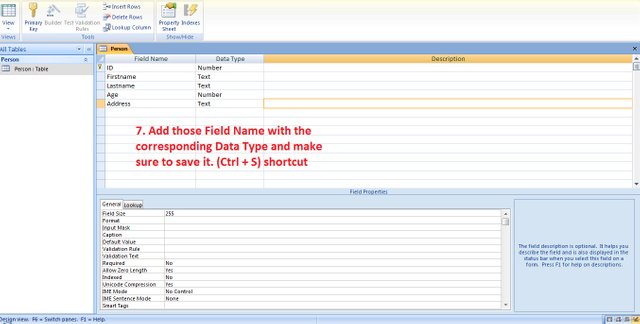
7.Add those Field Name with the corresponding Data Type and make sure to save it.
Ctrl + S shortcut for SAVE.
Field Name: ID
Data Type: Number
Field Name: Firstname
Data Type: Text
Field Name: Lastname
Data Type: Text
Field Name: Age
Data Type: Number
Field Name: Address
Data Type: Text
After saving the table you may now close the database you created for the mean time.
Next,
CREATE WINDOWS FORM PROJECT (VS2013)
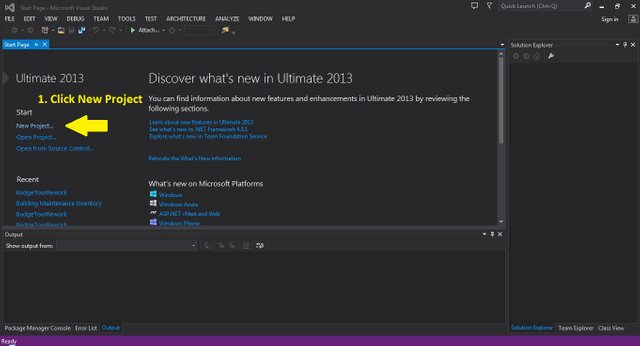
Open Visual Studio 2013
1.Click New Project
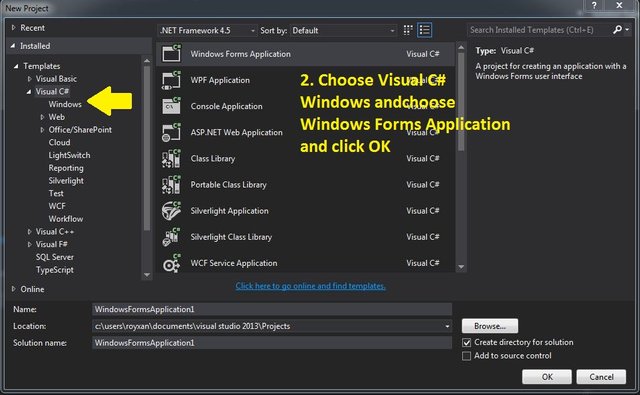
2.Choose Visual C#, Windows and choose Windows Forms Application and click OK.
After this, we need to connect our Windows Form Application to our database we created earlier.
You need to locate your database you created earlier.
Basically it will be saved in My Documents in your Computer/Laptop.
After Locating it, COPY it and PASTE it in the Debug Folder of your Project.
To open the debug folder
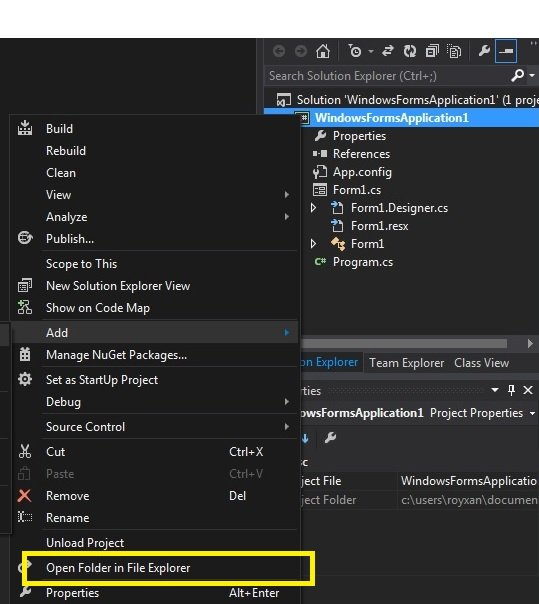
- Right click Project File name and Click Open Folder in File Explorer.
go to bin\debug and Paste the database there. After this, let move to the next step.
we will add not the Connection string to our database and to do that we need to create
New Class.
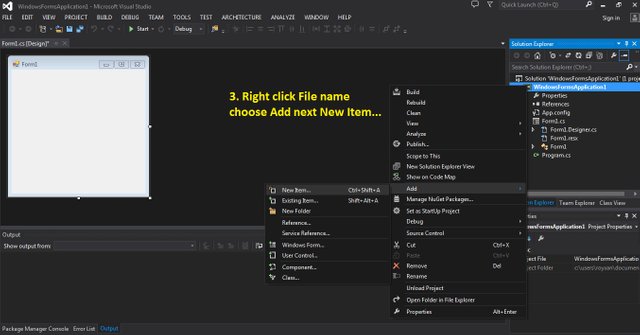
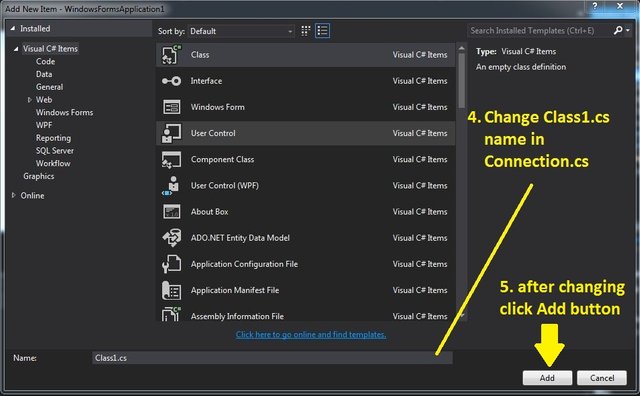
3.Right click File name choose Add new New Item...
4.Change Class1.cs name into Connection.cs
5.after changing it click Add Button below.
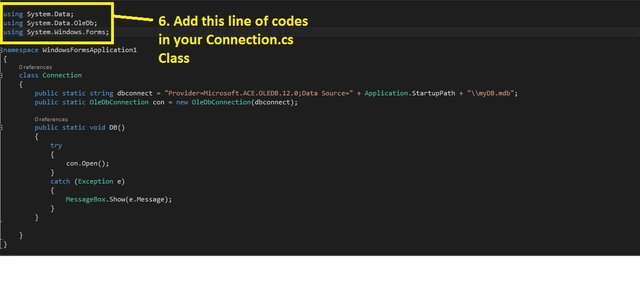
See Code below.
using System;
using System.Collections.Generic;
using System.Linq;
using System.Text;
using System.Threading.Tasks;

using System.Data;
using System.Data.OleDb;
using System.Windows.Forms;

namespace WindowsFormsApplication1
{
    class Connection
    {
        public static string dbconnect = "Provider=Microsoft.ACE.OLEDB.12.0;Data Source=" + Application.StartupPath + "\\myDB.mdb";
        public static OleDbConnection con = new OleDbConnection(dbconnect);

        public static void DB()
        {
            try
            {
                con.Open();
            }
            catch (Exception e)
            {
                MessageBox.Show(e.Message);
            }
        }

    }
}
After adding those code, lets go back to our main form to Add some items.
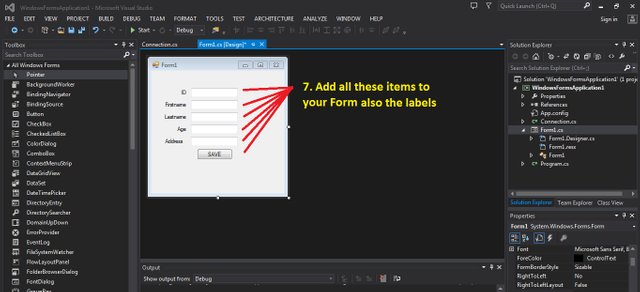
7.Add all these items to your Form also the labels.
to change the text of the labels Right Click the label and choose properties then look for the Text properties so that you can change the text of the label in your desired text. After that, we will now add the main code to save data to our database.
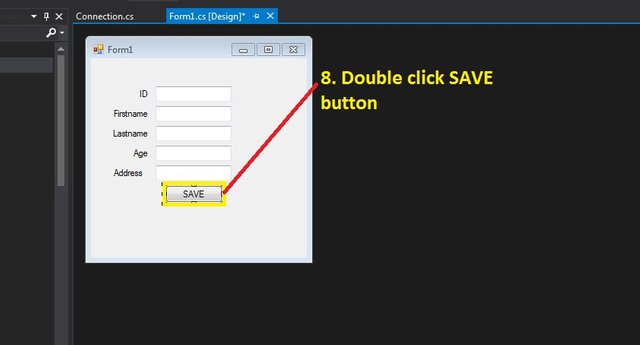
8.Double click SAVE button in your form.
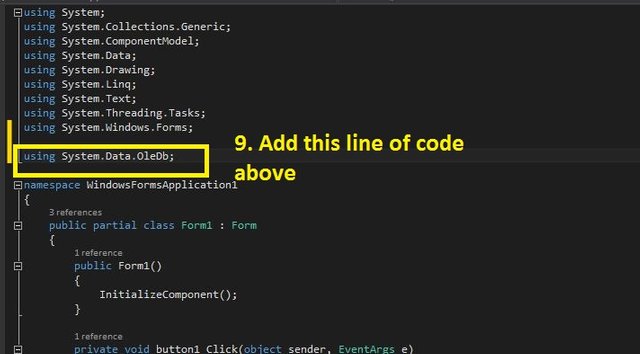
9.Add this line of code above.
10.copy this line of codes here.
See the codes below.
using System;
using System.Collections.Generic;
using System.ComponentModel;
using System.Data;
using System.Drawing;
using System.Linq;
using System.Text;
using System.Threading.Tasks;
using System.Windows.Forms;

using System.Data.OleDb;

namespace WindowsFormsApplication1
{
    public partial class Form1 : Form
    {
        public Form1()
        {
            InitializeComponent();
        }

        private void button1_Click(object sender, EventArgs e)
        {
            Connection.con.Open();
            string save = "Insert into Person(ID, Firstname, Lastname, Age, Address)VALUES("+textBox1.Text+", '"+textBox2.Text+"', '"+textBox3.Text+"', "+textBox4.Text+", '"+textBox5.Text+"')";
            OleDbCommand command = new OleDbCommand(save, Connection.con);
            command.ExecuteNonQuery();
            MessageBox.Show("Successfully saved");
            Connection.con.Close();

        }
    }
}
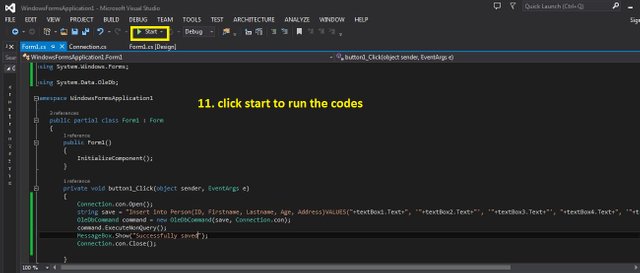
Now, we will run the codes.
11.Click start to run the codes.
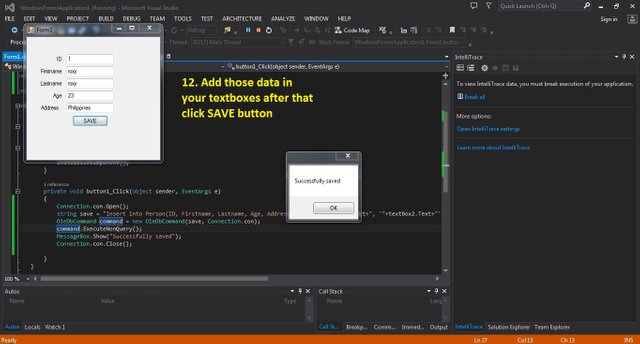
12.Add some data to your textbox after that click save button.
ID: 1
Firstname: roxy
Lastname: roxy
Age: 23
Address: Philippines
Hope you learn something with this turorial
Thank you!
Posted on Utopian.io - Rewarding Open Source Contributors

Your contribution cannot be approved because it does not follow the Utopian Rules.
Related Rule:
Clarifications and Suggestions:
You can contact us on Discord.
[utopian-moderator]
Downvoting a post can decrease pending rewards and make it less visible. Common reasons:
Submit
Congratulations @roxy19! You received a personal award!
Click here to view your Board
Do not miss the last post from @steemitboard:
Vote for @Steemitboard as a witness and get one more award and increased upvotes!
Downvoting a post can decrease pending rewards and make it less visible. Common reasons:
Submit
Congratulations @roxy19! You received a personal award!
You can view your badges on your Steem Board and compare to others on the Steem Ranking
Do not miss the last post from @steemitboard:
Vote for @Steemitboard as a witness to get one more award and increased upvotes!
Downvoting a post can decrease pending rewards and make it less visible. Common reasons:
Submit