Goodnight everyone! hopefully you are always in good health and can run daily activities and routines as usual, and hopefully today is better than yesterday.
On this occasion I would like to share a photo design tutorial using Picsay application on the smartphone. The tutorial I will share is how to create a photo with a dispersion effect. and this is my first tutorial to design photos using Picsay. Let's jump right into the tutorial session.
Tutorial
How to create photos with dispersion effects using Picsay Apps on smartphone

Image Source
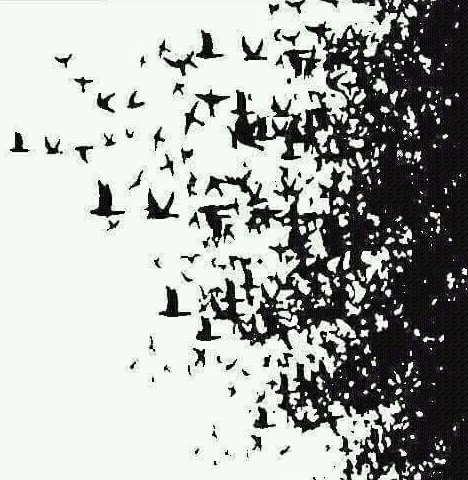
For the first step prepare a piece of photo and one picture of the dispersion effect, for the picture of the dispersion effect can be downloaded on this link .
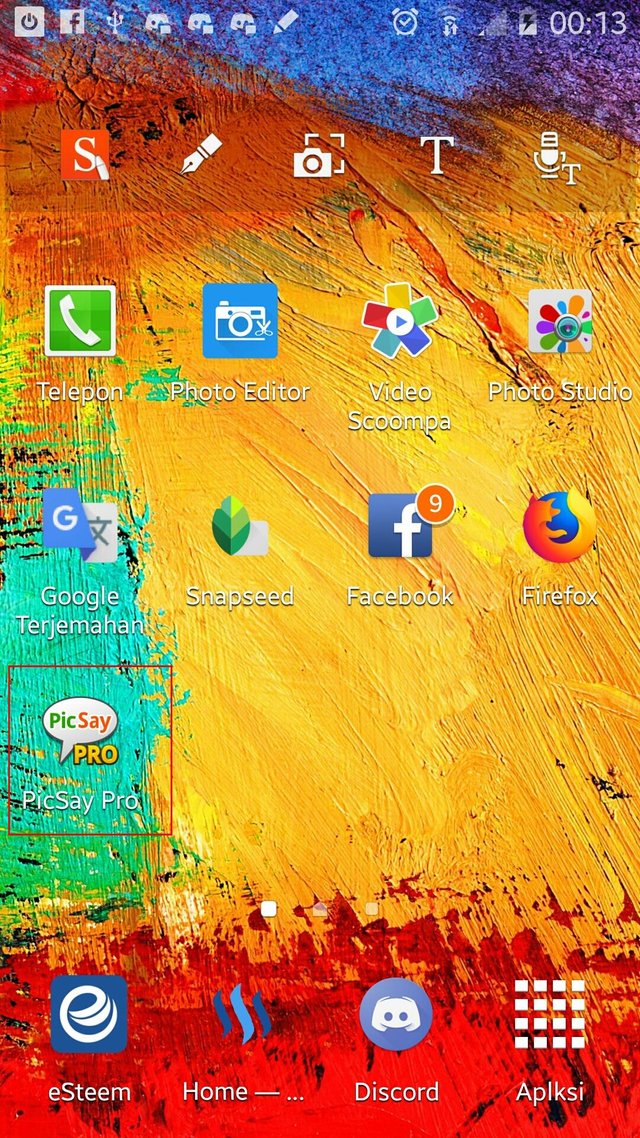
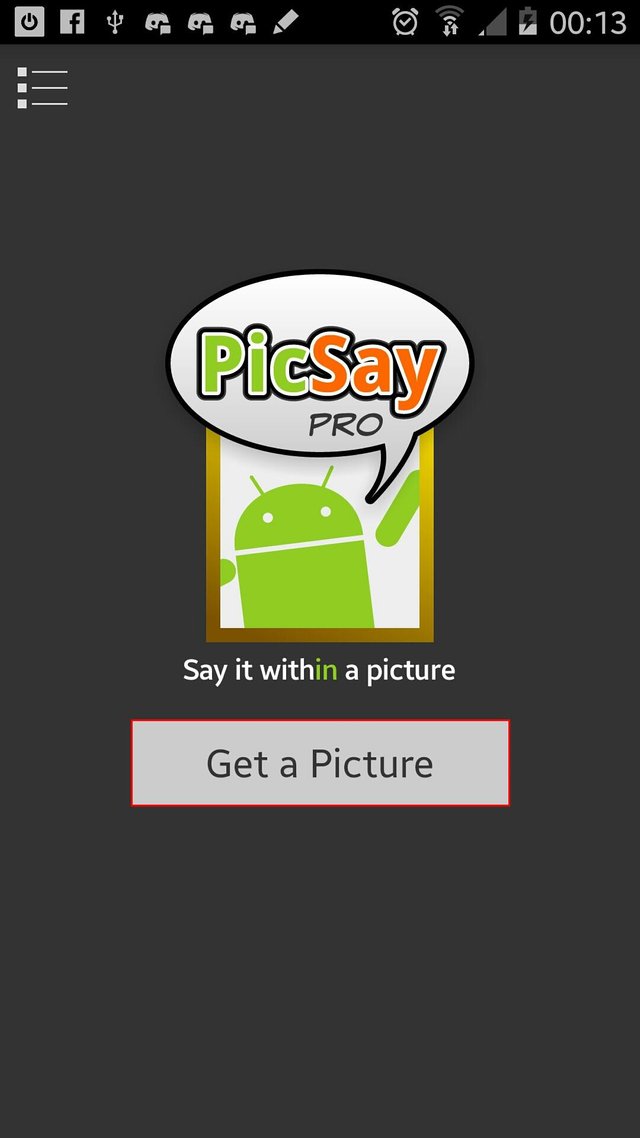
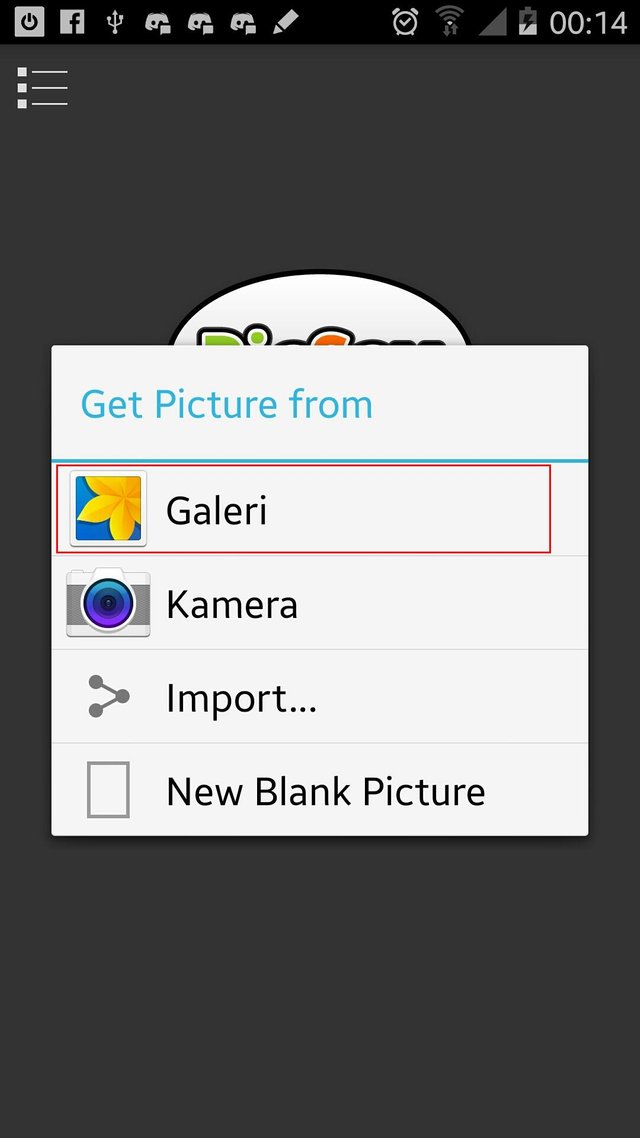
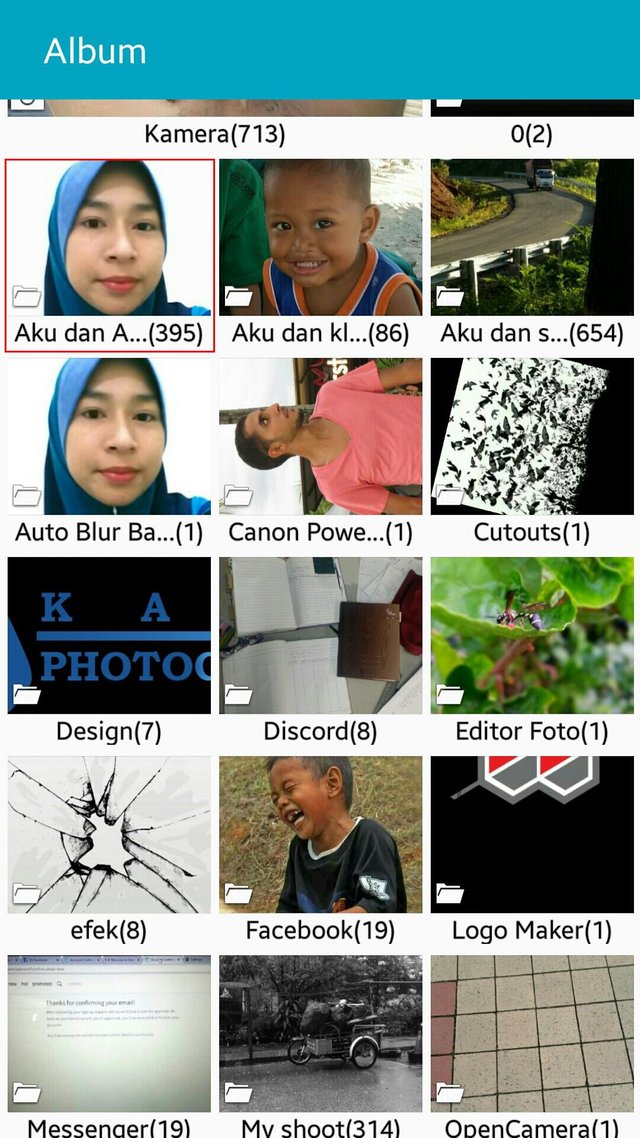
Next open the picsay app on your smartphone, then click get a picture, select the photo you want to use for the last material.
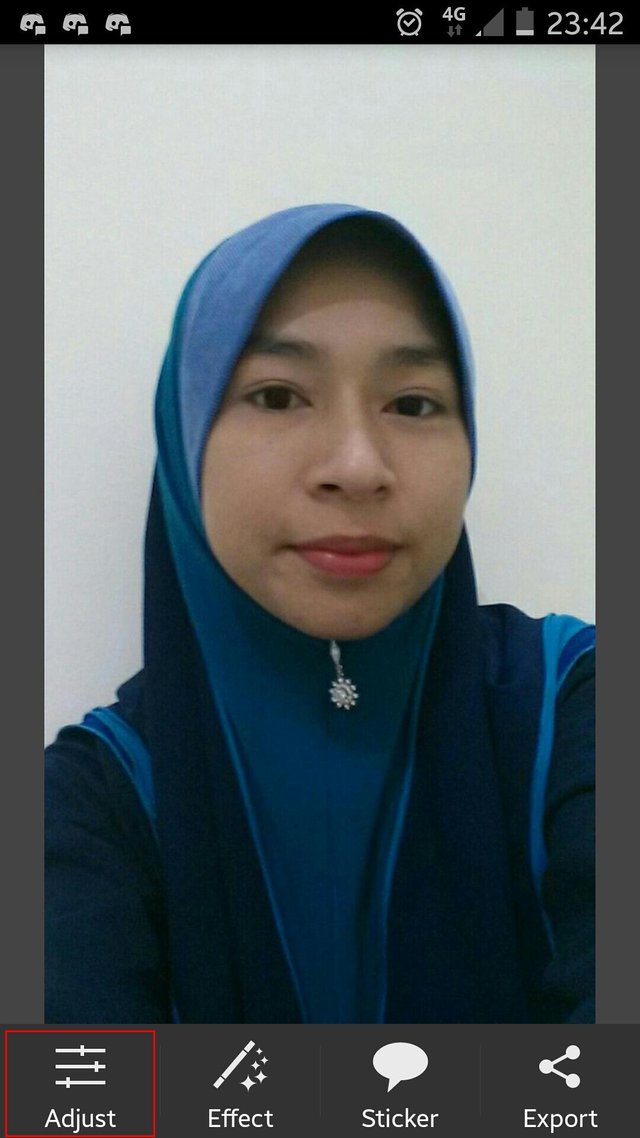
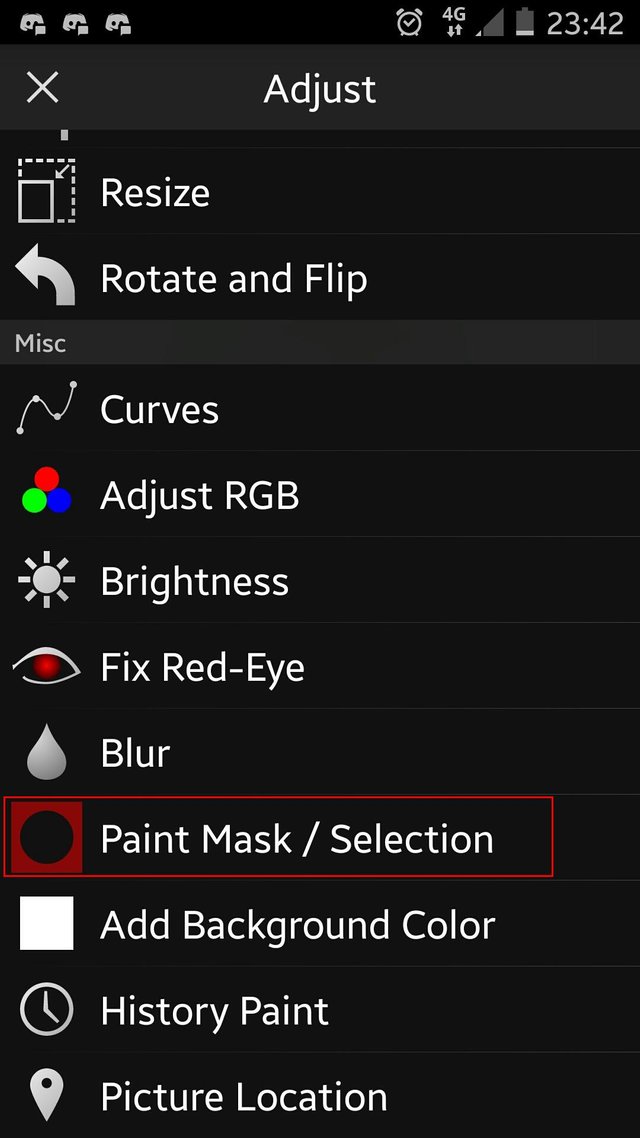
In the second step click the adjust button and select Paint Mask or Selection, then select the green button on the column select the top of the object and color the background part of the first object or the photo until evenly and neatly.
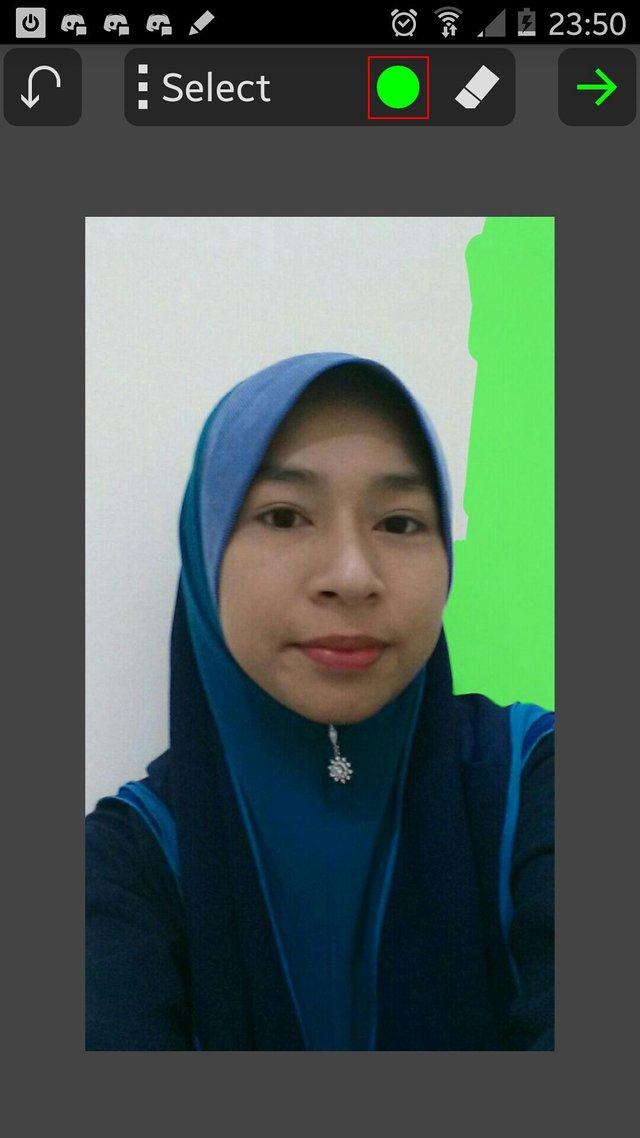
The third step, after finished coloring then click the arrow at the top of the screen and select make transparent, then the green background will be erased clean, and click the check mark at the top of the screen to complete the stage.
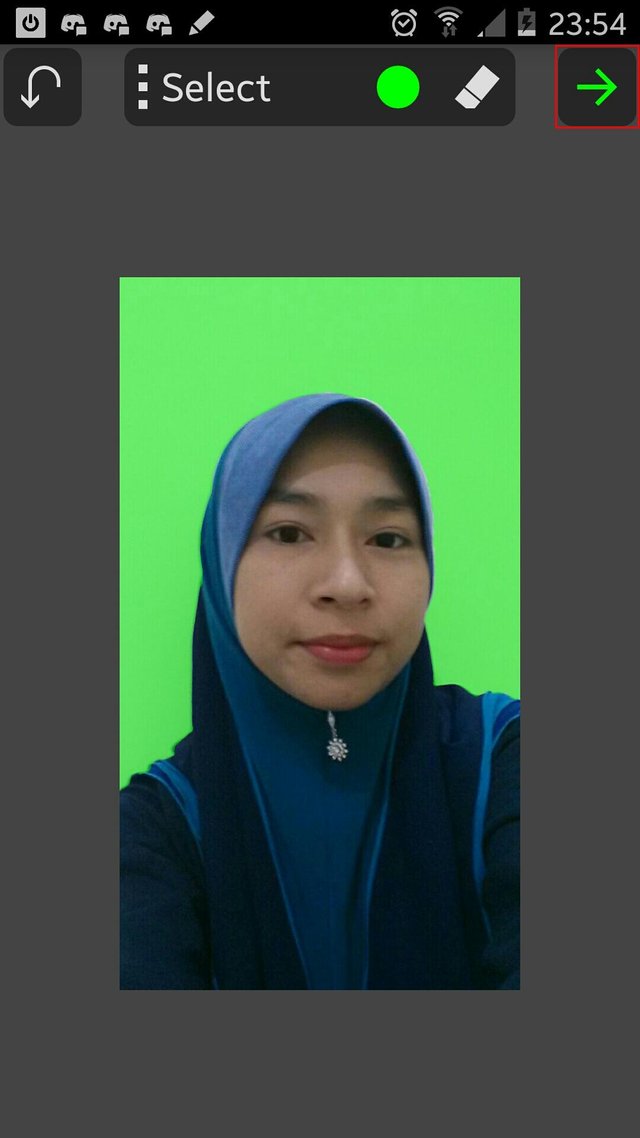
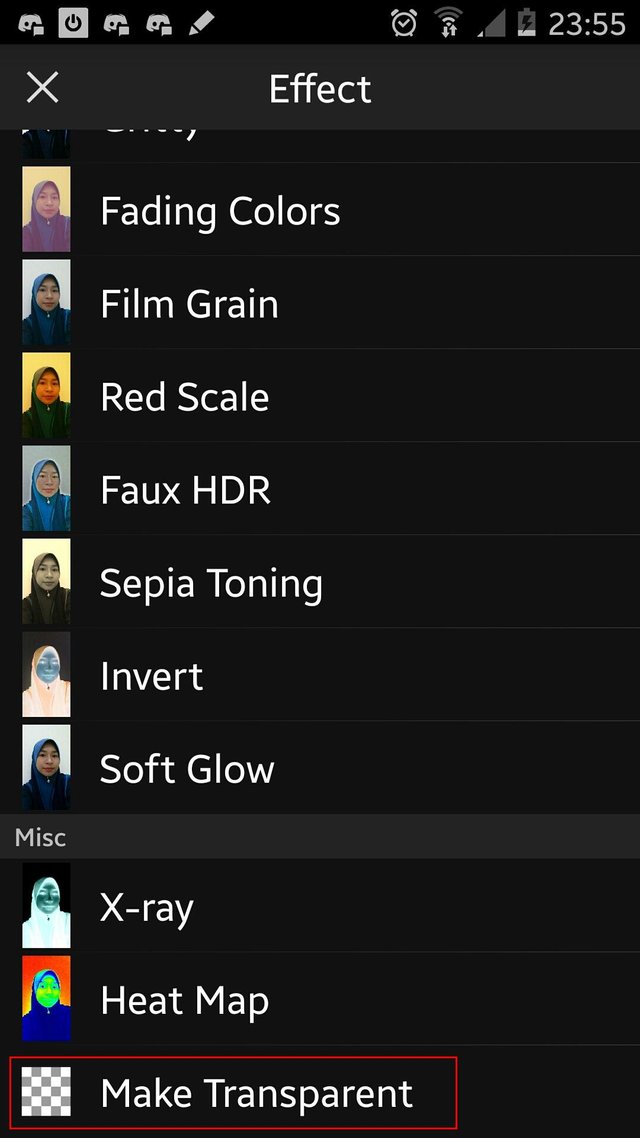
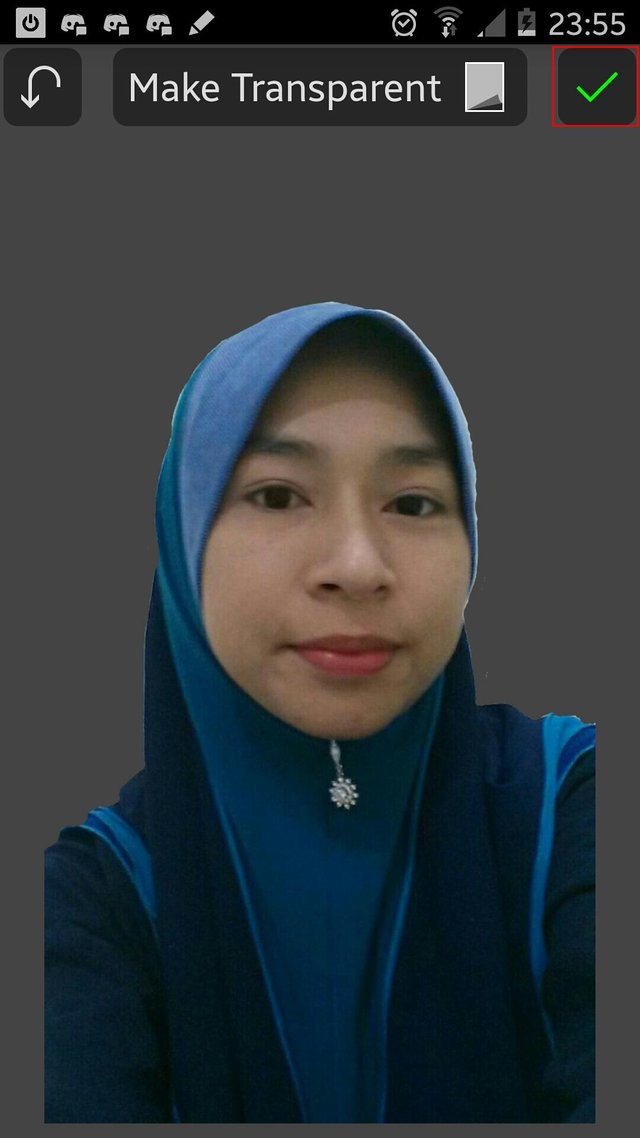
For the fourth step, we save the object first in PNG format before we go to the next step, click export on the bottom right side and select Save picture to album and select Picsay folder, to make it easier for us to take back the photo in next step.
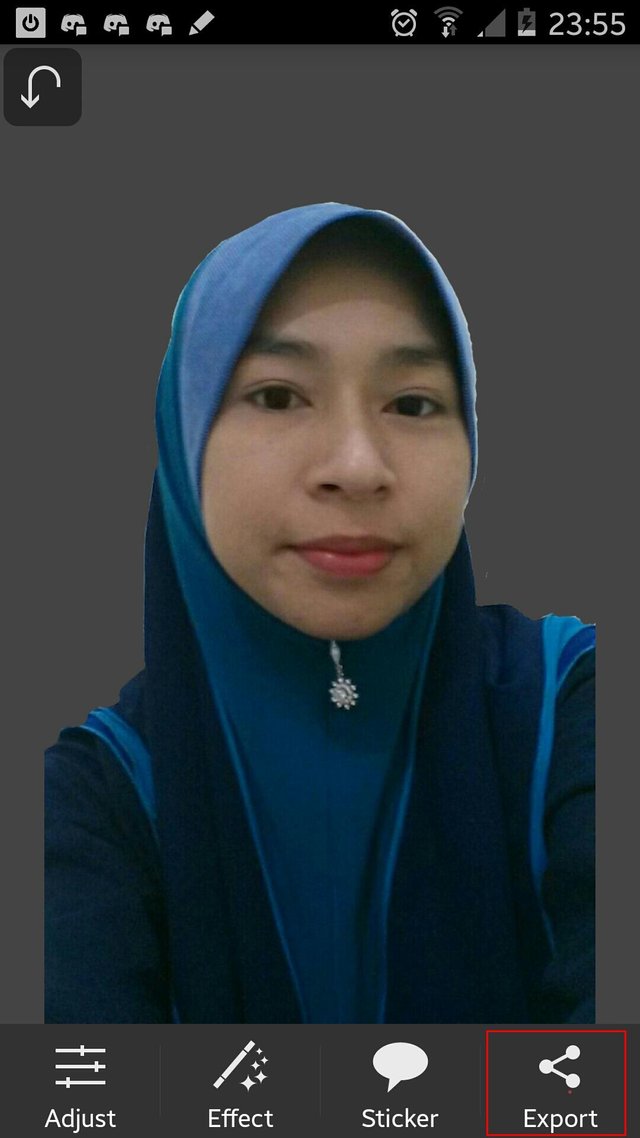
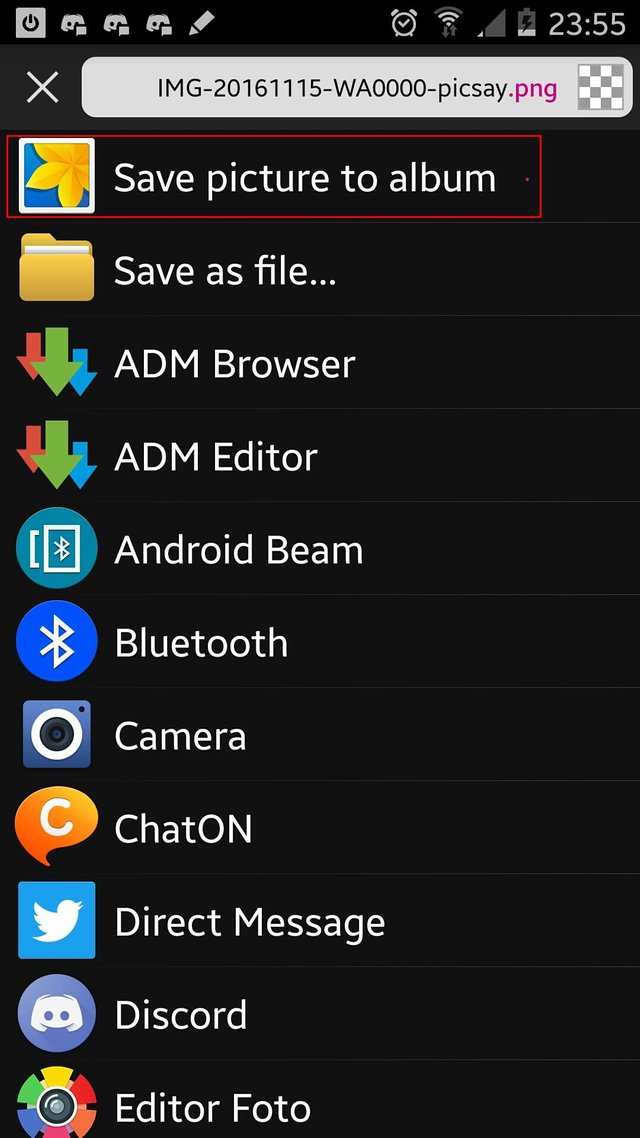
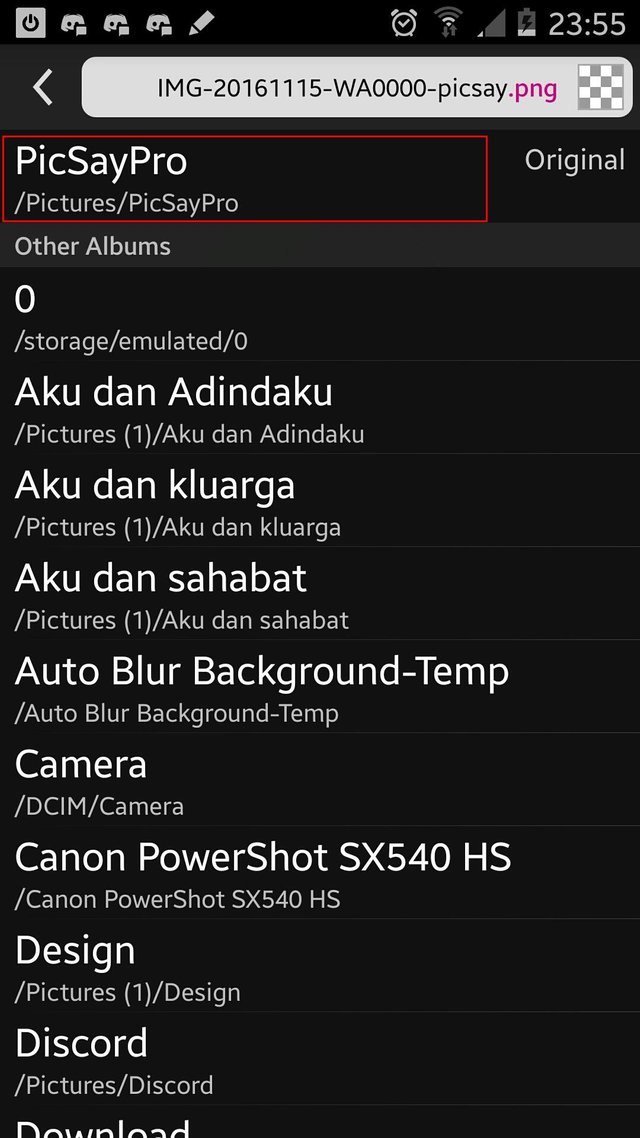
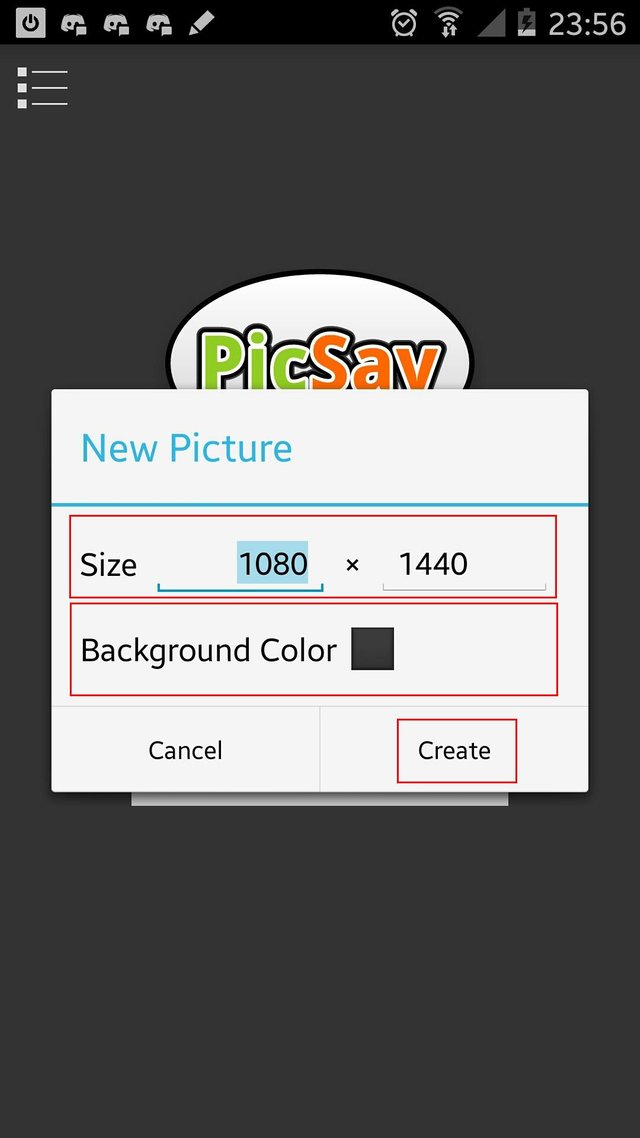
The fifth step, go back to Picsay start menu, click get a picture and select column new blank picture, then set the desired size and background color. here I use the 1080 width and 1440 height with 80% background color gray.
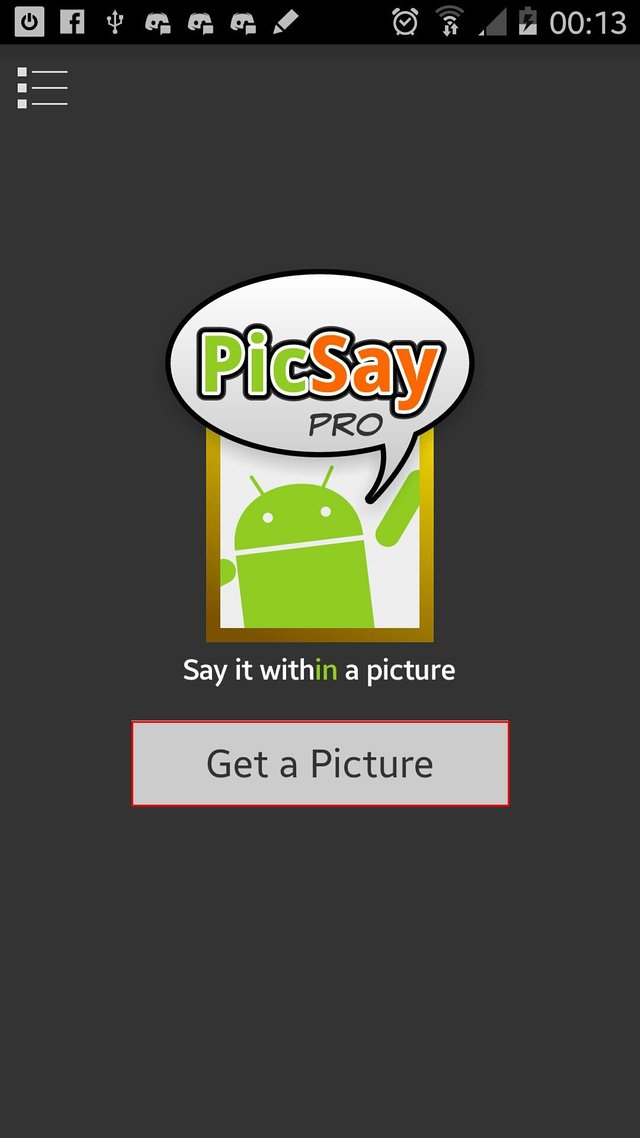
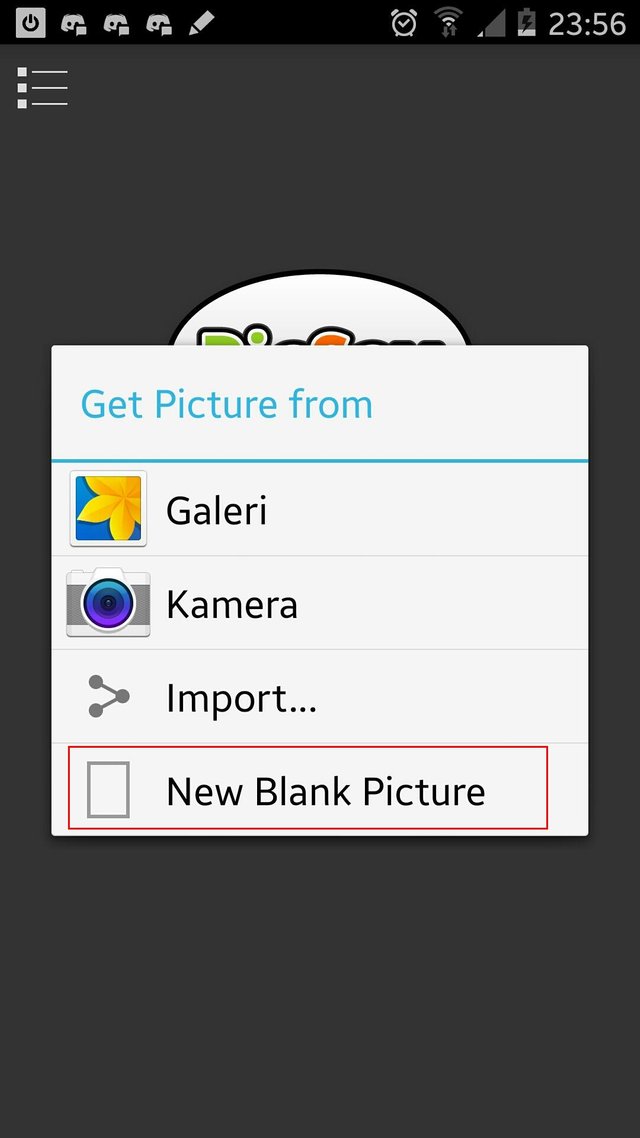
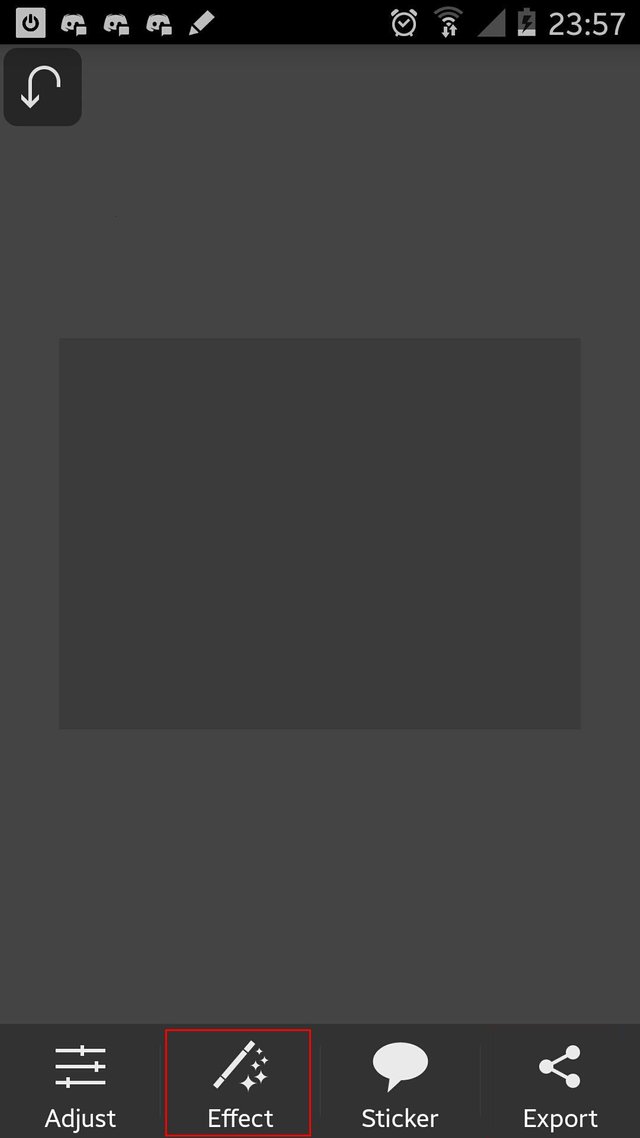
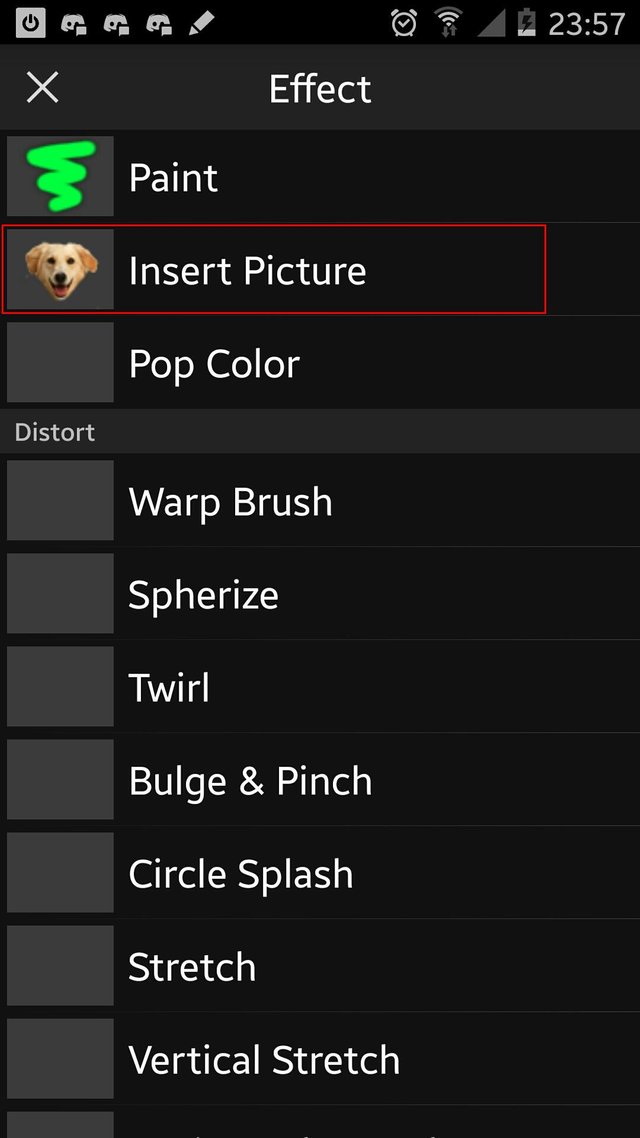
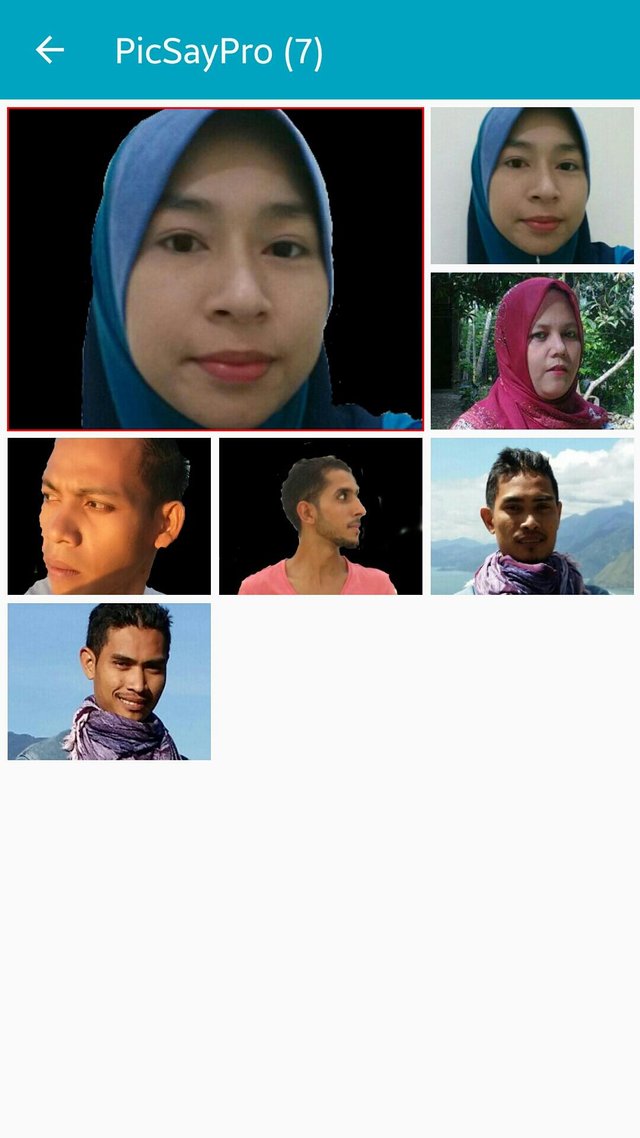
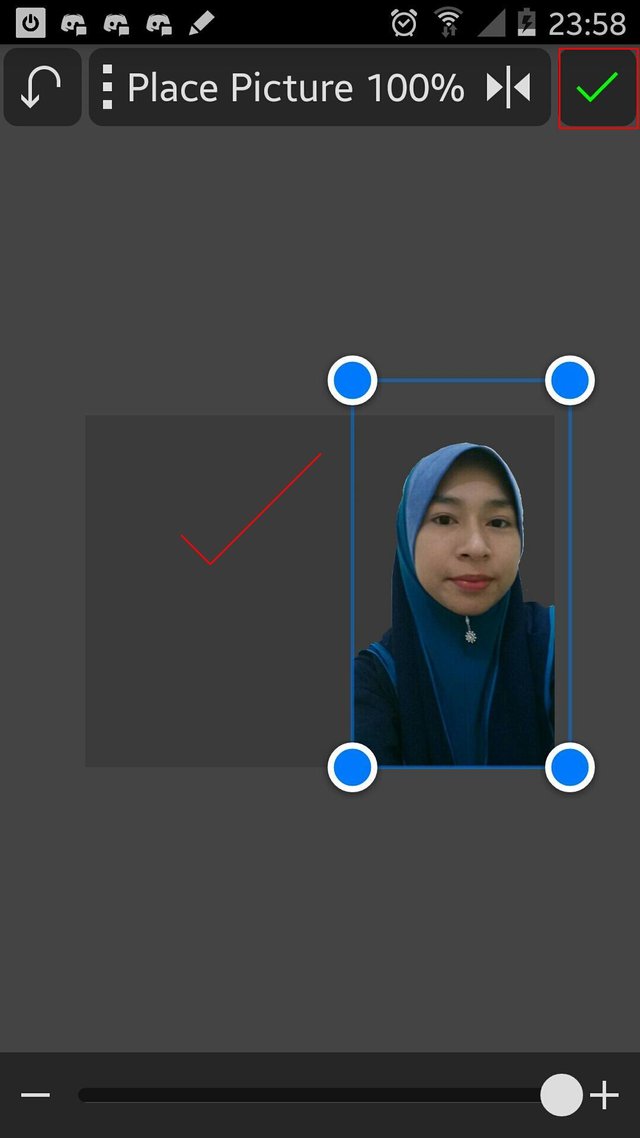
In the sixth step, after the new blank picture appear on the screen, then click the effect and select insert picture, then select the image we save in PNG format earlier and set the position on the background that we have prepared, click the check mark at the top when you finished.
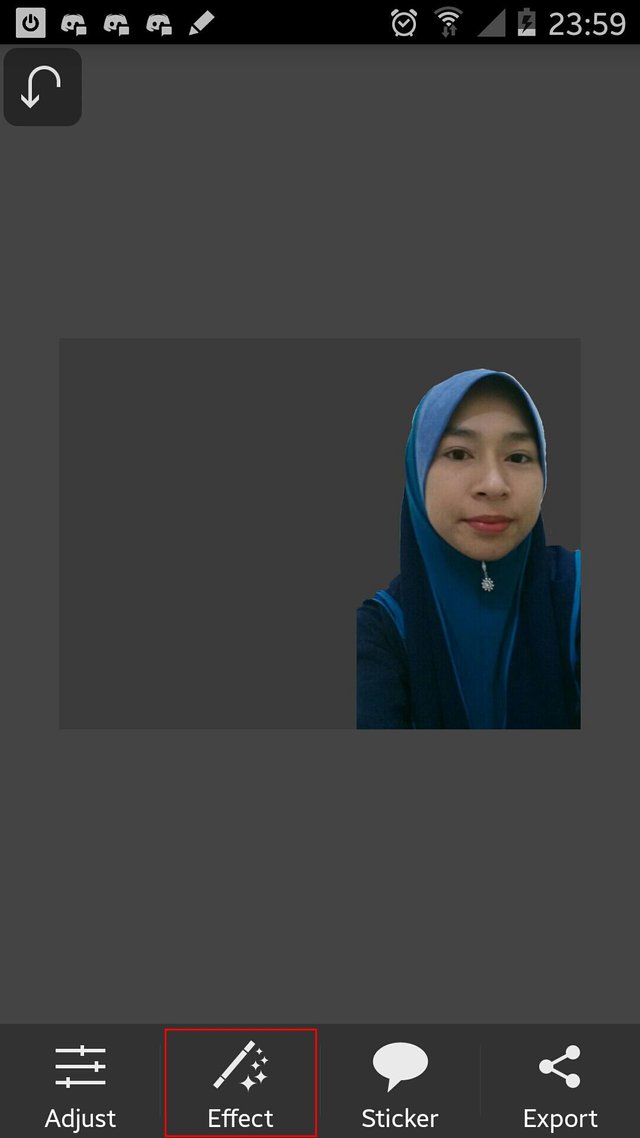
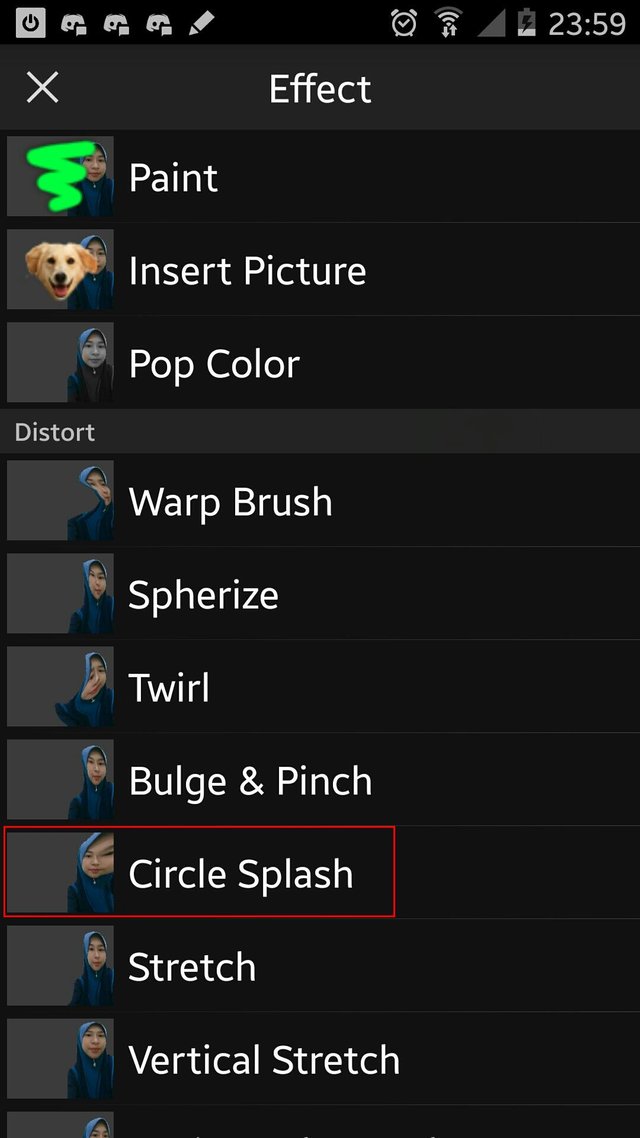
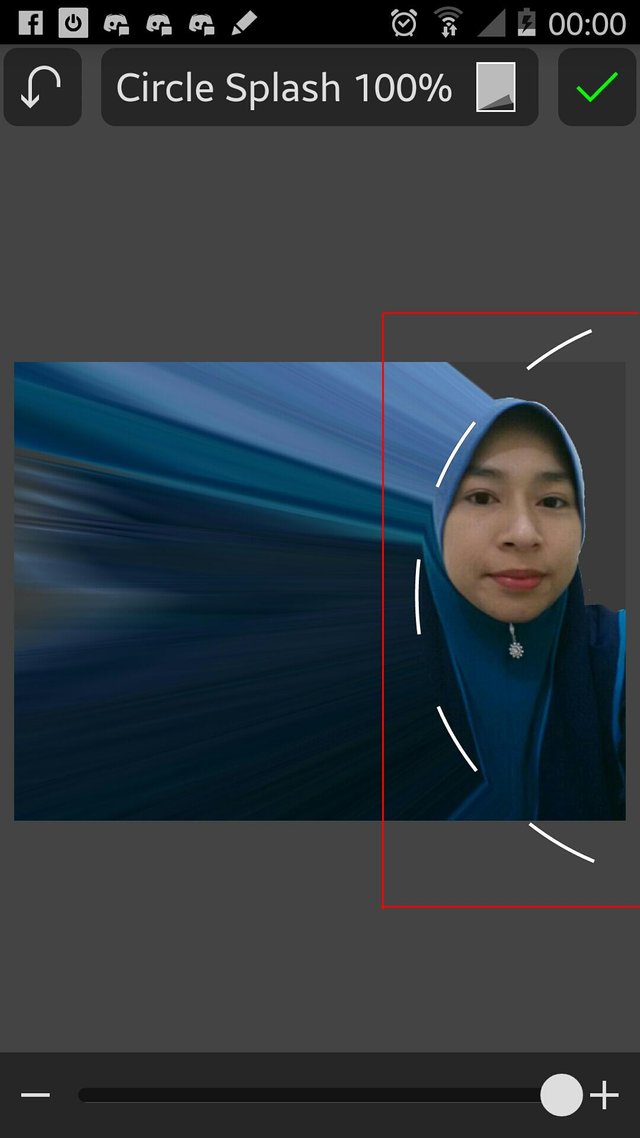
For the seventh step, click the effect button at the bottom and select circle splash. Next set the circle position and raise the opacity to 100% so that the photo has a splash effect on the outside of the circle line, and click the check mark on the top object.
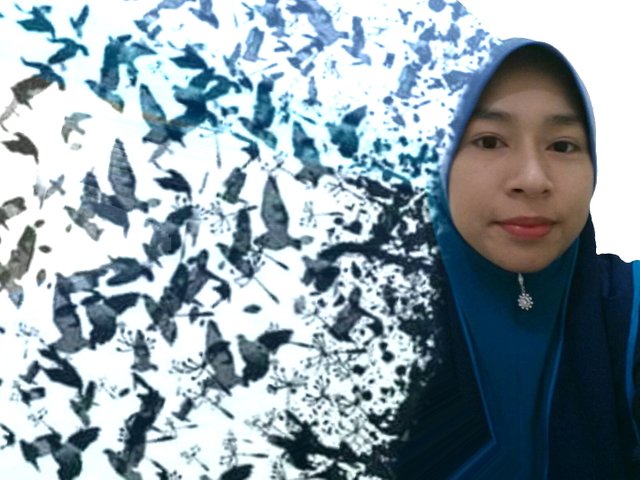
In the eighth step, we will give the effect of dispersion on the photo, how, click the effect on the bottom and select the photo insert and select the image of the dispersion effect we have prepared, then set the opacity to 50% to facilitate the positioning of the effect on the photo object. click the check mark at the top of the object when it's done.
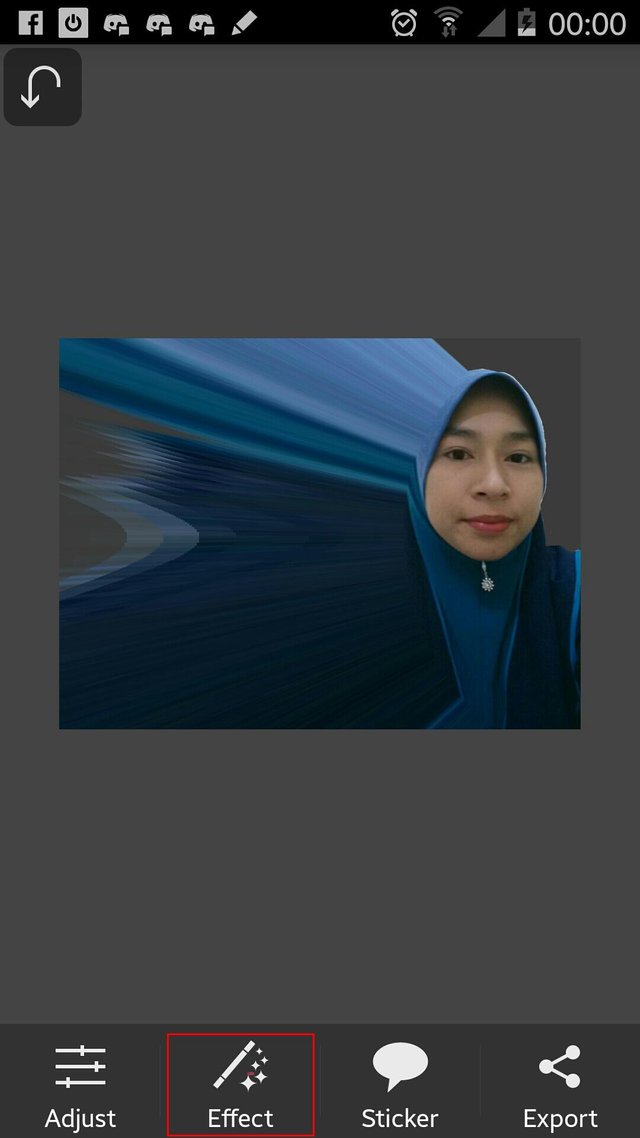
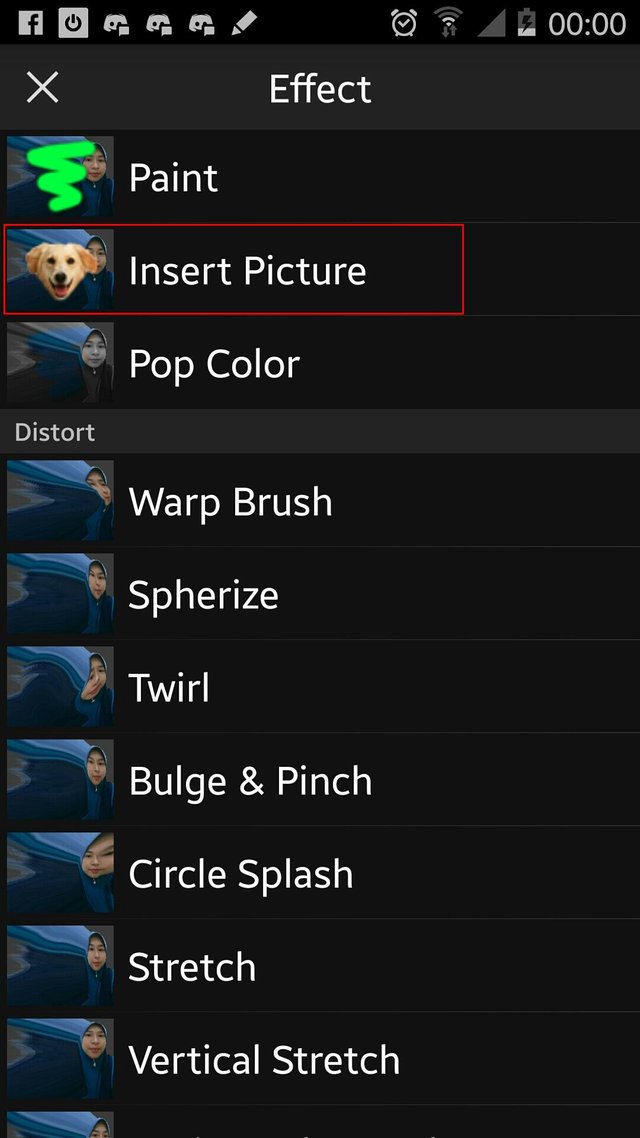
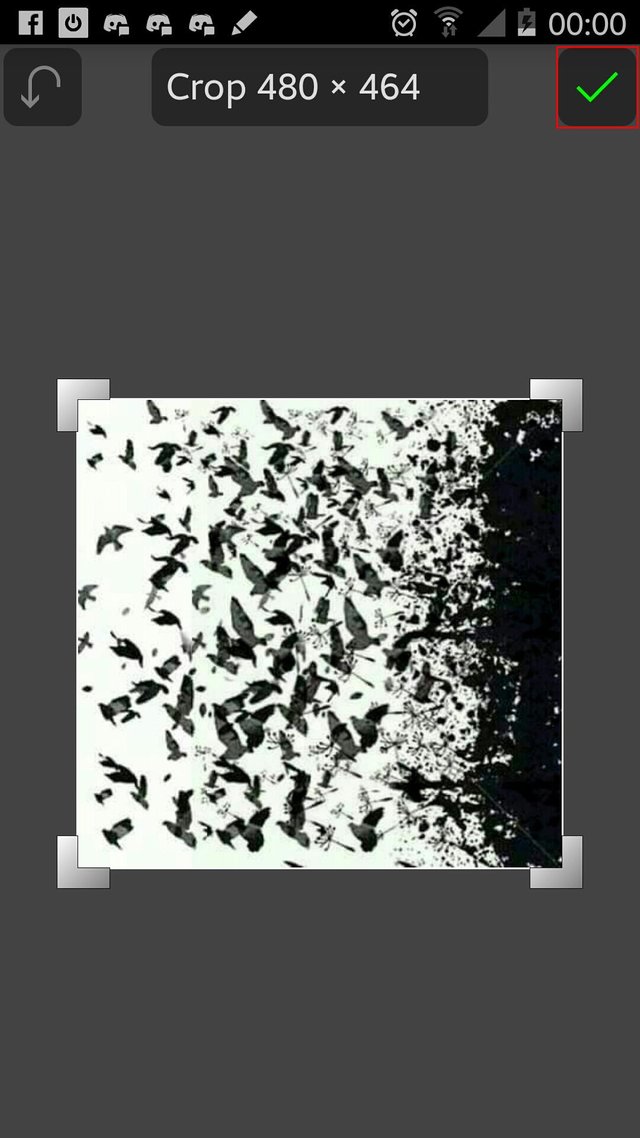
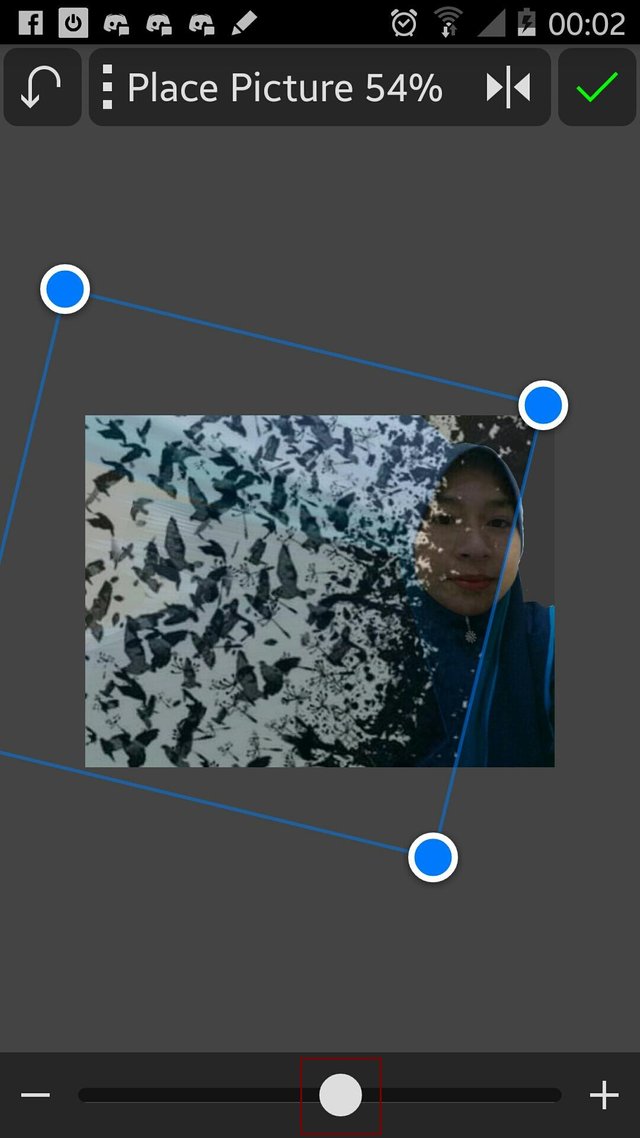
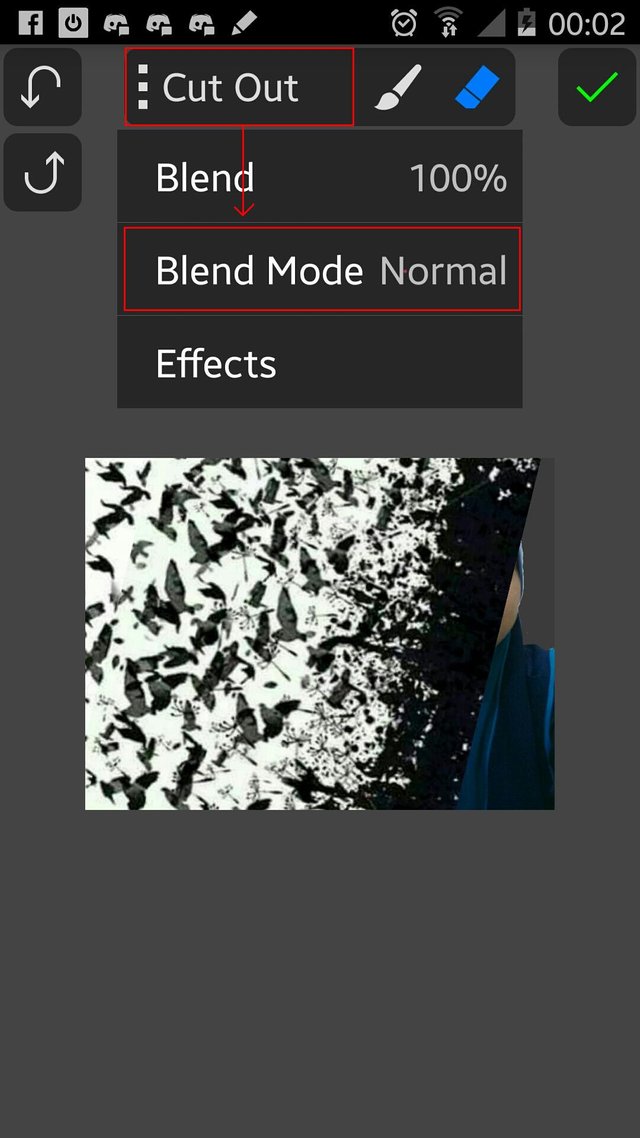
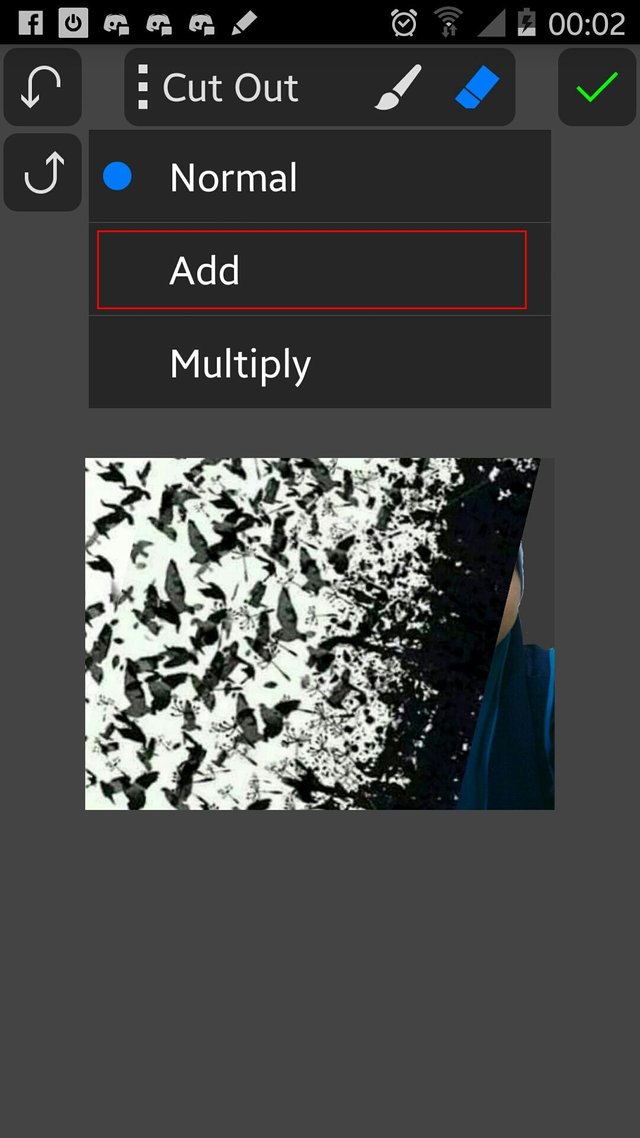
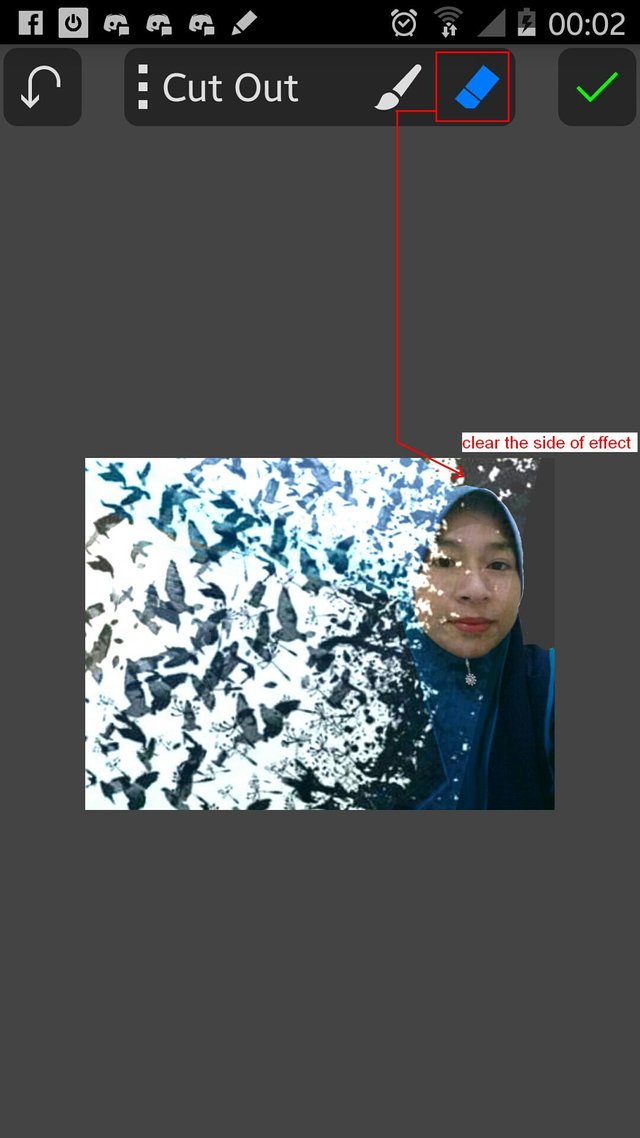
For the ninth step, click the cut out column at the top of the object and select the normal blend mode and select add, then click the eraser button at the top of the object as well and then clean up the affected dispersion effect on the unfit photo section, and click the mark when you finished.
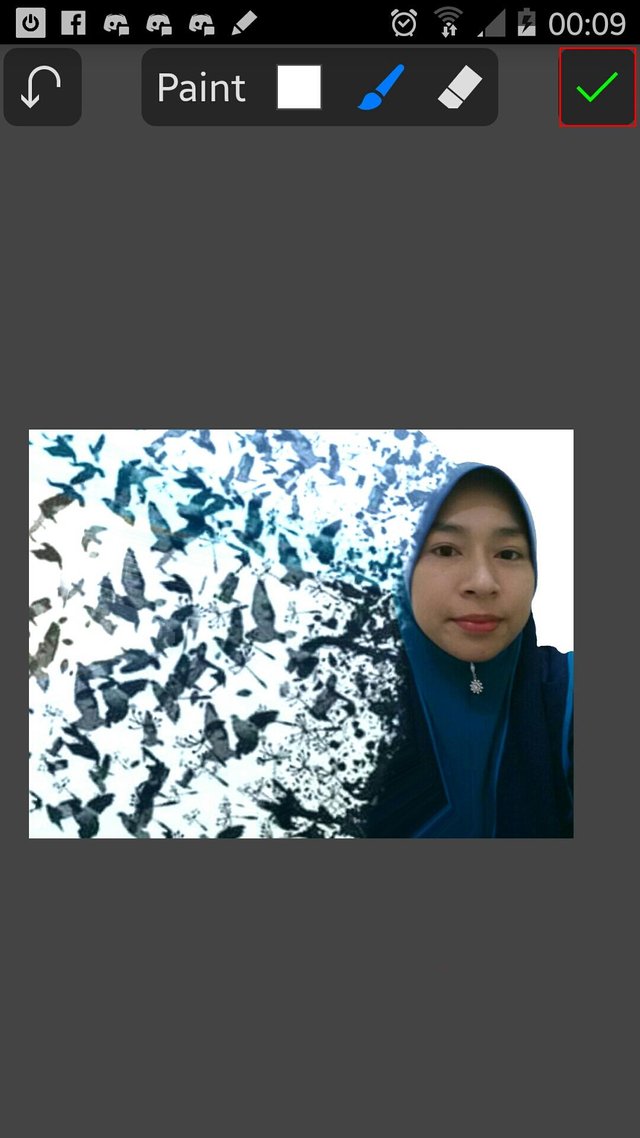
In the tenth step, or the last step, save the object into a file, click export on the bottom and select Save picture to album and select Picsay folder to make it easier to find the file.
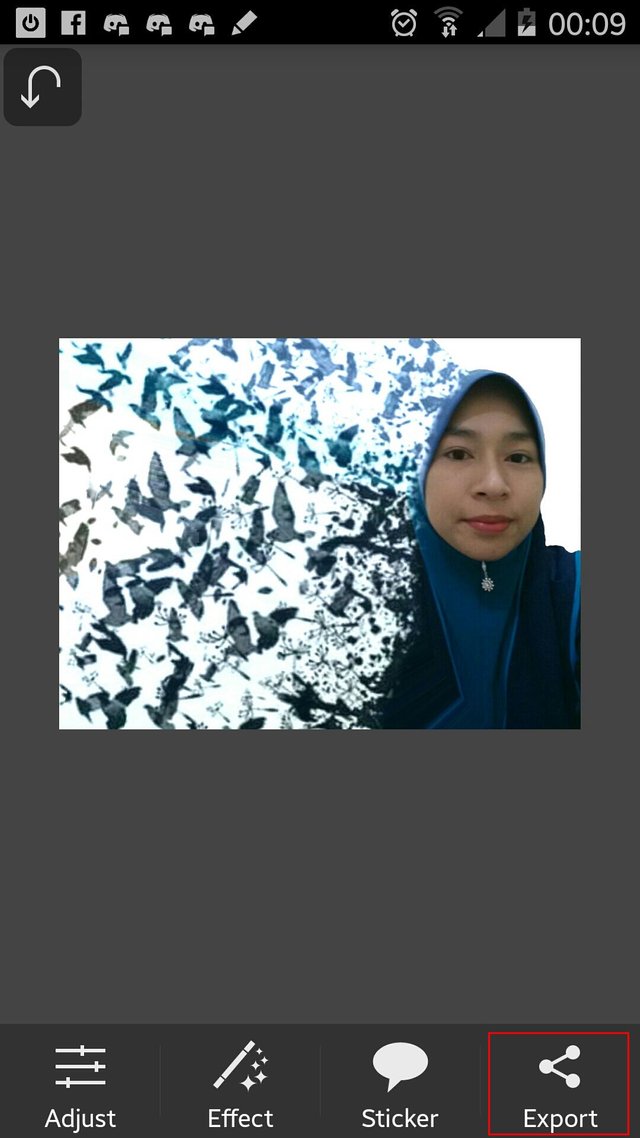
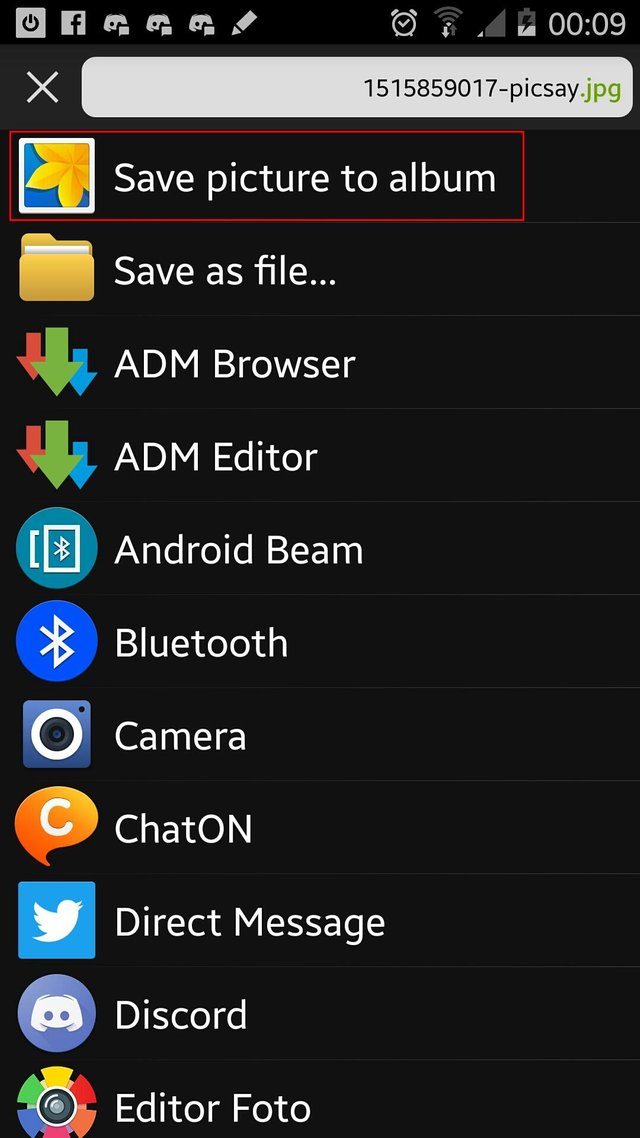
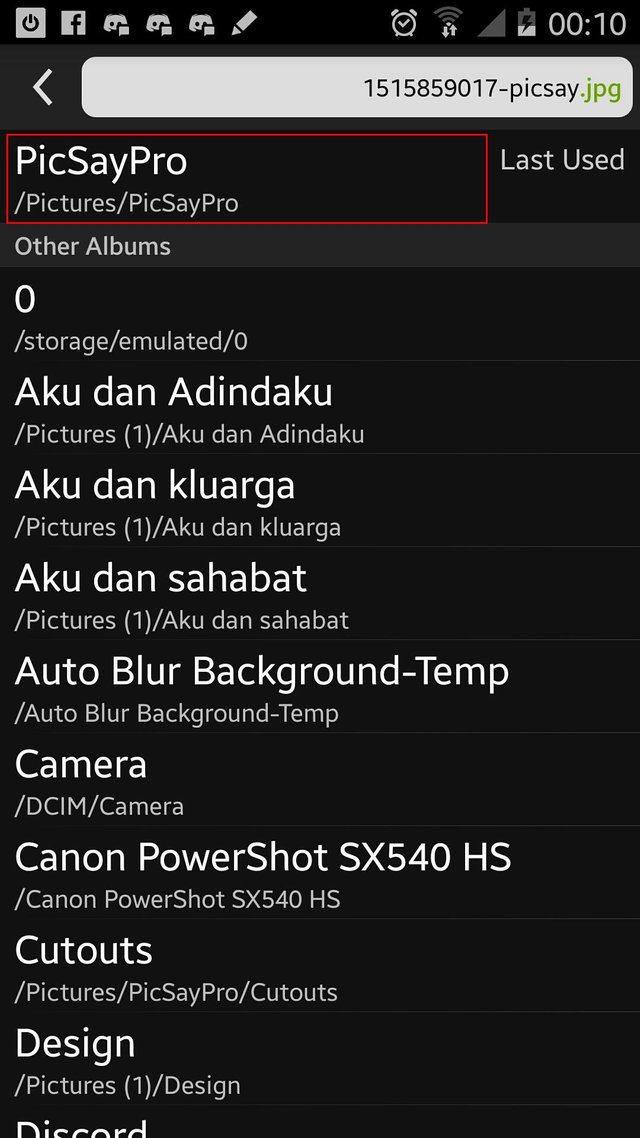
That's the steps or photo design process with the effect of dispersion using Picsay application on smart phone, hopefully useful for us. Thank you for reading my tutorial and see you later in the tutorial. Below is the result of my design in this tutorial.
My other tutorial using Inkscape
Tutorial : How to design a knife using Inkscape software - @saini88
Tutorial : How to design a logo with a letter using Inkscape Software - @saini88
Tutorial : How to create Word Art with reflect effect using Inkscape software - @saini88
Posted on Utopian.io - Rewarding Open Source Contributors
lagak tat cewek go bg.. hehe
Downvoting a post can decrease pending rewards and make it less visible. Common reasons:
Submit
Hehehe... adik sepupu
Downvoting a post can decrease pending rewards and make it less visible. Common reasons:
Submit
Your contribution cannot be approved because it does not follow the Utopian Rules.
‘
Tutorial on how to create graphics are invalid. Please refer to the rules.
You can contact us on Discord.
[utopian-moderator]
Downvoting a post can decrease pending rewards and make it less visible. Common reasons:
Submit