What Will I Learn?
- How to create flexible box with some flex item in CSS3 Flexbox
Requirements
- Any Browser, it is recommended to use the latest browser that supports flex view. In this tutorial, i will use Mozilla Firefox Quantum 58.
- Editor Text
Difficulty
- Basic
Preliminary
Flexbox is a layout model designed to help web authors create advanced website layouts that are difficult to achieve using other layout models. The Flexbox Layout officially called CSS Flexible Box Layout Module is new layout module in CSS3 made to improve the items align, directions and order in the container even when they are with dynamic or even unknown size. The prime characteristic of the flex container is the ability to modify the width or height of its children to fill the available space in the best possible way on different screen sizes.
Some of the advantages of flexbox are :
- Page content can be laid out in any direction (to the left, right, downwards or even upwards).
- Bits of content can have their visual order reversed or rearranged.
- Items can "flex" their sizes to respond to the available space and can be aligned with respect to their container or each other.
- Achieving equal-column layouts (irrespective of the amount of content inside each column) is a
breeze.
Flexbox consists of various "flex" properties, as well as a whole bunch of alignment properties. Alignment is a big part of flexbox. And now grid layout also uses most of the same alignment properties, so the W3C has separated the alignment properties from the flexbox module and moved them to their own "alignment" module.
Basically, the flexbox properties define how flex items are sized, how they wrap, and which direction they go in. The alignment properties define how the flex items are aligned, both horizontally and vertically, within their container.
So, Let's Flex!
Practice Create Flexible Box
Here's a quick example of creating a flex container with some flex items. We'll create one flex container and put three flex items inside it. We'll also see how we can affect their size by adding more content, and playing around with some property values.
Here's how we'll start it :
<!doctype html>
<title>Example for Flex</title>
<style>
.container {
  display: flex;
  }
.blue {
  background: steelblue;
  flex-grow: 1;
}
.green {
  background: yellowgreen;
}
.red {
  background: orangered;
}
.container > div {
  font-size: 5vw;
  padding: .5em;
  color: white;
}
</style>
<div class="container">
  <div class="blue">1</div>
  <div class="green">2</div>
  <div class="red">3</div>
</div>
and type code above in editor text.
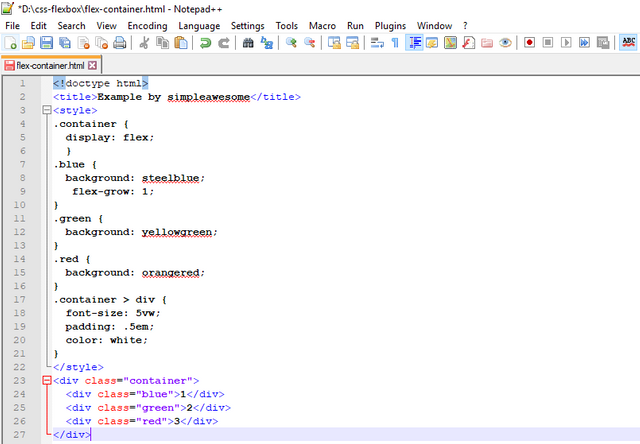
Here are the preview :
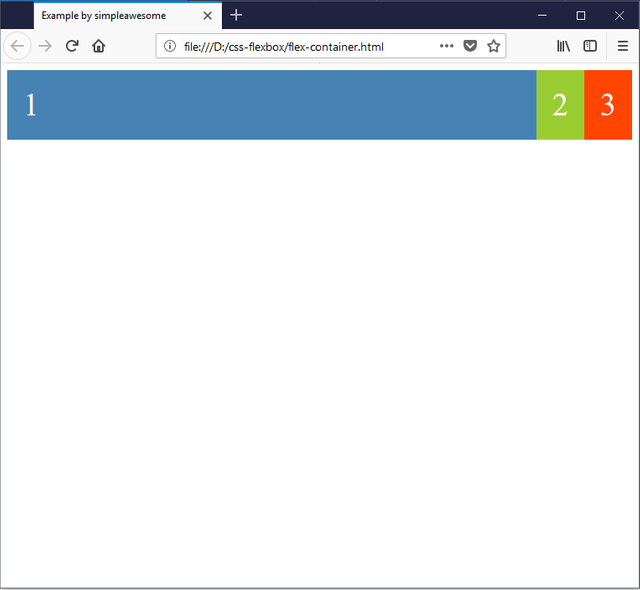
We've got a big wide blue flex item, followed by a small green and a small red. Here's the relevant code from that example above :
.container {
  display: flex;
  }
We use display: flex to declare the outer element as a flex container. That's all we need in order to start using flexbox. Now all of that flex container's in-flow children automatically become flex items and are therefore laid out using the flex layout model.
But you'll notice that the red flex item is wider than the other two. This is because we applied flex-grow: 1 to that item. Here's the code we used for that :
.blue {
  background: steelblue;
   flex-grow: 1;
}
The flex-grow property sets the flex item's grow factor, which determines how much the flex item will grow relative to the other flex items (after any positive free space is distributed).
The initial value is zero, so the other two items have a grow factor of zero (because we haven't used the flex-grow property on those items). This causes the blue flex item to grow as much as needed to take up the available space. The other two items oblige by shrinking until they just fit their contents and no more.
- Flex Direction
By default, every time we apply the flex mode layout to the container, the elements in it will behave like columns. This is due to the direction of flexbox by default is row (horizontal). As we know, that in a row / row, must have a column. And we can guess, the opposite direction of the row is a column. Every column, there must be rows of data in it.
To set the direction of flexbox, we can use flex-direction property with value row and columnoption in its .flex-container.
.container {
  display: flex;
  flex-direction: column;
  }
Here is a preview after changes :
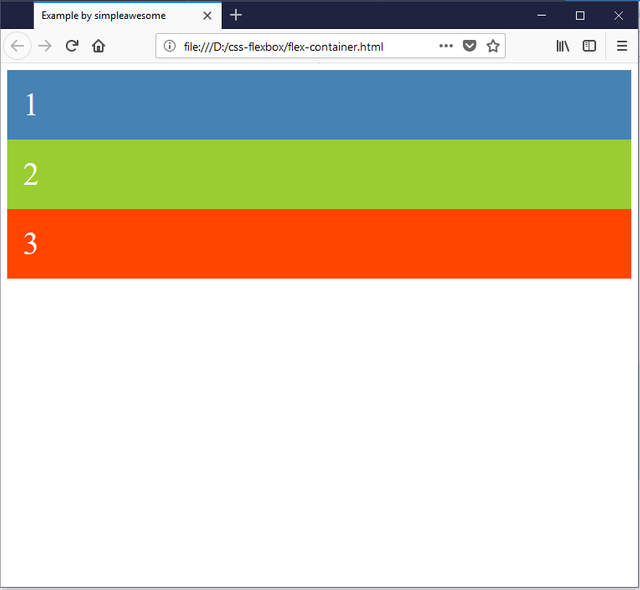
Seen from the above results, the flex will drop sequentially downwards. This is the column position on flexbox.
- Add Content on Flex
Follow the program code below :
<!doctype html>
<title>Example by simpleawesome</title>
<style>
.container {
  display: flex;
  }
.blue {
  background: steelblue;
   flex-grow: 1;
}
.green {
  background: yellowgreen;
}
.red {
  background: orangered;
}
.container > div {
  font-size: 5vw;
  padding: .5em;
  color: white;
}
</style>
<div class="container">
  <div class="blue">1</div>
  <div class="green">2</div>
  <div class="red">3
  <p>The Flexbox item will follow the content so it can change shape (grow and shrink).</p>
 </div>
</div>
and type code program above in editor text.
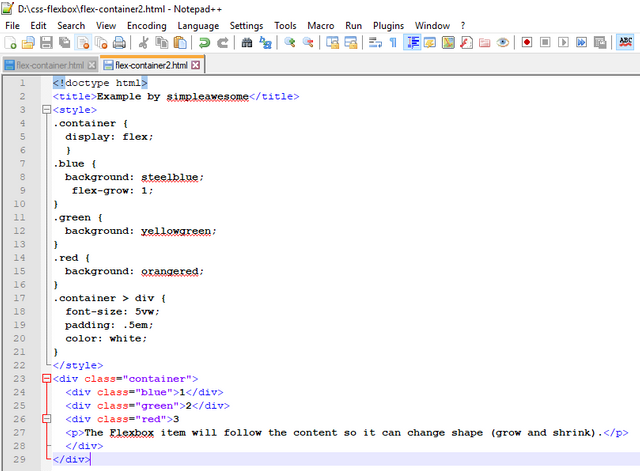
Here are the results with added content :
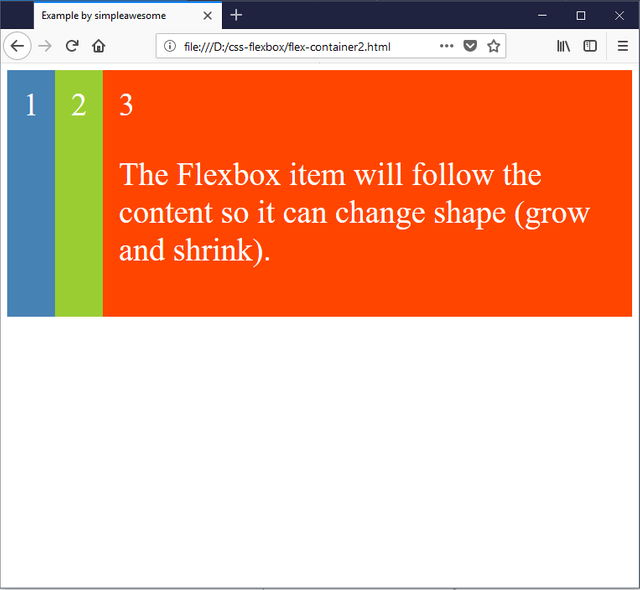
So here, we do not use the width property to change the size of the flex item. It's just that with the content in one of the flex items, then the form will change.
All we did was add some content to the blue item, and it grew as required in order to fit the new content. In fact, there was so much content, that the red item completely shrunk to fit its own contents and no more. The height of the red flex item also grew to accommodate the new content. And just as importantly, the other two items also increased their height to match.
- Set the Width
Follow the program code below :
<!doctype html>
<title>Example by simpleawesome</title>
<style>
.container {
  display: flex;
  }
.blue {
  background: steelblue;
   flex-grow: 1;
   width: 60vw;
}
.green {
  background: yellowgreen;
}
.red {
  background: orangered;

}
.container > div {
  font-size: 5vw;
  padding: .5em;
  color: white;
}
</style>
<div class="container">
  <div class="blue">1</div>
  <div class="green">2</div>
  <div class="red">3
  <p>The Flexbox item will follow the content so it can change shape (grow and shrink).</p>
  </div>
</div>
Here are the results :
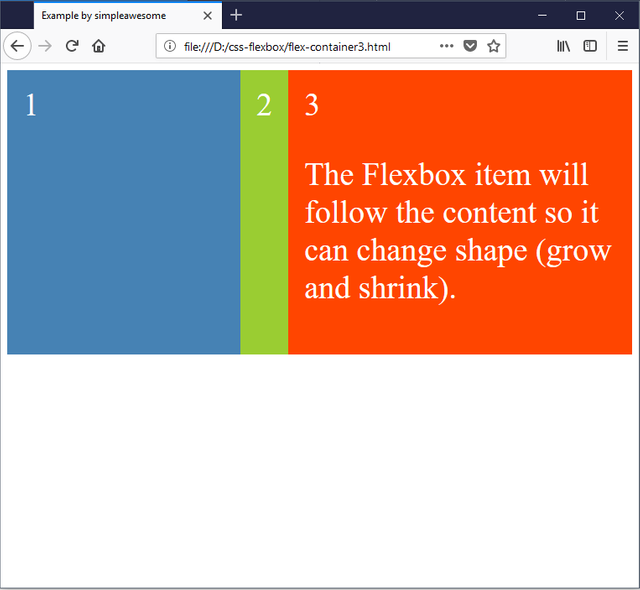
We have added width property to blue with size 60vw and vw in CSS terms means viewport-width.
.blue {
  background: steelblue;
   flex-grow: 1;
   width: 60vw;
As expected, the red item becomes as wide as the specified width. But because this now reduces the size of the red item, the blue item grows again but only as much as required to take up the available free space.
So now we're starting to see why it's called flexible box layout. Our flex items are nice and flexible and they seem happy to fit in with whatever's going on around them.
Curriculum
This is the first tutorial i'm contributing using CSS3 Flexbox.
Posted on Utopian.io - Rewarding Open Source Contributors
Your contribution cannot be approved because it does not follow the Utopian Rules.
I suggest that in the future you make your tutorials more in-depth, and also link to the correct, official repository.
You can contact us on Discord.
[utopian-moderator]
Downvoting a post can decrease pending rewards and make it less visible. Common reasons:
Submit