Hi friends, on this occasion I will share the tutorial 'How to create a cinematic effect in Photos with RawTherapee'. In this tutorial, we use RawTherapee software to process the images into cinematic. RawTherapee is a useful software for photo editing. If you ever use Adobe Lightroom, then you will find similarities with RawTherapee Software. In terms of appearance and features provided RawTherapee almost the same as Adobe Lightroom.
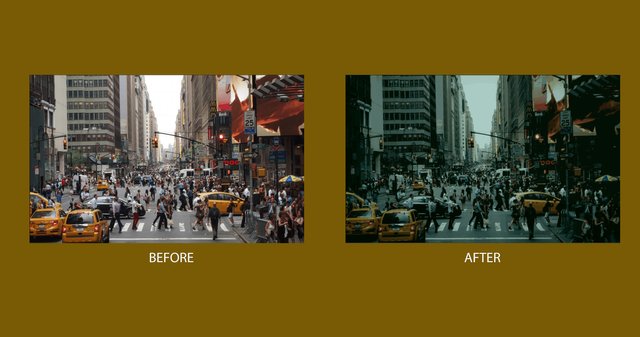
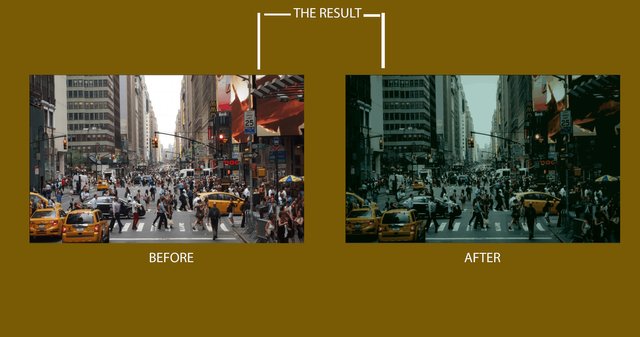
The cinematic effect or cinematic photography is a way of making a still photo visible as a scene or scene taken from a movie. The cinematic effect usually displays a color like blue, green, or yellow with slightly darker saturation.
To start the editing process, first prepare the RawTherapee software first. If you do not have the software yet, please click the download link below:
Download RawTherapee
Next, to start the editing process how to create cinematic effects, please follow the steps below:
How to create a cinematic effect in Photos
First of all, prepare the first photo you want to edit. In this tutorial I use city landscape photos, if you want to get it CLICK HERE.
Next open your RawTherapee software, and select the photo you want to edit via "Recent Folders" like the example image below. And double click on the photo you want to edit.
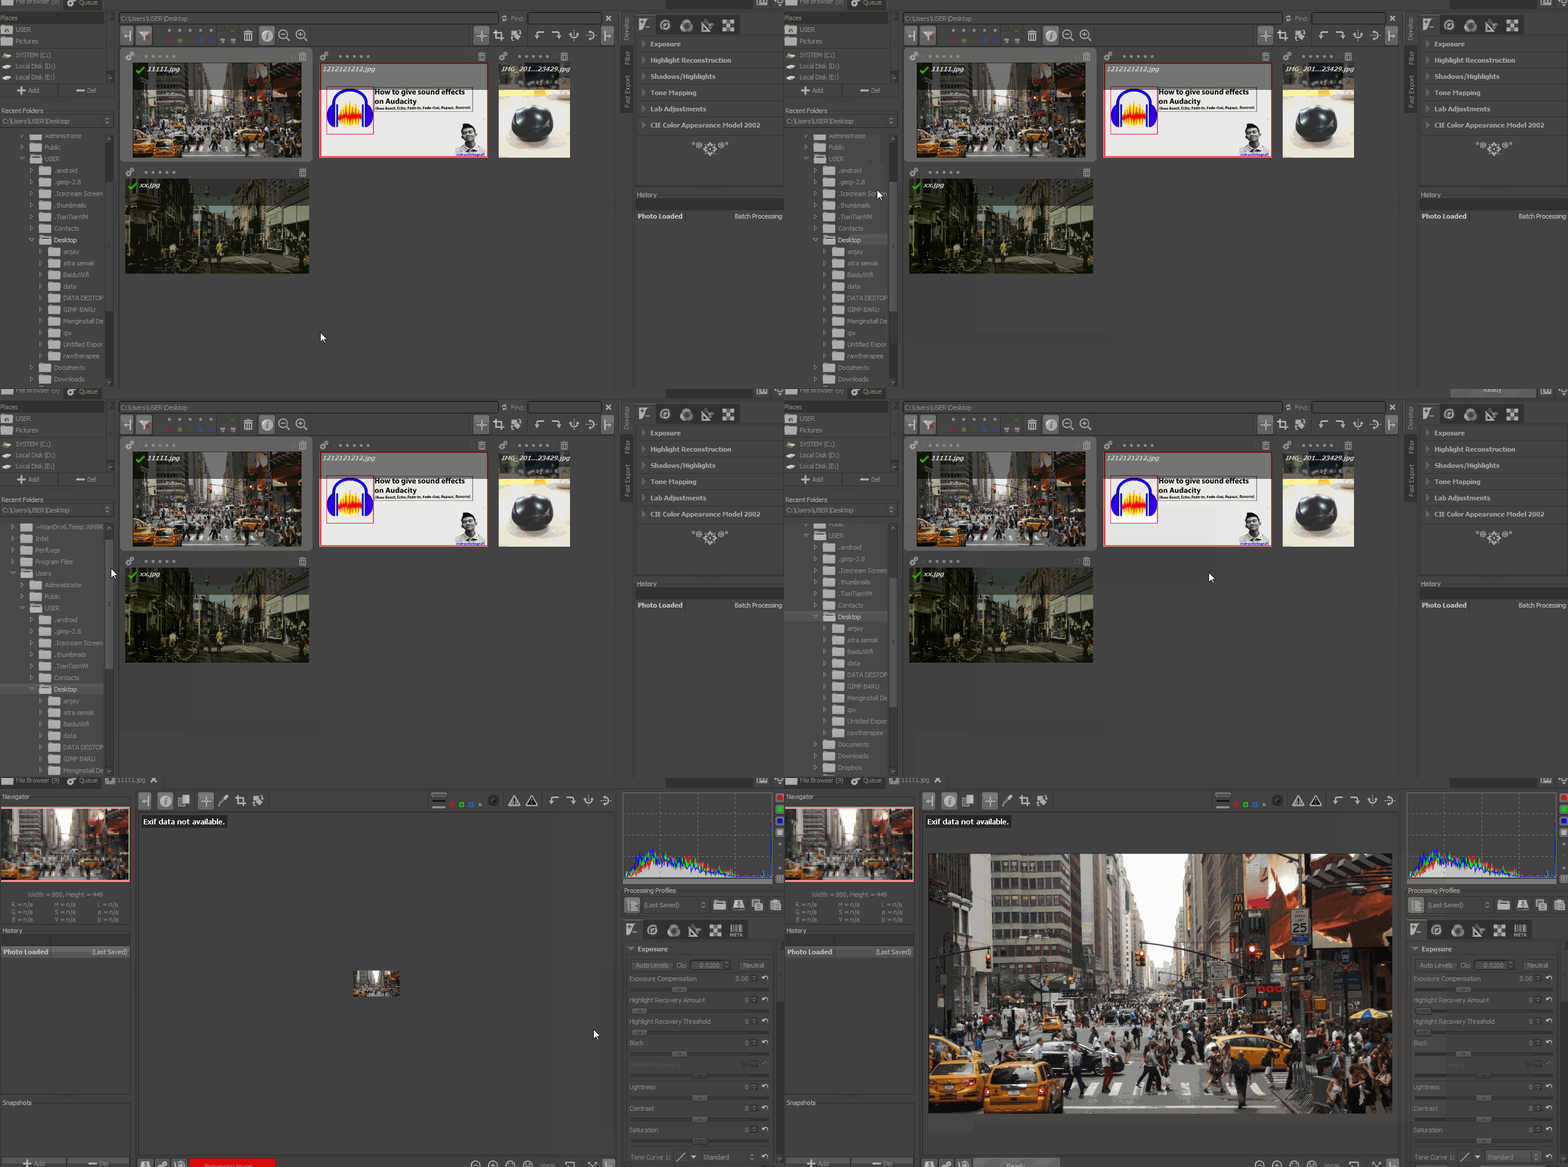
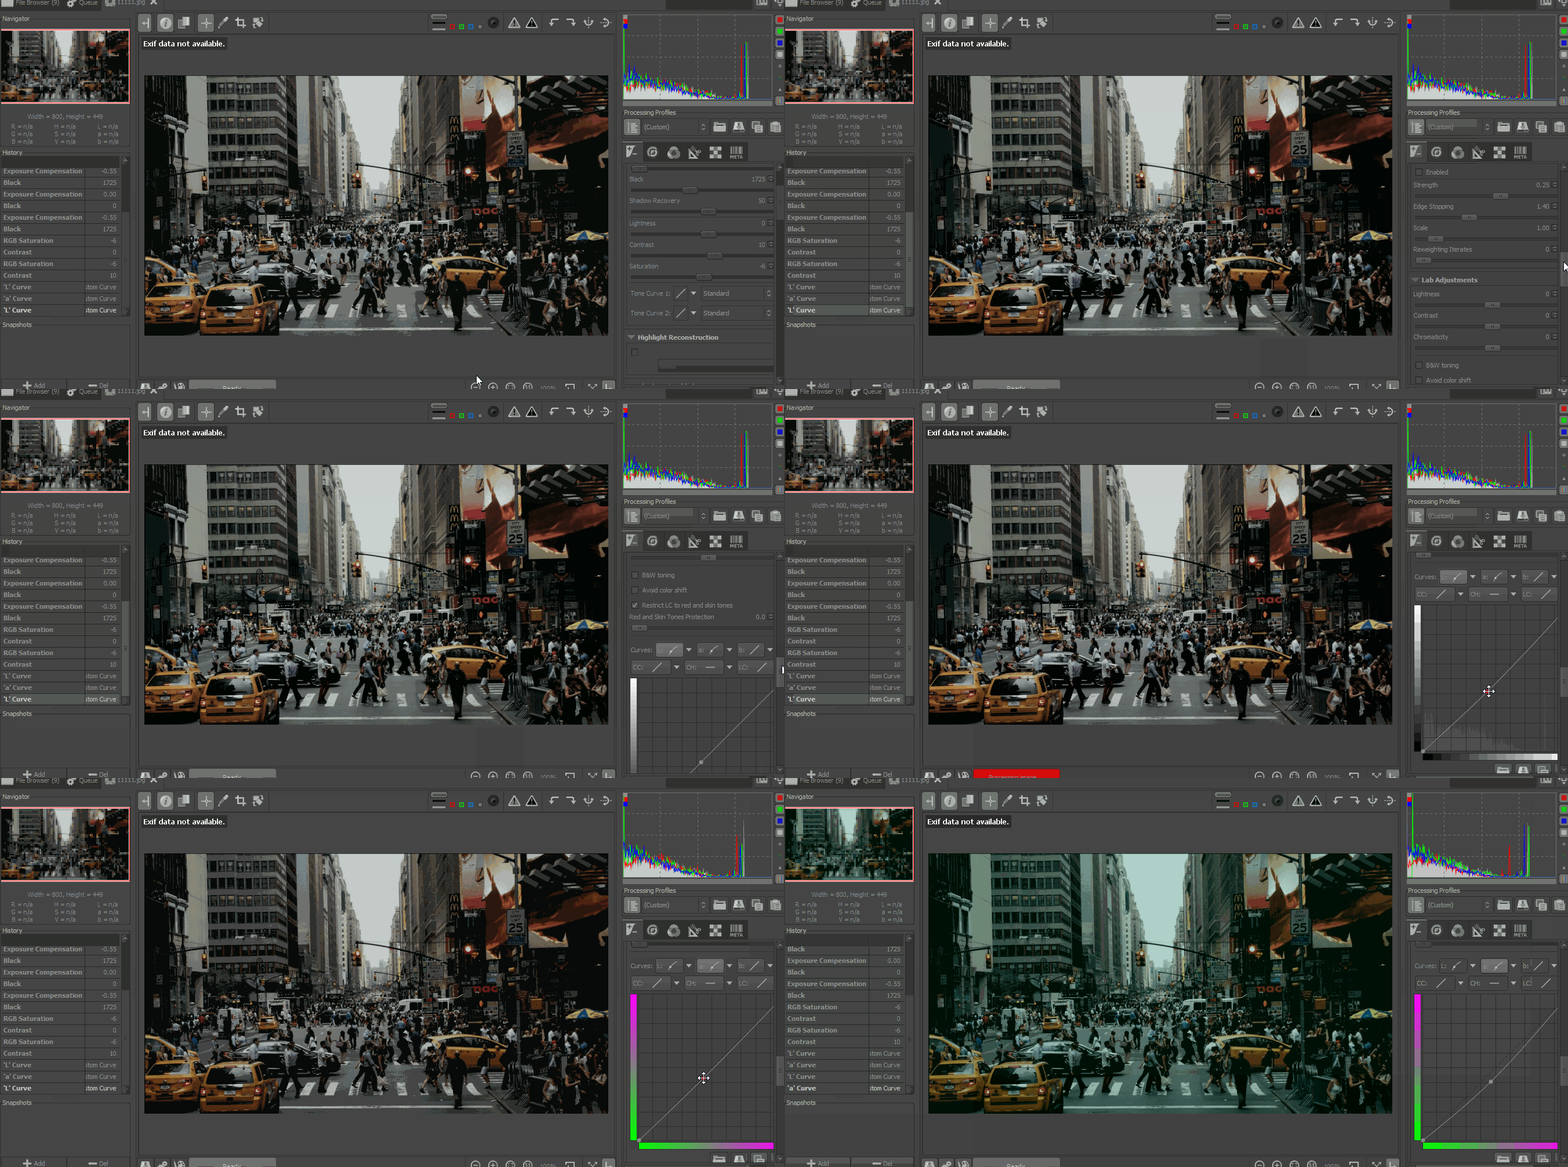
Next reduce the Exposure to around "-0.55". And add Black to "1700".
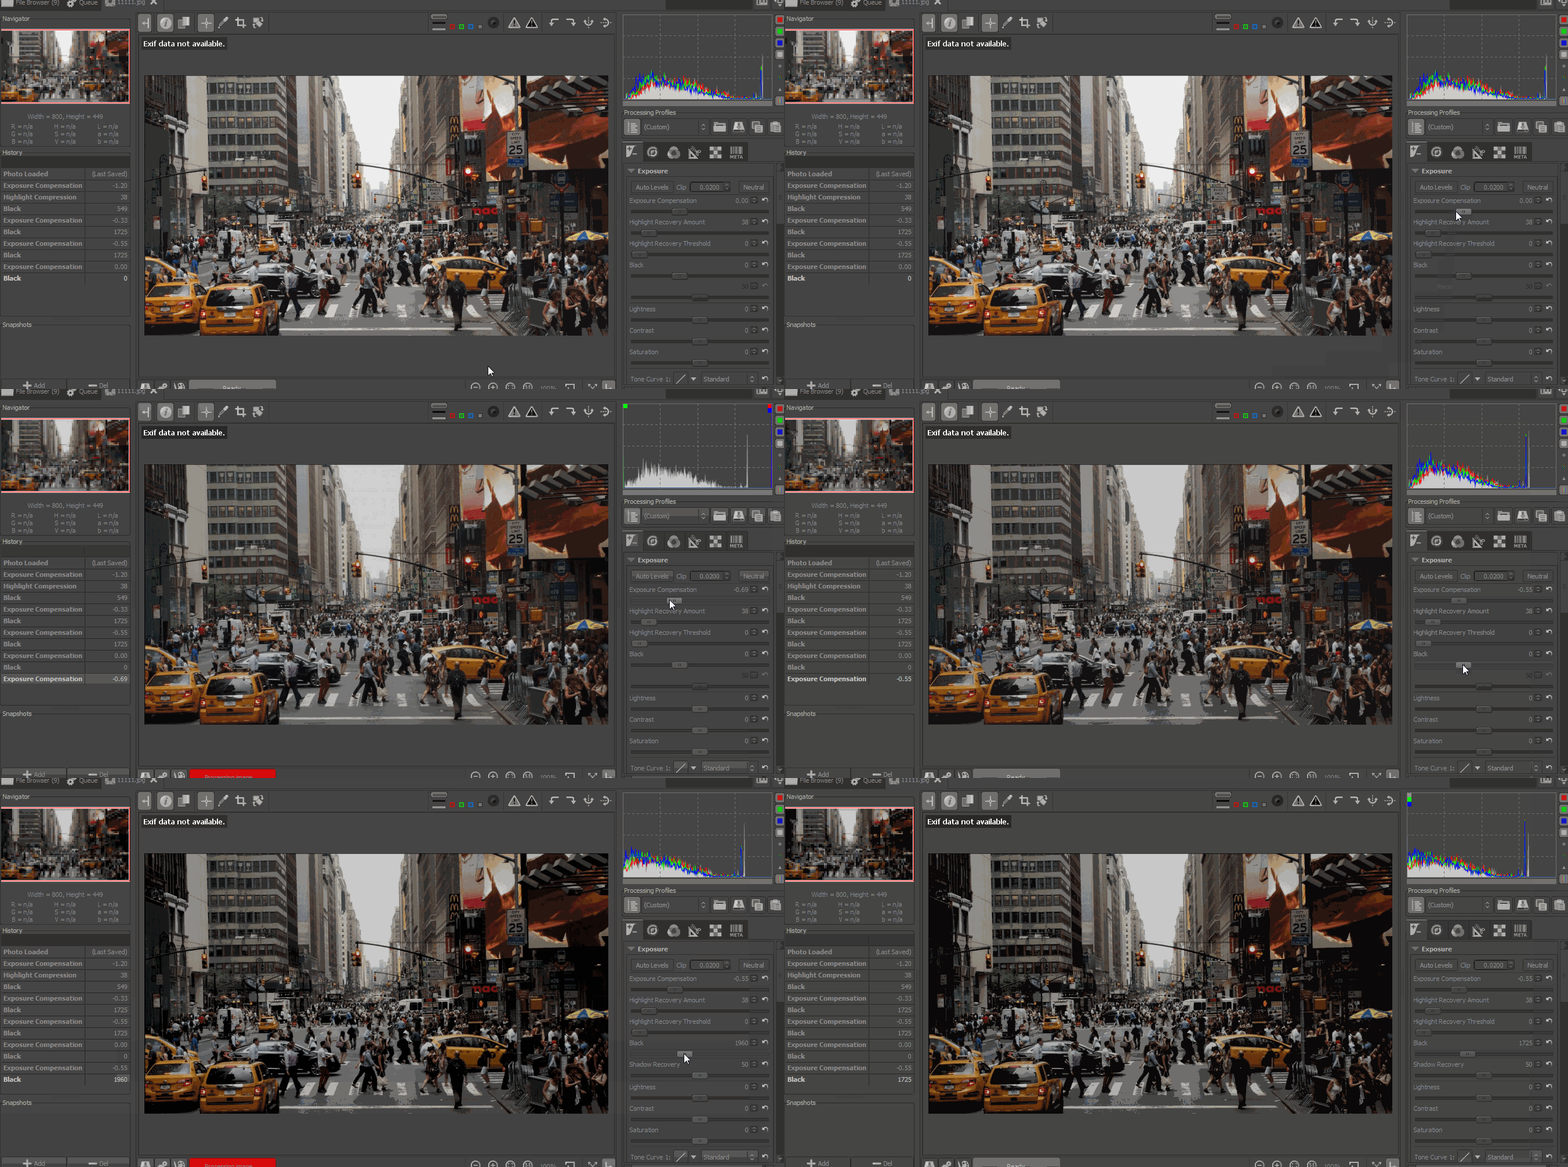
Reduce the saturation around (-6) and Increase the contrast around (+10)
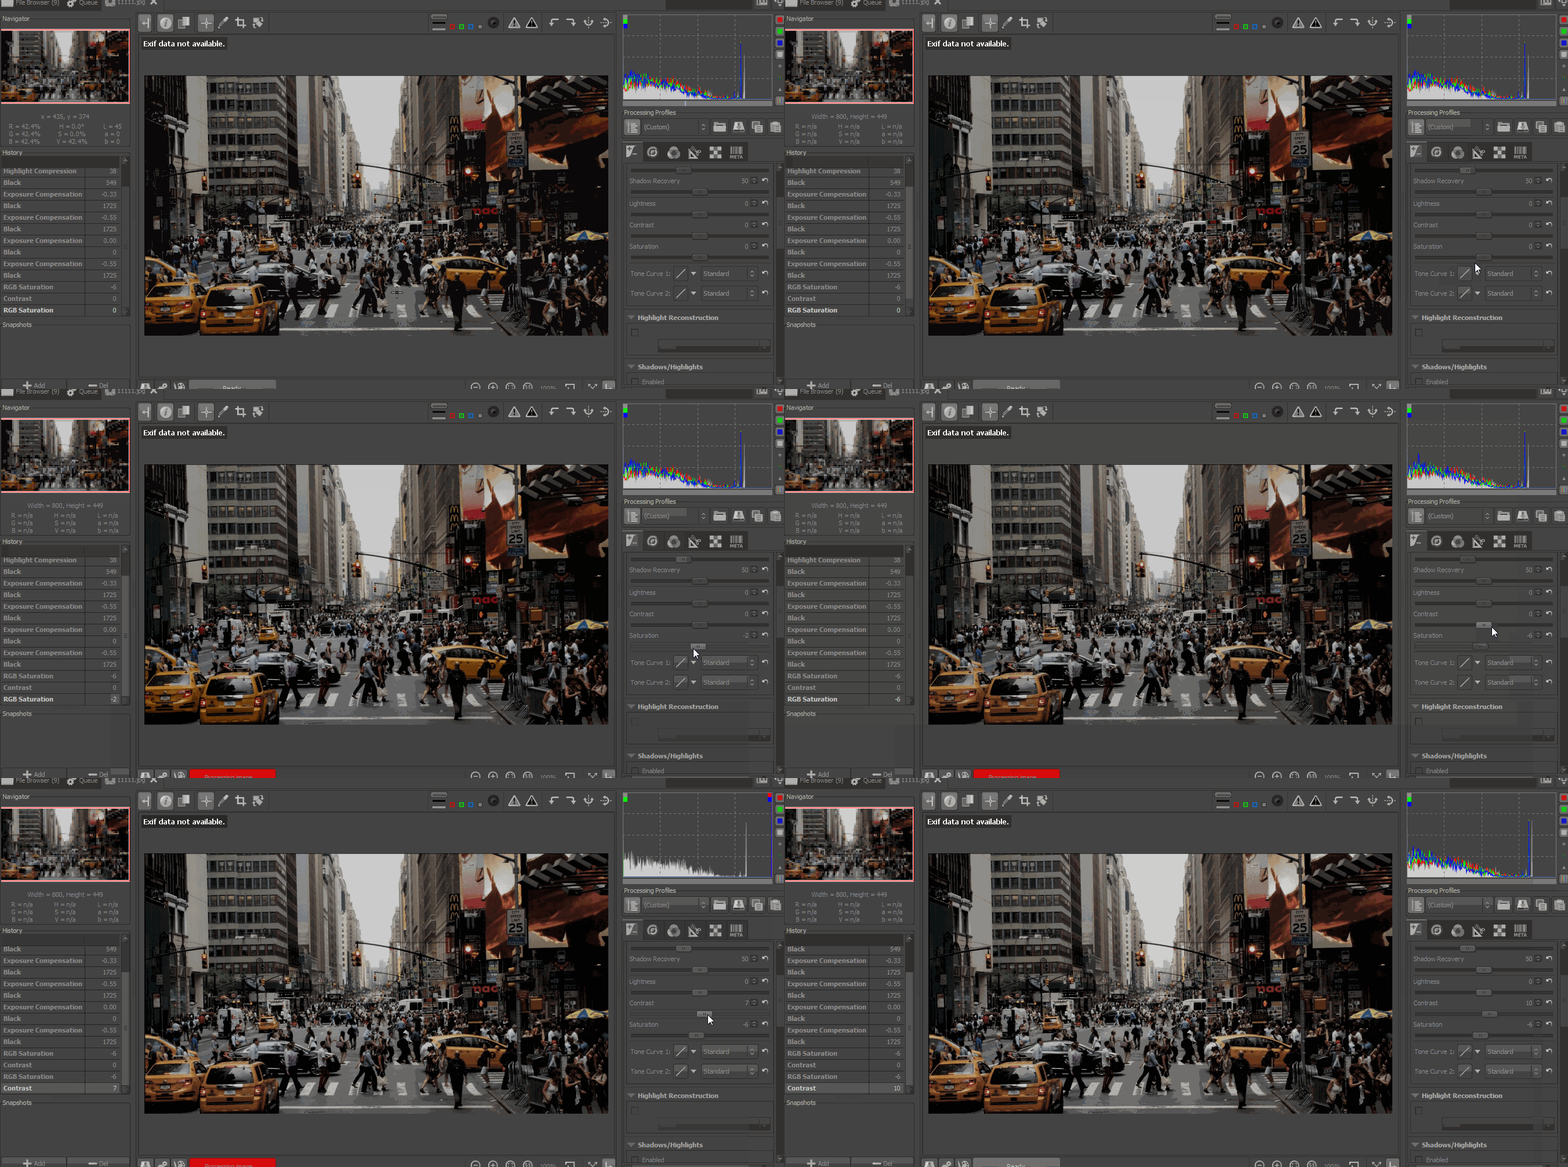
Next give the effect of green color on the photo by using Curves Tool. For more details, please see sample image below.
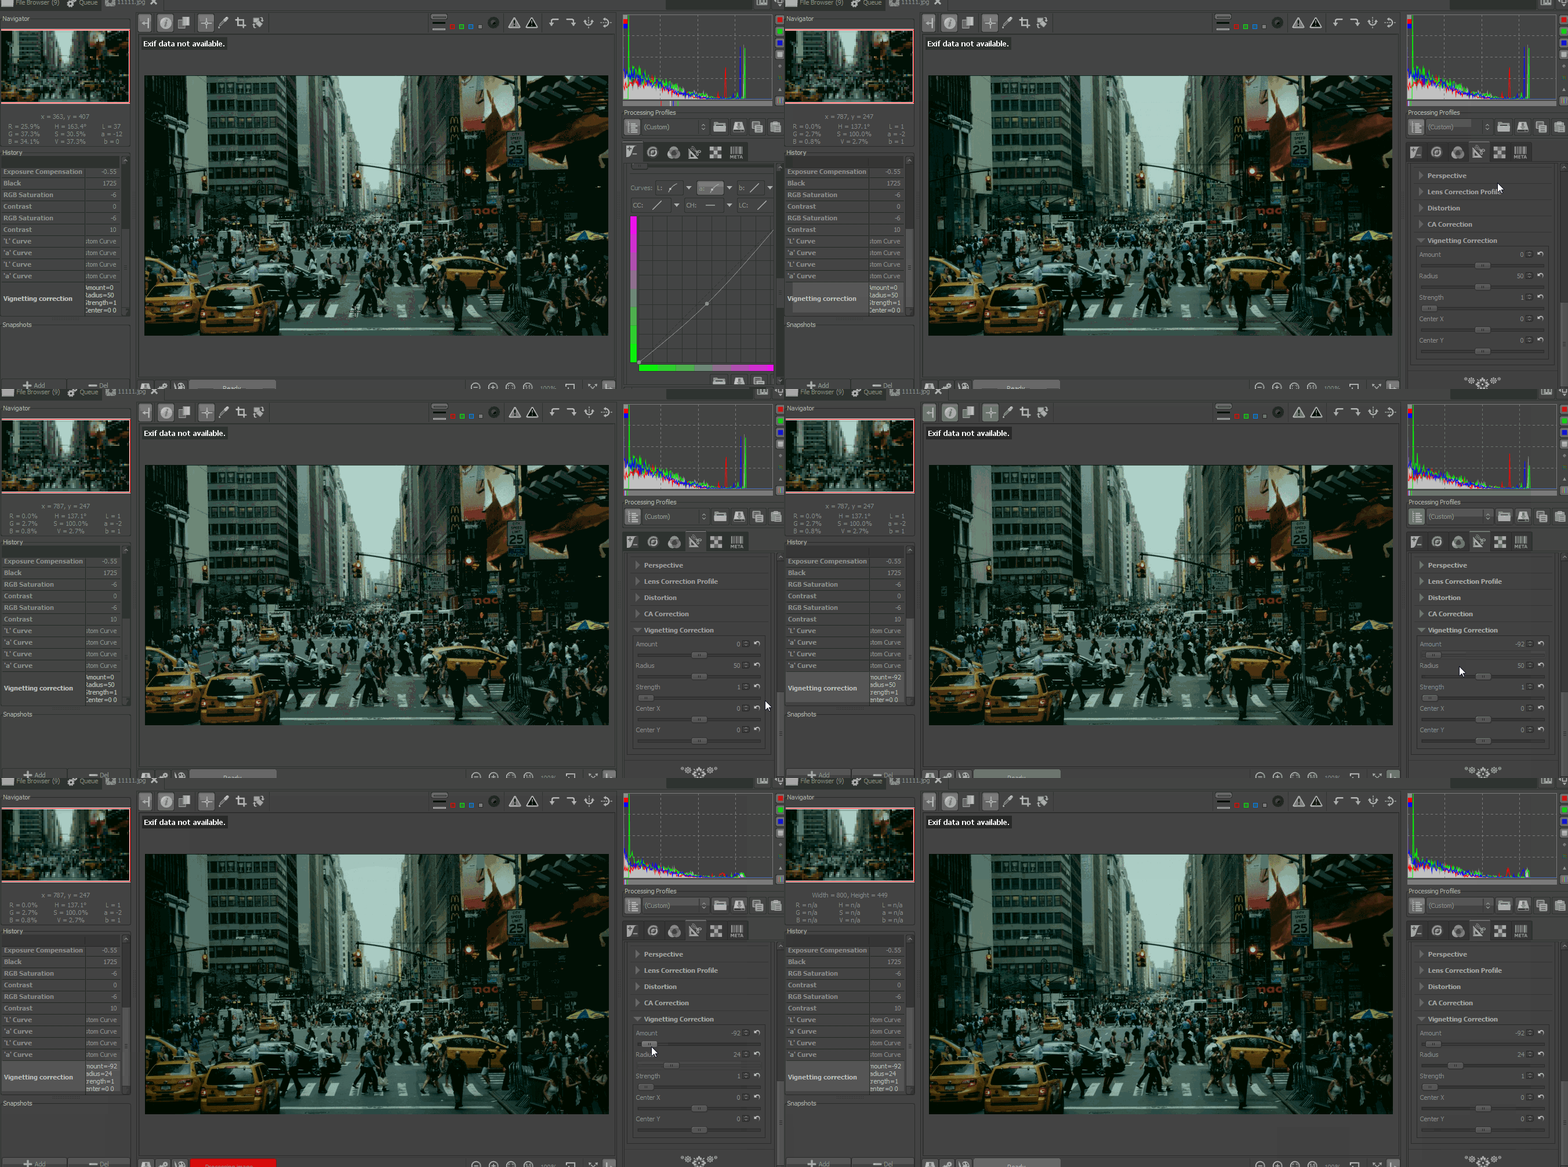
Next add the vintage to make it look more dramatic. How to click Menu Transform> Scroll down to find the "Vignetting Corection". Then set by reducing Amount and Radius as shown below.
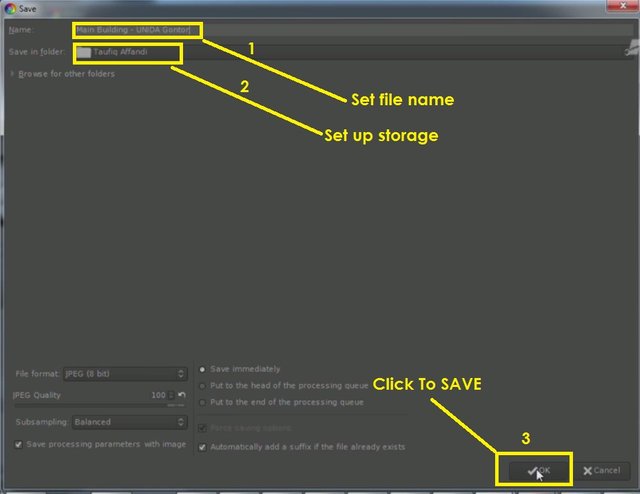
Editing makes the cinematic effect complete. To save it please press CTRL + S then there will be a display like the picture below, then set the file name, set the storage place, and finally click OK.
Thank You
Posted on Utopian.io - Rewarding Open Source Contributors
Thank you for the contribution. It has been approved.
You can contact us on Discord.
[utopian-moderator]
Downvoting a post can decrease pending rewards and make it less visible. Common reasons:
Submit
thanks sir @shreyasgune
Downvoting a post can decrease pending rewards and make it less visible. Common reasons:
Submit
Hey @streetfotografi I am @utopian-io. I have just upvoted you!
Achievements
Suggestions
Get Noticed!
Community-Driven Witness!
I am the first and only Steem Community-Driven Witness. Participate on Discord. Lets GROW TOGETHER!
Up-vote this comment to grow my power and help Open Source contributions like this one. Want to chat? Join me on Discord https://discord.gg/Pc8HG9x
Downvoting a post can decrease pending rewards and make it less visible. Common reasons:
Submit