INTRODUCTION:
What's up guys! this is toffer I have new interesting tutorial in Luminance HDR. In this tutorial I wanna show How To Convert Your Image To HDR Images Using Luminance HDR you don't need a professional software editor like, Adobe Photoshop, Illustration to make your images an HDR. Many professional photographer use the Luminance to make a professional HDR image you can make an HDR image like this just follow my tutorial. Let's take have a look guys!
Tutorial Cover The Following:
• How To Use The Operator
• How To Use The Adjustment Level
STEP BY STEP HOW TO MAKE HDR IMAGES:
STEP 1: OPEN LUMINANCE HDR
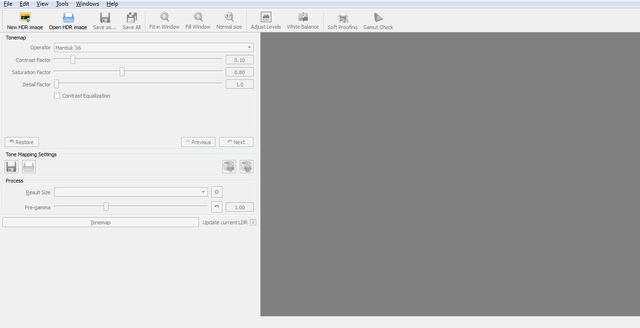
First is open up your Luminance HDR Software.
STEP 2: NEW HDR IMAGES
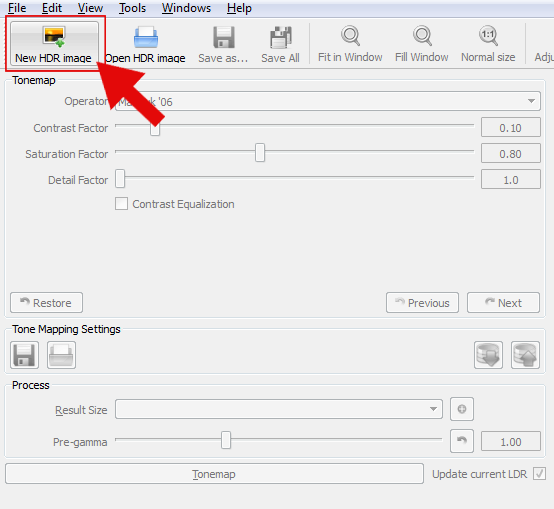
Go to the left upper corner find the New HDR images, choose and click to make a new HDR images.
STEP 3: LOAD IMAGES
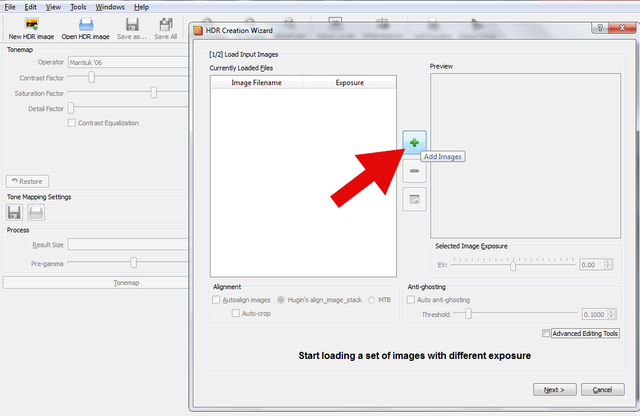
To load an images click the color green plus (+) sign button.
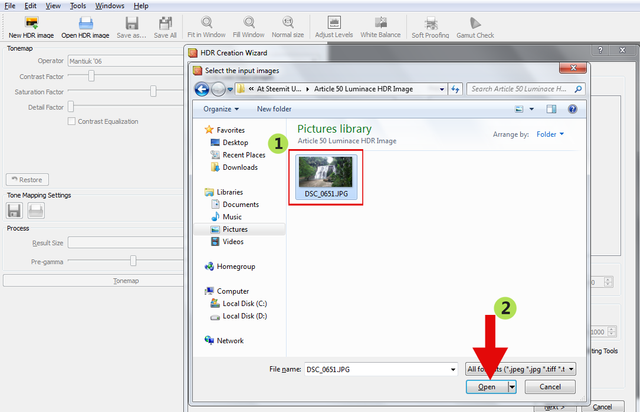
STEP 4: IMPORT IMAGES
After you click the plus(+) sign button your picture gallery open, choose the image that you want to load.
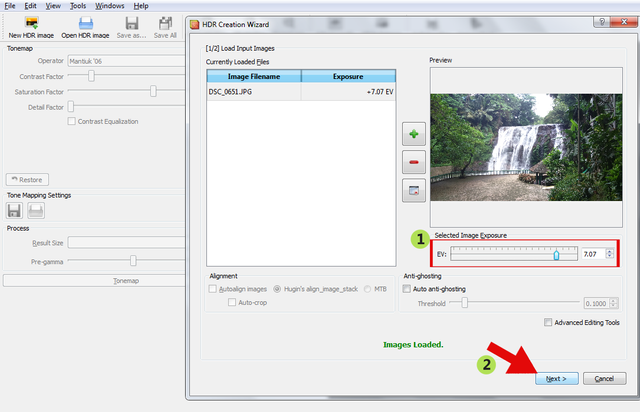
STEP 5: EXPOSURE VALUE
If your image is not set the Exposure Value you can set the value of your EV or Exposure Value then click Next.
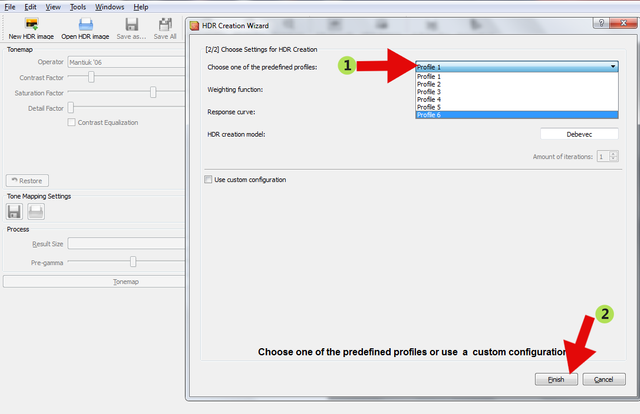
STEP 6: CUSTOM SETTINGS
Choose settings for HDR creation I choose the Profile 1 and click Finish.
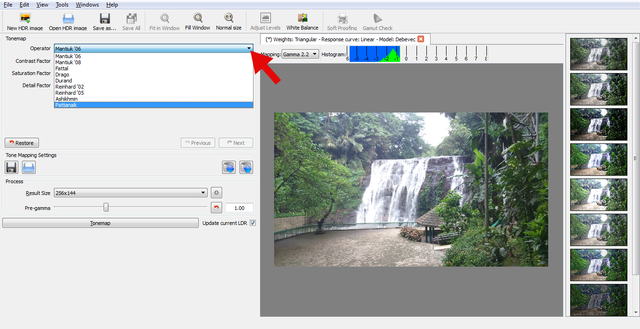
STEP 7: OPERATOR
You can in 9 operators for your images.
STEP 8: THUMBMAIL OPERATOR
Go to your thumb mail operator, choose the Pattanaik Operator and click the Adjust Level.
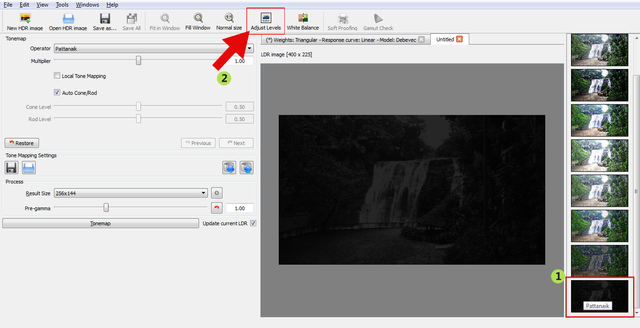
STEP 9: WHITE BALANCE
After you click the Adjust Level the level and gamma settings is open, adjust the clip white and set in 136 value then click Ok.
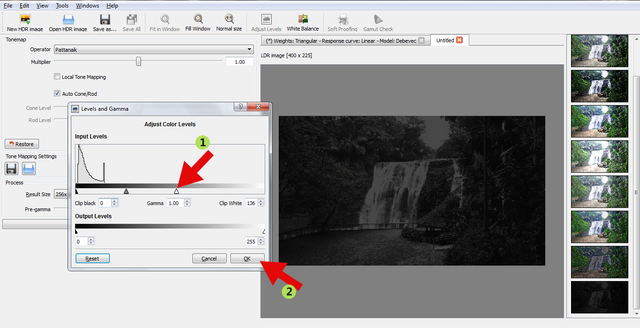
STEP 10: FATTAL OPERATOR
Go to your thumbmail operator again and choose the Fattal Operator.
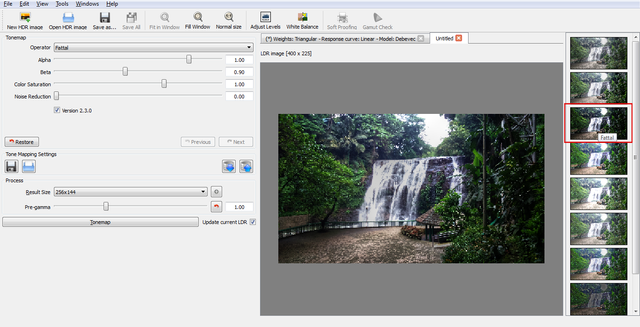
STEP 11: ADJUST LEVEL
Click the Adjust Level again the levels and gamma settings is open, adjust the some settings set the value of Clip Black in 60, Gamma in 1.00 and the Clip White in 202 then click Ok.
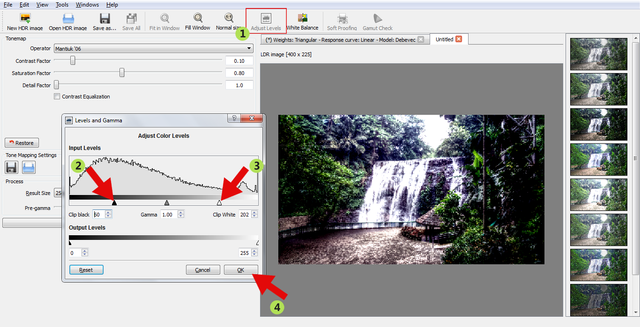
STEP 12: RESULT SIZE
Click the arrow down of the result size choose the size of your images.
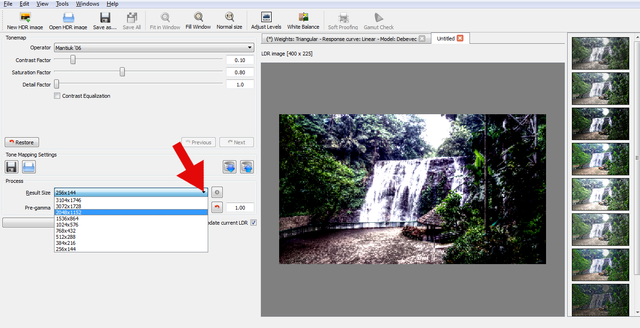
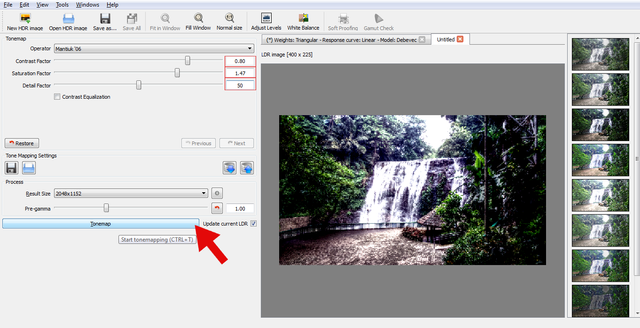
STEP 13: TONE MAP
Go to your Tone Map set the value of Contrast Factor to 0.80, Saturation Factor to 1.47 and Detail Factor to 50 and click the Tonemap button.
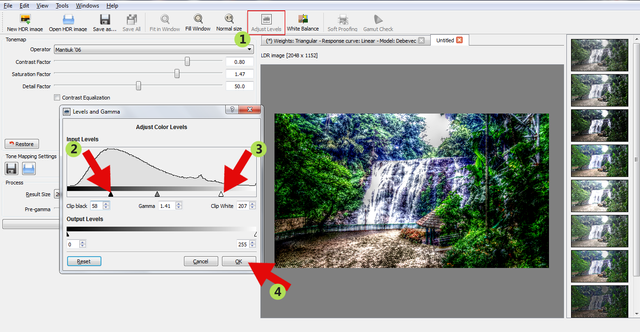
STEP 14: LEVELS AND GAMMA
Click the adjust level change the some value of levels and gamma set the value of Clip Black to 58 and Clip White to 207 and click Ok.
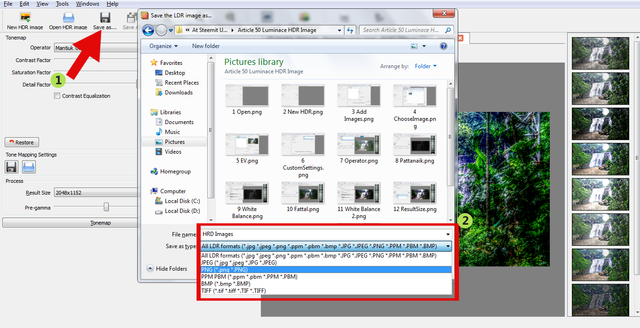
STEP 15: SAVE IMAGES
Click the Save As and choose the format of your HDR images and click Save.
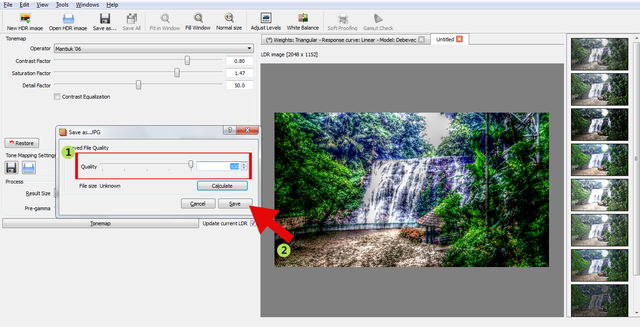
STEP 16: QUALITY
Choose the value of your quality image then click Save.
FINISHED PROJECT:
This the result of my HDR Image you can see below the before and after.


Images I used captured using my Sony Xperia M2
This is my tutorial how to make an HDR images using the Luminance HDR. I hope you like my contribution
Posted on Utopian.io - Rewarding Open Source Contributors
Hey @toffer I am @utopian-io. I have just upvoted you!
Achievements
Suggestions
Get Noticed!
Community-Driven Witness!
I am the first and only Steem Community-Driven Witness. Participate on Discord. Lets GROW TOGETHER!
Up-vote this comment to grow my power and help Open Source contributions like this one. Want to chat? Join me on Discord https://discord.gg/Pc8HG9x
Downvoting a post can decrease pending rewards and make it less visible. Common reasons:
Submit
Thank you so much @utopian-io
Downvoting a post can decrease pending rewards and make it less visible. Common reasons:
Submit
Thank you for the contribution. It has been approved.
You can contact us on Discord.
[utopian-moderator]
Downvoting a post can decrease pending rewards and make it less visible. Common reasons:
Submit
Thank you so much mod @slempase for the approval
Downvoting a post can decrease pending rewards and make it less visible. Common reasons:
Submit
good post @bijoy123
Downvoting a post can decrease pending rewards and make it less visible. Common reasons:
Submit
Thank you @bijoy123 I really appreciate this.
Downvoting a post can decrease pending rewards and make it less visible. Common reasons:
Submit
Useful post!
Downvoting a post can decrease pending rewards and make it less visible. Common reasons:
Submit
Nice cool! thanks for the good feedback @kunani
Downvoting a post can decrease pending rewards and make it less visible. Common reasons:
Submit
Congratulations @toffer! You have completed some achievement on Steemit and have been rewarded with new badge(s) :
Click on any badge to view your own Board of Honor on SteemitBoard.
For more information about SteemitBoard, click here
If you no longer want to receive notifications, reply to this comment with the word
STOPDownvoting a post can decrease pending rewards and make it less visible. Common reasons:
Submit