Learn Linux Series (#10) - Multilingual IMAP client Roundcube

What Will I Learn?
- What is Roundcube
- How to install Roundcube
- How to configure Roundcube
- Disabling Suhosin encryption session
- Enable Roundcube’s Apache Virtual Host
- Setting the footer for people of a new message
Requirements
- Linux system installed
- Basic knowledge of terminal operation
- Average knowledge of linux commands
- Motivation when something goes wrong
- MTA – mail server
- Database server - MySQL
- WWW server - Apache 2
Difficulty
- Intermediate
Learn Linux Series (#10) - Multilingual IMAP client Roundcube
- What is Roundcube

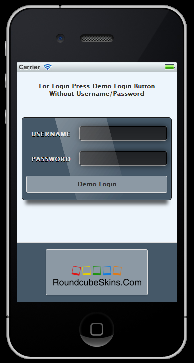
Roundcube Webmail is a browser-based multilingual IMAP client with an application-like user interface. It provides full functionality you expect from an email client, including MIME support, address book, folder management, message searching and spell checking. Roundcube Webmail is written in PHP and requires the MySQL, PostgreSQL or SQLite database. With its plugin API it is easily extendable and the user interface is fully customizable using skins which are pure XHTML and CSS 2.
The code is mainly written in PHP and is designed to run on a webserver. It includes other open-source classes/libraries from PEAR, an IMAP library derived from IlohaMail the TinyMCE rich text editor, Googiespell library for spell checking or the WASHTML.
- How to install Roundcube
We start with the installation of the necessary packages
sudo aptitude -y install roundcube roundcube-mysql
Answer "Yes" if you are asked for confirmation
Choose the database you will use later. "MySQL"
Enter the root password to the MySQL database
Enter the password for the RoundCube DB database
Password verification
- How to configure Roundcube
first we have to edit the configuration file. To do this, enter the terminal:
sudo nano /etc/roundcube/main.inc.php
and we edit according to the scheme:
# line 72: Specifying the server IMAP (SSL):
 $rcmail_config['default_host'] = 'ssl://mail.utopian.io';

# line 75: Specifying the server port IMAP (SSL):
 $rcmail_config['default_port'] =993;

# line 135: Specifying the SMTP server (SSL):
 $rcmail_config['smtp_server'] = 'ssl://mail.utopian.io';

# line 138: Specifying the SMTP server port (SSL):
 $rcmail_config['smtp_port'] =465;

# line 142: Use of the same user name for SMTP and IMAP authentication:
 $rcmail_config['smtp_user'] = '%u';

# line 146: Using the same password for SMTP and IMAP authentication:
 $rcmail_config['smtp_pass'] = '%p';

# line 162: Determining the HELP SMTP host:
 $rcmail_config['smtp_helo_host'] = 'mail.utopian.io';

# line 271: Specifying the domain name:
 $rcmail_config['mail_domain'] = 'utopian.io';

# line 289: changing UserAgent:
 $rcmail_config['useragent'] = 'Server World Webmail';

# line 292: changing title:
 $rcmail_config['product_name'] = 'Server World Webmail';

# line 380: changing language:
 $rcmail_config['language'] = 'en_EN';

# line 649: Change of coding:
 $rcmail_config['default_charset'] = 'UTF-8';
Then edit apache.conf.
sudo nano /etc/roundcube/apache.conf
# line 4: delete '#' with:
  Alias /roundcube /var/lib/roundcube
We restart the Apache2 server.
sudo /etc/init.d/apache2 restart
Access to the page:
http://(server name or IP)/roundcube/
Disabling Suhosin encryption session.
We edit the suhosin.ini configuration file.
sudo nano /etc/php5/apache2/conf.d/suhosin.ini
Find the line "suhosin.session.encrypt = off"
and remove the semicolon "; "Before this entry.
We make sure that the equality sign is "off" (in some cases "0").

- Enable Roundcube’s Apache Virtual Host
Enable the webmail.example.com virtual host you just wrote in the Creating an Apache Virtual Host with SSL section:
sudo a2ensite webmail.example.com.conf
Restart Apache to apply all configuration changes and enable your new virtual host:
sudo service apache2 restart
The output should be *
Restarting web server apache2 ... [ OK ]
If an error is given, use the error messages to troubleshoot your configuration. Missing files, incorrect permissions and typos are common causes for Apache not properly restarting.
- Setting the footer for people of a new message
Adding a footer (signature) to each message sent via the Roundcube webmail requires changing several settings. After logging in to your e-mail account, go to the settings.
Then select in succession: Settings tab -> Preferences -> Section tab -> Create new message
The value of the field Create HTML messages should be changed to Always, and finally confirm the changes by clicking the Save button
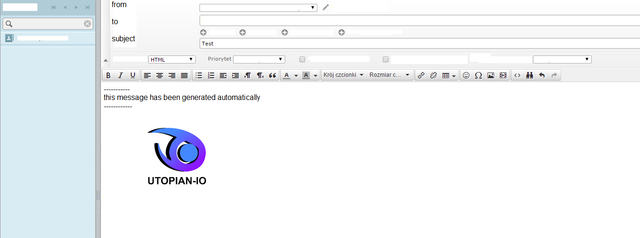
The footer can be defined from the option named Identity, in order for this functionality to work correctly, in the Name field, enter, for example, first and last name (each e-mail will be sent with this name). In the Signature field, enter the footer content, and finally click Save
In principle, the activities described above are enough to enjoy a functional foot in the form of plain text. If you want to add, eg a logo, this is of course the most possible way. To do this, we also mark the Signature option in HTML, thanks to which we will gain access to the extended editor.

The footer will be visible in every new e-mail and in the responses to the e-mails.
Curriculum
- Part 1 - TCP/IP Computer Adaptation
- Part 2 - Proftpd management and configuration
- Part 3 - Introduction to programming
- Part 4 - e-mail server (Postfix)
- Part 5 - e-mail server (Exim)
- Part 6 - Attack Detection System Snort
- Part 7 - Defense against port scans PortSentry
- Part 8 - Intrusion detection system TripWire
- Part 9 - e-mail server (Dovecot)
Posted on Utopian.io - Rewarding Open Source Contributors
Hi! I am a robot. I just upvoted you! I found similar content that readers might be interested in:
https://www.digitalocean.com/community/tutorials/how-to-install-your-own-webmail-client-with-roundcube-on-ubuntu-16-04
Downvoting a post can decrease pending rewards and make it less visible. Common reasons:
Submit
Your contribution cannot be approved because it does not follow the Utopian Rules.
This content has been copied from other sources.
You can contact us on Discord.
[utopian-moderator]
Downvoting a post can decrease pending rewards and make it less visible. Common reasons:
Submit
This post received a free Upvote. Get your free Upvote NOW! Just follow @upvoteforfree
Downvoting a post can decrease pending rewards and make it less visible. Common reasons:
Submit