Repository
https://github.com/nodejs/node
What Will I Learn?
- You will learn how to make a Complete Canvassing Application.
- You will learn how to install express.js and adding other plug-ins to our App.
- You will learn how to create a web server based on Node.js.
- You will learn how to build and include React Component.
- You will learn how to create and setting up the Package.JSON File.
- You will learn how to Integrate Socket.IO and send and receive data through it.
- You will learn the building and deploying of Header component to our application.
- You will learn how to consume the header component in our application.
Requirements
System Requirements:
- Node.js 8.11.1
- Sublime Text 3 or any similar editor for code editing
- A computer with basic functionalities and Web browsers
OS Requirements:
- Windows 7/8/10
- macOS
- Linux
Difficulty
- Intermediate
Resources
Prerequisite
- You need a good knowledge of JavaScript, Node.js and React.js.
- A fair understanding of web development.
- A thirst for learning and developing something new.
Tutorial Contents
Description
Welcome to the Tutorial of Complete Web Development using Node.js, EcmaScript and Webpack
The objective of this course will be to produce an exciting, complete Web Application which utilizes information in real time. The app enables a presenter to begin a presentation, as well as connect to audience members through asking queries and graphing their particular responses. To create this particular app, we are going to utilizing a mixture of technologies. We will begin by setting up an Express application with Node.js, after that we will integrate Socket.IO to manage real time data sharing. On the client side, we're going with making use of React to develop our user interfaces.
We'll wrap up by refactoring our React components for ES6 integration. When we're finished, you'll have a working Socket application that handles real time data creatively. So, with that, let's dive into building this canvassing app with Node.js, Socket.IO, EcmaScript and React.
We are also planning on using the React Developer Tools for Google Chrome. If you have not taken the time to install those tools, you can do so at this link. If you've been introduced to Node.js, Socket IO, and React.js in the past, then you're ready to build this app by integrating these JavaScript-based technologies.
Building the Web Server:
We will make initials with this application by building a web server which serves static files. We are going to utilize Express framework. Thus, let's take a take a look at the initial files. Within, we have a public folder which has an index.html along with a style.css. Let's look at to our terminal and through our terminal, we have to install a couple things. The very first thing I have to set up is Express and i also can use the node package manager to install express with this command,
npm install express
Which will set up the express framework. We're additionally getting using bootstrap for this application. So, we will install that too,
npm install bootstrap
At this point, we have to build our server file. So, I'll come to the root here, that is our main folder.
Save this particular file as app-server.js. So, this really is getting our server side file that we can run using node. So, I'll begin by including Express, by requiring it, and I have recently packed that express framework in to the express variable. I'll use this to create an instance of the express app.
var express = require('express');
So, simply invoking which express variable which i created will make a new instance of an express application which i will use. Therefore, on the express app instance, we have to inform this to provide files through our public directory.
var app = express();
So, we will make this happen simply by using a piece of middle ware app.use is the actual function which we will use to wire up our own middle ware and the middle ware that we might use is express.static. The express.static function will set us up to ensure that we are able to serve files from any static folder which we choose.
app.use(express.static('./public'));
But, I also require this server in order to serve our bootstrap files. At this point, if I drop in to node_modules folder after which further down into bootstrap, exactly what you will observe is, there's a dist folder. And underneath the dist folder, that's where the css that we want to serve,
//Styles.css//

html,
body {
    padding: 0;
    margin: 0;
}

#connection-status {
    height: 35px;
    width: 35px;
    border-radius: 50%;
    -webkit-border-radius: 50%;
    padding: 0;
    margin: 20px;
    display: block;
}

#connection-status.connected {
    background-color: green;
}

#connection-status.disconnected {
    background-color: red;
}

form button {
    margin: 1em 0;
}

form label {
    font-size: 1.5em;
    margin: 1em 0 0;
}

div#not-found a {
    display: block;
    clear: both;
}

div#not-found a,
form a {
    position: relative;
    left: 15px;
    top: 10px;
    padding-left: 20px;
}


#questions>div>span {
    padding: .5em;
    margin: .5em;
    display: block;
    cursor: pointer;
    border: 2px solid green;
}

#questions>div>span:hover {
    background-color: yellow;
}

#currentQuestion button {
    margin: 2px 0;
    cursor: pointer;
}

#currentQuestion button:hover {
    opacity: 0.9;
}
along with the fonts, can be found. If I extend this css folder, there's the bootstrap min css that I wish to serve using this web server.
app.use(express.static('./node_modules/bootstrap/dist'));
So, I'm going to include another bit of middle ware, an additional static file folder and this time, exactly what I'm going to go on and do is include the link to node_modules/bootstrap/dist because that is where we would like to serve the files from.
app.listen(3000);
I can send out a port number, which will certainly inform my application to start listening to get requests on port 3000.
console.log("Canvassing server is running at 'http://localhost:3000'");
Now, the final touch, that is nice, would be to let our end users know that there's a server operating here. We are able to do that with a console.log and I will simply send them the message that the Canvassing server is actually running at localhost:3000.
Now I will save this file and we'll return to the terminal to perform it and we can run our server file by simply inputting
node app-server.js
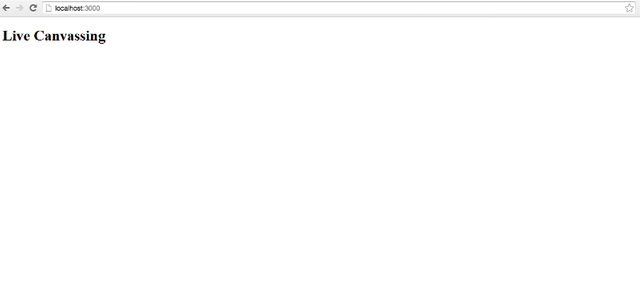
So, let's determine if it's running. I can basically go to open a web browser window and then, enter localhost:3000 and there, we come across our file running.
We also needs to be serving our css style, so if We do /style.css there we see our css file.
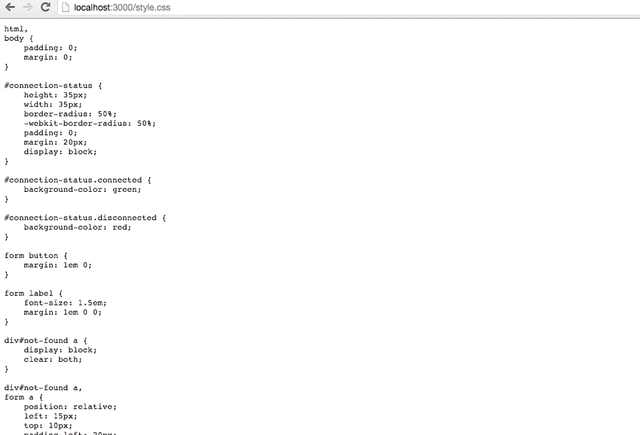
The only problem is actually, that does not seem like our css file has effects on this html page which is because we have not included the hyperlinks to the style sheet to the html yet. So, let's go on and do that next.
What I'll do is find that index file. It's within the public folder, index html, there is certainly no links for the css here.
<link rel="stylesheet" type="text/css" href="/style.css">
We want to include them as well as going to connect to style.css. So, which produces our original style sheet.
Right under this I'll put an additional link and this link, we will serve the bootstrap style sheet. So, keep in mind, we are going to serving all the files which are found in the dist folder and below that, we have the css folder and under that, we now have bootstrap.min.css.
<link rel="stylesheet" type="text/css" href="/css/bootstrap.min.css">
So, I have to serve the bootstrap file through referring to the css folder 1st after which, bootstrap.min.css. There we go. Therefore, we now have both these style sheets included in our index html. What we don't have are usually any bootstrap classes impacting anything in here.
Therefore, I'll put in a div that utilizes a bootstrap class to impact this live canvassing heading that we possess here. So, I'll come down
<div class="container">
So, just below the body, I will add a div and i also will give this a class of container and also the container class is a bootstrap class. How it works is, whatever we wrap within the container class, will certainly instantly be handled then it looks nicely in every screen sizes.
<h1>Live Canvassing</h1>
So, I will placed the heading one in in between our div and /div here.
So at this point, I have included the css style sheets as well as I have included a bootstrap class to a div within the html page, and we should see bootstrap taking impact. If I return over to the internet browser at this stage and hit refresh,
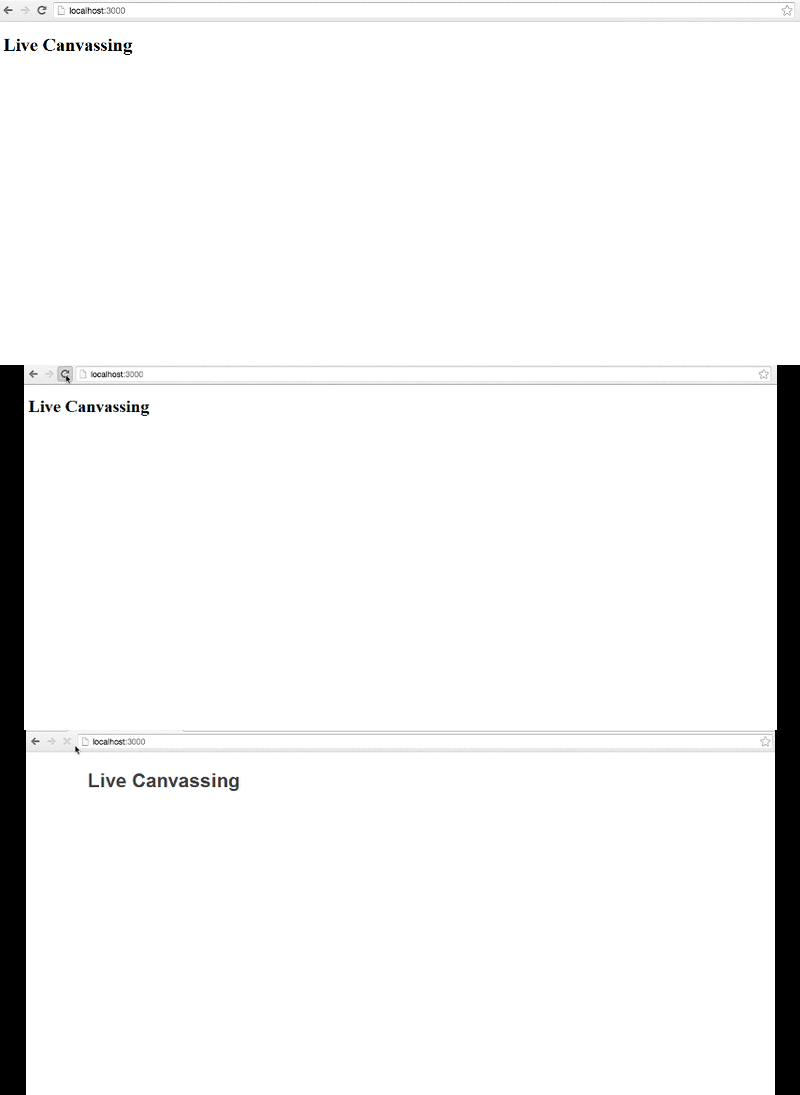
Great, you'll observe that the actual font has changed signaling that we have packed our css styles and also, that reside Canvassing jumped over. That's that bootstrap container working. Thus, If I change the size of my window that container class will be quickly dealing with the positioning of this Live Canvassing for me.
Building React Component:
Therefore we will utilize React as our view layer. And also the very first thing which we need to do to make use of React is to install it. Therefore begin with
npm install react
which will install React for us. Therefore the next thing is we have to go on and develop our very first React component. So I'll return into Sublime. And also within our root, our main folder, I'll right click over that and I'll choose New Folder. We will make a folder known as components. And all of the React components will be stored inside this folder. Now I will right click above my components folder and choose New File.
As well as I will instantly save this particular file as APP.js. Which means this will be our APP component or the very first component that we will render in to our index.html. So let's just do it
var React = require('react');
We will have to use React and that we need that React module which we installed there. And after this we want to make our component. So we will make a variable named APP. We'll utilize React.createClass to produce that component. And when we use React.createClass, we need to send it a literal of at least one thing it render function.
var APP = React.createClass({
    render() {
        return (<h1>This is me </h1>);
    }
});
So here's our render function here. And this render function is going to go ahead and return some JSX or return a heading one tag that says This is me. So that's heading one there. Great, and the last thing we want to do here is just export this.
module.exports = APP;
Great, so we've created and have exported our first component. We're going to go ahead and start using a little bit of ES6 at this point
Essence of ES6:
What we're going to go ahead and do is start incorporating that into our code. We can declare functions with ES6 using a shorter, simpler syntax. With ES6, you don't need to use that function keyword and we don't need this column. This will also create a render function that is within this React class for us using some ES6 shorthand at syntax. So we're going to go ahead and save this and we'll leave this open here. So this is a shorthand ES6 version of the render function.
And it's just a little bit different syntax. That's a little bit easier for us to use. Our next step is we need to actually render this component into the document. So we need a root client JavaScript file. The first JavaScript file that we'll run inside of the browser. I'm going to go ahead and create that in the root of our application. So I'm going to right click over the main folder, our root folder and select New File. Then I'm going to go ahead and save this file immediately as app-client.js. So there we have a server which is our main server side group file.
And now we have our client which is going to be our main client site file but first JavaScript that will run inside of the browser.
var React = require('react');
So in this file, we want to render our APP component which means we need to include React and we need to include our APP component.
var APP = require('./components/APP');
There we go. So we're going to use React.render to render our APP into the page. We're going to render our APP into the document into an element that has the id react-container.
React.render(<APP />, document.getElementById('react-container'));
Great, so we've created our first component and we've created our main JavaScript file which will render that APP component into the react-container.
Let's go into our public folder and open up that index.html. So if we look at this index.html, we do not have any element that has the id react-container. So I'm going to add that to this div that we've created.
<div id="react-container" class="container">
Our APP component will be rendered inside of this main div with the bootstrap container class. So what we need to do here is include our client-side JavaScript. We can not simply say script src="app-client.js".
<script type="text/javascript" src="app-client.js"></script>
And there are a number of reasons that we cannot do this. This makes sense. It seems like what we want to do. We want to run app-client and then render this app container into that div component. But the issue is one, we're not serving this app-client file and two, the very first thing we see in this app-client file are require statements as the common JS module pattern. The browser doesn't know what to do of that and the browser won't know how to find this APP component in the components folder and also render that. In addition to that, we have some other problems. The browser doesn't know what to do with JSX.
So we have some JSX in here and it makes our code really neat and clean but the browser doesn't know how to render this. So this JSX code needs to be converted into code that the browser can understand. We're also using a little bit of ES6 here. And since the ES6 spec is so new, chances are your browser also doesn't know what to do with this render function. So we want to help out our browser a little bit by converting this render function automatically into ES5 or below, something that the browser would understand. So we're going to need to compile our JavaScript.
We're going to need to take our app-client and our APP and compile it into a single JavaScript file that we will serve from the public folder. I'm going to call this file bundle.js. So instead of serving app-client, we're going to serve bundle. And bundle is going to be our app-client and our APP component, all packaged together in one neat file.
<script type="text/javascript" src="bundle.js"></script>
So in order to create this bundle.js file, we're going to use something called webpack. I'm going to go back over to my terminal. And webpack is a tool that we can use to help us package up and compile JavaScript code so that in can be served inside of the browser using those common JS module patterns.
So our index.html file will look like this now
//index.html//
<!DOCTYPE html>
<html>
<head>
    <title>Live Canvassing</title>
    <link rel="stylesheet" type="text/css" href="/style.css">
    <link rel="stylesheet" type="text/css" href="/css/bootstrap.min.css">
</head>
<body>
    <div id="react-container" class="container">
        <h1>Live Canvassing</h1>
    </div>
    <script type="text/javascript" src="bundle.js"></script>
</body>
</html>
Binding through Webpack:
So I'm going to install webpack globally.
npm install –g webpack
Now webpack will package up our JavaScript into that one bundle file but webpack doesn't know what to do with that JSX or that ES6 code that we have inside of our file.
So we need something that will also convert that. We are going to use babel. And specifically, we are going to use something called the babel-loader that works with webpack.
npm install babel-loader
This installer we're going to do locally because this project is going to utilize the babel-loader. Webpack is going to allow you to use a number of different loader for pre-processing and compiling your JavaScript. The babel-loader is going to automatically convert that JSX code into JavaScript that's readable by the browser and then it will also convert ES6 into JavaScript that is readable by older browsers.
So I'm going to go back over to our Sublime. And now we're including this bundle file here but we haven't created it yet. and that's because we haven't run webpack. But before we can run webpack, we have to give it some information. We have to tell it what files to use and what files to create. So we can do this with a webpack config file inside of the root folder of our application. Let me go ahead and right click over the main folder and select New File. And I'm going to immediately save this file as webpack.config.js.
module.exports = {
};
And so this is going to be a file that has configuration information for webpack. We're just going to export maybe literal that has all of the information that webpack needs to work. So the first thing that webpack needs is it wants to know what are start JavaScript file will be for the client. Our root JavaScript file in the client is going to be app-client. This is where webpack will start. We need to render this APP component into our document. So what we want to do in our config file is let webpack know that that's the entry.
entry: "./app-client.js",
And once webpack starts on the app-client, it will automatically pull in our APP module that we've declared here and it will incorporate that code into the bundle as well.
Now, we need something that's going to pre-process this JSX code and also pre-process any ES6 syntax that we might have. So we need to tell webpack one what the output file is, what file to create after all of that pre-processing and packaging has run and the file name is going to be that bundle.js.
output: {
        filename: "public/bundle.js"
    },
So this will be in the public folder, bundle.js. So that's the file we're telling webpack to create. Now we also need to include that babel-loader so that it does the pre-processing and converting of our JSX in ES6.
So I'm going to create a module node here. Inside of this module node, we're going to send an array of loaders. So webpack, we can actually pre-process our code with a number of different loaders if we like but we're only going to use one today and that will be the babel-loader.
    module: {
        loaders: [
            {
                    loader: 'babel'
            }
        ]
    }
So I'll put a literal in here for our loader and we will say we're using babel. Great, now the last thing I want to do is I want to make sure that when we run this babel-loader, we're not running it on everything inside of this directory. So what we want to do is we're going to add an exclude key. And this exclude key is set to take in a regular expression.
exclude: /(node_modules|app-server.js)/,
So I'm just going to create regular expression here that says exclude the node modules folder and exclude or exclude the app-server.js file. So now when we run webpack, we're going to make sure that the babel-loader isn't going to be running on node modules or anything inside of the app server. So I'll go ahead and save this and we will out of the terminal.
At this point we have coded our webpack.config.js
//webpack.config.js//
module.exports = {
    entry: "./app-client.js",
    output: {
        filename: "public/bundle.js"
    },
    module: {
        loaders: [
            {
                exclude: /(node_modules|app-server.js)/,
                loader: 'babel'
            }
        ]
    }
};
And let's go ahead and create that bundle.js simply by running webpack. We can run webpack by typing webpack.
So now let's go ahead and run our application,
node app-server.js
And we see we have our canvassing server running on local host 3000. Let's go over there and check that out. So now if we go to local host 3000 and the browser. There it is! Our This is me heading shows there. So our React component is getting rendered inside of the browser and any JSX or ES6 is being pre-processed for us.
Setting up Package JSON Script:
So we are actually over with the environment set up however we have been lacking the packing json file. Each and every great node GS app requires a package json file. Actually, in node package manager, provides us all a way of creating the package json file quickly by running the
npm init
command. So performing this command's going to request us a few questions after which it is going to instantly produce the package json based upon the particular responses
The entry point is actually the app server. So this is the file that will start to run this application. And we will skip the test command, and we'll skip the git repository. You could add comment and limit it list a key word, but we're also going to skip that. You can add your name as the author. And for the original license I'm going to choose MIT.
So our package json is automatically getting created for us.
So I'm going to go back over to Sublime, and I want you to take a look at that. We also have a scripts node in this file. So this package json file can give us a little bit of automation too. Now we're not going to go any testing with this application. I'm going to remove this test script to add a start script.So our start script is going to consist of the commands that we would type in the terminal to start our app.
"start": "node app-server.js"
So even type in node app-server.js so that will run our app server. Whenever I start this application I want to make sure that I have compiled the latest react components into that bundle js. So every time I start this application, I'm going to run webpack. I can add a prestart and I can add a poststart. You can add a pre and post to any of the scripts that you want to use. And this will run the command inside of the terminal that we want to run before we start the application.
"prestart": "webpack”,
That command is webpack. So whenever I start the application I want to compile it using webpack and then I want to start it. So we're going to get a little bit of automation out of this. Let's go back over to the terminal and see how we're going to be starting our application. So now I can run the application by typing npm start. And we know what the commands for npm start are because they are listed inside of the package json as that start script. So when I run this you'll notice that it runs webpack first, packages and pre-processes all of my Javascript into the bundle, and then it starts the app on
localhost 3000
So we can open up the browser, and see our app location running on localhost 3000. So this is going to be a much easier way for us to start our application.
Integrating the Socket IO:
It is currently time for you to include socket.io. socket.io will be the actual tool which we use for send data to and fro between client and the server. socket.io utilizes web sockets, that allow for a genuine 2-way link between a client and a server. The very first thing which we have to do is install socket.io, and we require the socket.io library which will run on the server along with the socket.io library which will run on the client. So we will set up two modules simultaneously with npm install. We'll send the --save flag therefore both of them get saved to the package JSON.
npm install -save socket.io socket.io-client
The first module is socket.io. This is actually the socket.io which we will use within the server with express. The socket.io-client we will utilize inside of our own APP component within the client. So we will certainly allow both of those install. And when socket.io is installed we are able to begin using it. Let's check out to Sublime. And we will begin by integrating socket.io on the server therefore I'll open up the app-server.js file. In the app-server.js file we inform our express app to listen on port 3000.
var server = app.listen(3000);
What we have to perform is we have to put in a variable for server. And we'll set the server to the HTTP server which will get returned from the app.listen call. Since we now have a server variable we are able to incorporate socket.io with the server that's running on port 3000. I will go ahead and create a variable for io, and I requires our socket.io.
var io = require('socket.io').listen(server);
And after we need the socket.io I'll go ahead and chain a listen function on right here, and we'll inject the actual server into the listen function.
Now we have create a socket server which is also listening on localhost port 3000. The next thing which we have to include is an event handler for when a socket connects. I'm going to add io.sockets.on, and we'll include an event listener for a connection.
io.sockets.on('connection', function (socket)
);
A connection event happens when a socket will get connected. But it will surely be dealt with this specific callback function here. This callback function which gets invoked when there is a new socket connection will get that socket injected as an argument.
What exactly we would like to do is whenever a new socket connection happens we would like to log the id of the connected socket. So I will console.log, connected, %s. And we'll go on and include the socket.id to this console.log.
console.log("Connected: %s", socket.id);
Now whenever new sockets are connected we will go on and record their id on the console. Let's go on and also include socket.io on the client.
Let's open the components, choose the APP.js component. The APP component is our own main component and when the browser starts, this element gets mounted. Whenever our APP component is installed is when we wish to add the socket.io client.
var io = require('socket.io-client');
Most important factor we need to carry out is include the socket.io client right here and I'll require our socket.io-client framework. And also the next thing that I have to do is when this component mounts we would like to setup a socket.
I'm going to include the componentWillMount lifecycle function. Right now when the component installs I will add a socket to this component.
componentWillMount()
this.socket = io('http://localhost:3000');
this.socket.on('connect', this.connect);
,
This refers to the instance of our own APP component. As well as I'm going to go on and add a socket for this using the socket.io client. So our io is a function, and it desires to consume the socket server which we should connect to. That's http://localhost, port 3000.
The next action which we need to do is we will add a listener to this socket for the connect event. Which means this.socket.on will certainly wire up an event handler for the connect event. So the event handler is going to be the 2nd argument and we will code a function in the app component called connect.
connect()
Whenever we connect with the socket we will handle it using the connect function present in this APP component. I'll come down right here and code our connect function.
Once we connect to this socket exactly what I'm going to perform is alert to the user they are connected. I will go on and send an alert. Connected. And that we can go ahead and show this.socket.id.
alert("Connected: " + this.socket.id);
Now we have included as well the socket.io client. Let's head out to the terminal so I can begin our app with npm start. Which will use webpack in order to package our components and it will begin our server listening on port 3000.
Once i go ahead and open the Chrome browser window I will navigate to localhost:3000. So when I hit localhost:3000 we come across connected and the socket id.
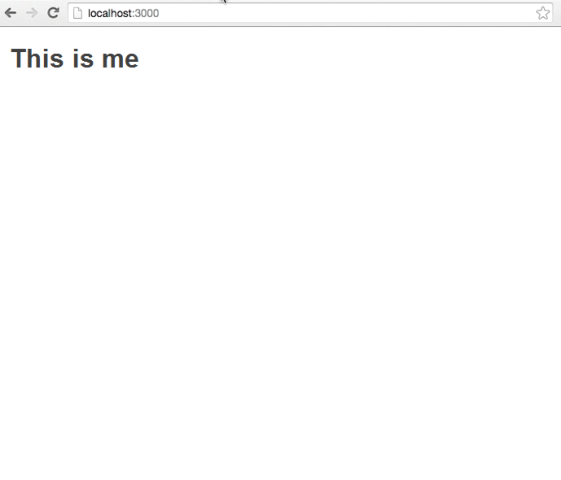
Now we now have integrated socket.io on both the server and the client, meaning that we're prepared to send data back and forth between the client and the server in our application.
Adding Header React Component:
At this point let's include a header component to the application. The header to be used to show the presentation title, the actual speaker's name, and also the link status to each application display screen. To do that, I'll put in a new sub folder below our components folder. I am going to click over that folder, and choose new folder. I'll call this particular folder Parts, and we'll include our used components in to the Parts folder. Therefore through the Parts folder I am going to right click on that, and I will choose new file. Now i am instantly likely to save this file as header.js.
var React = require('react');
So this is the file which will consist of our header React component, as well as making that header component is quite much like making our other component. We have to incorporate React, after which we have to create the actual component utilizing React createClass. And createClass consumes our literal width, at least a render function, and also we're still utilizing that ES6 syntax for that.
var Header = React.createClass({
render()
)
);
When we render the header, what I need to do is actually return a header, so I will go on and setup our parentheses, and then I'll add a header, and inside of this header, I'm going to add a heading 1 with the title, so we'll say this.props, title, and we will get the title from our props.
return (
            <header>
                <h1>{this.props.title}</h1>
            </header>
        );
In order for this header to work, we are going to require a title. So I can tell this component that a title property is required by setting up a propTypes. So adding the propTypes here, we can specify that we have a title property, and that title property is a string. So I can say React.PropTypes.string, and that will make sure the title that's coming into this component as a property is a string.
propTypes: {
        title: React.PropTypes.string.isRequired
    },
Now we also need to have this title, so I can also chain on an isRequired, and that means that we require a title property that's a string, so we will see the warning in our console if we use this header component without sending it a title.
We just need to export our header now. Alright, so now we have a header component set up.
module.exports = Header;
Header.js file becomes like this after editing the code
//header.js//
var React = require('react');

var Header = React.createClass({

    propTypes: {
        title: React.PropTypes.string.isRequired
    },

    render() {
        return (
            <header>
                <h1>{this.props.title}</h1>
            </header>
        );
    }

});

module.exports = Header;
Consuming Header In Our Application:
Now we need to consume this component. So we are going to add this header to our app component. So let's go ahead and open our app, and the first thing that I want to do here is incorporate our header. So I have to say var Header, and require that component that I just created. And that's in the Parts folder, there we go. So now that I have the header, I can use the header inside of my render function for the app.
var Header = require('./parts/Header');
So instead of outputting a heading one, what I'm going to do is I'll put a div, because we're going to need to add several components here. So we will group them all under one root div. And now here is where I will add the header. So we're going to add a header, and we're going to send it a property of title, and that will be set to new header.
return (
            <div>
                <Header title="New Header" />
            </div>
        );
We’ve created a header, and we've incorporated it in our app component, so now let's go over to the terminal, and see it working.
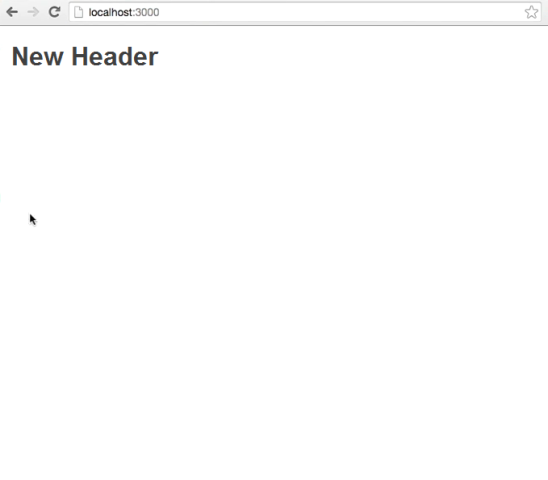
I will run our application with an npm start, and that will repackage our components, and start our canvassing server. So now I will go ahead and open up the browser window, and navigate to local host 3000, and lo and behold, there is our header. So we see that we have our new header showing up there. Awesome. Now we have a header component.
APP.js file becomes like this after editing the code
//APP.js//
var React = require('react');
var io = require('socket.io-client');
var Header = require('./parts/Header');

var APP = React.createClass({

    componentWillMount() {
        this.socket = io('http://localhost:3000');
        this.socket.on('connect', this.connect);
    },

    connect() {
        alert("Connected: " +  this.socket.id);
    },

    render() {
        return (
            <div>
                <Header title="New Header" />
            </div>
        );
    }

});

module.exports = APP;
Conclusion:
So, we have learned building the node server application and how to install as well setup the initials of our project. We have studied how to integrate express and react components into our application, we have also seen how to create package.json script for our application. We have studied about the integration of socket.IO in our application as well as adding react header component to our project. In the next part we will see how show and display connection status and how handle disconnect in our application.
Curriculum
- This is the first part of the tutorial, when later parts are created they will be placed here.
Proof of Work Done
- Here is the Complete Source Code of our Project Canvassing-App Part 1
✅ @xmysteriousx, I gave you an upvote on your first post! Please give me a follow and I will give you a follow in return!
Please also take a moment to read this post regarding bad behavior on Steemit.
Downvoting a post can decrease pending rewards and make it less visible. Common reasons:
Submit
Thank you for your contribution.
While I liked the content of your contribution, I would still like to extend few advices for your upcoming contributions:
Looking forward to your upcoming tutorials.
Your contribution has been evaluated according to Utopian rules and guidelines, as well as a predefined set of questions pertaining to the category.
To view those questions and the relevant answers related to your post,Click here
Need help? Write a ticket on https://support.utopian.io/.
Chat with us on Discord.
[utopian-moderator]
Downvoting a post can decrease pending rewards and make it less visible. Common reasons:
Submit
Your contribution has been found to be using plagiarized content from the web.
Relying on outside sources for partial or complete content of your tutorials is plain plagiarism, and is a serious offense.
You have been banned from receiving Utopian Reviews.
Plagiarism source: https://www.lynda.com/Web-Development-tutorials/Building-Polling-App-Socket-IO-React-js/387145-2.html
Need help? Write a ticket on https://support.utopian.io/.
Chat with us on Discord.
[utopian-moderator]
Downvoting a post can decrease pending rewards and make it less visible. Common reasons:
Submit
Congratulations @xmysteriousx! You received a personal award!
Click here to view your Board
Do not miss the last post from @steemitboard:
Vote for @Steemitboard as a witness and get one more award and increased upvotes!
Downvoting a post can decrease pending rewards and make it less visible. Common reasons:
Submit
Congratulations @xmysteriousx! You received a personal award!
You can view your badges on your Steem Board and compare to others on the Steem Ranking
Do not miss the last post from @steemitboard:
Vote for @Steemitboard as a witness to get one more award and increased upvotes!
Downvoting a post can decrease pending rewards and make it less visible. Common reasons:
Submit